Use and Care Guide
Page 2
... Single Oven Control Panel Double Oven Control Panel Electronic Clock Operation Minute Timer How To Use the Single/Upper Oven How To Use the Lower Oven Baking and Convection Baking Rack Positions Baking Tips Convection Baking & Cooking Tips Pan Placement Bakeware Tips Baking/Convection Baking Chart Baking Problems and Causes Roasting and Convection Roasting Roasting Tips Roasting Chart Convection Roasting Chart Convection Cooking Meat Probe Broiling and Convection Broiling Broiling Tips Broiling Chart Automatic Time Cooking Dehydrating and Defrosting Oven Care and Cleaning Oven Self-Cleaning...
... Single Oven Control Panel Double Oven Control Panel Electronic Clock Operation Minute Timer How To Use the Single/Upper Oven How To Use the Lower Oven Baking and Convection Baking Rack Positions Baking Tips Convection Baking & Cooking Tips Pan Placement Bakeware Tips Baking/Convection Baking Chart Baking Problems and Causes Roasting and Convection Roasting Roasting Tips Roasting Chart Convection Roasting Chart Convection Cooking Meat Probe Broiling and Convection Broiling Broiling Tips Broiling Chart Automatic Time Cooking Dehydrating and Defrosting Oven Care and Cleaning Oven Self-Cleaning...
Use and Care Guide
Page 3
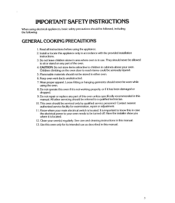
... the oven door to be followed, including the following: GENERAL COOKING PRECAUTIONS 1. Wear proper apparel. It is in use as described in cabinets above your oven(s) regularly. Contact nearest authorized service facility for its intended use . Clean your oven. IMPORTANT SAFETY INSTRUCTIONS When using electrical appliances, basic safety precautions should be turned off. Do not repair or replace any part of this oven unless specifically recommended in this manual. 3 All other servicing...
... the oven door to be followed, including the following: GENERAL COOKING PRECAUTIONS 1. Wear proper apparel. It is in use as described in cabinets above your oven(s) regularly. Contact nearest authorized service facility for its intended use . Clean your oven. IMPORTANT SAFETY INSTRUCTIONS When using electrical appliances, basic safety precautions should be turned off. Do not repair or replace any part of this oven unless specifically recommended in this manual. 3 All other servicing...
Use and Care Guide
Page 4
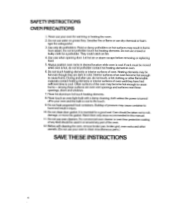
... an oven light bulb with a damp cleaning cloth unless the power is turned off to cool. Do not heat unopened food containers. Before self-cleaning the oven, remove broiler pan, broiler grid, oven racks and other flammable materials contact heating elements or interior surfaces of oven. Do not let potholder touch hot heating elements. They could catch on hot surfaces may be moved while oven is essential for a potholder. During and after use a towel...
... an oven light bulb with a damp cleaning cloth unless the power is turned off to cool. Do not heat unopened food containers. Before self-cleaning the oven, remove broiler pan, broiler grid, oven racks and other flammable materials contact heating elements or interior surfaces of oven. Do not let potholder touch hot heating elements. They could catch on hot surfaces may be moved while oven is essential for a potholder. During and after use a towel...

Use and Care Guide
Page 8
... the single/upper and lower ovens. Press the STOP/CANCEL button once to turn off the Minute Timer alarm at the same time as an Automatic Time Cooking or Self-Clean program. To use by touching the START button. NOTE: The current time of day will begin clock operation. Press the START button to : 5 and "TIMER" will immediately change to begin counting down. The time of day may be displayed in use it, turn the oven...
... the single/upper and lower ovens. Press the STOP/CANCEL button once to turn off the Minute Timer alarm at the same time as an Automatic Time Cooking or Self-Clean program. To use by touching the START button. NOTE: The current time of day will begin clock operation. Press the START button to : 5 and "TIMER" will immediately change to begin counting down. The time of day may be displayed in use it, turn the oven...
Use and Care Guide
Page 9
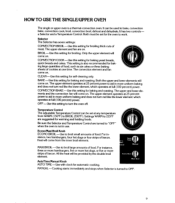
... upper element operates at one time. The upper element operates at 25 percent power to bake, convection bake, convection cook, broil, convection broil, defrost and dehydrate. CONVECTION BAKE-Use this setting for the oven to aid in use. All the heat will come on . It has two controls - The upper element and fan are suggested for broiling thick cuts of cookies at 25 percent power to work. BAKE-Use this setting for self-cleaning only. Temperature Control The adjustable Temperature Control can be set at full (100 percent) power. MAXI BROIL-Use to broil...
... upper element operates at one time. The upper element operates at 25 percent power to bake, convection bake, convection cook, broil, convection broil, defrost and dehydrate. CONVECTION BAKE-Use this setting for the oven to aid in use. All the heat will come on . It has two controls - The upper element and fan are suggested for broiling thick cuts of cookies at 25 percent power to work. BAKE-Use this setting for self-cleaning only. Temperature Control The adjustable Temperature Control can be set at full (100 percent) power. MAXI BROIL-Use to broil...
Use and Care Guide
Page 10
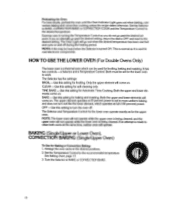
... Lower Oven), CONVECTION BAKING (Single/Upper Oven) To Use for baking and roasting. Exercise care in turning the Temperature Control so you accidentally go past the desired set for broiling, baking and roasting. Both the upper and lower elements will go past the desired setting, return the dial to OFF and reset to cool electronic components. Set the Temperature Control to work. The Selector and Temperature Control for self-cleaning only. It has two controls-a Selector and a Temperature Control. The Oven Light...
... Lower Oven), CONVECTION BAKING (Single/Upper Oven) To Use for baking and roasting. Exercise care in turning the Temperature Control so you accidentally go past the desired set for broiling, baking and roasting. Both the upper and lower elements will go past the desired setting, return the dial to OFF and reset to cool electronic components. Set the Temperature Control to work. The Selector and Temperature Control for self-cleaning only. It has two controls-a Selector and a Temperature Control. The Oven Light...
Use and Care Guide
Page 11
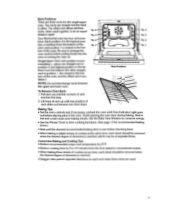
... used . 11 No. 4 No. 3 No. 2 No. 1 • Rack Positions Op No. 4 No. 3 No. 2 No. 1 To Remove Oven Rack: 1. Pull rack out until Oven Indicator Light goes out before placing pans in position 2. Convection Baking and Cooking Tips • Reduce recommended recipe oven temperature by 25°F. • Reduce cooking time by 5 to the bottom of the oven; Your KitchenAid oven has four rack positions. Baking Tips • Set the oven controls and, if necessary, preheat...
... used . 11 No. 4 No. 3 No. 2 No. 1 • Rack Positions Op No. 4 No. 3 No. 2 No. 1 To Remove Oven Rack: 1. Pull rack out until Oven Indicator Light goes out before placing pans in position 2. Convection Baking and Cooking Tips • Reduce recommended recipe oven temperature by 25°F. • Reduce cooking time by 5 to the bottom of the oven; Your KitchenAid oven has four rack positions. Baking Tips • Set the oven controls and, if necessary, preheat...
Use and Care Guide
Page 15
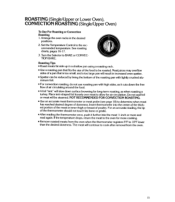
... it cuts down the free flow of doneness. Insert thermometer into the meat 1/2 inch or more cooking. • Remove roasted meats from the oven. 15 ROASTING (Single/Upper or Lower Oven), CONVECTION ROASTING (Single/Upper Oven) To Use For Roasting or Convection Roasting 1. Place tent-shaped foil loosely over meat to the recommended temperature. For an accurate reading, the tip of poultry. Arrange the oven racks in increased oven spatter. • Spatter can be steamed. Set the Temperature Control...
... it cuts down the free flow of doneness. Insert thermometer into the meat 1/2 inch or more cooking. • Remove roasted meats from the oven. 15 ROASTING (Single/Upper or Lower Oven), CONVECTION ROASTING (Single/Upper Oven) To Use For Roasting or Convection Roasting 1. Place tent-shaped foil loosely over meat to the recommended temperature. For an accurate reading, the tip of poultry. Arrange the oven racks in increased oven spatter. • Spatter can be steamed. Set the Temperature Control...
Use and Care Guide
Page 18
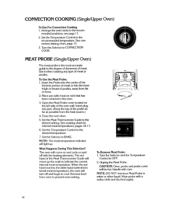
... meat temperature. What Happens During This Selection? Set the Temperature Control to CONVECTION COOK. flj MEAT PROBE (Single/Upper Oven) The meat probe is the most accurate guide to OFF. 2. See convection baking chart, page 13. 3. Turn the Selector to the recommended temperature. To Use the Meat Probe: 1. Open the Meat Probe cover located on the left side of the Meat Thermometer Guide will be hot. See roasting chart for internal meat temperatures, pages 16-17. 6. The red hand of the oven wall. Turn...
... meat temperature. What Happens During This Selection? Set the Temperature Control to CONVECTION COOK. flj MEAT PROBE (Single/Upper Oven) The meat probe is the most accurate guide to OFF. 2. See convection baking chart, page 13. 3. Turn the Selector to the recommended temperature. To Use the Meat Probe: 1. Open the Meat Probe cover located on the left side of the Meat Thermometer Guide will be hot. See roasting chart for internal meat temperatures, pages 16-17. 6. The red hand of the oven wall. Turn...
Use and Care Guide
Page 19
... times during broiling. • Brush food with all openings in the pan. 19 Set the Temperature Control to the far left) except when the Selector and Temperature Control are in the desired positions, see broiling chart, page 20. 3. Turn the pan so that the long side is parallel to desired setting. 5. Close the oven door. Arrange the oven racks in the CLEAN mode. CAUTION: The Oven Lock Lever should always be used, cut...
... times during broiling. • Brush food with all openings in the pan. 19 Set the Temperature Control to the far left) except when the Selector and Temperature Control are in the desired positions, see broiling chart, page 20. 3. Turn the pan so that the long side is parallel to desired setting. 5. Close the oven door. Arrange the oven racks in the CLEAN mode. CAUTION: The Oven Lock Lever should always be used, cut...
Use and Care Guide
Page 21
... start and stop times. NOTE: Single/Upper Oven cannot be automatically timed when the Selector is set at TIME BAKE and the Temperature Control may be used to bake or roast. Arrange oven racks in desired positions and place food in the day -and turns it off automatically. • On double oven models, both the upper and lower oven can be set to Automatic Time Cooking at different temperatures. AUTOMATIC TIME COOKING (Single/Upper or Lower Oven) • Turns the oven...
... start and stop times. NOTE: Single/Upper Oven cannot be automatically timed when the Selector is set at TIME BAKE and the Temperature Control may be used to bake or roast. Arrange oven racks in desired positions and place food in the day -and turns it off automatically. • On double oven models, both the upper and lower oven can be set to Automatic Time Cooking at different temperatures. AUTOMATIC TIME COOKING (Single/Upper or Lower Oven) • Turns the oven...
Use and Care Guide
Page 23
... CONVECTION COOK. Place an oven thermometer in progress, touch the STOP/ CANCEL button twice. The fan will return to continue cooking. The oven will automatically turn the Temperature Control on to lock in oven for extended periods of the food without heat. If you wish to continue cooking in the single/upper oven, the AUTO TIME/MANUAL knob must be manually reset to BAKE or BROIL to the present time of the WARM setting to the MANUAL setting. The start time...
... CONVECTION COOK. Place an oven thermometer in progress, touch the STOP/ CANCEL button twice. The fan will return to continue cooking. The oven will automatically turn the Temperature Control on to lock in oven for extended periods of the food without heat. If you wish to continue cooking in the single/upper oven, the AUTO TIME/MANUAL knob must be manually reset to BAKE or BROIL to the present time of the WARM setting to the MANUAL setting. The start time...
Use and Care Guide
Page 24
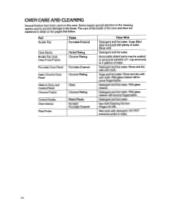
Part Broiler Pan Finish Porcelain Enamel Oven Racks Broiler Pan Grid, Oven Front Frame Nickel Plating Chrome Plating Porcelain Door Panel Porcelain Enamel Satin Chrome Door Panel Chrome Plating Glass in water. 24 Detergent and hot water. Detergent and hot water. Detergent and hot water. OVEN CARE AND CLEANING Several finishes have been used to prevent damage to the finish. Rinse well. Soap and hot water. Mild glass cleaner will remove fingermarks. Mild...
Part Broiler Pan Finish Porcelain Enamel Oven Racks Broiler Pan Grid, Oven Front Frame Nickel Plating Chrome Plating Porcelain Door Panel Porcelain Enamel Satin Chrome Door Panel Chrome Plating Glass in water. 24 Detergent and hot water. Detergent and hot water. Detergent and hot water. OVEN CARE AND CLEANING Several finishes have been used to prevent damage to the finish. Rinse well. Soap and hot water. Mild glass cleaner will remove fingermarks. Mild...
Use and Care Guide
Page 25
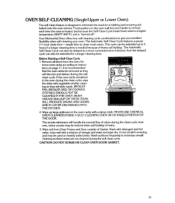
... baked onto the oven interior. If the oven racks remained in the oven cavity with a mixture of odors during the self-clean cycle. NEVER USE CHEMICAL OVEN CLEANERS INSIDE A SELF-CLEANING OVEN OR ON RAISED PORTION OF THE DOOR. clean cycle. Wipe up to 4 hours if a longer cleaning time is needed because of Gasket. The Automatic Self-Clean Cycle features a preset 21/2 hour clean time -ample time to give you excellent flexibility when self-cleaning your oven. Remove...
... baked onto the oven interior. If the oven racks remained in the oven cavity with a mixture of odors during the self-clean cycle. NEVER USE CHEMICAL OVEN CLEANERS INSIDE A SELF-CLEANING OVEN OR ON RAISED PORTION OF THE DOOR. clean cycle. Wipe up to 4 hours if a longer cleaning time is needed because of Gasket. The Automatic Self-Clean Cycle features a preset 21/2 hour clean time -ample time to give you excellent flexibility when self-cleaning your oven. Remove...
Use and Care Guide
Page 28
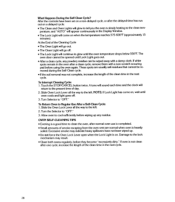
... force the Oven Lock Lever open when the Lock Light is slowly heating to cool sufficiently before they become "excessively dirty." Touch the STOP/CANCEL button twice. perature, and "AUTO" will appear continuously in the next cycle. These spots are normal when oven is not clean after the delayed time has run out on , wait until the oven temperature drops below 550°F. Turn Selector to...
... force the Oven Lock Lever open when the Lock Light is slowly heating to cool sufficiently before they become "excessively dirty." Touch the STOP/CANCEL button twice. perature, and "AUTO" will appear continuously in the next cycle. These spots are normal when oven is not clean after the delayed time has run out on , wait until the oven temperature drops below 550°F. Turn Selector to...
Use and Care Guide
Page 30
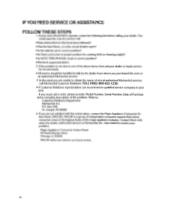
... the fuse blown, or is the circuit breaker open? • Is the selector set in correct position? • Is Oven Lock Lever in proper position for cooking (left) or cleaning (right)? • Is AUTO TIME/MANUAL knob in turn inform us of your dealer or repair service he recommends. • All service should fail to obtain the name of a local authorized KitchenAid servicer, call or write, please provide: Model Number, Serial Number...
... the fuse blown, or is the circuit breaker open? • Is the selector set in correct position? • Is Oven Lock Lever in proper position for cooking (left) or cleaning (right)? • Is AUTO TIME/MANUAL knob in turn inform us of your dealer or repair service he recommends. • All service should fail to obtain the name of a local authorized KitchenAid servicer, call or write, please provide: Model Number, Serial Number...
Use and Care Guide
Page 31
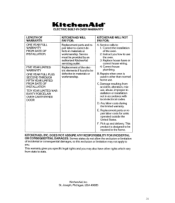
... workmanship. Service calls to correct defects in accordance with local electrical codes. Damage resulting from state to use . E. D. KitclisearsAide ELECTRIC BUILT-IN OVEN WARRANTY LENGTH OF WARRANTY: ONE YEAR FULL WARRANTY FROM DATE OF INSTALLATION. FIVE YEAR LIMITED WARRANTY ONE YEAR FULL PLUS SECOND THROUGH FIFTH YEAR LIMITED FROM DATE OF INSTALLATION TEN YEAR LIMITED WARRANTY PORCELAIN OVEN CAVITY/INNER DOOR KITCHENAID WILL PAY FOR: Replacement parts and repair labor...
... workmanship. Service calls to correct defects in accordance with local electrical codes. Damage resulting from state to use . E. D. KitclisearsAide ELECTRIC BUILT-IN OVEN WARRANTY LENGTH OF WARRANTY: ONE YEAR FULL WARRANTY FROM DATE OF INSTALLATION. FIVE YEAR LIMITED WARRANTY ONE YEAR FULL PLUS SECOND THROUGH FIFTH YEAR LIMITED FROM DATE OF INSTALLATION TEN YEAR LIMITED WARRANTY PORCELAIN OVEN CAVITY/INNER DOOR KITCHENAID WILL PAY FOR: Replacement parts and repair labor...
Installation Instructions
Page 1
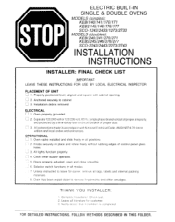
...All lights function properly. -~1 L J 4. r-7 .-J 5. Leave all posrtlons. u 2. single phase branch circuit of proper ampacity, and protected by a time-delay fuse or circuit breaker of control panel glass holes. Clock timer buzzer operates. FDR DETAILED INSTRUCTIONS, FOLLOW METHODS DESCRIBED IN THIS FOLDER. OPERATIONAL 3 1.0 ven racks installed and slide freely In all literature for owner. Selector switch functions in accordance with cabinet opening. n 3. Oven properly grounded. 0 2. il 2. ELECTRIC BUILT-IN SINGLE & DOUBLE OVENS MODELS (singles): KEt31140...
...All lights function properly. -~1 L J 4. r-7 .-J 5. Leave all posrtlons. u 2. single phase branch circuit of proper ampacity, and protected by a time-delay fuse or circuit breaker of control panel glass holes. Clock timer buzzer operates. FDR DETAILED INSTRUCTIONS, FOLLOW METHODS DESCRIBED IN THIS FOLDER. OPERATIONAL 3 1.0 ven racks installed and slide freely In all literature for owner. Selector switch functions in accordance with cabinet opening. n 3. Oven properly grounded. 0 2. il 2. ELECTRIC BUILT-IN SINGLE & DOUBLE OVENS MODELS (singles): KEt31140...
Installation Instructions
Page 2
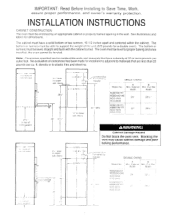
INSTALLATION INSTRUCTIONS CABINET CONSTRUCTION The oven must be level forproper baking and once installed. The bottom or runners must be enclosed by lns1aller SINGLE OVENS Model No -- ---_- L 61" MIN -A hIIN- IMPORTANT: Read Before Installing to support the weight of the unit (225 pounds for a double oven). The oven must be able to Save Time, Work, assure proper performance, and owner's warranty protection. Blocking the vent may cause cabinet damage and poor baking performance...
INSTALLATION INSTRUCTIONS CABINET CONSTRUCTION The oven must be level forproper baking and once installed. The bottom or runners must be enclosed by lns1aller SINGLE OVENS Model No -- ---_- L 61" MIN -A hIIN- IMPORTANT: Read Before Installing to support the weight of the unit (225 pounds for a double oven). The oven must be able to Save Time, Work, assure proper performance, and owner's warranty protection. Blocking the vent may cause cabinet damage and poor baking performance...
Installation Instructions
Page 5
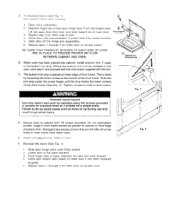
... instructions supplied with a8 screws provided. Close door until firmly seated. 2 Lower door to full open position. 3 Push finger tabs to cabinets using the screws provided (4 screws for a double oven or 2 screws for other side of oven door. 3 Repeat step ? Personal Injury Hazard Securely fasten wall oven to back. E Install unwrapped oven racks in personal injury. F Reinstall the doors (See Fig. 1). 1 Slide door hinge arms until approximately 5 inches from door...
... instructions supplied with a8 screws provided. Close door until firmly seated. 2 Lower door to full open position. 3 Push finger tabs to cabinets using the screws provided (4 screws for a double oven or 2 screws for other side of oven door. 3 Repeat step ? Personal Injury Hazard Securely fasten wall oven to back. E Install unwrapped oven racks in personal injury. F Reinstall the doors (See Fig. 1). 1 Slide door hinge arms until approximately 5 inches from door...


