Installation Guide
Page 1
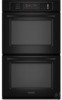
IMPORTANT: Save for local electrical inspector's use. This symbol alerts you to reduce the chance of others . All safety messages will tell you don.... INSTALLATION INSTRUCTIONS 24" (61.0 CM) ELECTRIC SINGLE AND DOUBLE BUILT-IN OVEN Table of Contents BUILT-IN OVEN SAFETY 1 INSTALLATION REQUIREMENTS 2 Tools and Parts 2 Location Requirements 2 Electrical Requirements 4 INSTALLATION INSTRUCTIONS 4 Prepare Built-In Oven 4 Remove Oven Trim 4 Make Electrical Connection 5 Install Oven 7 Complete Installation 8 BUILT-IN OVEN SAFETY Your safety and the safety of injury...
IMPORTANT: Save for local electrical inspector's use. This symbol alerts you to reduce the chance of others . All safety messages will tell you don.... INSTALLATION INSTRUCTIONS 24" (61.0 CM) ELECTRIC SINGLE AND DOUBLE BUILT-IN OVEN Table of Contents BUILT-IN OVEN SAFETY 1 INSTALLATION REQUIREMENTS 2 Tools and Parts 2 Location Requirements 2 Electrical Requirements 4 INSTALLATION INSTRUCTIONS 4 Prepare Built-In Oven 4 Remove Oven Trim 4 Make Electrical Connection 5 Install Oven 7 Complete Installation 8 BUILT-IN OVEN SAFETY Your safety and the safety of injury...
Installation Guide
Page 2
...some models) Check local codes. Undercounter Installation (with bottom of cabinet cutout. Product Dimensions - single oven (2), double oven (4) ■ Bottom vent (supplied on rear wall behind oven, the junction box must be solid, level and flush with cooktop installed above ) A B E... the upper or lower right or left rear corner of the oven. INSTALLATION REQUIREMENTS Tools and Parts Gather the required tools and parts before starting installation. Check existing electrical supply. See "Electrical Requirements." cabinet width B. 1¹⁄₂" (3.8 cm) min....
...some models) Check local codes. Undercounter Installation (with bottom of cabinet cutout. Product Dimensions - single oven (2), double oven (4) ■ Bottom vent (supplied on rear wall behind oven, the junction box must be solid, level and flush with cooktop installed above ) A B E... the upper or lower right or left rear corner of the oven. INSTALLATION REQUIREMENTS Tools and Parts Gather the required tools and parts before starting installation. Check existing electrical supply. See "Electrical Requirements." cabinet width B. 1¹⁄₂" (3.8 cm) min....

Installation Guide
Page 4
...Fire Protection Association One Batterymarch Park Quincy, MA 02269 Electrical Connection To properly install your oven, you must determine the type of electrical connection you are in back or other parts from oven should be connected directly to the junction box. &#...oven is properly grounded. Model/serial number plate Double oven A. INSTALLATION INSTRUCTIONS Prepare Built-In Oven 1. Remove the hardware package from the oven. 4. A B A. Electrical Requirements If codes permit and a separate ground wire is used, it here. ■ Oven must be connected to the proper electrical...
...Fire Protection Association One Batterymarch Park Quincy, MA 02269 Electrical Connection To properly install your oven, you must determine the type of electrical connection you are in back or other parts from oven should be connected directly to the junction box. &#...oven is properly grounded. Model/serial number plate Double oven A. INSTALLATION INSTRUCTIONS Prepare Built-In Oven 1. Remove the hardware package from the oven. 4. A B A. Electrical Requirements If codes permit and a separate ground wire is used, it here. ■ Oven must be connected to the proper electrical...
Installation Guide
Page 8
...panel will appear in the display. 18. Check that all parts are testing. 3. Dispose of hinges into place. 13. Turn power on . W10045010 © 2007 Whirlpool Corporation. Check that you are now installed. See "Remove Oven Trim" section. 15. Reconnect power. 17. If display ... open the oven door. Check Operation of Single Oven 1. For oven use and cleaning, read the Use and Care Guide. Check Operation of Double Oven 1. "BROIL" will light briefly, and "PF" should appear in oven. or circuit breaker has not tripped. ■ Electrical supply is free to oven. 10....
...panel will appear in the display. 18. Check that all parts are testing. 3. Dispose of hinges into place. 13. Turn power on . W10045010 © 2007 Whirlpool Corporation. Check that you are now installed. See "Remove Oven Trim" section. 15. Reconnect power. 17. If display ... open the oven door. Check Operation of Single Oven 1. For oven use and cleaning, read the Use and Care Guide. Check Operation of Double Oven 1. "BROIL" will light briefly, and "PF" should appear in oven. or circuit breaker has not tripped. ■ Electrical supply is free to oven. 10....

Use and Care Manual
Page 1
BUILT-IN ELECTRIC CONVECTION OVEN Use & Care Guide For questions about features, operation/performance, parts accessories or service, call: 1-800-422-1230 In Canada, call for assistance 1-800-461-5681, for installation and service, call: 1-800-807-6777 or visit our website at... www.kitchenaid.com or www.KitchenAid.ca Table of Contents...2 Models KEBC107 KEBC177 KEBC247 KEBC278 KEBV107 KEBV208 KEBC147 KEBC208 KEBC277 KEBC207 8304062
BUILT-IN ELECTRIC CONVECTION OVEN Use & Care Guide For questions about features, operation/performance, parts accessories or service, call: 1-800-422-1230 In Canada, call for assistance 1-800-461-5681, for installation and service, call: 1-800-807-6777 or visit our website at... www.kitchenaid.com or www.KitchenAid.ca Table of Contents...2 Models KEBC107 KEBC177 KEBC247 KEBC278 KEBV107 KEBV208 KEBC147 KEBC208 KEBC277 KEBC207 8304062
Use and Care Manual
Page 2
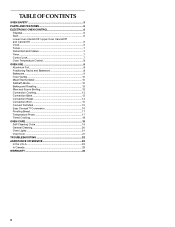
...OF CONTENTS OVEN SAFETY 3 PARTS AND FEATURES 5 ELECTRONIC OVEN CONTROL 6 Displays 6 Start 6 Lower Oven Cancel/Off, Upper Oven Cancel/Off and Cancel Off 6 Clock 6 Tones 7 Fahrenheit and Celsius 7 Timer 7 Control Lock 7 Oven Temperature Control 8 OVEN USE 8 Aluminum Foil 8 Positioning Racks and Bakeware 8 Bakeware 9 Oven Vent(s ...Easy Convect™ Conversion 16 Proofing Bread 17 Temperature Probe 17 Timed Cooking 18 OVEN CARE 19 Self-Cleaning Cycle 19 General Cleaning 20 Oven Lights 21 Oven Door 21 TROUBLESHOOTING 22 ASSISTANCE OR SERVICE 23 In the U.S.A 23 In Canada...
...OF CONTENTS OVEN SAFETY 3 PARTS AND FEATURES 5 ELECTRONIC OVEN CONTROL 6 Displays 6 Start 6 Lower Oven Cancel/Off, Upper Oven Cancel/Off and Cancel Off 6 Clock 6 Tones 7 Fahrenheit and Celsius 7 Timer 7 Control Lock 7 Oven Temperature Control 8 OVEN USE 8 Aluminum Foil 8 Positioning Racks and Bakeware 8 Bakeware 9 Oven Vent(s ...Easy Convect™ Conversion 16 Proofing Bread 17 Temperature Probe 17 Timed Cooking 18 OVEN CARE 19 Self-Cleaning Cycle 19 General Cleaning 20 Oven Lights 21 Oven Door 21 TROUBLESHOOTING 22 ASSISTANCE OR SERVICE 23 In the U.S.A 23 In Canada...

Use and Care Manual
Page 3
...THESE INSTRUCTIONS 3 These words mean: You can happen if the instructions are oven vent openings and surfaces near these openings, oven doors, and windows of Oven Racks - Do not repair or replace any part of the oven. Flammable materials should never be referred to cause burns. Moist or damp...fire, electrical shock, injury to reduce the chance of injury, and tell you how to persons, or damage when using the oven. Children should never be moved while oven is properly installed and grounded by a qualified technician. s Do Not Use Water on any part of the oven unless ...
...THESE INSTRUCTIONS 3 These words mean: You can happen if the instructions are oven vent openings and surfaces near these openings, oven doors, and windows of Oven Racks - Do not repair or replace any part of the oven. Flammable materials should never be referred to cause burns. Moist or damp...fire, electrical shock, injury to reduce the chance of injury, and tell you how to persons, or damage when using the oven. Children should never be moved while oven is properly installed and grounded by a qualified technician. s Do Not Use Water on any part of the oven unless ...
Use and Care Manual
Page 4
... list of substances known to cause cancer, birth defects, or other reproductive harm. No commercial oven cleaner or oven liner protective coating of any part of California to the State of the oven. WARNING: This product contains a chemical known to the State of California to cause cancer, ..., or other reproductive harm, and requires businesses to such substances. IMPORTANT SAFETY INSTRUCTIONS For self-cleaning ovens: s Do Not Clean Door Gasket - s Do Not Use Oven Cleaners - s Clean Only Parts Listed in or around any kind should be used in Manual. s Before Self-Cleaning the...
... list of substances known to cause cancer, birth defects, or other reproductive harm. No commercial oven cleaner or oven liner protective coating of any part of California to the State of the oven. WARNING: This product contains a chemical known to the State of California to cause cancer, ..., or other reproductive harm, and requires businesses to such substances. IMPORTANT SAFETY INSTRUCTIONS For self-cleaning ovens: s Do Not Clean Door Gasket - s Do Not Use Oven Cleaners - s Clean Only Parts Listed in or around any kind should be used in Manual. s Before Self-Cleaning the...

Use and Care Manual
Page 5
... shown here may have purchased may not match those of the items listed. Lower oven (on right mounting rail) Parts and Features not shown Oven light Third oven rack Broiler pan and grid Roasting rack Temperature probe 5 T.H.E.™ (Third Hidden...PARTS AND FEATURES This manual covers different models. The oven you have some or all of your model. Broil elements (not shown) C. Automatic oven light switch G. Oven lock latch H. CleanBake™ bake element (hidden in back panel) I J K C D A. Electronic oven control F. Model and serial number plate (on double oven...
... shown here may have purchased may not match those of the items listed. Lower oven (on right mounting rail) Parts and Features not shown Oven light Third oven rack Broiler pan and grid Roasting rack Temperature probe 5 T.H.E.™ (Third Hidden...PARTS AND FEATURES This manual covers different models. The oven you have some or all of your model. Broil elements (not shown) C. Automatic oven light switch G. Oven lock latch H. CleanBake™ bake element (hidden in back panel) I J K C D A. Electronic oven control F. Model and serial number plate (on double oven...

Use and Care Manual
Page 10
... to keep the oven on for only part of the thermometer should not be disabled of the ability to remain on or off . Meat Thermometer On models without a temperature probe, always rely on the oven display throughout the Sabbath Mode. On double ovens, press UPPER OVEN CANCEL/OFF. Oven Vent(s) Single and Double Oven Models A A. Upper oven B. A meat thermometer is...
... to keep the oven on for only part of the thermometer should not be disabled of the ability to remain on or off . Meat Thermometer On models without a temperature probe, always rely on the oven display throughout the Sabbath Mode. On double ovens, press UPPER OVEN CANCEL/OFF. Oven Vent(s) Single and Double Oven Models A A. Upper oven B. A meat thermometer is...

Use and Care Manual
Page 23
...: s Features and specifications on our full line of a service call. KitchenAid designated service technicians are trained to fulfill the product warranty and provide after-warranty service, anywhere in your area, you the cost of appliances. If you use only factory specified parts. Saturday 8:30 a.m. - 4:30 p.m. (EST). When calling, please know the purchase date and...
...: s Features and specifications on our full line of a service call. KitchenAid designated service technicians are trained to fulfill the product warranty and provide after-warranty service, anywhere in your area, you the cost of appliances. If you use only factory specified parts. Saturday 8:30 a.m. - 4:30 p.m. (EST). When calling, please know the purchase date and...

Use and Care Manual
Page 24
... if defective in materials or workmanship: s Electric element s Solid state touch control system parts SECOND THROUGH TENTH YEAR LIMITED WARRANTY On microwaves ovens only, in the second through due to defects in the home. 7. You will pay for factory specified parts for product service in materials or workmanship. KITCHENAID SHALL NOT BE LIABLE FOR INCIDENTAL...
... if defective in materials or workmanship: s Electric element s Solid state touch control system parts SECOND THROUGH TENTH YEAR LIMITED WARRANTY On microwaves ovens only, in the second through due to defects in the home. 7. You will pay for factory specified parts for product service in materials or workmanship. KITCHENAID SHALL NOT BE LIABLE FOR INCIDENTAL...

Parts Diagram
Page 1
A W10203840 Rev. OVEN PARTS For Models: KEBC147KBL08,KEBC147KWH08,KEBC147KSS08 (Black) (White) (Stainless) 24" BUILT−IN ELECTRIC OVEN SELF CLEAN 05−08 Litho in U.S.A. (amd)(bay) 1 Part No.
A W10203840 Rev. OVEN PARTS For Models: KEBC147KBL08,KEBC147KWH08,KEBC147KSS08 (Black) (White) (Stainless) 24" BUILT−IN ELECTRIC OVEN SELF CLEAN 05−08 Litho in U.S.A. (amd)(bay) 1 Part No.

Parts Diagram
Page 2
... 4448444 Grommet 25 4455641 Side, Chassis 26 4452232 Back, Chassis 27 Liner, Oven (Not serviceable) Illus. Part No. Part No. No. DESCRIPTION 1 Literature Parts W10045010 Installation Instructions 8304062 Owners Manual W10185218 Tech Sheet 8301928 Installation, MWO Trim Kit... Bumper, Door 6 8281236 Screw 7 4455863 Top Chassis Illus. OVEN PARTS For Models: KEBC147KBL08,KEBC147KWH08,KEBC147KSS08 (Black) (White) (Stainless) Illus. No. DESCRIPTION 28 3400832 Screw 29 4455636 Sensor 30 4449748 Screw 31 4452152 Bracket, Bottom Vent Trim 32 4450038 Screw...
... 4448444 Grommet 25 4455641 Side, Chassis 26 4452232 Back, Chassis 27 Liner, Oven (Not serviceable) Illus. Part No. Part No. No. DESCRIPTION 1 Literature Parts W10045010 Installation Instructions 8304062 Owners Manual W10185218 Tech Sheet 8301928 Installation, MWO Trim Kit... Bumper, Door 6 8281236 Screw 7 4455863 Top Chassis Illus. OVEN PARTS For Models: KEBC147KBL08,KEBC147KWH08,KEBC147KSS08 (Black) (White) (Stainless) Illus. No. DESCRIPTION 28 3400832 Screw 29 4455636 Sensor 30 4449748 Screw 31 4452152 Bracket, Bottom Vent Trim 32 4450038 Screw...

Parts Diagram
Page 4
DESCRIPTION 1 9760772 Element, Broil 2 4449154 Screw 3 W10116351 Fan Blade, Convection 4 W10116349 Nut 6 4448716 Rack, Oven 7 9760768 Element, Bake 8 4449809 Screw 9 9760769 Element, Convect. 10 W10116228 Motor, Convection 11 4448418 Cover, Fan 12 9755547 Lock Washer 13 9755543 Jack, Meat Probe 14 9755546 Hex Nut 15 4455035 Tray, Bake 16 9755542 Probe − Meat 17 4450039 Cover, Bake Tray 4 W10203840 No. Part No. INTERNAL OVEN PARTS For Models: KEBC147KBL08,KEBC147KWH08,KEBC147KSS08 (Black) (White) (Stainless) Illus.
DESCRIPTION 1 9760772 Element, Broil 2 4449154 Screw 3 W10116351 Fan Blade, Convection 4 W10116349 Nut 6 4448716 Rack, Oven 7 9760768 Element, Bake 8 4449809 Screw 9 9760769 Element, Convect. 10 W10116228 Motor, Convection 11 4448418 Cover, Fan 12 9755547 Lock Washer 13 9755543 Jack, Meat Probe 14 9755546 Hex Nut 15 4455035 Tray, Bake 16 9755542 Probe − Meat 17 4450039 Cover, Bake Tray 4 W10203840 No. Part No. INTERNAL OVEN PARTS For Models: KEBC147KBL08,KEBC147KWH08,KEBC147KSS08 (Black) (White) (Stainless) Illus.

Parts Diagram
Page 5
... Retainer, Glass 21 8300853 Seal, Door Top 22 4457112 Shield, Heat 23 Retainer, Clip 4450863 Black 4450864 White 4451432 Stainless 24 9759226 Glass, Inner W10203840 5 OVEN DOOR PARTS For Models: KEBC147KBL08,KEBC147KWH08,KEBC147KSS08 (Black) (White) (Stainless) Illus. No...
... Retainer, Glass 21 8300853 Seal, Door Top 22 4457112 Shield, Heat 23 Retainer, Clip 4450863 Black 4450864 White 4451432 Stainless 24 9759226 Glass, Inner W10203840 5 OVEN DOOR PARTS For Models: KEBC147KBL08,KEBC147KWH08,KEBC147KSS08 (Black) (White) (Stainless) Illus. No...

Parts Diagram
Page 6
TOP VENTING PARTS For Models: KEBC147KBL08,KEBC147KWH08,KEBC147KSS08 (Black) (White) (Stainless) Illus. No. DESCRIPTION 1 4451759 Vent, Exhaust 2 4455178 Elbow, Vent−Top 3 4457289 Blower 60MM 4 4451758 Block, Foam 6 4451985 Suppressor 7 3400080 Screw 8 4455177 Elbow, Vent Bottom 10 9760587 Transformer, Control 11 4449868 Block, Terminal 12 3400080 Screw 13 4448547 Vent, Control Panel 14 Side, Control Top 4451597 Right 4451598 Left 15 9759135 Back, Control 16 4450549 Cover, Top Rear 17 4449809 Screw 18 4452365 Cover, Top Front 6 W10203840 Part No.
TOP VENTING PARTS For Models: KEBC147KBL08,KEBC147KWH08,KEBC147KSS08 (Black) (White) (Stainless) Illus. No. DESCRIPTION 1 4451759 Vent, Exhaust 2 4455178 Elbow, Vent−Top 3 4457289 Blower 60MM 4 4451758 Block, Foam 6 4451985 Suppressor 7 3400080 Screw 8 4455177 Elbow, Vent Bottom 10 9760587 Transformer, Control 11 4449868 Block, Terminal 12 3400080 Screw 13 4448547 Vent, Control Panel 14 Side, Control Top 4451597 Right 4451598 Left 15 9759135 Back, Control 16 4450549 Cover, Top Rear 17 4449809 Screw 18 4452365 Cover, Top Front 6 W10203840 Part No.

Parts Diagram
Page 7
.... DESCRIPTION SPLICING WIRES−−25FT. OPTIONAL PARTS For Models: KEBC147KBL08,KEBC147KWH08,KEBC147KSS08 (Black) (White) (Stainless) Illus. No. No. No. LENGTH 242828 Wire (12 Ga. 150 c Black) 242820 Wire (14 Ga. 150 c Black) ... Ga. 150 c Orange) 242825 Wire (14 Ga. 150 c Red) 242831 Wire (14 Ga. 200 c Red) 242827 Wire (14 Ga. 150 c Yellow) Illus. DESCRIPTION WIRING HARNESS PARTS W10179651 Harness, Main 4450952 Conduit 4448664 Clamp 98997 Clip 4449809 Screw 4450800 Screw, Ground 112432 Nut 4451761 Support, Wiring 4452400 Harness, Ground Miscellaneous 814381 Pin...
.... DESCRIPTION SPLICING WIRES−−25FT. OPTIONAL PARTS For Models: KEBC147KBL08,KEBC147KWH08,KEBC147KSS08 (Black) (White) (Stainless) Illus. No. No. No. LENGTH 242828 Wire (12 Ga. 150 c Black) 242820 Wire (14 Ga. 150 c Black) ... Ga. 150 c Orange) 242825 Wire (14 Ga. 150 c Red) 242831 Wire (14 Ga. 200 c Red) 242827 Wire (14 Ga. 150 c Yellow) Illus. DESCRIPTION WIRING HARNESS PARTS W10179651 Harness, Main 4450952 Conduit 4448664 Clamp 98997 Clip 4449809 Screw 4450800 Screw, Ground 112432 Nut 4451761 Support, Wiring 4452400 Harness, Ground Miscellaneous 814381 Pin...


