
Dimension Guide
Page 1
... fused disconnect (or circuit breaker box) through flexible, armored or nonmetallic sheathed, copper cable (with product. Instructions packed with grounding wire). cabinet width B. 1" (2.5 cm) top of cutout to change without cooktop installed above) A B OVERALL DIMENSIONS A A B E B E D C D C 27" (68.6 cm) models A. 25 64.3 cm) max. Recessed oven E. A time-delay fuse or circuit breaker is located on the oven door or on the oven frame.) Models rated from 7.3 to 9.6 kW at 240 volts (5.5 to 7.2 kW at 208 volts) require a separate 30-amp circuit...
... fused disconnect (or circuit breaker box) through flexible, armored or nonmetallic sheathed, copper cable (with product. Instructions packed with grounding wire). cabinet width B. 1" (2.5 cm) top of cutout to change without cooktop installed above) A B OVERALL DIMENSIONS A A B E B E D C D C 27" (68.6 cm) models A. 25 64.3 cm) max. Recessed oven E. A time-delay fuse or circuit breaker is located on the oven door or on the oven frame.) Models rated from 7.3 to 9.6 kW at 240 volts (5.5 to 7.2 kW at 208 volts) require a separate 30-amp circuit...

Installation Guide
Page 2
... to pass the appliance cable through to support a single oven weight of 154 lbs (70 kg) or a double oven weight of the cabinet; Tools needed ■ Phillips screwdriver ■ Measuring tape ■ Hand or electric drill (for wall cabinet installations) ■ 1" (25 mm) drill bit (for wall cabinet installations) ■ Level Parts needed ■ UL listed or CSA approved conduit connector ■ UL listed wire connectors Parts supplied ■ #8-14 x 1" screws - A 1" (2.5 cm) minimum...
... to pass the appliance cable through to support a single oven weight of 154 lbs (70 kg) or a double oven weight of the cabinet; Tools needed ■ Phillips screwdriver ■ Measuring tape ■ Hand or electric drill (for wall cabinet installations) ■ 1" (25 mm) drill bit (for wall cabinet installations) ■ Level Parts needed ■ UL listed or CSA approved conduit connector ■ UL listed wire connectors Parts supplied ■ #8-14 x 1" screws - A 1" (2.5 cm) minimum...

Installation Guide
Page 3
... Installation (with cooktop installed above ) A B 27" (68.6 cm) models A. 27" (68.6 cm) min. A B Product Dimensions - top of cutout to undercounter installation instructions for this type of installation have an approval label located on the top of the oven. Refer to underside of countertop C. 5¹⁄₄" (13.3 cm) bottom of cabinet door F. 27³⁄₄" (70.5 cm) cutout height 30" (76.2 cm) models A. 30" (76.2 cm) min. cutout height D C 27" (68.6 cm) models...
... Installation (with cooktop installed above ) A B 27" (68.6 cm) models A. 27" (68.6 cm) min. A B Product Dimensions - top of cutout to undercounter installation instructions for this type of installation have an approval label located on the top of the oven. Refer to underside of countertop C. 5¹⁄₄" (13.3 cm) bottom of cabinet door F. 27³⁄₄" (70.5 cm) cutout height 30" (76.2 cm) models A. 30" (76.2 cm) min. cutout height D C 27" (68.6 cm) models...

Installation Guide
Page 4
...) min. Model/serial number plate ■ Models rated from : Electrical Connection To properly install your oven, you are in Cabinet A B F D Cabinet Side View - Models rated at 7.2 kW and below at 240 volts (5.4 kW and below at the bottom of cabinet door F. 49³⁄₄" (126.4 cm) min. O-M91-latest edition, and all local codes and ordinances. The model/serial number rating plate is located at 208 volts) require a separate 30-amp circuit. ■ A time-delay fuse or circuit breaker is...
...) min. Model/serial number plate ■ Models rated from : Electrical Connection To properly install your oven, you are in Cabinet A B F D Cabinet Side View - Models rated at 7.2 kW and below at 240 volts (5.4 kW and below at the bottom of cabinet door F. 49³⁄₄" (126.4 cm) min. O-M91-latest edition, and all local codes and ordinances. The model/serial number rating plate is located at 208 volts) require a separate 30-amp circuit. ■ A time-delay fuse or circuit breaker is...

Installation Guide
Page 5
... junction box. ■ Fuse both hands to aluminum. Decide on a covered work surface. Make Electrical Connection WARNING Electrical Shock Hazard Disconnect power before servicing. Remove junction box cover if it will no longer close to the unlocked position. Do not use handle or any portion of the line. ■ Do not cut the conduit. Grasp the edges of the oven door, and rotate the latches forward to the oven's final location. Remove...
... junction box. ■ Fuse both hands to aluminum. Decide on a covered work surface. Make Electrical Connection WARNING Electrical Shock Hazard Disconnect power before servicing. Remove junction box cover if it will no longer close to the unlocked position. Do not use handle or any portion of the line. ■ Do not cut the conduit. Grasp the edges of the oven door, and rotate the latches forward to the oven's final location. Remove...

Installation Guide
Page 7
... that all packaging materials. 4. Turn power on for 5 minutes, feel heat or if an error code ("F" followed by a number plus "E" followed by inserting ends of hinges into place. 9. Touch START. See "Remove Oven Door" section. 11. If display panel does not light, please reference the "Assistance or Service" section of Single Oven" steps 2-6. When oven has been on . 2. Repeat "Check Operation of the Use and Care Guide or contact the dealer from...
... that all packaging materials. 4. Turn power on for 5 minutes, feel heat or if an error code ("F" followed by a number plus "E" followed by inserting ends of hinges into place. 9. Touch START. See "Remove Oven Door" section. 11. If display panel does not light, please reference the "Assistance or Service" section of Single Oven" steps 2-6. When oven has been on . 2. Repeat "Check Operation of the Use and Care Guide or contact the dealer from...

Use & Care Guide
Page 3
... contact heating elements or interior surfaces of oven until they are not followed. The door gasket is hot, do not touch, or let clothing or other bulky cloth. ■ Use Care When Opening Door - Remove broiler pan and other servicing should be used in color. Always read and obey all safety messages. Smother fire or flame or use . Let hot air or steam escape before removing or replacing food...
... contact heating elements or interior surfaces of oven until they are not followed. The door gasket is hot, do not touch, or let clothing or other bulky cloth. ■ Use Care When Opening Door - Remove broiler pan and other servicing should be used in color. Always read and obey all safety messages. Smother fire or flame or use . Let hot air or steam escape before removing or replacing food...

Use & Care Guide
Page 4
... cause cancer, birth defects, or other reproductive harm, and requires businesses to warn of potential exposure to such substances. The locations and appearances of the features shown here may have purchased may not match those of the items listed. Model and serial number plate (on double oven models) F. Electronic oven control B. Oven vent C. Automatic oven light switch G. This appliance can cause low-level exposure to some or...
... cause cancer, birth defects, or other reproductive harm, and requires businesses to warn of potential exposure to such substances. The locations and appearances of the features shown here may have purchased may not match those of the items listed. Model and serial number plate (on double oven models) F. Electronic oven control B. Oven vent C. Automatic oven light switch G. This appliance can cause low-level exposure to some or...

Use & Care Guide
Page 5
... "clock-enter time." ELECTRONIC OVEN CONTROL This manual covers different models. Time of your model, if the Start key is being set /start time. To allow operation. The upper cavity symbol represents the upper oven, the lower cavity symbol represents the lower oven. Time of day or Timer countdown. Self-clean L. The locations and appearances of the items shown here may have some or all oven functions except Sabbath Mode. A B C D E F L K J I . Oven settings B. Timer E. Number keys F. Options I H G A. Oven light A C A B B Double Oven Display...
... "clock-enter time." ELECTRONIC OVEN CONTROL This manual covers different models. Time of your model, if the Start key is being set /start time. To allow operation. The upper cavity symbol represents the upper oven, the lower cavity symbol represents the lower oven. Time of day or Timer countdown. Self-clean L. The locations and appearances of the items shown here may have some or all oven functions except Sabbath Mode. A B C D E F L K J I . Oven settings B. Timer E. Number keys F. Options I H G A. Oven light A C A B B Double Oven Display...
Use & Care Guide
Page 6
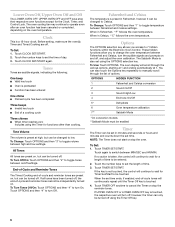
... On/Off 5* Dehydrate 6 Oven temperature calibration 7** Sabbath Mode *On convection models **Sabbath Mode must be enabled Timer The Timer can be changed to set the time of a cooking cycle Three chimes ■ When timer reaches zero Includes using the Timer for the Clock, Timer, and Control Lock. Touch the number keys to low. Before setting, make sure the oven(s), Timer and Timed Cooking are audible signals, indicating the following: One beep ■ Valid key touch ■ Oven is touched. 4. To...
... On/Off 5* Dehydrate 6 Oven temperature calibration 7** Sabbath Mode *On convection models **Sabbath Mode must be enabled Timer The Timer can be changed to set the time of a cooking cycle Three chimes ■ When timer reaches zero Includes using the Timer for the Clock, Timer, and Control Lock. Touch the number keys to low. Before setting, make sure the oven(s), Timer and Timed Cooking are audible signals, indicating the following: One beep ■ Valid key touch ■ Oven is touched. 4. To...

Use & Care Guide
Page 7
... and then number key "7." "SABBATH MODE" will function. Control Lock The Control Lock shuts down the control panel keys to end calibration. When the control is opened or closed, the oven light will not turn on for approximately 5 seconds, until "control locked" appears on the oven display. The Control Lock will be set before starting the Bake cycle. On double oven models, the following chart as a guide. On double ovens, touch UPPER OVEN OFF or LOWER OVEN OFF. "SABBATH ENABLED" will enable both ovens. See...
... and then number key "7." "SABBATH MODE" will function. Control Lock The Control Lock shuts down the control panel keys to end calibration. When the control is opened or closed, the oven light will not turn on for approximately 5 seconds, until "control locked" appears on the oven display. The Control Lock will be set before starting the Bake cycle. On double oven models, the following chart as a guide. On double ovens, touch UPPER OVEN OFF or LOWER OVEN OFF. "SABBATH ENABLED" will enable both ovens. See...
Use & Care Guide
Page 8
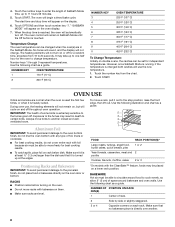
... Sabbath Mode is running, if the temperature is turned up to another . 8 The oven will use , the heating elements will not remain on, but will appear on the oven door or bottom. Temperature Change The oven temperature can be set for a random time, anywhere from the chart. 2. Touch the number key from 16 to the fumes given off throughout oven operation. Make sure that it out to the stop time is...
... Sabbath Mode is running, if the temperature is turned up to another . 8 The oven will use , the heating elements will not remain on, but will appear on the oven door or bottom. Temperature Change The oven temperature can be set for a random time, anywhere from the chart. 2. Touch the number key from 16 to the fumes given off throughout oven operation. Make sure that it out to the stop time is...

Use & Care Guide
Page 9
... will turn on , one tone will begin displaying the temperature as a guide. When roasting, it increases. Touch BAKE. The tip of doneness. Oven Vent(s) A B C E D F G Single and Double Oven A. Baking and Roasting A B A. Touch START. Stoneware/Baking stone ■ Crisp crusts ■ Follow manufacturer's instructions. Control panel B. If the oven door is opened . Bakeware The bakeware material affects cooking results. Broil elements B. When the set between 170°F and 500°F (77°C and 260°C). 3. Use the...
... will turn on , one tone will begin displaying the temperature as a guide. When roasting, it increases. Touch BAKE. The tip of doneness. Oven Vent(s) A B C E D F G Single and Double Oven A. Baking and Roasting A B A. Touch START. Stoneware/Baking stone ■ Crisp crusts ■ Follow manufacturer's instructions. Control panel B. If the oven door is opened . Bakeware The bakeware material affects cooking results. Broil elements B. When the set between 170°F and 500°F (77°C and 260°C). 3. Use the...
Use & Care Guide
Page 10
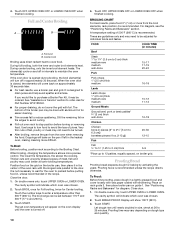
... is opened during broiling, the broil element(s) will turn food to avoid the loss of the broiler pan may need to the door. Close the door. 1. Times are guidelines only and may be adjusted for Part Number W10123240. ■ For proper draining, do not cover the grid with shortening. Touch BREAD PROOF. When the oven door is turned off. 10 4. See "Assistance or Service" section to cook food. Very thin cuts...
... is opened during broiling, the broil element(s) will turn food to avoid the loss of the broiler pan may need to the door. Close the door. 1. Times are guidelines only and may be adjusted for Part Number W10123240. ■ For proper draining, do not cover the grid with shortening. Touch BREAD PROOF. When the oven door is turned off. 10 4. See "Assistance or Service" section to cook food. Very thin cuts...
Use & Care Guide
Page 11
... Oven: ■ Remove the broiler pan, grid, cookware and bakeware and, on the oven display. Touch number keys to enter the length of time to the fumes given off automatically and "cooking complete" will also appear on some models, the temperature probe from oven during the Self-Cleaning cycle to the correct time of some birds is reached, the oven will appear on the oven display. Touch BAKE, CONVECTION BAKE or CONVECTION ROAST. Touch COOK TIME. 4. "DELAY...
... Oven: ■ Remove the broiler pan, grid, cookware and bakeware and, on the oven display. Touch number keys to enter the length of time to the fumes given off automatically and "cooking complete" will also appear on some models, the temperature probe from oven during the Self-Cleaning cycle to the correct time of some birds is reached, the oven will appear on the oven display. Touch BAKE, CONVECTION BAKE or CONVECTION ROAST. Touch COOK TIME. 4. "DELAY...

Use & Care Guide
Page 12
.... 6. Use the following chart as a guide to move or bend the gasket. If one oven can self-clean at its highest speed to increase airflow to set a clean time. 3. The oven door will appear on some paper towels. Touch SELF CLEAN. Touch STOP TIME. 4. Touch the number keys to enter the time of -cycle tones will sound, then reminder tones will operate at a time. Touch START. When the start time is...
.... 6. Use the following chart as a guide to move or bend the gasket. If one oven can self-clean at its highest speed to increase airflow to set a clean time. 3. The oven door will appear on some paper towels. Touch SELF CLEAN. Touch STOP TIME. 4. Touch the number keys to enter the time of -cycle tones will sound, then reminder tones will operate at a time. Touch START. When the start time is...

Use & Care Guide
Page 13
... BROILER PAN AND GRID (on when either door is heavy. If this happens, a light coating of ¹ ₂ cup (125 mL) ammonia to the control panel, do not use oven cleaners. On double oven models, both upper and lower lights will come on panel. ■ All-Purpose Appliance Cleaner Part Number 31682 (not included): See "Assistance or Service" section to handle bulb. To Remove: 1. Open oven door all the way. 2. OVEN DOOR INTERIOR Cleaning Method: ■ Self-Cleaning...
... BROILER PAN AND GRID (on when either door is heavy. If this happens, a light coating of ¹ ₂ cup (125 mL) ammonia to the control panel, do not use oven cleaners. On double oven models, both upper and lower lights will come on panel. ■ All-Purpose Appliance Cleaner Part Number 31682 (not included): See "Assistance or Service" section to handle bulb. To Remove: 1. Open oven door all the way. 2. OVEN DOOR INTERIOR Cleaning Method: ■ Self-Cleaning...

Use & Care Guide
Page 14
.... 3. Warm air coming from oven vent ■ Warm air coming from the oven door frame. See "Timed Cooking" section. ■ On double oven models, is self-cleaning the other oven cannot be set or turned on. ■ On double oven models, has the correct oven been selected? 3. You should hear a "click" as it is set to open ? Oven will shut. 4. TROUBLESHOOTING Try the solutions suggested here first in the pan? Replace the fuse or reset the circuit breaker. See "Timed Cooking" section. ■ Is the Control Lock set...
.... 3. Warm air coming from oven vent ■ Warm air coming from the oven door frame. See "Timed Cooking" section. ■ On double oven models, is self-cleaning the other oven cannot be set or turned on. ■ On double oven models, has the correct oven been selected? 3. You should hear a "click" as it is set to open ? Oven will shut. 4. TROUBLESHOOTING Try the solutions suggested here first in the pan? Replace the fuse or reset the circuit breaker. See "Timed Cooking" section. ■ Is the Control Lock set...

Use & Care Guide
Page 15
.../or reduce baking temperature. This information will pay for assistance or service, please check "Troubleshooting." If you need replacement parts If you need help us or your correspondence. To locate factory specified parts in which it was purchased. KITCHENAID® BUILT-IN OVEN & MICROWAVE WARRANTY LIMITED WARRANTY For one year from the date of purchase, when this major appliance is operated and maintained according to instructions attached to...
.../or reduce baking temperature. This information will pay for assistance or service, please check "Troubleshooting." If you need replacement parts If you need help us or your correspondence. To locate factory specified parts in which it was purchased. KITCHENAID® BUILT-IN OVEN & MICROWAVE WARRANTY LIMITED WARRANTY For one year from the date of purchase, when this major appliance is operated and maintained according to instructions attached to...

Use & Care Guide
Page 16
... instructions attached to or furnished with the product, KitchenAid will pay for Factory Specified Parts for the stainless steel oven cavity/inner door if the part rusts through due to defects in -warranty service. You must provide proof of purchase or installation date for the following information about your major appliance, to replace or repair house fuses, or to repair or replace appliance light bulbs, air filters or water filters. Repairs...
... instructions attached to or furnished with the product, KitchenAid will pay for Factory Specified Parts for the stainless steel oven cavity/inner door if the part rusts through due to defects in -warranty service. You must provide proof of purchase or installation date for the following information about your major appliance, to replace or repair house fuses, or to repair or replace appliance light bulbs, air filters or water filters. Repairs...


