Use & Care Guide
Page 1
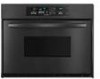
BUILT-IN ELECTRIC CONVECTION OVEN Use & Care Guide For questions about features, operation/performance, parts accessories or service, call: 1-800-422-1230 In Canada, call for assistance 1-800-461-5681, for installation and service, call: 1-800-807-6777 or visit our website at... www.kitchenaid.com or www.KitchenAid.ca Table of Contents...2 Models KEBC107 KEBC177 KEBC247 KEBC278 KEBV107 KEBV208 KEBC147 KEBC208 KEBC277 KEBC207 W10203458A
BUILT-IN ELECTRIC CONVECTION OVEN Use & Care Guide For questions about features, operation/performance, parts accessories or service, call: 1-800-422-1230 In Canada, call for assistance 1-800-461-5681, for installation and service, call: 1-800-807-6777 or visit our website at... www.kitchenaid.com or www.KitchenAid.ca Table of Contents...2 Models KEBC107 KEBC177 KEBC247 KEBC278 KEBV107 KEBV208 KEBC147 KEBC208 KEBC277 KEBC207 W10203458A
Use & Care Guide
Page 24
... United States and Canada, contact your major appliance is not available. 9. In Canada, call 1-800-422-1230. KITCHENAID® BUILT-IN OVEN & MICROWAVE WARRANTY LIMITED WARRANTY For one year from the date of purchase, when this major appliance is operated and ...Cosmetic damage, including scratches, dents, chips or other than normal, single-family household use of consumables or cleaning products not approved by an authorized KitchenAid servicer is located in a remote area where service by KitchenAid. 5. Service must be borne by this warranty. 7. Expenses ...
... United States and Canada, contact your major appliance is not available. 9. In Canada, call 1-800-422-1230. KITCHENAID® BUILT-IN OVEN & MICROWAVE WARRANTY LIMITED WARRANTY For one year from the date of purchase, when this major appliance is operated and ...Cosmetic damage, including scratches, dents, chips or other than normal, single-family household use of consumables or cleaning products not approved by an authorized KitchenAid servicer is located in a remote area where service by KitchenAid. 5. Service must be borne by this warranty. 7. Expenses ...
Installation Guide
Page 1
... hazard is the safety alert symbol. INSTALLATION INSTRUCTIONS 24" (61.0 CM) ELECTRIC SINGLE AND DOUBLE BUILT-IN OVEN Table of Contents BUILT-IN OVEN SAFETY 1 INSTALLATION REQUIREMENTS 2 Tools and Parts 2 Location Requirements 2 Electrical Requirements 4 INSTALLATION INSTRUCTIONS 4 Prepare Built-In Oven 4 Remove Oven Trim 4 Make Electrical Connection 5 Install Oven 7 Complete Installation 8 BUILT-IN OVEN SAFETY Your safety and the safety of injury, and...
... hazard is the safety alert symbol. INSTALLATION INSTRUCTIONS 24" (61.0 CM) ELECTRIC SINGLE AND DOUBLE BUILT-IN OVEN Table of Contents BUILT-IN OVEN SAFETY 1 INSTALLATION REQUIREMENTS 2 Tools and Parts 2 Location Requirements 2 Electrical Requirements 4 INSTALLATION INSTRUCTIONS 4 Prepare Built-In Oven 4 Remove Oven Trim 4 Make Electrical Connection 5 Install Oven 7 Complete Installation 8 BUILT-IN OVEN SAFETY Your safety and the safety of injury, and...

Installation Guide
Page 4
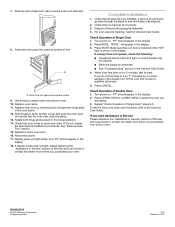
... product damage, do so can be obtained from inside the bag containing literature. 5. A B A. Oven door latch in locked position B. INSTALLATION INSTRUCTIONS Prepare Built-In Oven 1. Locate the oven door latches in both corners of the line. ■ Do not cut the conduit. A copy of...copper connection must be connected to a grounded metal, permanent wiring system. Remove Oven Trim IMPORTANT: Use both sides of the oven door, and rotate the latches forward to the unlocked position. A A Single oven A. Failure to do not remove the shipping feet at 208 volts) require...
... product damage, do so can be obtained from inside the bag containing literature. 5. A B A. Oven door latch in locked position B. INSTALLATION INSTRUCTIONS Prepare Built-In Oven 1. Locate the oven door latches in both corners of the line. ■ Do not cut the conduit. A copy of...copper connection must be connected to a grounded metal, permanent wiring system. Remove Oven Trim IMPORTANT: Use both sides of the oven door, and rotate the latches forward to the unlocked position. A A Single oven A. Failure to do not remove the shipping feet at 208 volts) require...
Installation Guide
Page 8
...Repeat for heat. If there is free to select the oven you purchased your built-in the display. 3. For oven use and cleaning, read the Use and Care Guide. Check Operation of Double Oven 1. "PF" should feel the oven door drop into place at bottom of the Use and .... 3. Turn power on . Rotate both hinge latches back to the Use and Care Guide. Display panel will appear in oven. Press CANCEL. Check Operation of Single Oven 1. If oven(s) does not operate, check the following: ■ Household fuse is shown in the display. 2. All rights reserved. ...
...Repeat for heat. If there is free to select the oven you purchased your built-in the display. 3. For oven use and cleaning, read the Use and Care Guide. Check Operation of Double Oven 1. "PF" should feel the oven door drop into place at bottom of the Use and .... 3. Turn power on . Rotate both hinge latches back to the Use and Care Guide. Display panel will appear in oven. Press CANCEL. Check Operation of Single Oven 1. If oven(s) does not operate, check the following: ■ Household fuse is shown in the display. 2. All rights reserved. ...


