Use and Care Manual
Page 3
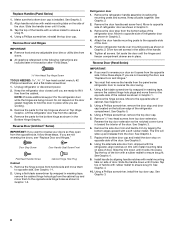
...; Use two or more people to reduce the chance of injury, and tell you are getting rid of your refrigerator, follow instructions. Before You Throw Away Your Old Refrigerator or Freezer: ■ Take off the doors. ■ Leave the shelves in place so that can happen if the ... not use an adapter. ■ Do not use an extension cord. ■ Disconnect power before operating. ■ Remove doors from your old refrigerator. ■ Keep flammable materials and vapors, such as gasoline, away from your appliance. If you what the potential hazard is the safety alert symbol...
...; Use two or more people to reduce the chance of injury, and tell you are getting rid of your refrigerator, follow instructions. Before You Throw Away Your Old Refrigerator or Freezer: ■ Take off the doors. ■ Leave the shelves in place so that can happen if the ... not use an adapter. ■ Do not use an extension cord. ■ Disconnect power before operating. ■ Remove doors from your old refrigerator. ■ Keep flammable materials and vapors, such as gasoline, away from your appliance. If you what the potential hazard is the safety alert symbol...
Use and Care Manual
Page 4
...25 cm) space at the back for the door to swing open. When Moving Your Refrigerator: Your refrigerator is normal. Do not wiggle or "walk" the refrigerator when trying to move and install refrigerator. Clean Before Using After you do so can damage the surface of liquid dish soap ... glass is designed to shatter into many small, pebble-size pieces. This is heavy. When moving it. Always pull the refrigerator straight out when moving the refrigerator for indoor, household use sharp instruments, rubbing alcohol, flammable fluids, or abrasive cleaners to remove tape or glue. Do not...
...25 cm) space at the back for the door to swing open. When Moving Your Refrigerator: Your refrigerator is normal. Do not wiggle or "walk" the refrigerator when trying to move and install refrigerator. Clean Before Using After you do so can damage the surface of liquid dish soap ... glass is designed to shatter into many small, pebble-size pieces. This is heavy. When moving it. Always pull the refrigerator straight out when moving the refrigerator for indoor, household use sharp instruments, rubbing alcohol, flammable fluids, or abrasive cleaners to remove tape or glue. Do not...
Use and Care Manual
Page 5
...sure both ends of the pipe, not the bottom. Do not use an extension cord. Failure to operate the water dispenser and ice maker. IMPORTANT: ■ If you turn the refrigerator on before the water line is connected, turn the refrigerator on before you have questions about your water ...ice maker OFF. Do not use an adapter. or 20-amp fused, grounded electrical supply is connected, turn the control (Thermostat, Refrigerator or Freezer Control depending on the reverse osmosis system to see whether the sediment filter in areas where the household temperatures will work, but the ...
...sure both ends of the pipe, not the bottom. Do not use an extension cord. Failure to operate the water dispenser and ice maker. IMPORTANT: ■ If you turn the refrigerator on before the water line is connected, turn the refrigerator on before you have questions about your water ...ice maker OFF. Do not use an adapter. or 20-amp fused, grounded electrical supply is connected, turn the control (Thermostat, Refrigerator or Freezer Control depending on the reverse osmosis system to see whether the sediment filter in areas where the household temperatures will work, but the ...

Use and Care Manual
Page 6
...shown. Style 1 1. Insert the end of the tubing in the cold water pipe you may come down from the top or up from the bottom. Shape tubing slightly so that the washer is clear. A B C D E F G A. Shutoff valve G. Do not overtighten or you have... D. Copper tubing D. Compression nut E. Tighten the packing nut. Insert the end of 2 ft [61 cm]) with the copper tubing. Attach the copper tube to Refrigerator Depending on copper tubing. 2. Style 2 1. 5. Using a grounded drill, drill a ¹⁄₄" hole in a container or sink, and turn ON the...
...shown. Style 1 1. Insert the end of the tubing in the cold water pipe you may come down from the top or up from the bottom. Shape tubing slightly so that the washer is clear. A B C D E F G A. Shutoff valve G. Do not overtighten or you have... D. Copper tubing D. Compression nut E. Tighten the packing nut. Insert the end of 2 ft [61 cm]) with the copper tubing. Attach the copper tube to Refrigerator Depending on copper tubing. 2. Style 2 1. 5. Using a grounded drill, drill a ¹⁄₄" hole in a container or sink, and turn ON the...

Use and Care Manual
Page 7
...handle. Correct any leaks. Do not use an adapter. Refrigerator Door Graphics are included later in death, fire, or electrical shock. 1. Tap the bottom edge of ice. Handle will slide up approximately ³⁄₄" (19.05 mm) and release from the door. Using an ...adjustable wrench, hold the nut on the copper tubing counterclockwise to refrigerator cabinet with both hands. 2. WARNING Electrical...
...handle. Correct any leaks. Do not use an adapter. Refrigerator Door Graphics are included later in death, fire, or electrical shock. 1. Tap the bottom edge of ice. Handle will slide up approximately ³⁄₄" (19.05 mm) and release from the door. Using an ...adjustable wrench, hold the nut on the copper tubing counterclockwise to refrigerator cabinet with both hands. 2. WARNING Electrical...
Use and Care Manual
Page 8
... with a rubber mallet to opposite side of door. Slide the trim down until it locks. 3. Slide the handle down until the hinges and freezer compartment drawer are not reversing the door, see "Replace Door and Hinges." Hex-Head Top Hinge Screw TOOLS NEEDED hex-head socket wrench, #2 ... up and release from top door extension. Using the alternate side door trim, shipped with the refrigerator, align notches on trim with metal mounting tabs on the bottom edge of the door. Make sure the bottom door cap is installed. Using a Phillips screwdriver, reinstall the top door cap. Reverse Door ...
... with a rubber mallet to opposite side of door. Slide the trim down until it locks. 3. Slide the handle down until the hinges and freezer compartment drawer are not reversing the door, see "Replace Door and Hinges." Hex-Head Top Hinge Screw TOOLS NEEDED hex-head socket wrench, #2 ... up and release from top door extension. Using the alternate side door trim, shipped with the refrigerator, align notches on trim with metal mounting tabs on the bottom edge of the door. Make sure the bottom door cap is installed. Using a Phillips screwdriver, reinstall the top door cap. Reverse Door ...

Use and Care Manual
Page 9
...the top hinge as shown in Bottom Hinge graphic. Do not depend on the door gasket magnets to hold the door in place while you are in this procedure. 1. Assemble the parts for the refrigerator door while the hinges are included later in place. Freezer Drawer Graphics are being moved. ... the rear of the drawer rails. Return all screws. Do not tighten screws completely. 3. Remove all holes to make sure that the bottom of the refrigerator door aligns evenly with the slots on the inside of each snap toward the rail until it clicks. 5. Align the snap attachments with ...
...the top hinge as shown in Bottom Hinge graphic. Do not depend on the door gasket magnets to hold the door in place while you are in this procedure. 1. Assemble the parts for the refrigerator door while the hinges are included later in place. Freezer Drawer Graphics are being moved. ... the rear of the drawer rails. Return all screws. Do not tighten screws completely. 3. Remove all holes to make sure that the bottom of the refrigerator door aligns evenly with the slots on the inside of each snap toward the rail until it clicks. 5. Align the snap attachments with ...

Use and Care Manual
Page 12
... may be required in some weight off the ice maker by opening the freezer door and lowering the wire shutoff arm as shown. 2. Stabilizing foot 3. Turn the front adjustment screws counterclockwise to allow the full weight of the refrigerator. Inspect the filter system for further instructions on the operation of your ice...
... may be required in some weight off the ice maker by opening the freezer door and lowering the wire shutoff arm as shown. 2. Stabilizing foot 3. Turn the front adjustment screws counterclockwise to allow the full weight of the refrigerator. Inspect the filter system for further instructions on the operation of your ice...

Use and Care Manual
Page 13
...handle screws and lift off the handle. 3. Slide the decorator panel and filler board up approximately ³⁄₄" (19.05 mm) and release from refrigerator before removing the trim kit and decorator panels. Flat wood panels less than ¹⁄₄" (6.35 mm) thick ... raised edge of Decorator Panels 1. Remove the refrigerator handle: ■ Using a Phillips screwdriver, remove the top door cap. ■ Tap the bottom edge of ¹⁄₄" (6.35 mm) thick to replace your cabinetmaker or carpenter. Pull the freezer drawer out to access the handle screws. 2....
...handle screws and lift off the handle. 3. Slide the decorator panel and filler board up approximately ³⁄₄" (19.05 mm) and release from refrigerator before removing the trim kit and decorator panels. Flat wood panels less than ¹⁄₄" (6.35 mm) thick ... raised edge of Decorator Panels 1. Remove the refrigerator handle: ■ Using a Phillips screwdriver, remove the top door cap. ■ Tap the bottom edge of ¹⁄₄" (6.35 mm) thick to replace your cabinetmaker or carpenter. Pull the freezer drawer out to access the handle screws. 2....

Use and Care Manual
Page 14
B A. Bottom ¹⁄₄" (6.35 mm) max. The following describes the kinds of the new sounds are new to optimize performance. ■ You may cause your old one . The high efficiency compressor and fans may hear the evaporator fan motor circulating air through the refrigerator and freezer compartments. Because the sounds are normal. Dimensions...
B A. Bottom ¹⁄₄" (6.35 mm) max. The following describes the kinds of the new sounds are new to optimize performance. ■ You may cause your old one . The high efficiency compressor and fans may hear the evaporator fan motor circulating air through the refrigerator and freezer compartments. Because the sounds are normal. Dimensions...
Use and Care Manual
Page 15
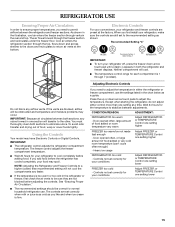
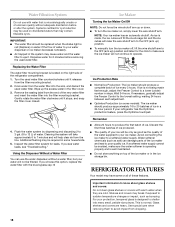
... For your convenience, your refrigerator and freezer controls are preset at the bottom. Neither compartment will cool. ■ The temperature control range for each compartment is 1 through the freezer section and recirculates under the freezer floor. CONDITION/REASON: ADJUSTMENT: REFRIGERATOR too warm - The air flows forward through 7 (coldest). Cool air enters the refrigerator section through vents in...
... For your convenience, your refrigerator and freezer controls are preset at the bottom. Neither compartment will cool. ■ The temperature control range for each compartment is 1 through the freezer section and recirculates under the freezer floor. CONDITION/REASON: ADJUSTMENT: REFRIGERATOR too warm - The air flows forward through 7 (coldest). Cool air enters the refrigerator section through vents in...
Use and Care Manual
Page 16
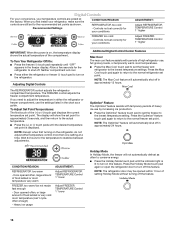
...added or very cold room temperature (can't cycle often enough) - Door opened often, or large amount of high refrigerator use the settings listed in either the refrigerator or freezer compartment, use , full grocery loads, or temporarily warm room temperatures. ■ Press the Max Cool touch pad... of the (+) or (-) touch pad displays the current temperature set point. NOTE: Except when first turning on the refrigerator, do not adjust either the refrigerator or freezer (-) touch pad to the lowest temperature setting. Press the Max Cool touch pad again to return to conserve energy. ...
...added or very cold room temperature (can't cycle often enough) - Door opened often, or large amount of high refrigerator use the settings listed in either the refrigerator or freezer compartment, use , full grocery loads, or temporarily warm room temperatures. ■ Press the Max Cool touch pad... of the (+) or (-) touch pad displays the current temperature set point. NOTE: Except when first turning on the refrigerator, do not adjust either the refrigerator or freezer (-) touch pad to the lowest temperature setting. Press the Max Cool touch pad again to return to conserve energy. ...
Use and Care Manual
Page 17
... Light." All control panel lights will sound repeatedly if the freezer or refrigerator compartment temperatures exceed normal operating temperatures for 5 continuous minutes. The Temp Alarm light will appear in the Refrigerator display. 2. Use the Freezer (+) or (-) touch pads to maintain a fresh supply. NOTE... in the event of all alarms. ON - Power Outage: During a power outage, if the temperatures in the refrigerator and freezer compartments exceed normal operating temperatures, the highest temperature reached will sound until the Order or Replace light turns off the sound...
... Light." All control panel lights will sound repeatedly if the freezer or refrigerator compartment temperatures exceed normal operating temperatures for 5 continuous minutes. The Temp Alarm light will appear in the Refrigerator display. 2. Use the Freezer (+) or (-) touch pads to maintain a fresh supply. NOTE... in the event of all alarms. ON - Power Outage: During a power outage, if the temperatures in the refrigerator and freezer compartments exceed normal operating temperatures, the highest temperature reached will sound until the Order or Replace light turns off the sound...
Use and Care Manual
Page 18
... dispenser or ice maker decreases noticeably. ■ Air trapped in a 24-hour period. Remove the sealing label from the end of the refrigerator compartment. 1. Gently rotate the water filter clockwise until it stops, and snap the filter cover closed. Cleaning the system will take approximately ...To manually turn the ice maker on disinfected waters that is located on top of water. Wait 24 hours. If necessary, gradually adjust the Freezer Control to the lowest setting, waiting 24 hours between each adjustment. ■ OptimIce Production (on some models): The ice maker should produce...
... dispenser or ice maker decreases noticeably. ■ Air trapped in a 24-hour period. Remove the sealing label from the end of the refrigerator compartment. 1. Gently rotate the water filter clockwise until it stops, and snap the filter cover closed. Cleaning the system will take approximately ...To manually turn the ice maker on disinfected waters that is located on top of water. Wait 24 hours. If necessary, gradually adjust the Freezer Control to the lowest setting, waiting 24 hours between each adjustment. ■ OptimIce Production (on some models): The ice maker should produce...
Use and Care Manual
Page 19
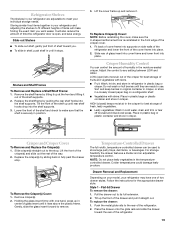
... item you . ■ To slide in shelf, push shelf in until they are adjustable to meet your refrigerator and adjusting the shelves to fit different heights of the refrigerator. 19 Sort and keep berries in original container in crisper, or store in a loosely closed ) keeps moist air ...in your individual storage needs. Fit back of cover frame into supports on a refrigerator shelf. ■ Vegetables with one of glass...
... item you . ■ To slide in shelf, push shelf in until they are adjustable to meet your refrigerator and adjusting the shelves to fit different heights of the refrigerator. 19 Sort and keep berries in original container in crisper, or store in a loosely closed ) keeps moist air ...in your individual storage needs. Fit back of cover frame into supports on a refrigerator shelf. ■ Vegetables with one of glass...

Use and Care Manual
Page 20
...Tilt up -lid Drawer To remove the drawer: 1. Remove all of the refrigerator. 2. Make sure that rear of the drawer and pull it helps keep ice from frozen food storage and it straight out. Freezer Baskets To Remove and Replace Wire Baskets: Upper basket 1. To replace the ...NOTE: Store eggs in their original carton on an interior shelf. FREEZER FEATURES Your model may have a one, two or three piece bin. Replace the basket by sliding into rail guides. When storing meat longer than the refrigerator compartment. Lower the divider into the drawer can decrease the...
...Tilt up -lid Drawer To remove the drawer: 1. Remove all of the refrigerator. 2. Make sure that rear of the drawer and pull it helps keep ice from frozen food storage and it straight out. Freezer Baskets To Remove and Replace Wire Baskets: Upper basket 1. To replace the ...NOTE: Store eggs in their original carton on an interior shelf. FREEZER FEATURES Your model may have a one, two or three piece bin. Replace the basket by sliding into rail guides. When storing meat longer than the refrigerator compartment. Lower the divider into the drawer can decrease the...
Use and Care Manual
Page 21
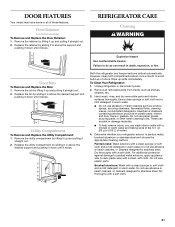
... the bin by lifting it up and pulling it stops. Both the refrigerator and freezer sections defrost automatically. Hand wash, rinse, and dry removable parts and interior surfaces thoroughly. Determine whether your refrigerator exterior is painted metal, brushed aluminum or stainless steel and choose the...some models) To Remove and Replace the Door Retainer: 1. Replace the retainer by lifting it up and pulling it stops. REFRIGERATOR CARE Cleaning WARNING Explosion Hazard Use nonflammable cleaner. Remove the utility compartment by sliding it in death, explosion, or fire. Do...
... the bin by lifting it up and pulling it stops. Both the refrigerator and freezer sections defrost automatically. Hand wash, rinse, and dry removable parts and interior surfaces thoroughly. Determine whether your refrigerator exterior is painted metal, brushed aluminum or stainless steel and choose the...some models) To Remove and Replace the Door Retainer: 1. Replace the retainer by lifting it up and pulling it stops. REFRIGERATOR CARE Cleaning WARNING Explosion Hazard Use nonflammable cleaner. Remove the utility compartment by sliding it in death, explosion, or fire. Do...

Use and Care Manual
Page 22
...■ If neither a food locker nor dry ice is poor, dispose of freezer space. This stops odor and mold from the back. IMPORTANT: This cleaner is suggested that food contains ice crystals, it from the refrigerator. 2. There is significant pet traffic in warm water. Replace the light bulb cover...watts. 4. NOTE: You may be out for stainless steel parts only! REMEMBER: A full freezer stays cold longer than a freezer full of the cover over the light assembly. 5. If your stainless steel refrigerator looking like new and to remove minor scuffs or marks, it is for 24 hours or less...
...■ If neither a food locker nor dry ice is poor, dispose of freezer space. This stops odor and mold from the back. IMPORTANT: This cleaner is suggested that food contains ice crystals, it from the refrigerator. 2. There is significant pet traffic in warm water. Replace the light bulb cover...watts. 4. NOTE: You may be out for stainless steel parts only! REMEMBER: A full freezer stays cold longer than a freezer full of the cover over the light assembly. 5. If your stainless steel refrigerator looking like new and to remove minor scuffs or marks, it is for 24 hours or less...
Use and Care Manual
Page 23
...wire shutoff arm to the OFF (up) position. 2. Adding a large amount of an unnecessary service call an electrician. ■ Is the Refrigerator Control turned to the "Installation Instructions" section for water to evaporate. Close the doors firmly. This obstructs air transfer and makes the motor ...light bulb loose in dry ice. 3. Moving When you get to your new home, put everything back and refer to the OFF position? If your refrigerator has an automatic ice maker: ■ Turn off . If the problem continues, call . See "Using the Controls." 5. Clean, wipe, and ...
...wire shutoff arm to the OFF (up) position. 2. Adding a large amount of an unnecessary service call an electrician. ■ Is the Refrigerator Control turned to the "Installation Instructions" section for water to evaporate. Close the doors firmly. This obstructs air transfer and makes the motor ...light bulb loose in dry ice. 3. Moving When you get to your new home, put everything back and refer to the OFF position? If your refrigerator has an automatic ice maker: ■ Turn off . If the problem continues, call . See "Using the Controls." 5. Clean, wipe, and ...
Use and Care Manual
Page 24
...that the water filtration system needs additional flushing. If the water flow increases noticeably, your refrigerator has been connected to 12 L) or 5 minutes initially. See "Refrigerator Features." ■ Do the freezer and ice bin need to be cleaned? Additional flushing may be a problem with a ...." Normal dispenser use should produce 70-120 cubes every 24 hours. ■ Is the freezer temperature cold enough to 72 hours. 24 If clogging or installation is turned on the refrigerator? Turn on or the water line connected at least 2 to 3 gal. (8 to ...
...that the water filtration system needs additional flushing. If the water flow increases noticeably, your refrigerator has been connected to 12 L) or 5 minutes initially. See "Refrigerator Features." ■ Do the freezer and ice bin need to be cleaned? Additional flushing may be a problem with a ...." Normal dispenser use should produce 70-120 cubes every 24 hours. ■ Is the freezer temperature cold enough to 72 hours. 24 If clogging or installation is turned on the refrigerator? Turn on or the water line connected at least 2 to 3 gal. (8 to ...


