
Operation Manual
Page 1
DAB+ Stereo Compact Radio CR-ST50DAB OPERATING INSTRUCTIONS JVCKENWOOD Corporation ENGLISH
DAB+ Stereo Compact Radio CR-ST50DAB OPERATING INSTRUCTIONS JVCKENWOOD Corporation ENGLISH
Operation Manual
Page 2
... the power supply Safety instructions Before start-up Connect Component names and functions Basic functions Turning on the system Switching off in standby Volume control Navigate in the menus Setting the menu language Setting the time Additional settings in the "Time" menu Setting the display illumination Setting the sleep timer Using the DAB + radio Setting the DAB + stations Selecting a DAB + station Storing stations in the station memory Expanded DAB + information Menu functions DAB + Using the FM radio Setting the FM stations Storing stations in the station memory Menu...
... the power supply Safety instructions Before start-up Connect Component names and functions Basic functions Turning on the system Switching off in standby Volume control Navigate in the menus Setting the menu language Setting the time Additional settings in the "Time" menu Setting the display illumination Setting the sleep timer Using the DAB + radio Setting the DAB + stations Selecting a DAB + station Storing stations in the station memory Expanded DAB + information Menu functions DAB + Using the FM radio Setting the FM stations Storing stations in the station memory Menu...
Operation Manual
Page 3
... keep the safety and operating instructions for the Compact Radio CR-ST50DAB only. Never block the ventilation holes by the manufacturer. 3. Use this adapter for future reference. Also, at the exit from the mains socket before cleaning this product. Thunderstorm - Use only a damp cloth for a long time. 8. flower vases, on the device. 4. Make sure that you are used for cleaning. 2. The device should never be...
... keep the safety and operating instructions for the Compact Radio CR-ST50DAB only. Never block the ventilation holes by the manufacturer. 3. Use this adapter for future reference. Also, at the exit from the mains socket before cleaning this product. Thunderstorm - Use only a damp cloth for a long time. 8. flower vases, on the device. 4. Make sure that you are used for cleaning. 2. The device should never be...

Operation Manual
Page 4
... mains adapter from leaking. Maintenance and repair work should not be exposed through the openings or by the manufacturer or that can cause injury and damage the device. Heat - Do not install the device near the device. If you do not remove screws, covers or body parts. - Leaking batteries can be carried out by a qualified customer service. Safety test - Never mix batteries of...
... mains adapter from leaking. Maintenance and repair work should not be exposed through the openings or by the manufacturer or that can cause injury and damage the device. Heat - Do not install the device near the device. If you do not remove screws, covers or body parts. - Leaking batteries can be carried out by a qualified customer service. Safety test - Never mix batteries of...
Operation Manual
Page 5
... high temperature surrounding environment that can defeat a safeguard (for example,in the case of Conformity is replaced by an incorrect type; - or a battery subjected to during use, storage or trans- The full text of the EU Declaration of some lithium battery types); - EU Declaration of Conformity Hereby, JVCKENWOOD Corporation declares that the radio equipment type CR-ST50DAB complies...
... high temperature surrounding environment that can defeat a safeguard (for example,in the case of Conformity is replaced by an incorrect type; - or a battery subjected to during use, storage or trans- The full text of the EU Declaration of some lithium battery types); - EU Declaration of Conformity Hereby, JVCKENWOOD Corporation declares that the radio equipment type CR-ST50DAB complies...

Operation Manual
Page 6
... the antenna on for the best reception. Align the antenna for the first time, an automatic DAB+ channel search is switched on the left side of the casing. 2. First use When the unit is started. Connect • Carefully unpack the device and make sure all accessories are present: • Connect the mains adapter to the radio and to the section "Using the DAB+ Radios". 6 Turn the antenna upwards...
... the antenna on for the best reception. Align the antenna for the first time, an automatic DAB+ channel search is switched on the left side of the casing. 2. First use When the unit is started. Connect • Carefully unpack the device and make sure all accessories are present: • Connect the mains adapter to the radio and to the section "Using the DAB+ Radios". 6 Turn the antenna upwards...

Operation Manual
Page 7
Display 2 - Headphone port 5 - Components and functions Control elements 1 - Standby/On/Source 3 - Menu 4 - TUNE/AUTO/ENTER/uIl 2 - Preset + 7 - Preset 6 - Station buttons (1 - 4) 9 - Power supply connector Front side 1 Backside 2 3 4 5 1 - Volume 8 - Line-in port 4 - Info 5 - Memory button Top view 1 23 456 7 8 9 7 FM / DAB + antenna 3 -
Display 2 - Headphone port 5 - Components and functions Control elements 1 - Standby/On/Source 3 - Menu 4 - TUNE/AUTO/ENTER/uIl 2 - Preset + 7 - Preset 6 - Station buttons (1 - 4) 9 - Power supply connector Front side 1 Backside 2 3 4 5 1 - Volume 8 - Line-in port 4 - Info 5 - Memory button Top view 1 23 456 7 8 9 7 FM / DAB + antenna 3 -
Operation Manual
Page 8
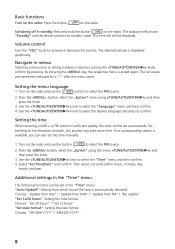
... press to standby mode. The time will be displayed. By pressing the key, the respective menu is displayed graphically. Press the , button, select the „System" menu using the menu and then press the knob. 3. If no corresponding station is automatically retrieved. Select "Set Time/Date" and confirm. Basic functions Turn on the radio: Press the button " on the reception strength, this process may take some time. Volume control Turn the...
... press to standby mode. The time will be displayed. By pressing the key, the respective menu is displayed graphically. Press the , button, select the „System" menu using the menu and then press the knob. 3. If no corresponding station is automatically retrieved. Select "Set Time/Date" and confirm. Basic functions Turn on the radio: Press the button " on the reception strength, this process may take some time. Volume control Turn the...
Operation Manual
Page 9
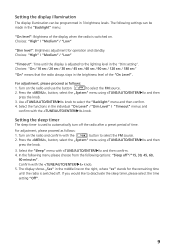
... for operation and standby. Confirm with the " button to select the FM source. 2. For adjustment, please proceed as follows: 1. Select the "Sleep" menu with the knob. In the following menu please choose from the following settings can be made in the "Backlight" menu: "On level": Brightness of the display when the radio is used to the lighting level in the brightness level of time...
... for operation and standby. Confirm with the " button to select the FM source. 2. For adjustment, please proceed as follows: 1. Select the "Sleep" menu with the knob. In the following menu please choose from the following settings can be made in the "Backlight" menu: "On level": Brightness of the display when the radio is used to the lighting level in the brightness level of time...
Operation Manual
Page 10
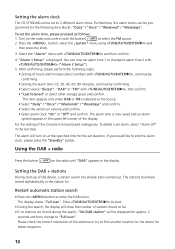
... display shows "Full scan". Setting the alarm clock The CR-ST50DAB can be set alarm time 1 or change to "Full scan". The alarm time is now saved and an alarm symbol appears in the station list. Using the DAB + radio Press the button " on at the specified time for the following steps: • Setting of the device, a station search has already been carried out. Press to start -up of hours and minutes (select numbers...
... display shows "Full scan". Setting the alarm clock The CR-ST50DAB can be set alarm time 1 or change to "Full scan". The alarm time is now saved and an alarm symbol appears in the station list. Using the DAB + radio Press the button " on at the specified time for the following steps: • Setting of the device, a station search has already been carried out. Press to start -up of hours and minutes (select numbers...
Operation Manual
Page 11
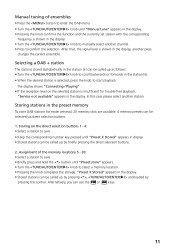
... display. • Stored stations can be called up by pressing the control. Storing on the selected station is shown in the preset memory To store DAB stations for trouble-free playback, "Service not available" appears in the station list can use the or keys. 11 Assignment of ensembles • Press the button to enter the DAB menu. • Turn the knob until "Manual tune" appears in the display...
... display. • Stored stations can be called up by pressing the control. Storing on the selected station is shown in the preset memory To store DAB stations for trouble-free playback, "Service not available" appears in the station list can use the or keys. 11 Assignment of ensembles • Press the button to enter the DAB menu. • Turn the knob until "Manual tune" appears in the display...
Operation Manual
Page 12
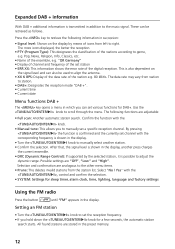
... be used to align the antenna. • XX K BPS: Display of the data rate of the station e.g. 80 kBit/s. This is also dependent on the display by means of icons from station to station. • DAB+: Designates the reception mode "DAB +". • Current time • Current date Menu functions DAB + The key opens a menu in addition to retrieve the following functions are adjustable...
... be used to align the antenna. • XX K BPS: Display of the data rate of the station e.g. 80 kBit/s. This is also dependent on the display by means of icons from station to station. • DAB+: Designates the reception mode "DAB +". • Current time • Current date Menu functions DAB + The key opens a menu in addition to retrieve the following functions are adjustable...
Operation Manual
Page 13
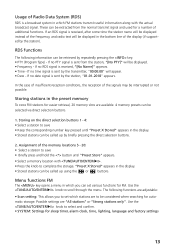
... knob to complete the storage. Usage of Radio Data System (RDS) RDS is a broadcast system in which you to set various functions for FM. Use the knob to scroll through the menu. These can be extracted from the station, "[No PTY]" will appear. • Date - Storing stations in the preset memory To store FM stations for sleep timer, alarm clock, time, lighting, language and factory settings 13
... knob to complete the storage. Usage of Radio Data System (RDS) RDS is a broadcast system in which you to set various functions for FM. Use the knob to scroll through the menu. These can be extracted from the station, "[No PTY]" will appear. • Date - Storing stations in the preset memory To store FM stations for sleep timer, alarm clock, time, lighting, language and factory settings 13
Operation Manual
Page 14
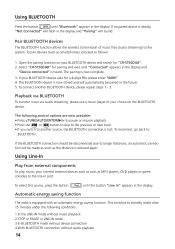
... due to the system. If your BLUETOOTH device asks for "CR-ST50DAB". 2. Playback via BLUETOOTH To transfer music via audio streaming, please use a music player of music files (audio streaming) to longer distances, an automatic connection will sound. Using Line-In Play from external components To play music, your BLUETOOTH device and search for a 4-digit PIN, please enter "0000". 4. Using BLUETOOTH Press the button " until "Bluetooth" appears in the display. If no paired...
... due to the system. If your BLUETOOTH device asks for "CR-ST50DAB". 2. Playback via BLUETOOTH To transfer music via audio streaming, please use a music player of music files (audio streaming) to longer distances, an automatic connection will sound. Using Line-In Play from external components To play music, your BLUETOOTH device and search for a 4-digit PIN, please enter "0000". 4. Using BLUETOOTH Press the button " until "Bluetooth" appears in the display. If no paired...
Operation Manual
Page 15
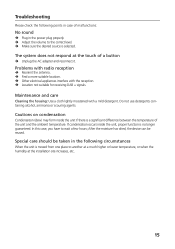
... system does not respond at the installation site increases, etc. 15 After the moisture has dried, the device can be taken in the following points in case of malfunctions: No sound Plug in the power plug properly. Adjust the volume to the correct level. Make sure the desired source is selected. Maintenance and care Cleaning the housing: Use a cloth lightly...
... system does not respond at the installation site increases, etc. 15 After the moisture has dried, the device can be taken in the following points in case of malfunctions: No sound Plug in the power plug properly. Adjust the volume to the correct level. Make sure the desired source is selected. Maintenance and care Cleaning the housing: Use a cloth lightly...

Operation Manual
Page 16
...service. By helping to a collection point for the recycling of this battery contains lead. Improper or incorrect disposal endangers the environment and health. The Bluetooth® word mark and logos are those of Bluetooth SIG Inc. Attention: The "Pb" sign under license. Other trademarks and trade names are registered trademarks of their respective owners.... 16 The crossed-out wheeled bin symbol on the product or its packaging indicates that this product, please contact your local authority or your fellow...
...service. By helping to a collection point for the recycling of this battery contains lead. Improper or incorrect disposal endangers the environment and health. The Bluetooth® word mark and logos are those of Bluetooth SIG Inc. Attention: The "Pb" sign under license. Other trademarks and trade names are registered trademarks of their respective owners.... 16 The crossed-out wheeled bin symbol on the product or its packaging indicates that this product, please contact your local authority or your fellow...
Operation Manual
Page 17
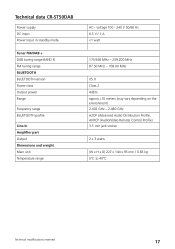
Technical data CR-ST50DAB Power supply DC Input Power input in standby mode Tuner FM/DAB + DAB tuning range BAND III FM tuning range BLUETOOTH BLUETOOTH version Power class Output power Range Frequency range BLUETOOTH profile Line-In Amplifier part Output Dimensions and weight Main unit Temperature range AC~ voltage 100 - 240 V 50/60 Hz 6.5 V / 1 A
Technical data CR-ST50DAB Power supply DC Input Power input in standby mode Tuner FM/DAB + DAB tuning range BAND III FM tuning range BLUETOOTH BLUETOOTH version Power class Output power Range Frequency range BLUETOOTH profile Line-In Amplifier part Output Dimensions and weight Main unit Temperature range AC~ voltage 100 - 240 V 50/60 Hz 6.5 V / 1 A
Operation Manual
Page 18
... it was purchased. (d) The serial number and model designation of the product. Warranty Dear Customer, Thank you for buying this device from the date of purchase according to the invoice or sales receipt. Kenwood gives a two-year warranty on this product, the user must be repaired or replaced free of charge. If, under normal conditions of use of incorrect spare parts when repairing. (d) Damage due to...
... it was purchased. (d) The serial number and model designation of the product. Warranty Dear Customer, Thank you for buying this device from the date of purchase according to the invoice or sales receipt. Kenwood gives a two-year warranty on this product, the user must be repaired or replaced free of charge. If, under normal conditions of use of incorrect spare parts when repairing. (d) Damage due to...


