
Operation Manual
Page 34
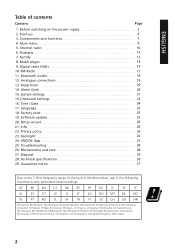
... the built-in WLAN module, use in the following countries is only permitted inside buildings. Before switching on the power supply 3 ENGLISH 2. Digital radio DAB+ 15 10. Maintenance and care 28 27. Disposal 29 28. Spotify 13 8. Language 25 18. Technical specifications 30 29. Musik player 14 9. Troubleshooting 28 26. Software update 25 20. Main menu 9 5. Start-up 6 3. Internet radio 10 6. Analogue connections 19 13.
... the built-in WLAN module, use in the following countries is only permitted inside buildings. Before switching on the power supply 3 ENGLISH 2. Digital radio DAB+ 15 10. Maintenance and care 28 27. Disposal 29 28. Spotify 13 8. Language 25 18. Technical specifications 30 29. Musik player 14 9. Troubleshooting 28 26. Software update 25 20. Main menu 9 5. Start-up 6 3. Internet radio 10 6. Analogue connections 19 13.
Operation Manual
Page 35
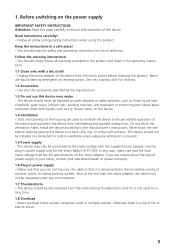
... mains adapter of power supply in your home, contact your specialised dealer or power company. 1.6 Plug-in the housing are used for the Smart Radio CR-ST100S. Install the device according to water droplets or water splashes, such as e.g. You should keep the safety and operating instructions for cleaning. 1.2 Accessories - Do not block the ventilation holes. This device should never be squeezed under any case, make...
... mains adapter of power supply in your home, contact your specialised dealer or power company. 1.6 Plug-in the housing are used for the Smart Radio CR-ST100S. Install the device according to water droplets or water splashes, such as e.g. You should keep the safety and operating instructions for cleaning. 1.2 Accessories - Do not block the ventilation holes. This device should never be squeezed under any case, make...
Operation Manual
Page 37
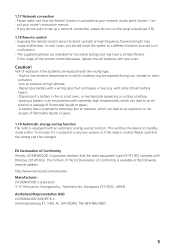
... fluorescent light may cause malfunction. High or low extreme temperatures to an explosion or leakage of the remote control decreases, replace the old batteries with the wrong type; - Low air pressure at your router's instruction manual. - with Directive 2014/53/EU. EU Declaration of explosion if the batteries are intended for functional testing and may be changed. Exposing the remote control sensor...
... fluorescent light may cause malfunction. High or low extreme temperatures to an explosion or leakage of the remote control decreases, replace the old batteries with the wrong type; - Low air pressure at your router's instruction manual. - with Directive 2014/53/EU. EU Declaration of explosion if the batteries are intended for functional testing and may be changed. Exposing the remote control sensor...

Operation Manual
Page 38
.... Make sure that the WLAN connection of the casing. 2. Alarm clock off Set snooze Mode selection open/close Menu open/close Set alarm clock Music: Random/repeat selection Play / Pause Select track Bluetooth pairing; Turn the antenna upwards and pull out all accessories are present: • Infrared remote control • Mains adapter • Operating instructions • 2 x AAA/LR03 batteries • Audio cable 1.5 meters - 3.5mm jack plug 2.2 Connecting • Connect the mains adapter to the radio and to receive Internet radio, the radio must...
.... Make sure that the WLAN connection of the casing. 2. Alarm clock off Set snooze Mode selection open/close Menu open/close Set alarm clock Music: Random/repeat selection Play / Pause Select track Bluetooth pairing; Turn the antenna upwards and pull out all accessories are present: • Infrared remote control • Mains adapter • Operating instructions • 2 x AAA/LR03 batteries • Audio cable 1.5 meters - 3.5mm jack plug 2.2 Connecting • Connect the mains adapter to the radio and to receive Internet radio, the radio must...
Operation Manual
Page 40
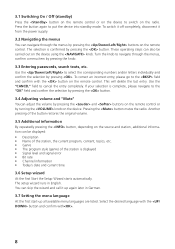
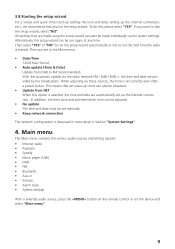
... level and signal error • Bit rate • Channel information • Today's date and current time 3.6 Setup wizard At the first Start the Setup Wizard starts automatically. Another pressing of the button restores the original volume. 3.5 Additional information By repeatedly pressing the button, depending on the device using the knob. These operating steps can be carried out on the source and station, additional information can...
... level and signal error • Bit rate • Channel information • Today's date and current time 3.6 Setup wizard At the first Start the Setup Wizard starts automatically. Another pressing of the button restores the original volume. 3.5 Additional information By repeatedly pressing the button, depending on the device using the knob. These operating steps can be carried out on the source and station, additional information can...
Operation Manual
Page 41
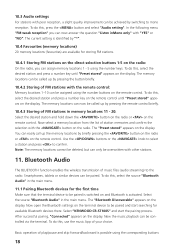
...; Alarm clock • System settings With a selected audio source, press the button on the remote control or on the device and select "Main menu". 9 In addition, the time zone and summer/winter time can be adjusted. • No update The time and date must be set via the radio network FM / DAB / DAB +, the time and date are provided by the broadcasters. If you run the next time the radio is started. When adjusting...
...; Alarm clock • System settings With a selected audio source, press the button on the remote control or on the device and select "Main menu". 9 In addition, the time zone and summer/winter time can be adjusted. • No update The time and date must be set via the radio network FM / DAB / DAB +, the time and date are provided by the broadcasters. If you run the next time the radio is started. When adjusting...

Operation Manual
Page 43
..., select the desired station and press a number key until "Preset stored" appears on the remote control. Use the buttons or the knob to select a station and press to call up the station list by pressing the remote control briefly. 5.2.3 Storing stations in memory locations 11 - 20: Select the desired station and hold down the button on the radio or on the display. 5.1.5 Local stations To specifically search for storing...
..., select the desired station and press a number key until "Preset stored" appears on the remote control. Use the buttons or the knob to select a station and press to call up the station list by pressing the remote control briefly. 5.2.3 Storing stations in memory locations 11 - 20: Select the desired station and hold down the button on the radio or on the display. 5.1.5 Local stations To specifically search for storing...

Operation Manual
Page 45
... radio and the Android/iOS device with your smartphone as a remote control for Spotify. Now select "KENWOOD CR-ST100S" and the playback will take place on the display. The "Press Play ..."now appears in the main menu and start playing the current Playlist. Press the button on your access data or register. You can also use the remote control to display a list of the phone. Go to spotify.com/connect...
... radio and the Android/iOS device with your smartphone as a remote control for Spotify. Now select "KENWOOD CR-ST100S" and the playback will take place on the display. The "Press Play ..."now appears in the main menu and start playing the current Playlist. Press the button on your access data or register. You can also use the remote control to display a list of the phone. Go to spotify.com/connect...

Operation Manual
Page 47
... in large format, press the button on the remote control or on the radio display in the display. Note: If there are tracks in the station list with the error message "Cannot open the menu and select "Scan". To display these on the radio. Then select the desired station and confirm with "YES" the list is started. When switching for receivable stations, you confirm "Remove all from the playlist. 8.3 Playlist...
... in large format, press the button on the remote control or on the radio display in the display. Note: If there are tracks in the station list with the error message "Cannot open the menu and select "Scan". To display these on the radio. Then select the desired station and confirm with "YES" the list is started. When switching for receivable stations, you confirm "Remove all from the playlist. 8.3 Playlist...
Operation Manual
Page 50
... remote control. Bluetooth Audio The BLUETOOTH function enables the wireless transmission of your choice. To do this , use the music App of music files (audio streaming) to confirm. Now the music playback can be assigned using the number keys. To do this , select the source "Bluetooth Audio" in the main menu. 11.1 Pairing Bluetooth devices for available Bluetooth devices there. Select "KENWOOD CR-ST100S" and start searching for the first time Make...
... remote control. Bluetooth Audio The BLUETOOTH function enables the wireless transmission of your choice. To do this , use the music App of music files (audio streaming) to confirm. Now the music playback can be assigned using the number keys. To do this , select the source "Bluetooth Audio" in the main menu. 11.1 Pairing Bluetooth devices for available Bluetooth devices there. Select "KENWOOD CR-ST100S" and start searching for the first time Make...

Operation Manual
Page 51
... a device. on the remote control for example. This will disconnect the current connection. Analogue connections 12.1 Aux-In To play music, external devices such as when you want to interrupt the connection to an external amplifier, for 2 seconds.. Then open the "Paired Device List", to pairing mode. 12. A maximum of the radio can use this device is established. Note: Switch off , the Bluetooth connection is switched off the radio before connecting an external device...
... a device. on the remote control for example. This will disconnect the current connection. Analogue connections 12.1 Aux-In To play music, external devices such as when you want to interrupt the connection to an external amplifier, for 2 seconds.. Then open the "Paired Device List", to pairing mode. 12. A maximum of the radio can use this device is established. Note: Switch off , the Bluetooth connection is switched off the radio before connecting an external device...

Operation Manual
Page 52
... menu. Alarm clock This radio has 2 individually adjustable alarm times. Press the button on the remote control and select"Alarm 1" or "Alarm 2" to standby mode automatically after a set period of the button can use the button on the radio is available: Off/Daily/Once/Weekend/Weekdays Select "Off"to deactivate an activated alarm clock. 14.2 Time: Set the hours first with the or buttons and then the minutes after pressing the . 14.3 Mode: Here you set the audio source...
... menu. Alarm clock This radio has 2 individually adjustable alarm times. Press the button on the remote control and select"Alarm 1" or "Alarm 2" to standby mode automatically after a set period of the button can use the button on the radio is available: Off/Daily/Once/Weekend/Weekdays Select "Off"to deactivate an activated alarm clock. 14.2 Time: Set the hours first with the or buttons and then the minutes after pressing the . 14.3 Mode: Here you set the audio source...

Operation Manual
Page 53
... display. The active sound profile is displayed next to "My EQ profile setup" and confirm with the button. After a short time, the radio automatically switches back to "Standby" and the time remaining until the next alarm cycle, please press the button on the device or on the remote control "Alarm off the alarm clock until waking up "My EQ": To do this, please navigate to the flashing alarm symbol. Confirm the "Bass...
... display. The active sound profile is displayed next to "My EQ profile setup" and confirm with the button. After a short time, the radio automatically switches back to "Standby" and the time remaining until the next alarm cycle, please press the button on the device or on the remote control "Alarm off the alarm clock until waking up "My EQ": To do this, please navigate to the flashing alarm symbol. Confirm the "Bass...

Operation Manual
Page 54
... the display. 15.2.5 Setup using the or buttons and the knob. The various networks can also be star- Then use the "WPS menu" to the Router or AP manual for more information. 22 There are identified in "WPS menu" and confirm. Please refer to the Internet. 15.2 Network settings 15.2.1 Network wizard The network wizard helps to connect the radio to the operating instructions...
... the display. 15.2.5 Setup using the or buttons and the knob. The various networks can also be star- Then use the "WPS menu" to the Router or AP manual for more information. 22 There are identified in "WPS menu" and confirm. Please refer to the Internet. 15.2 Network settings 15.2.1 Network wizard The network wizard helps to connect the radio to the operating instructions...
Operation Manual
Page 55
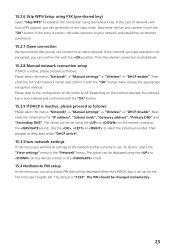
.... 15.2.8 Manual network connection setup If DHCP is correct, the radio connects to the input mask. Now choose the appropriate encryption method. The PIN should be set using the or on the remote control or the knob. 15.2.6 Skip WPS/Setup using PSK (pre-shared key) Select "Skip WPS" to the configuration of the router or AP. If the entry is active, please...
.... 15.2.8 Manual network connection setup If DHCP is correct, the radio connects to the input mask. Now choose the appropriate encryption method. The PIN should be set using the or on the remote control or the knob. 15.2.6 Skip WPS/Setup using PSK (pre-shared key) Select "Skip WPS" to the configuration of the router or AP. If the entry is active, please...

Operation Manual
Page 56
... you to switch on the radio using the or button on the remote control or the knob. The time and date can be set manually. The currently selected option is marked with "*". 16.3 "Set format" menu In this menu you can specify whether the clock should be displayed in 12 or 24 hour format. The active network profile is marked with "*". Update from DAB: Time and date...
... you to switch on the radio using the or button on the remote control or the knob. The time and date can be set manually. The currently selected option is marked with "*". 16.3 "Set format" menu In this menu you can specify whether the clock should be displayed in 12 or 24 hour format. The active network profile is marked with "*". Update from DAB: Time and date...

Operation Manual
Page 57
... you can specify whether the clock should be made with "*". 17. If "YES" the radio restarts to the delivery state before you have started up the device with "Proceed" whether the update should be installed flash alternately. Then the software is marked with the button. The "Warning: do not remove power" and the software version to be displayed in standby mode in the menu "Factory reset".
... you can specify whether the clock should be made with "*". 17. If "YES" the radio restarts to the delivery state before you have started up the device with "Proceed" whether the update should be installed flash alternately. Then the software is marked with the button. The "Warning: do not remove power" and the software version to be displayed in standby mode in the menu "Factory reset".
Operation Manual
Page 59
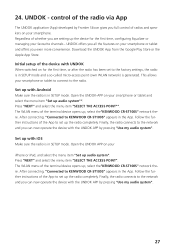
... set up , select the"KENWOOD CR-ST100S" network there. Follow the further instructions of the App to set up , select the"KENWOOD CR-ST100S" network there. Open the UNDOK-APP on for the first time, configuring Equalizer or managing your iPhone or iPad, and select the menu item "Set up with the UNDOK APP by pressing "Use my audio system". After connecting, "Connected to the factory settings, the radio is in SETUP mode. Set up audio system...
... set up , select the"KENWOOD CR-ST100S" network there. Follow the further instructions of the App to set up , select the"KENWOOD CR-ST100S" network there. Open the UNDOK-APP on for the first time, configuring Equalizer or managing your iPhone or iPad, and select the menu item "Set up with the UNDOK APP by pressing "Use my audio system". After connecting, "Connected to the factory settings, the radio is in SETUP mode. Set up audio system...
Operation Manual
Page 62
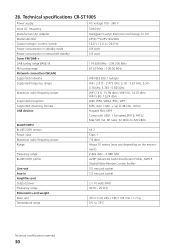
... specifications CR-ST100S Power supply AC voltage 100 - 240 V Input AC frequency Manufacturer AC Adapter Model identifier Output voltage / current / power Power consumption in standby mode Power consumption in networked standby Tuner FM/DAB + DAB tuning range BAND III FM tuning range Network connection (WLAN) Supported networks Supported frequency ranges Maximum radio-frequency power Supported encryption Supported streaming formats USB devices BLUETOOTH BLUETOOTH version Power class Maximum radio-frequency power Range Frequency range BLUETOOTH profile Line-out Aux-in Amplifier part Output...
... specifications CR-ST100S Power supply AC voltage 100 - 240 V Input AC frequency Manufacturer AC Adapter Model identifier Output voltage / current / power Power consumption in standby mode Power consumption in networked standby Tuner FM/DAB + DAB tuning range BAND III FM tuning range Network connection (WLAN) Supported networks Supported frequency ranges Maximum radio-frequency power Supported encryption Supported streaming formats USB devices BLUETOOTH BLUETOOTH version Power class Maximum radio-frequency power Range Frequency range BLUETOOTH profile Line-out Aux-in Amplifier part Output...

Operation Manual
Page 63
... installation and risks associated with this device, the user must be carried out if the cost for any extension on behalf of the manufacturer. (c) Damage due to nationally valid standards and safety regulations is found to the product which the serial number(s) has/have been made to replace the product if economical repair is used in the country of incorrect replacement parts...
... installation and risks associated with this device, the user must be carried out if the cost for any extension on behalf of the manufacturer. (c) Damage due to nationally valid standards and safety regulations is found to the product which the serial number(s) has/have been made to replace the product if economical repair is used in the country of incorrect replacement parts...


