
Operation Manual
Page 2
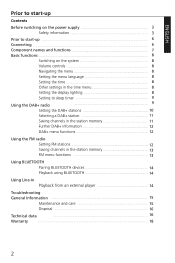
...Before switching on the power supply 3 Safety information 3 Prior to start-up 6 Connecting 6 Component names and functions 7 Basic functions 8 Switching on the system 8 Volume controls 8 Navigating the menu 8 Setting the menu language 8 Setting the time 8 Other settings in the time menu 8 Setting the display lighting 8 Setting to sleep timer 9 Using the DAB+ radio 9 Setting the DAB+ stations 10 Selecting a DAB+ station 11 Saving channels in the station memory 11 Further DAB+ information 12 DAB+ menu functions 12 Using...
...Before switching on the power supply 3 Safety information 3 Prior to start-up 6 Connecting 6 Component names and functions 7 Basic functions 8 Switching on the system 8 Volume controls 8 Navigating the menu 8 Setting the menu language 8 Setting the time 8 Other settings in the time menu 8 Setting the display lighting 8 Setting to sleep timer 9 Using the DAB+ radio 9 Setting the DAB+ stations 10 Selecting a DAB+ station 11 Saving channels in the station memory 11 Further DAB+ information 12 DAB+ menu functions 12 Using...
Operation Manual
Page 3
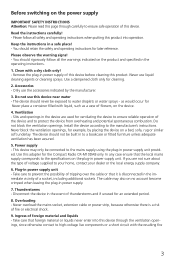
..., extension cable or power strip, because otherwise there is disconnected in the operating instructions. 1. Power supply - Before switching on the power supply IMPORTANT SAFETY INSTRUCTIONS Attention: Please read this page through carefully to ensure safe operation of this device through the ventilation openings, since otherwise contact to high-voltage live components or a short circuit with liquid, such as would occur for the Compact Radio CR-M10DAB only. Use a dampened...
..., extension cable or power strip, because otherwise there is disconnected in the operating instructions. 1. Power supply - Before switching on the power supply IMPORTANT SAFETY INSTRUCTIONS Attention: Please read this page through carefully to ensure safe operation of this device through the ventilation openings, since otherwise contact to high-voltage live components or a short circuit with liquid, such as would occur for the Compact Radio CR-M10DAB only. Use a dampened...
Operation Manual
Page 4
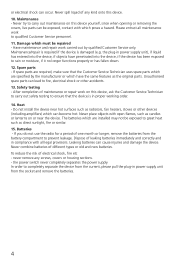
... on this device yourself, since when opening or removing the covers, live parts can become hot. Have maintenance and repair work to qualified Customer Service personnel. 11. the plug-in compliance with all maintenance work carried out by the manufacturer or which are specified by qualified Customer Service only. If spare parts are required, make sure that the Customer Service Technician uses spare parts which...
... on this device yourself, since when opening or removing the covers, live parts can become hot. Have maintenance and repair work to qualified Customer Service personnel. 11. the plug-in compliance with all maintenance work carried out by the manufacturer or which are specified by qualified Customer Service only. If spare parts are required, make sure that the Customer Service Technician uses spare parts which...
Operation Manual
Page 5
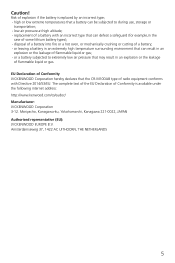
... Conformity JVCKENWOOD Corporation hereby declares that the CR-M10DAB type of radio equipment conforms with an incorrect type that can defeat a safeguard (for example,in the case of Conformity is replaced by an incorrect type; - Risk of flammable liquid or gas. or leaving a battery in an extremely high temperature surrounding environment that can be subjected to...
... Conformity JVCKENWOOD Corporation hereby declares that the CR-M10DAB type of radio equipment conforms with an incorrect type that can defeat a safeguard (for example,in the case of Conformity is replaced by an incorrect type; - Risk of flammable liquid or gas. or leaving a battery in an extremely high temperature surrounding environment that can be subjected to...

Operation Manual
Page 6
... device and ensure that all accessory parts are present: Operating instructions Plug-in power supply unit Insert batteries (not supplied) • Insert 4 R6 / AA / Mignon batteries into the radio, ensuring the correct polarity (+ and -). • Power supply via the batteries will be shut off if power is being supplied via the plug-in power supply unit. • Batteries will wear out sooner if they are present: • Connect the plug-in cold surroundings...
... device and ensure that all accessory parts are present: Operating instructions Plug-in power supply unit Insert batteries (not supplied) • Insert 4 R6 / AA / Mignon batteries into the radio, ensuring the correct polarity (+ and -). • Power supply via the batteries will be shut off if power is being supplied via the plug-in power supply unit. • Batteries will wear out sooner if they are present: • Connect the plug-in cold surroundings...

Operation Manual
Page 7
Headphone connection 4 4 - Standby/ On 3 - Station buttons (1/2/3/4) 7 - Tune+ 10 - Plug-in power supply 1 5 unit connection 5 - Memory button 8 - Info Top View 1 2 3 4 5 6 11 10 9 8 7 7 FM / DAB antenna 1 - Storage location- (Preset-) 6 - Display 3 2 - Storage location+ (Preset+) 5 - Components and functions Control elements Front Panel Rear Panel 2 1 - Menu 11 - Tune9 - Volume/Enter/Auto/Play/Pause 4 - Line-In connection 3 - Switching sources 2 -
Headphone connection 4 4 - Standby/ On 3 - Station buttons (1/2/3/4) 7 - Tune+ 10 - Plug-in power supply 1 5 unit connection 5 - Memory button 8 - Info Top View 1 2 3 4 5 6 11 10 9 8 7 7 FM / DAB antenna 1 - Storage location- (Preset-) 6 - Display 3 2 - Storage location+ (Preset+) 5 - Components and functions Control elements Front Panel Rear Panel 2 1 - Menu 11 - Tune9 - Volume/Enter/Auto/Play/Pause 4 - Line-In connection 3 - Switching sources 2 -
Operation Manual
Page 8
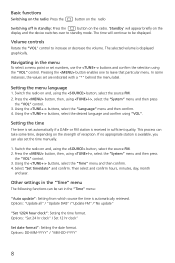
... button on the radio Switching off in standby: Press the button on the radio. 'Standby' will continue to standby mode. The time will appear briefly on the display and the device switches over to be set the time manually. 1. Navigating in sufficient quality. In some time, depending on and, using , select the "System" menu and then press the "VOL" control. 3. This process can also set in the "Time" menu: "Auto update": Setting from which source the time is displayed graphically. Switch...
... button on the radio Switching off in standby: Press the button on the radio. 'Standby' will continue to standby mode. The time will appear briefly on the display and the device switches over to be set the time manually. 1. Navigating in sufficient quality. In some time, depending on and, using , select the "System" menu and then press the "VOL" control. 3. This process can also set in the "Time" menu: "Auto update": Setting from which source the time is displayed graphically. Switch...
Operation Manual
Page 9
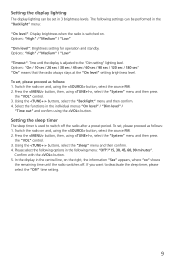
... adjusted to deactivate the sleep timer, please select the "Off" time setting. 9 Setting the sleep timer The sleep timer is switched on. The following options in the individual menus "On level" / "Dim level" / "Time out" and confirm using the button, select the source FM. 2. Options: "High" / "Medium" / "Low" "Dim level": Brightness setting for operation and standby. In the display in 3 brightness levels. Switch the radio on and, using the button...
... adjusted to deactivate the sleep timer, please select the "Off" time setting. 9 Setting the sleep timer The sleep timer is switched on. The following options in the individual menus "On level" / "Dim level" / "Time out" and confirm using the button, select the source FM. 2. Options: "High" / "Medium" / "Low" "Dim level": Brightness setting for operation and standby. In the display in 3 brightness levels. Switch the radio on and, using the button...
Operation Manual
Page 10
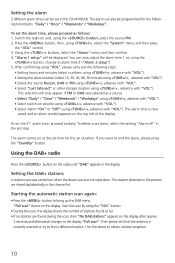
... operation. You can now adjust the alarm time 1 or, using , select the "System" menu and then press the "VOL" control. 3. Setting the DAB+ stations A station scan was carried out when the device was selected as follows: 1. Using the buttons, select the "Alarm" menu and then confirm. 4. After confirming using , advance with "VOL"). Then please test that the antenna is now saved and an alarm symbol appears on the display. Switch the radio...
... operation. You can now adjust the alarm time 1 or, using , select the "System" menu and then press the "VOL" control. 3. Setting the DAB+ stations A station scan was carried out when the device was selected as follows: 1. Using the buttons, select the "Alarm" menu and then confirm. 4. After confirming using , advance with "VOL"). Then please test that the antenna is now saved and an alarm symbol appears on the display. Switch the radio...
Operation Manual
Page 11
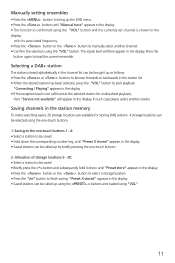
Allocation of storage locations 5 - 20: • Select a station to be called up using the buttons and loaded using the "VOL" button and the currently set channel is shown in the display with its associated frequency. • Press the button or the button to manually select another station. The signal level will appear in the display. "Connecting / Playing" appears in the display • If the reception level is...
Allocation of storage locations 5 - 20: • Select a station to be called up using the buttons and loaded using the "VOL" button and the currently set channel is shown in the display with its associated frequency. • Press the button or the button to manually select another station. The signal level will appear in the display. "Connecting / Playing" appears in the display • If the reception level is...
Operation Manual
Page 12
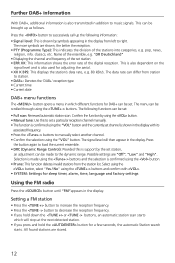
... automatic station scan starts which different functions for sleep timer, alarm, time, language and factory settings Using the FM radio Press the button until "FM"appears in the display with . • SYSTEM: Settings for DAB+ can be set : • Full scan: Renewed automatic station scan. Selection is made to set station, an adjustment can be scrolled through using the buttons. classics, etc. "DR Deutschland" • Displaying the channel and frequency of the set channel...
... automatic station scan starts which different functions for sleep timer, alarm, time, language and factory settings Using the FM radio Press the button until "FM"appears in the display with . • SYSTEM: Settings for DAB+ can be set : • Full scan: Renewed automatic station scan. Selection is made to set station, an adjustment can be scrolled through using the buttons. classics, etc. "DR Deutschland" • Displaying the channel and frequency of the set channel...
Operation Manual
Page 13
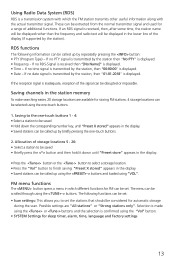
... number key, until "Preset store" appears in the display. • Saved stations can be called up using the buttons and loaded using the one -touch buttons. 2. The menu can be scrolled through using the "Vol" button. • SYSTEM Settings for sleep timer, alarm, time, language and factory settings 13 These can be considered for automatic storage during the scan. If an RDS signal is received, then, after some time, the station...
... number key, until "Preset store" appears in the display. • Saved stations can be called up using the buttons and loaded using the one -touch buttons. 2. The menu can be scrolled through using the "Vol" button. • SYSTEM Settings for sleep timer, alarm, time, language and factory settings 13 These can be considered for automatic storage during the scan. If an RDS signal is received, then, after some time, the station...
Operation Manual
Page 14
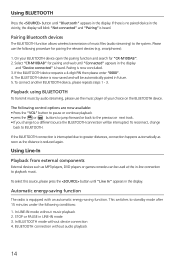
... press the button until "Line In" appears in -line connection to a different source the BLUETOOTH connection will be used at the in the display. If the BLUETOOTH device requests a 4-digit PIN then please enter "0000". 4. Playback using BLUETOOTH To transmit music by audio streaming, please use the following procedure for "CR-M10DAB". 2. This switches to greater distances, connection happens automatically as soon as MP3 players, DVD players or games...
... press the button until "Line In" appears in -line connection to a different source the BLUETOOTH connection will be used at the in the display. If the BLUETOOTH device requests a 4-digit PIN then please enter "0000". 4. Playback using BLUETOOTH To transmit music by audio streaming, please use the following procedure for "CR-M10DAB". 2. This switches to greater distances, connection happens automatically as soon as MP3 players, DVD players or games...
Operation Manual
Page 15
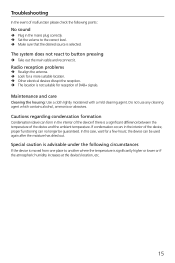
...: Use a cloth lightly moistened with a mild cleaning agent. Cautions regarding condensation formation Condensation (dew) can form in the interior of the device, proper functioning can be guaranteed. Special caution is advisable under the following points: No sound Plug in the mains plug correctly. Set the volume to the correct level. Make sure that the desired source is...
...: Use a cloth lightly moistened with a mild cleaning agent. Cautions regarding condensation formation Condensation (dew) can form in the interior of the device, proper functioning can be guaranteed. Special caution is advisable under the following points: No sound Plug in the mains plug correctly. Set the volume to the correct level. Make sure that the desired source is...
Operation Manual
Page 16
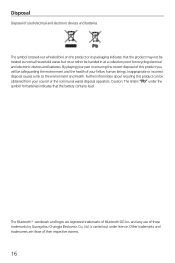
...playing your part in ensuring the correct disposal of this product can be handed in at a collection point for batteries indicates that the product may not be treated as normal household waste but must rather be obtained from your fellow human beings. Caution: The letters "Pb" under licence. and any use... of your council or the communal waste disposal operators. is carried out under the symbol for recycling electrical and electronic devices and batteries. Further information about recycling this product you will be safeguarding the environment ...
...playing your part in ensuring the correct disposal of this product can be handed in at a collection point for batteries indicates that the product may not be treated as normal household waste but must rather be obtained from your fellow human beings. Caution: The letters "Pb" under licence. and any use... of your council or the communal waste disposal operators. is carried out under the symbol for recycling electrical and electronic devices and batteries. Further information about recycling this product you will be safeguarding the environment ...
Operation Manual
Page 17
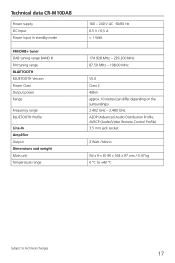
Technical data CR-M10DAB Power supply DC Input Power input in standby mode FM/DAB+ tuner DAB tuning range BAND III FM tuning range BLUETOOTH BLUETOOTH Version Power Class Output power Range Frequency range BLUETOOTH Profile Line-In Amplifier Output Dimensions and weight Main unit Temperature range 100 - 240 V AC 50/60 Hz 6.5 V / 0,5 A < 1 Watt 174.928 MHz - 239.200 MHz 87.50 MHz - 108.00 MHz V5.0 Class 2 4dbm approx...
Technical data CR-M10DAB Power supply DC Input Power input in standby mode FM/DAB+ tuner DAB tuning range BAND III FM tuning range BLUETOOTH BLUETOOTH Version Power Class Output power Range Frequency range BLUETOOTH Profile Line-In Amplifier Output Dimensions and weight Main unit Temperature range 100 - 240 V AC 50/60 Hz 6.5 V / 0,5 A < 1 Watt 174.928 MHz - 239.200 MHz 87.50 MHz - 108.00 MHz V5.0 Class 2 4dbm approx...
Operation Manual
Page 18
... the operating instructions. (b) Damage to the product which has occurred due to poor or incorrect work if this work was purchased. (d) The serial number and model designation of purchase. Conditions A. B. The following information is not responsible. (e) Damage to the speakers due to the product as well as pick-up systems, needles, drive belts, recording heads, plug-ins, audio furniture, dry cells, rechargeable batteries, power tubes...
... the operating instructions. (b) Damage to the product which has occurred due to poor or incorrect work if this work was purchased. (d) The serial number and model designation of purchase. Conditions A. B. The following information is not responsible. (e) Damage to the speakers due to the product as well as pick-up systems, needles, drive belts, recording heads, plug-ins, audio furniture, dry cells, rechargeable batteries, power tubes...


