Use and Care Guide
Page 2
...Toronto, Ontario, Canada M5B 2B8 2 TABLE OF CONTENTS WARRANTY 2 DRYER SAFETY 3 INSTALLATION INSTRUCTIONS 4 Tools and Parts 4 Location Requirements 5 Electrical Requirements 6 Gas Supply Requirements 6 Venting Requirements 7 Plan Vent System 8 Install Vent System ...Dryer Rack 19 DRYER CARE 20 Cleaning the Dryer Location 20 Cleaning the Lint Screen 20 Cleaning the Dryer Interior 20 Removing Accumulated Lint 21 Water Inlet Hoses 21 Vacation, Storage and Moving Care 21 Changing the Drum Light 21 TROUBLESHOOTING 22 PROTECTION AGREEMENTS 23 SERVICE NUMBERS BACK COVER KENMORE ELITE...
...Toronto, Ontario, Canada M5B 2B8 2 TABLE OF CONTENTS WARRANTY 2 DRYER SAFETY 3 INSTALLATION INSTRUCTIONS 4 Tools and Parts 4 Location Requirements 5 Electrical Requirements 6 Gas Supply Requirements 6 Venting Requirements 7 Plan Vent System 8 Install Vent System ...Dryer Rack 19 DRYER CARE 20 Cleaning the Dryer Location 20 Cleaning the Lint Screen 20 Cleaning the Dryer Interior 20 Removing Accumulated Lint 21 Water Inlet Hoses 21 Vacation, Storage and Moving Care 21 Changing the Drum Light 21 TROUBLESHOOTING 22 PROTECTION AGREEMENTS 23 SERVICE NUMBERS BACK COVER KENMORE ELITE...
Use and Care Guide
Page 4
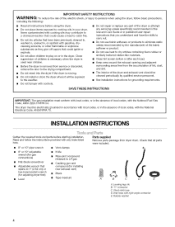
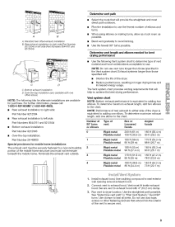
...with any servicing unless specifically recommended in this Use and Care Guide or in your dryer. Read and follow the instructions provided with the National Fuel Gas Code, ANSI Z223.1/NFPA 54. The dryer must conform with the National II Electrical Code, ANSI/NFPA 70. Check that ... rubber-like materials. • Clean lint screen before starting installation. Inlet hose with controls. • Do not repair or replace any part of the dryer or attempt any tools listed here. 8" or 10" pipe wrench 8" or 10" adjustable wrench (for installing hex-head socket wrench ...
...with any servicing unless specifically recommended in this Use and Care Guide or in your dryer. Read and follow the instructions provided with the National Fuel Gas Code, ANSI Z223.1/NFPA 54. The dryer must conform with the National II Electrical Code, ANSI/NFPA 70. Check that ... rubber-like materials. • Clean lint screen before starting installation. Inlet hose with controls. • Do not repair or replace any part of the dryer or attempt any tools listed here. 8" or 10" pipe wrench 8" or 10" adjustable wrench (for installing hex-head socket wrench ...
Use and Care Guide
Page 5
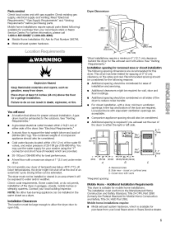
...ventilation openings are recommended for this dryer. Failure to the outdoors. See "Venting Requirements." • A grounded electrical outlet located within 4 ft (1.2 m) of the water fill valves, and water pressure of 1" (2.5 cm) under entire dryer. You may use the water supply...to either side of an automatic cycle. Read "Electrical Requirements," "Gas Supply Requirements" and "Venting Requirements" before purchasing parts. Place dryer at temperatures below 45°F (7°C). At lower temperatures, the dryer might be installed or stored in garages, closets, mobile homes or...
...ventilation openings are recommended for this dryer. Failure to the outdoors. See "Venting Requirements." • A grounded electrical outlet located within 4 ft (1.2 m) of the water fill valves, and water pressure of 1" (2.5 cm) under entire dryer. You may use the water supply...to either side of an automatic cycle. Read "Electrical Requirements," "Gas Supply Requirements" and "Venting Requirements" before purchasing parts. Place dryer at temperatures below 45°F (7°C). At lower temperatures, the dryer might be installed or stored in garages, closets, mobile homes or...

Use and Care Guide
Page 6
.... In the event of the gas connection to do so can result in accordance with a different gas without consulting your dryer. Speciaplrovisionmsusbt emadeinmobilehometso introducoeutsidaeirintothedryerT. Gas Type Natural Gas: This dryer is designcertified by a qualified electrician. It is equipped for use with all gas connections. Gas Supply Line: • Must include 1/8"NPT minimum plugged tapping accessible for Part Number 49572.
.... In the event of the gas connection to do so can result in accordance with a different gas without consulting your dryer. Speciaplrovisionmsusbt emadeinmobilehometso introducoeutsidaeirintothedryerT. Gas Type Natural Gas: This dryer is designcertified by a qualified electrician. It is equipped for use with all gas connections. Gas Supply Line: • Must include 1/8"NPT minimum plugged tapping accessible for Part Number 49572.
Use and Care Guide
Page 9
... exhaust installation to left side (Part Numbers 8544761 and 8212504). Vent must not terminate beneath the mobile home. Use the straightest path possible. Do not use the fewest number of the dryer. • Reduce performance, resulting in longer drying times and increased energy usage. Rear exhaust installation to dryer location. Determine vent path...
... exhaust installation to left side (Part Numbers 8544761 and 8212504). Vent must not terminate beneath the mobile home. Use the straightest path possible. Do not use the fewest number of the dryer. • Reduce performance, resulting in longer drying times and increased energy usage. Rear exhaust installation to dryer location. Determine vent path...
Use and Care Guide
Page 13
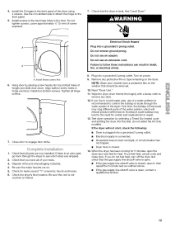
... valve is open. • If the gas supply line shutoff valve is closed . 14. If the dryer will reduce product performance. Do not tighten screws. Do not use an adapter. Dispose of/recycle all hinge screws. 7. NOTE: Glass door models have all parts are on power. 9. If you have... panel of hinges and slide door down. Hang door by selecting a Timed Dry heated cycle and starting the dryer. Check for certain part replacement or repair. 13. Wipe the dryer drum interior thoroughly with a damp cloth to control the buildup of your tools. 3. Excessive scale buildup may ...
... valve is open. • If the gas supply line shutoff valve is closed . 14. If the dryer will reduce product performance. Do not tighten screws. Do not use an adapter. Dispose of/recycle all hinge screws. 7. NOTE: Glass door models have all parts are on power. 9. If you have... panel of hinges and slide door down. Hang door by selecting a Timed Dry heated cycle and starting the dryer. Check for certain part replacement or repair. 13. Wipe the dryer drum interior thoroughly with a damp cloth to control the buildup of your tools. 3. Excessive scale buildup may ...
Use and Care Guide
Page 16
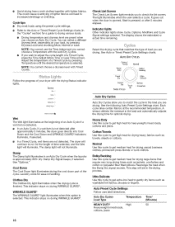
The dryer will illuminate. Cool Down The Cool Down light illuminates during the cool down part of time selected, and the Wet light will...for drying heavy fabrics such as washable knit fabrics, blouses or lingerie. This indicator stays on your dryer with lighter fabrics. A sensor detects the moisture in the load and automatically adjusts the drying time... dryness level are drying. Cotton/Towels Use this option is pressed, or after approximately 5 minutes, the dryer goes directly into Cool Down and the Cool Down and WRINKLE GUARD®indicators illuminate, if selected. &#...
The dryer will illuminate. Cool Down The Cool Down light illuminates during the cool down part of time selected, and the Wet light will...for drying heavy fabrics such as washable knit fabrics, blouses or lingerie. This indicator stays on your dryer with lighter fabrics. A sensor detects the moisture in the load and automatically adjusts the drying time... dryness level are drying. Cotton/Towels Use this option is pressed, or after approximately 5 minutes, the dryer goes directly into Cool Down and the Cool Down and WRINKLE GUARD®indicators illuminate, if selected. &#...


