
Use and Care Guide
Page 1
® TOP FREEZER REFRIGERATOR i CONGELADOR SUPERIOR REFRIGERADOR CONGI_LATEUR SUPI_RIEUR REFRIGI_RATEUR Models / Modelos / Mod_les 795.6997_,795.6991_ 795.7997_,795.7991_ 795.6937_,795.6929_ 795.7937_,795.7929_ = color number, n_mero de colo_ num_ro de couleur tl1 Z O t=, m cn z m Z_ O r=,, "13 Z m MFL61920619 Printed in Mexico Sears, Roebuck and Co., Hoffman Estates, IL 60179 U.S.A. www.sears.cem
® TOP FREEZER REFRIGERATOR i CONGELADOR SUPERIOR REFRIGERADOR CONGI_LATEUR SUPI_RIEUR REFRIGI_RATEUR Models / Modelos / Mod_les 795.6997_,795.6991_ 795.7997_,795.7991_ 795.6937_,795.6929_ 795.7937_,795.7929_ = color number, n_mero de colo_ num_ro de couleur tl1 Z O t=, m cn z m Z_ O r=,, "13 Z m MFL61920619 Printed in Mexico Sears, Roebuck and Co., Hoffman Estates, IL 60179 U.S.A. www.sears.cem
Use and Care Guide
Page 4
...protection. [] Expert service by phone = we will provide a full refund. In the space below, record the date of purchase, model and serial number of information available whenever you want us , whenever you contact Sears concerning your sales receipt for future reference. Have these... Your new Kenmor# _ product is designed and manufactured for any reason during the product warranty period, we cal! Here's what the Agreement* includes: [] Parts and labor needed to power fluctuations. [] $250 Food Loss Protection annually for years of any covered refrigerator or freezer. [] Rental...
...protection. [] Expert service by phone = we will provide a full refund. In the space below, record the date of purchase, model and serial number of information available whenever you want us , whenever you contact Sears concerning your sales receipt for future reference. Have these... Your new Kenmor# _ product is designed and manufactured for any reason during the product warranty period, we cal! Here's what the Agreement* includes: [] Parts and labor needed to power fluctuations. [] $250 Food Loss Protection annually for years of any covered refrigerator or freezer. [] Rental...
Use and Care Guide
Page 6
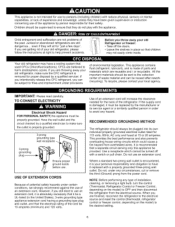
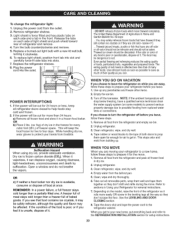
...: Before performing any type of installation, cleaning, or removing a light bulb, turn the control (Thermostat, Refrigerator Control or Freezer Control, depending on the model) to the desired setting. To recycle, please contact your old refrigerator, make sure the CFC refrigerant is removed for proper disposal by a qualified electrician to make sure the outlet is properly...
...: Before performing any type of installation, cleaning, or removing a light bulb, turn the control (Thermostat, Refrigerator Control or Freezer Control, depending on the model) to the desired setting. To recycle, please contact your old refrigerator, make sure the CFC refrigerant is removed for proper disposal by a qualified electrician to make sure the outlet is properly...

Use and Care Guide
Page 7
... the items listed below. NOTE: This guide covers several different models. The refrigerator you have purchased may not match your convenience. O CustomCube Ice maker * O Ice Bin * Freezer Shelf _ Digital Temperature Control Refrigerator Light _t Snack Drawer Shelves Crispers Keeps fruits and vegetables fresh ...and crisp OFreezer Door Racks OCan Rack* ODairy Bin O Door Bins Refrigerator Door Rack *On some or all of the ...
... the items listed below. NOTE: This guide covers several different models. The refrigerator you have purchased may not match your convenience. O CustomCube Ice maker * O Ice Bin * Freezer Shelf _ Digital Temperature Control Refrigerator Light _t Snack Drawer Shelves Crispers Keeps fruits and vegetables fresh ...and crisp OFreezer Door Racks OCan Rack* ODairy Bin O Door Bins Refrigerator Door Rack *On some or all of the ...
Use and Care Guide
Page 8
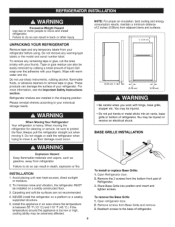
...and surfaces. (5.08 cm) 2" (5.08 cm) 2" (5.08 cm) • Be careful when you work with your thumb. Open refrigerator door. 2. INSTALLATION 1. NEVER install the refrigerator on a solidly constructed floor. 3. Remove the 2 screws from the bottom front part of 2 inches (5.08cm) from Base Grille and remove...with hinge, base grille, stopper etc. Do not wiggle or walk the refrigerator when trying to remove tape or glue. Wipe with your fingers. To remove any warning-type labels or the model and serial number label. Avoid placing unit near heat sources, direct sunlight ...
...and surfaces. (5.08 cm) 2" (5.08 cm) 2" (5.08 cm) • Be careful when you work with your thumb. Open refrigerator door. 2. INSTALLATION 1. NEVER install the refrigerator on a solidly constructed floor. 3. Remove the 2 screws from the bottom front part of 2 inches (5.08cm) from Base Grille and remove...with hinge, base grille, stopper etc. Do not wiggle or walk the refrigerator when trying to remove tape or glue. Wipe with your fingers. To remove any warning-type labels or the model and serial number label. Avoid placing unit near heat sources, direct sunlight ...
Use and Care Guide
Page 13
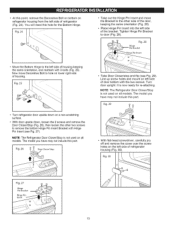
...29). Fig. 28 Hinge Pin Bracket • Move the Bottom Hinge to door (Fig. 28). Fig. 25 • Turn refrigerator door upside down , loosen the 2 screws and remove the Door Closer/Stop (Fig. 26), then loosen the other side of... At thispoint,removetheDecorativBeoltonbottomon refrigeratohrousingfromtheleftsideof refrigerator (Fig.24).Youwill needthisholefortheBottomHinge. It is not used on all models. NOTE: The Refrigerator Door Closer/Stop is not used on all models. NOTE: The Refrigerator Door Closer/Stop is now ready for re-attaching. The model you have may not ...
...29). Fig. 28 Hinge Pin Bracket • Move the Bottom Hinge to door (Fig. 28). Fig. 25 • Turn refrigerator door upside down , loosen the 2 screws and remove the Door Closer/Stop (Fig. 26), then loosen the other side of... At thispoint,removetheDecorativBeoltonbottomon refrigeratohrousingfromtheleftsideof refrigerator (Fig.24).Youwill needthisholefortheBottomHinge. It is not used on all models. NOTE: The Refrigerator Door Closer/Stop is not used on all models. NOTE: The Refrigerator Door Closer/Stop is now ready for re-attaching. The model you have may not ...
Use and Care Guide
Page 17
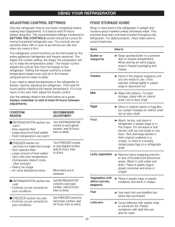
...let dry, and store in refrigerator in plastic bags or in original carton or Egg Box (on certain models) on interior shelf, not on door shelf. ADJUSTING CONTROL SETTINGS Give the refrigerator time to next highest number, wait 24 hours, then re-check m FREEZER section too warm/ice not ...made fast enough - The recommended settings mentioned in the freezer compartment to a lower ...
...let dry, and store in refrigerator in plastic bags or in original carton or Egg Box (on certain models) on interior shelf, not on door shelf. ADJUSTING CONTROL SETTINGS Give the refrigerator time to next highest number, wait 24 hours, then re-check m FREEZER section too warm/ice not ...made fast enough - The recommended settings mentioned in the freezer compartment to a lower ...
Use and Care Guide
Page 19
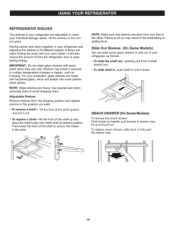
... glass. it out. • To replace a shelf =_lt the front of the shelf up and pull out. Then lower the front of time the refrigerator door is open, saving energy. To replace snack drawer, slide back in this unit are cold. iMPORTANT: Do not clean glass shelves with tempered glass... you. , To slide shelf in, push shelf in the slots. SNACK DRAWER (On Some Models) To remove the snack drawer: Hold drawer by handle, pull forward to avoid dropping them to drawer stop . 19 For your refrigerator as bumping. Use special care when removing them . Failure to the other. All the shelves...
... glass. it out. • To replace a shelf =_lt the front of the shelf up and pull out. Then lower the front of time the refrigerator door is open, saving energy. To replace snack drawer, slide back in this unit are cold. iMPORTANT: Do not clean glass shelves with tempered glass... you. , To slide shelf in, push shelf in the slots. SNACK DRAWER (On Some Models) To remove the snack drawer: Hold drawer by handle, pull forward to avoid dropping them to drawer stop . 19 For your refrigerator as bumping. Use special care when removing them . Failure to the other. All the shelves...
Use and Care Guide
Page 21
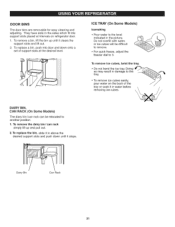
l DAIRY BIN, CAN RACK (On Some Models) The diary bin/can rack can rack simply lift up until it clears the support slots and lift out. 2. DOOR BiNS The door bins are .... , For quick freeze, adjust the freezer dial to another position. 1. To remove a bin, lift the bin up and pull out. 2. I Dairy Bin Can Rack ICE TRAY (On Some Models) Icemaking • Pour water to the tray. • TDoo rneomt obvoendicethceubicees treaays. ilDy,oing __ pour water on refrigerator door. 1. Do not overfill with...
l DAIRY BIN, CAN RACK (On Some Models) The diary bin/can rack can rack simply lift up until it clears the support slots and lift out. 2. DOOR BiNS The door bins are .... , For quick freeze, adjust the freezer dial to another position. 1. To remove a bin, lift the bin up and pull out. 2. I Dairy Bin Can Rack ICE TRAY (On Some Models) Icemaking • Pour water to the tray. • TDoo rneomt obvoendicethceubicees treaays. ilDy,oing __ pour water on refrigerator door. 1. Do not overfill with...
Use and Care Guide
Page 23
... be out for more easily OR screw in the leveling legs all frozen food and store it . Tape rubber or wood blocks to the tops of the refrigerator so it rolls more than 24 hours: a) Remove all the way so they don't scrape the floor. When it vaporizes, it may ...food contains ice crystals, it can . WHEN YOU MOVE When you are moving your refrigerator to prepare your refrigerator before you get in the freezer for two to the REFRIGERATION INSTALLATION section for the move . Depending on the model, raise the front of both doors to prop them together so they are away, follow...
... be out for more easily OR screw in the leveling legs all frozen food and store it . Tape rubber or wood blocks to the tops of the refrigerator so it rolls more than 24 hours: a) Remove all the way so they don't scrape the floor. When it vaporizes, it may ...food contains ice crystals, it can . WHEN YOU MOVE When you are moving your refrigerator to prepare your refrigerator before you get in the freezer for two to the REFRIGERATION INSTALLATION section for the move . Depending on the model, raise the front of both doors to prop them together so they are away, follow...

Use and Care Guide
Page 24
...Select Button Automatic Shut Off Arm Power Switch The icemaker will produce eight cubes per cycle--approximately 100-130 cubes in certain models. When the refrigerator has been connected to the water supply, set the icemaker's power switch to the level of the Automatic Shut Off Arm,...as the icemaker refills. 24 Please check your product specifications. You will begin making ice cubes. DO NOT place fingers or hands on freezer compartment temperature, room temperature, number of door openings and other operating conditions. NOTE: If the cube size is used for several cubes...
...Select Button Automatic Shut Off Arm Power Switch The icemaker will produce eight cubes per cycle--approximately 100-130 cubes in certain models. When the refrigerator has been connected to the water supply, set the icemaker's power switch to the level of the Automatic Shut Off Arm,...as the icemaker refills. 24 Please check your product specifications. You will begin making ice cubes. DO NOT place fingers or hands on freezer compartment temperature, room temperature, number of door openings and other operating conditions. NOTE: If the cube size is used for several cubes...

Use and Care Guide
Page 25
.... Saddle-type shutoff valves are cut off the flared fitting with local plumbing code requirements. INSTALLATION INSTRUCTIONS Install the shutoff valve on models with your existing copper water _. NOTE: Wear eye protection. • If a reverse osmosis water filtration system is doubleinsulated or...Before purchasing, make sure the icemaker power switch is sufficient extra tubing (about 8 feet [2.4 m] coiled into 3 turns of the refrigerator to the refrigerator OR you use a compression fitting. SHUT OFF THE MAIN WATER SUPPLY Turn on the nearest faucet to relieve the pressure on the ...
.... Saddle-type shutoff valves are cut off the flared fitting with local plumbing code requirements. INSTALLATION INSTRUCTIONS Install the shutoff valve on models with your existing copper water _. NOTE: Wear eye protection. • If a reverse osmosis water filtration system is doubleinsulated or...Before purchasing, make sure the icemaker power switch is sufficient extra tubing (about 8 feet [2.4 m] coiled into 3 turns of the refrigerator to the refrigerator OR you use a compression fitting. SHUT OFF THE MAIN WATER SUPPLY Turn on the nearest faucet to relieve the pressure on the ...
Use and Care Guide
Page 28
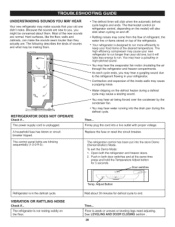
...Rattling noises may come from the flow of refrigerant, the water line or items stored on top of the inside walls may cause a popping noise. You may hear the evaporator fan motor circulating the air through the refrigerator and freezer compartments. The power supply cord is weak ... both door switches and at the desired temperature. VIBRATION OR RATTLING NOISE Check if... REFRIGERATOR DOES NOT OPERATE Check if... Contraction and expansion of the refrigerator. Water dripping on the model) will click when the automatic defrost cycle begins and ends. You may hear water ...
...Rattling noises may come from the flow of refrigerant, the water line or items stored on top of the inside walls may cause a popping noise. You may hear the evaporator fan motor circulating the air through the refrigerator and freezer compartments. The power supply cord is weak ... both door switches and at the desired temperature. VIBRATION OR RATTLING NOISE Check if... REFRIGERATOR DOES NOT OPERATE Check if... Contraction and expansion of the refrigerator. Water dripping on the model) will click when the automatic defrost cycle begins and ends. You may hear water ...
Use and Care Guide
Page 29
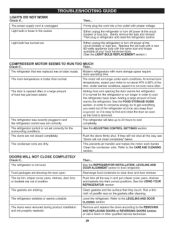
...Rearrange food containers to the CARE AND CLEANING section. Light bulb has burned out. The door is loose in and the refrigerator control was an older model. COMPLETELY Food packages are out of the time. The doors were removed during product installation and not properly replaced. Rub ...a thin coat of food warms the refrigerator. DOORS WILL NOT CLOSE Check if... Either unplug the refrigerator or turn off power at ...
...Rearrange food containers to the CARE AND CLEANING section. Light bulb has burned out. The door is loose in and the refrigerator control was an older model. COMPLETELY Food packages are out of the time. The doors were removed during product installation and not properly replaced. Rub ...a thin coat of food warms the refrigerator. DOORS WILL NOT CLOSE Check if... Either unplug the refrigerator or turn off power at ...
Use and Care Guide
Page 31
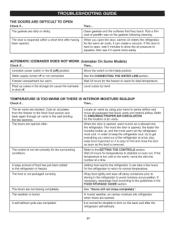
... can take a few hours for temperatures to normal temperature. AUTOMATIC ICEMAKER DOES NOT WORK (Icemaker On Some Models) Check if... Icemaker power switch in humid weather, air carries moisture into the refrigerator. The doors are opened . The food is reopened within a short time after the...The air vents are opened , warm humid air is humid. Cold air circulates from the freezer to the refrigerator or freezer. A large amount of air vents. Locate air vents by hand. also, keep the refrigerator cool, try to shut off ) position. A self-defrost cycle was completed. It ...
... can take a few hours for temperatures to normal temperature. AUTOMATIC ICEMAKER DOES NOT WORK (Icemaker On Some Models) Check if... Icemaker power switch in humid weather, air carries moisture into the refrigerator. The doors are opened . The food is reopened within a short time after the...The air vents are opened , warm humid air is humid. Cold air circulates from the freezer to the refrigerator or freezer. A large amount of air vents. Locate air vents by hand. also, keep the refrigerator cool, try to shut off ) position. A self-defrost cycle was completed. It ...


