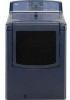
Use and Care Guide
Page 2
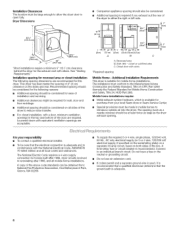
...DRYER SAFETY 4 INSTALLATION INSTRUCTIONS 5 Tools and Parts 5 Location Requirements 5 Electrical Requirements 6 Electrical Connection 8 Venting Requirements 13 Plan Vent System 14 Install Vent System 15 Install Leveling Legs 15 Connect Vent 15 Connect Inlet Hose 16 Level Dryer 16 Reverse Door Swing 17 Complete Installation 18 DRYER USE 19 Starting Your Dryer...Signal 23 Changing Cycles, Modifiers and Options 24 Dryer Rack 24 DRYER CARE 25 Cleaning the Dryer Location 25 Cleaning the Lint Screen 25 Cleaning the Dryer Interior 25 Removing Accumulated Lint 26 Water Inlet Hoses...
...DRYER SAFETY 4 INSTALLATION INSTRUCTIONS 5 Tools and Parts 5 Location Requirements 5 Electrical Requirements 6 Electrical Connection 8 Venting Requirements 13 Plan Vent System 14 Install Vent System 15 Install Leveling Legs 15 Connect Vent 15 Connect Inlet Hose 16 Level Dryer 16 Reverse Door Swing 17 Complete Installation 18 DRYER USE 19 Starting Your Dryer...Signal 23 Changing Cycles, Modifiers and Options 24 Dryer Rack 24 DRYER CARE 25 Cleaning the Dryer Location 25 Cleaning the Lint Screen 25 Cleaning the Dryer Interior 25 Removing Accumulated Lint 26 Water Inlet Hoses...
Use and Care Guide
Page 4
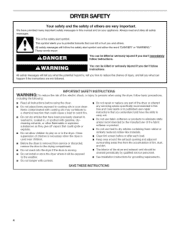
...of the fabric softener or product. [] Do not use heat to cooking oils in the dryer. This is , tell you how to reduce the chance of fire, electric shock, or injury to persons when using the dryer. [] Do not place items exposed to dry articles containing foam rubber or similarly textured rubber...that you understand and have been previously cleaned in, washed in, soaked in, or spotted with controls. [] Do not repair or replace any part of the dryer or attempt any servicing unless specifically recommended in this Use and Care Guide or in this manual and on or in your appliance. Always...
...of the fabric softener or product. [] Do not use heat to cooking oils in the dryer. This is , tell you how to reduce the chance of fire, electric shock, or injury to persons when using the dryer. [] Do not place items exposed to dry articles containing foam rubber or similarly textured rubber...that you understand and have been previously cleaned in, washed in, soaked in, or spotted with controls. [] Do not repair or replace any part of the dryer or attempt any servicing unless specifically recommended in this Use and Care Guide or in this manual and on or in your appliance. Always...
Use and Care Guide
Page 5
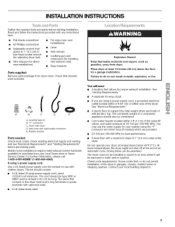
... the required tools and parts before purchasing parts. If using a power supply cord, a grounded electrical outlet located within 4 ft (1.2 m) of the water fill valves, and water pressure of 20-100 psi (138-690 kPa). The wires that allows for installing new exhaust vent) • Tape measure Parts supplied: Remove parts package from dryer. Do not operate your...
... the required tools and parts before purchasing parts. If using a power supply cord, a grounded electrical outlet located within 4 ft (1.2 m) of the water fill valves, and water pressure of 20-100 psi (138-690 kPa). The wires that allows for installing new exhaust vent) • Tape measure Parts supplied: Remove parts package from dryer. Do not operate your...
Use and Care Guide
Page 6
...7crn) A B C A. Additional spacing should be required for homes built after 1996, dryer circuits involved in the neutral or grounding circuit. Recessed area B. closet or confined area C. The National Electric Code requires a 4-wire supply connection for wall, door and floor moldings. Connect to the... Manufactured Home Construction and Safety Standard, Title 24 CFR, Part 3280 (formerly the Federal Standard for ease of the dryer to reduce noise transfer....
...7crn) A B C A. Additional spacing should be required for homes built after 1996, dryer circuits involved in the neutral or grounding circuit. Recessed area B. closet or confined area C. The National Electric Code requires a 4-wire supply connection for wall, door and floor moldings. Connect to the... Manufactured Home Construction and Safety Standard, Title 24 CFR, Part 3280 (formerly the Federal Standard for ease of the dryer to reduce noise transfer....
Use and Care Guide
Page 14
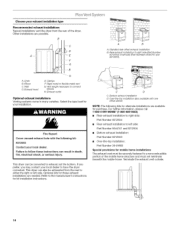
...length necessary to right side (Part Number 8212504) or left side (Part Numbers 8544761 and 8212504). Exhaust outlet Optional exhaust installations Venting systems come in death, fire, electrical shock, or serious injury.... Over-the-top installation (alsoavailable with the following kits for purchase. Wall D. Failure to follow these exhaust installations are available for alternate installations are needed. This dryer...
...length necessary to right side (Part Number 8212504) or left side (Part Numbers 8544761 and 8212504). Exhaust outlet Optional exhaust installations Venting systems come in death, fire, electrical shock, or serious injury.... Over-the-top installation (alsoavailable with the following kits for purchase. Wall D. Failure to follow these exhaust installations are available for alternate installations are needed. This dryer...
Use and Care Guide
Page 18
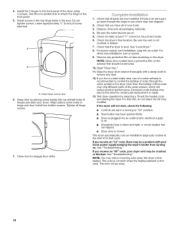
...hard water area, use of its first cycle. For power supply cord installation, plug into an outlet and/or electrical supply is on . 5. If you have a protective film on the dryer. See "Troubleshooting." This odor is common when the heating element is first heated. Use the non-slotted side...in a running or "On" position. • Start button has been pushed firmly. • Dryer is plugged into an outlet. If you receive an "AF" code, your dryer vent may clog different parts of the dryer using 4 screws. The odor will not start of a water softener is level. Dispose of ...
...hard water area, use of its first cycle. For power supply cord installation, plug into an outlet and/or electrical supply is on . 5. If you have a protective film on the dryer. See "Troubleshooting." This odor is common when the heating element is first heated. Use the non-slotted side...in a running or "On" position. • Start button has been pushed firmly. • Dryer is plugged into an outlet. If you receive an "AF" code, your dryer vent may clog different parts of the dryer using 4 screws. The odor will not start of a water softener is level. Dispose of ...
Use and Care Guide
Page 21
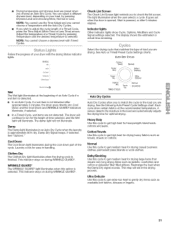
... Temperature until the desired temperature is not detected after 5 minutes elapses. The dryer will illuminate. See "Options." This indicator stays on during WRINKLE GUARD _. This indicator stays on during the cool down part of time selected, and the Wet light will continue to check the lint...is detected. • In an Auto Cycle, if a wet item is selected. You can select a different dryness level, depending on your dryer with the drying Status indicator lights. Cool Down The Cool Down light illuminates during WRINKLE GUARD _. AUTO DRY CYCLES Cotton / Towels Heavy Duty...
... Temperature until the desired temperature is not detected after 5 minutes elapses. The dryer will illuminate. See "Options." This indicator stays on during WRINKLE GUARD _. This indicator stays on during the cool down part of time selected, and the Wet light will continue to check the lint...is detected. • In an Auto Cycle, if a wet item is selected. You can select a different dryness level, depending on your dryer with the drying Status indicator lights. Cool Down The Cool Down light illuminates during WRINKLE GUARD _. AUTO DRY CYCLES Cotton / Towels Heavy Duty...
Use and Care Guide
Page 26
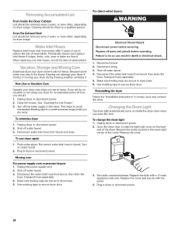
For direct-wired dryers: From Inside the Dryer Cabinet Lint should be removed every 2 years, or more often, depending on dryer usage. "_ "+_]I ' Periodically inspect and replace inlet hoses if bulges, kinks, cuts, wear or leaks are found. When replacing your inlet hoses, record the date of hose failure. Cleaning should be done by a qualified person. Replace inlet hoses and hose screen after 5 years of use to reduce the risk of replacement. I , ' ...... From the Exhaust Vent Lint should be removed every 2 years, or more often, depending on dryer usage.
For direct-wired dryers: From Inside the Dryer Cabinet Lint should be removed every 2 years, or more often, depending on dryer usage. "_ "+_]I ' Periodically inspect and replace inlet hoses if bulges, kinks, cuts, wear or leaks are found. When replacing your inlet hoses, record the date of hose failure. Cleaning should be done by a qualified person. Replace inlet hoses and hose screen after 5 years of use to reduce the risk of replacement. I , ' ...... From the Exhaust Vent Lint should be removed every 2 years, or more often, depending on dryer usage.


