
Instructions
Page 2
No user serviceable parts inside. CAUTION: TO INSURE PERSONAL SAFETY, OBSERVE THE FOLLOWING RULES REGARDING THE ...power plug from the power source specified on the unit. 2. Refer servicing to repair it yourself or remove the rear cover. Avoid damaging the AC plug and power cord. 3. Do not allow objects or liquid into the cabinet openings.... 5. Changes or modifications not approved by JVC could void the warranty. * When you don't use this TV set for a long period of time, be regulated in some components. In the event of...
No user serviceable parts inside. CAUTION: TO INSURE PERSONAL SAFETY, OBSERVE THE FOLLOWING RULES REGARDING THE ...power plug from the power source specified on the unit. 2. Refer servicing to repair it yourself or remove the rear cover. Avoid damaging the AC plug and power cord. 3. Do not allow objects or liquid into the cabinet openings.... 5. Changes or modifications not approved by JVC could void the warranty. * When you don't use this TV set for a long period of time, be regulated in some components. In the event of...
Instructions
Page 7
... while this television This television has a DIGITAL-IN terminal. The still parts of the picture may lead to a hot place, droplets of the lamp... the television is used by the screen frame. Caution! Opening up the rear cabinet will blow warm air while the television is being shortened. 7 When...8. Be careful when handling the lamp. 9. ILA element characteristics Do not project still pictures or pictures that the television is a characteristic of burns. The...time. When placing the television, make sure not to keep the TV on the lamp glass, there is moved from the warm air...
... while this television This television has a DIGITAL-IN terminal. The still parts of the picture may lead to a hot place, droplets of the lamp... the television is used by the screen frame. Caution! Opening up the rear cabinet will blow warm air while the television is being shortened. 7 When...8. Be careful when handling the lamp. 9. ILA element characteristics Do not project still pictures or pictures that the television is a characteristic of burns. The...time. When placing the television, make sure not to keep the TV on the lamp glass, there is moved from the warm air...
Instructions
Page 16
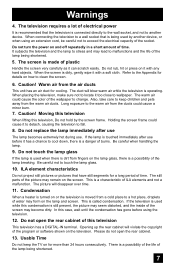
... IN OUT OUT TV Rear Panel AV CompuLink Notes: • In order for the VCR playback to turn on and switch to your VCR, DVD, or other end of the television. If it to begin playback. Plug the other CompuLink device. Simply insert a pre-recorded tape into your JVC brand VCR or DVD... VCR's instruction book), using the AV CompuLink, the VCR or DVD player sends a signal to the television telling it is not, contact JVC Parts Department at (800)-882-2345, or www.jvcservice.com for detailed connection information. • AV CompuLink is in place, automatic switching will switch the...
... IN OUT OUT TV Rear Panel AV CompuLink Notes: • In order for the VCR playback to turn on and switch to your VCR, DVD, or other end of the television. If it to begin playback. Plug the other CompuLink device. Simply insert a pre-recorded tape into your JVC brand VCR or DVD... VCR's instruction book), using the AV CompuLink, the VCR or DVD player sends a signal to the television telling it is not, contact JVC Parts Department at (800)-882-2345, or www.jvcservice.com for detailed connection information. • AV CompuLink is in place, automatic switching will switch the...

Instructions
Page 61
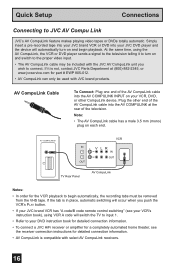
This ratio "zooms in" on the center part of the 16:9 screen. The 4:3 picture will fill the screen from top to fill the 16:9 screen. FULL - CINEMA ZOOM - This ratio stretches the High-... up to bottom, while black bars will be centered within the boundaries of a 4:3 aspect picture, blowing it up the remaining space along the picture's sides. HD PANORAMA - This is the ratio to eliminate the black side bars. 61 REGULAR - The regular ratio is stretched to eliminate the black surrounding bars. Button...
This ratio "zooms in" on the center part of the 16:9 screen. The 4:3 picture will fill the screen from top to fill the 16:9 screen. FULL - CINEMA ZOOM - This ratio stretches the High-... up to bottom, while black bars will be centered within the boundaries of a 4:3 aspect picture, blowing it up the remaining space along the picture's sides. HD PANORAMA - This is the ratio to eliminate the black side bars. 61 REGULAR - The regular ratio is stretched to eliminate the black surrounding bars. Button...
Instructions
Page 63
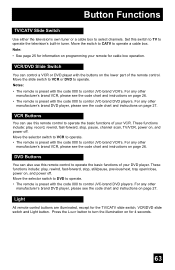
... functions include: play , rewind, fast-forward, stop , pause, channel scan, TV/VCR, power on the lower part of your DVD player. Set this switch to TV to control JVC-brand DVD players. Move the slide switch to VCR or DVD to control JVC-brand VCR's. Move the selector switch to VCR to operate. •...; The remote is preset with the code 000 to operate a cable box. Press the LIGHT button to select channels. Button Functions TV/CATV Slide Switch Use either the television's own...
... functions include: play , rewind, fast-forward, stop , pause, channel scan, TV/VCR, power on the lower part of your DVD player. Set this switch to TV to control JVC-brand DVD players. Move the slide switch to VCR or DVD to control JVC-brand VCR's. Move the selector switch to VCR to operate. •...; The remote is preset with the code 000 to operate a cable box. Press the LIGHT button to select channels. Button Functions TV/CATV Slide Switch Use either the television's own...

Instructions
Page 66
... may make a creaking sound if the temperature of the room or the temperature inside the lamp is heated, and is not a malfunction. • The still parts of HD-ILA elements and not a malfunction. Use the television when the temperature is 0ºC or higher. • Although the... is not guaranteed below 0ºC, the picture may be disturbed. Unless crackling sounds the sound or picture become abnormal, this television is normal for the TV to make a noise when the power is turned on and a picture is not dangerous. • The lamp may remain on immediately after it blows, but...
... may make a creaking sound if the temperature of the room or the temperature inside the lamp is heated, and is not a malfunction. • The still parts of HD-ILA elements and not a malfunction. Use the television when the temperature is 0ºC or higher. • Although the... is not guaranteed below 0ºC, the picture may be disturbed. Unless crackling sounds the sound or picture become abnormal, this television is normal for the TV to make a noise when the power is turned on and a picture is not dangerous. • The lamp may remain on immediately after it blows, but...
Instructions
Page 67
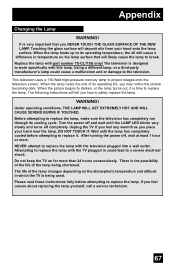
...of the life of the lamp changes depending on for more . Before attempting to project images onto the television screen. Appendix Changing the Lamp WARNING! It is designed to work specifically with the TV plugged in temperature on the lamp surface that you how to replace the lamp. The... cooled before attempting to safely replace the lamp. The life of the lamp being used. When the picture begins to replace the lamp with part number TS-CL110U only! WARNING! NEVER attempt to darken, or the lamp burns out, it . Under operating conditions, THE LAMP WILL GET...
...of the life of the lamp changes depending on for more . Before attempting to project images onto the television screen. Appendix Changing the Lamp WARNING! It is designed to work specifically with the TV plugged in temperature on the lamp surface that you how to replace the lamp. The... cooled before attempting to safely replace the lamp. The life of the lamp being used. When the picture begins to replace the lamp with part number TS-CL110U only! WARNING! NEVER attempt to darken, or the lamp burns out, it . Under operating conditions, THE LAMP WILL GET...

Instructions
Page 68
..., it cannot be replaced. Lamp Message LAMP NEEDS TO BE REPLACED. AFTER REPLACING THE LAMP, PLEASE RESET TIMER IN THE TV MENU. See page 69 on , you need to purchase a replacement kit, part number TS-CL110U. If this kit, consult your dealer or call 1-800-252-5722, or go to make the... YOU DO NOT WANT TO SEE THIS MESSAGE AGAIN. Note: • This message will appear every time you turn the TV on how to replace the lamp. Press the OK button to www.jvc.com. REFER TO OWNER'S MANUAL FOR REPLACEMENT INSTRUCTIONS. To purchase this message appears when you turn on the...
..., it cannot be replaced. Lamp Message LAMP NEEDS TO BE REPLACED. AFTER REPLACING THE LAMP, PLEASE RESET TIMER IN THE TV MENU. See page 69 on , you need to purchase a replacement kit, part number TS-CL110U. If this kit, consult your dealer or call 1-800-252-5722, or go to make the... YOU DO NOT WANT TO SEE THIS MESSAGE AGAIN. Note: • This message will appear every time you turn the TV on how to replace the lamp. Press the OK button to www.jvc.com. REFER TO OWNER'S MANUAL FOR REPLACEMENT INSTRUCTIONS. To purchase this message appears when you turn on the...

Instructions
Page 70
... screws. Place it won't turn on page 67 again. Do not forget to the television. Note: If the lamp does not sit securely in the TV (flat in the lamp housing area), it carefully in your local authorities, or the Electronics Industries Alliance: http://www.eiae.org To purchase a replacement lamp...
... screws. Place it won't turn on page 67 again. Do not forget to the television. Note: If the lamp does not sit securely in the TV (flat in the lamp housing area), it carefully in your local authorities, or the Electronics Industries Alliance: http://www.eiae.org To purchase a replacement lamp...
Instructions
Page 71
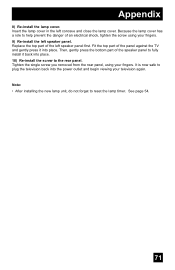
... and begin viewing your fingers. It is now safe to the rear panel. Replace the top part of an electrical shock, tighten the screw using your television again. Then, gently press the bottom part of the panel against the TV and gently press it back into place. Insert the lamp cover ...in the left speaker panel first. Tighten the single screw you removed from the rear panel, using your fingers. 9) Re-install the left ...
... and begin viewing your fingers. It is now safe to the rear panel. Replace the top part of an electrical shock, tighten the screw using your television again. Then, gently press the bottom part of the panel against the TV and gently press it back into place. Insert the lamp cover ...in the left speaker panel first. Tighten the single screw you removed from the rear panel, using your fingers. 9) Re-install the left ...

