User Guide
Page 8
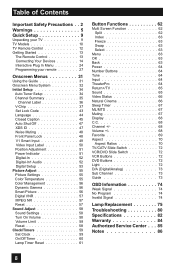
... 47 Noise Muting 48 Front Panel Lock 48 V1 Smart Input 49 Video Input Label 50 Position Adjustment 51 Power Indicator 51 Digital-In 52 Digital-In1 Audio 52 Digital Setup 53 Picture Adjust 55 Picture Settings 55 Color Temperature 55 Color Management 56 Dynamic Gamma 56 Smart Picture 56 Digital VNR... Set Clock 59 On/Off Timer 60 Lamp Timer Reset 61 Button Functions 62 Multi Screen Function 62 Split 62 Index 63 Freeze 63 Swap 63 Select 63 Menu 63 OK 63 Back 63 Power 64 Number Buttons 64 Tune 64 Input 64 TheaterPro 64 Return+/TV 65 Sound 65 Video Status 66...
... 47 Noise Muting 48 Front Panel Lock 48 V1 Smart Input 49 Video Input Label 50 Position Adjustment 51 Power Indicator 51 Digital-In 52 Digital-In1 Audio 52 Digital Setup 53 Picture Adjust 55 Picture Settings 55 Color Temperature 55 Color Management 56 Dynamic Gamma 56 Smart Picture 56 Digital VNR... Set Clock 59 On/Off Timer 60 Lamp Timer Reset 61 Button Functions 62 Multi Screen Function 62 Split 62 Index 63 Freeze 63 Swap 63 Select 63 Menu 63 OK 63 Back 63 Power 64 Number Buttons 64 Tune 64 Input 64 TheaterPro 64 Return+/TV 65 Sound 65 Video Status 66...
User Guide
Page 13
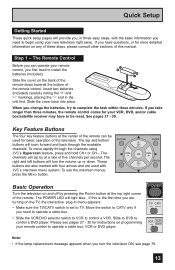
... Remote Control Before you can be reset. Insert two batteries (included) carefully noting the "+" and "-" markings, placing the "-" end in menu appears. • Make sure the TV/CATV switch is the first time ... 30 for your remote control to be used with the basic information you need to begin using JVC's Hyperscan feature, press and hold CH+ or CH-. The right and left buttons will scan ...to CATV only if you need to install the batteries (included). POWER T TV CATV MUL VCR DVD Note: • If the lamp replacement message appears when you turn the volume up or down towards the ...
... Remote Control Before you can be reset. Insert two batteries (included) carefully noting the "+" and "-" markings, placing the "-" end in menu appears. • Make sure the TV/CATV switch is the first time ... 30 for your remote control to be used with the basic information you need to begin using JVC's Hyperscan feature, press and hold CH+ or CH-. The right and left buttons will scan ...to CATV only if you need to install the batteries (included). POWER T TV CATV MUL VCR DVD Note: • If the lamp replacement message appears when you turn the volume up or down towards the ...

User Guide
Page 33
... MENU EXIT SOUND ADJUST 01 SOUND ADJUST PREVIOUS TURN ON VOLUME 10 VOLUME LIMIT 40 RESET NEXT PAGE SELECT OPERATE (2/2) MENU EXIT SOUND ADJUST 02 CLOCK / TIMERS PREVIOUS SET CLOCK ON / OFF TIMER LAMP TIMER RESET NEXT PAGE SELECT OPERATE MENU EXIT CLOCK/TIMERS • The DIGITAL-IN menu can only... be displayed when a 480p picture signal is input to the digital-in terminal and the picture is being displayed on the screen. • When the Menu button on the TV side ...
... MENU EXIT SOUND ADJUST 01 SOUND ADJUST PREVIOUS TURN ON VOLUME 10 VOLUME LIMIT 40 RESET NEXT PAGE SELECT OPERATE (2/2) MENU EXIT SOUND ADJUST 02 CLOCK / TIMERS PREVIOUS SET CLOCK ON / OFF TIMER LAMP TIMER RESET NEXT PAGE SELECT OPERATE MENU EXIT CLOCK/TIMERS • The DIGITAL-IN menu can only... be displayed when a 480p picture signal is input to the digital-in terminal and the picture is being displayed on the screen. • When the Menu button on the TV side ...

User Guide
Page 61
... OK button while the above message appears on lamp replacement. 61 Onscreen menus Lamp Timer Reset The lamp replacement message will appear. CLOCK / TIMERS PREVIOUS SET CLOCK ON / OFF TIMER LAMP TIMER RESET PRESS OK TO RESET THE LAMP TIMER. Notes: • You can use the Lamp Timer Reset only after replacing the lamp. • See Page 75 for instructions on...
... OK button while the above message appears on lamp replacement. 61 Onscreen menus Lamp Timer Reset The lamp replacement message will appear. CLOCK / TIMERS PREVIOUS SET CLOCK ON / OFF TIMER LAMP TIMER RESET PRESS OK TO RESET THE LAMP TIMER. Notes: • You can use the Lamp Timer Reset only after replacing the lamp. • See Page 75 for instructions on...

User Guide
Page 76
...jvc.com. Note: • This message will need to replace the lamp. To purchase this message appears when you turn on the TV when the lamp needs to be disposed of with normal trash. AFTER REPLACING THE LAMP, PLEASE RESET TIMER IN THE TV MENU. Lamp Replacement Replacement Lamp Kit Before replacing the lamp..., you will appear every time you turn the TV on, you need to purchase ...
...jvc.com. Note: • This message will need to replace the lamp. To purchase this message appears when you turn on the TV when the lamp needs to be disposed of with normal trash. AFTER REPLACING THE LAMP, PLEASE RESET TIMER IN THE TV MENU. Lamp Replacement Replacement Lamp Kit Before replacing the lamp..., you will appear every time you turn the TV on, you need to purchase ...

User Guide
Page 78
... not sit securely in the TV (flat in your community due to re-tighten the two screws. Make sure the lamp sits securely and flat in the right concave and close the lamp cover. Disposal of an electrical shock, tighten the screw using your local authorities or for USA)... call 1-800-252-5722. 6) Re-install the lamp cover. For disposal or recycling information, please contact your fingers. Holding the handle attached to help prevent the danger of these materials may cause malfunctions and/or other damage to reset the lamp timer. See page 61. 78 WARNING! Remember it...
... not sit securely in the TV (flat in your community due to re-tighten the two screws. Make sure the lamp sits securely and flat in the right concave and close the lamp cover. Disposal of an electrical shock, tighten the screw using your local authorities or for USA)... call 1-800-252-5722. 6) Re-install the lamp cover. For disposal or recycling information, please contact your fingers. Holding the handle attached to help prevent the danger of these materials may cause malfunctions and/or other damage to reset the lamp timer. See page 61. 78 WARNING! Remember it...

User Guide
Page 80
...high-wattage appliance, like a hairdryer or vacuum, operating nearby. Check to see if other device conected to see if the Sleep Timer was not reset. Therefore, you can not output audio using the AUDIO OUTPUT under the following conditions: 1) When you are working and properly installed. • ...have digital sound from the appliance or change to a coaxial cable connection which is less prone to a malfunction. • The lamp door may be a malfunction that the TV/CATV switch is in the Closed Caption Menu, page 45. • Make sure the MTS settings are lines across the picture...
...high-wattage appliance, like a hairdryer or vacuum, operating nearby. Check to see if other device conected to see if the Sleep Timer was not reset. Therefore, you can not output audio using the AUDIO OUTPUT under the following conditions: 1) When you are working and properly installed. • ...have digital sound from the appliance or change to a coaxial cable connection which is less prone to a malfunction. • The lamp door may be a malfunction that the TV/CATV switch is in the Closed Caption Menu, page 45. • Make sure the MTS settings are lines across the picture...


