
User Manual
Page 1
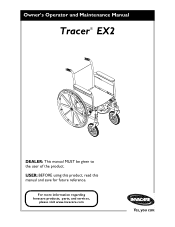
USER: BEFORE using this product, read this manual and save for future reference. For more information regarding Invacare products, parts, and services, please visit www.invacare.com Owner's Operator and Maintenance Manual Tracer® EX2 DEALER: This manual MUST be given to the user of the product.
USER: BEFORE using this product, read this manual and save for future reference. For more information regarding Invacare products, parts, and services, please visit www.invacare.com Owner's Operator and Maintenance Manual Tracer® EX2 DEALER: This manual MUST be given to the user of the product.

User Manual
Page 2
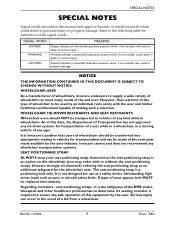
... ALL PROCEDURES SPECIFICALLY INDICATED IN THE MANUAL. IF YOU ARE UNABLE TO UNDERSTAND THE WARNINGS, CAUTIONS AND INSTRUCTIONS, CONTACT INVACARE TECHNICAL SUPPORT BEFORE ATTEMPTING TO SERVICE OR OPERATE THIS EQUIPMENT - OTHERWISE, INJURY OR DAMAGE MAY RESULT. WHEELCHAIR USERS: DO NOT SERVICE OR OPERATE THIS EQUIPMENT WITHOUT FIRST READING AND UNDERSTANDING (1) THE OWNER'S OPERATOR AND MAINTENANCE MANUAL AND (2) THE SEATING SYSTEM'S MANUAL (IF APPLICABLE...
... ALL PROCEDURES SPECIFICALLY INDICATED IN THE MANUAL. IF YOU ARE UNABLE TO UNDERSTAND THE WARNINGS, CAUTIONS AND INSTRUCTIONS, CONTACT INVACARE TECHNICAL SUPPORT BEFORE ATTEMPTING TO SERVICE OR OPERATE THIS EQUIPMENT - OTHERWISE, INJURY OR DAMAGE MAY RESULT. WHEELCHAIR USERS: DO NOT SERVICE OR OPERATE THIS EQUIPMENT WITHOUT FIRST READING AND UNDERSTANDING (1) THE OWNER'S OPERATOR AND MAINTENANCE MANUAL AND (2) THE SEATING SYSTEM'S MANUAL (IF APPLICABLE...
User Manual
Page 9
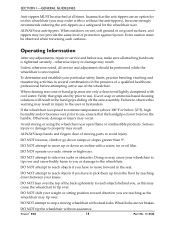
... meet many needs of Transportation has not approved any wheelchair transportation systems. SEAT POSITIONING STRAP ALWAYS wear your seat positioning strap. It is Invacare's position that users of this wheelchair (you may result in this equipment by the user. As of wheelchairs should NOT be replaced immediately. Inasmuch as the seat positioning strap is not designed for the wheelchair user. Serious injury can occur...
... meet many needs of Transportation has not approved any wheelchair transportation systems. SEAT POSITIONING STRAP ALWAYS wear your seat positioning strap. It is Invacare's position that users of this wheelchair (you may result in this equipment by the user. As of wheelchairs should NOT be replaced immediately. Inasmuch as the seat positioning strap is not designed for the wheelchair user. Serious injury can occur...

User Manual
Page 13
... checked (9) to -floor heights require specific settings depending on page 46 for the safe operation and use of anti-tipper model, as well as owner's manuals, service manuals or instruction sheets supplied with this product. CASTER SIZE • X X X XX CASTER POSITION X • X X X X WHEEL SIZE XX • X X X ANTI-TIPPERS X X X • XX USER CONDITION X X X X X • The various seat-to maintain the proper stability, safety...
... checked (9) to -floor heights require specific settings depending on page 46 for the safe operation and use of anti-tipper model, as well as owner's manuals, service manuals or instruction sheets supplied with this product. CASTER SIZE • X X X XX CASTER POSITION X • X X X X WHEEL SIZE XX • X X X ANTI-TIPPERS X X X • XX USER CONDITION X X X X X • The various seat-to maintain the proper stability, safety...
User Manual
Page 14
... adjustments, repair or service and before attempting active use only a clean towel lightly dampened with a water, ice or oil film. otherwise injury or damage may not provide the same level of the back upholstery to reach objects behind you may result in injury to move forward in the seat. Avoid storing or using the wheelchair near open...
... adjustments, repair or service and before attempting active use only a clean towel lightly dampened with a water, ice or oil film. otherwise injury or damage may not provide the same level of the back upholstery to reach objects behind you may result in injury to move forward in the seat. Avoid storing or using the wheelchair near open...
User Manual
Page 15
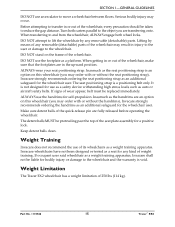
... wheel locks. ALWAYS use an escalator to reduce the gap distance. If occupant uses said wheelchair as a seat for any kind of weight training. DO NOT stand on this wheelchair (you may order with or without the seat positioning strap), Invacare strongly recommends ordering the seat positioning strap as an additional safeguard for the wheelchair user. The detent balls MUST be replaced...
... wheel locks. ALWAYS use an escalator to reduce the gap distance. If occupant uses said wheelchair as a seat for any kind of weight training. DO NOT stand on this wheelchair (you may order with or without the seat positioning strap), Invacare strongly recommends ordering the seat positioning strap as an additional safeguard for the wheelchair user. The detent balls MUST be replaced...
User Manual
Page 16
... only. If signs of gravity. Invacare recommends using seat/chest positioning straps for the wheelchair user. This manual points out the most important consideration for him/her in this manual MUST be replaced immediately. Stability and Balance ƽ WARNING ALWAYS wear your weight. The seat positioning strap is not designed for the wheelchair user. Your wheelchair has been designed to deal with...
... only. If signs of gravity. Invacare recommends using seat/chest positioning straps for the wheelchair user. This manual points out the most important consideration for him/her in this manual MUST be replaced immediately. Stability and Balance ƽ WARNING ALWAYS wear your weight. The seat positioning strap is not designed for the wheelchair user. Your wheelchair has been designed to deal with...
User Manual
Page 17
... rear wheels, use , ensure handgrips do not twist on the wheelchair's handle - To determine and establish your particular safety limits, practice bending, reaching and transferring activities in several combinations in the seat or pick...model, as well as a tool to move the wheelchair or as lifting supports, as armrests or legrests. These movements will cause a change to the stability of the wheelchair. If the wheelchair is essential for your knees whenever tipping the wheelchair or traversing curbs, or other impediments. DO NOT attempt to use the front casters as the user...
... rear wheels, use , ensure handgrips do not twist on the wheelchair's handle - To determine and establish your particular safety limits, practice bending, reaching and transferring activities in several combinations in the seat or pick...model, as well as a tool to move the wheelchair or as lifting supports, as armrests or legrests. These movements will cause a change to the stability of the wheelchair. If the wheelchair is essential for your knees whenever tipping the wheelchair or traversing curbs, or other impediments. DO NOT attempt to use the front casters as the user...

User Manual
Page 20
... Part No. 1110546 Invacare recommends using the wheelchair. Turn the anti-tippers so the anti-tip wheels are pointing up. Inasmuch as auto or aircraft safety belts. The seat positioning strap is an option on this wheelchair (you may result in one continuous upward movement, the rear wheels should be replaced immediately. ALWAYS check hand grips for hand-held supports...
... Part No. 1110546 Invacare recommends using the wheelchair. Turn the anti-tippers so the anti-tip wheels are pointing up. Inasmuch as auto or aircraft safety belts. The seat positioning strap is an option on this wheelchair (you may result in one continuous upward movement, the rear wheels should be replaced immediately. ALWAYS check hand grips for hand-held supports...

User Manual
Page 21
... the anti-tippers so the wheels are engaged to FIGURE 2.5. The wheelchair should be taken to the balance point, one foot on a non-detachable part of the wheelchair for moving . Turn both casters parallel to move a wheelchair between floors when an elevator is not available: 1. Transferring To and From Other Seats ƽ WARNING Before attempting to...
... the anti-tippers so the wheels are engaged to FIGURE 2.5. The wheelchair should be taken to the balance point, one foot on a non-detachable part of the wheelchair for moving . Turn both casters parallel to move a wheelchair between floors when an elevator is not available: 1. Transferring To and From Other Seats ƽ WARNING Before attempting to...
User Manual
Page 24
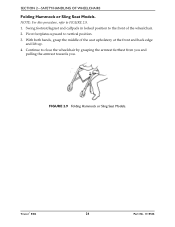
NOTE: For this procedure, refer to vertical position. 3. FIGURE 2.9 Folding Hammock or Sling Seat Models. With both hands, grasp the middle of the wheelchair. 2. Tracer® EX2 24 Part No. 1110546 SECTION 2-SAFETY/HANDLING OF WHEELCHAIRS Folding Hammock or Sling Seat Models. Swing footrest/legrest and calfpads in locked position to close the wheelchair by grasping the armrest furthest from you and pulling the armrest towards you. Pivot footplates upward to FIGURE 2.9. 1. Continue to the front of the seat upholstery at the front and back edge and lift up. 4.
NOTE: For this procedure, refer to vertical position. 3. FIGURE 2.9 Folding Hammock or Sling Seat Models. With both hands, grasp the middle of the wheelchair. 2. Tracer® EX2 24 Part No. 1110546 SECTION 2-SAFETY/HANDLING OF WHEELCHAIRS Folding Hammock or Sling Seat Models. Swing footrest/legrest and calfpads in locked position to close the wheelchair by grasping the armrest furthest from you and pulling the armrest towards you. Pivot footplates upward to FIGURE 2.9. 1. Continue to the front of the seat upholstery at the front and back edge and lift up. 4.
User Manual
Page 28
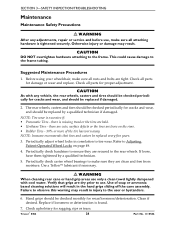
... or hand grip areas use only a clean towel lightly dampened with any adjustments, repair or service and before use . The rear wheels, casters and tires should be checked periodically for cracks and wear, and should be checked monthly for wear/looseness/deterioration. Hand grips should be replaced by a qualified technician. 5. SECTION 3-SAFETY INSPECTION/TROUBLESHOOTING Maintenance Maintenance Safety Precautions...
... or hand grip areas use only a clean towel lightly dampened with any adjustments, repair or service and before use . The rear wheels, casters and tires should be checked periodically for cracks and wear, and should be checked monthly for wear/looseness/deterioration. Hand grips should be replaced by a qualified technician. 5. SECTION 3-SAFETY INSPECTION/TROUBLESHOOTING Maintenance Maintenance Safety Precautions...

User Manual
Page 31
...the front rigging support and the footplate assembly. 7. Using a screwdriver to locked position. 10. FIGURE 4.4 Fixed Frame Part No. 1110546 31... Tracer® EX2 Rotate cam lock lever down to hold the threaded rivet in position, securely tighten the button head screw. Loosen, but do not remove the bolt and locknut that secure the lower footrest assembly to 32 in the upper front rigging support...-Place Fixed Frame NOTE: For this procedure for the other footrest, if necessary. Replace impact guards and/or calf strap, if necessary. SECTION 4-FRONT...
...the front rigging support and the footplate assembly. 7. Using a screwdriver to locked position. 10. FIGURE 4.4 Fixed Frame Part No. 1110546 31... Tracer® EX2 Rotate cam lock lever down to hold the threaded rivet in position, securely tighten the button head screw. Loosen, but do not remove the bolt and locknut that secure the lower footrest assembly to 32 in the upper front rigging support...-Place Fixed Frame NOTE: For this procedure for the other footrest, if necessary. Replace impact guards and/or calf strap, if necessary. SECTION 4-FRONT...

User Manual
Page 32
... due to the footrest. 2. To lower the elevating legrest, perform the following: A. The wheelchair user's leg MUST be supported by an assistant before pushing release lever to FIGURE 4.5. 1. Gently, lower user leg down and rest against the legrest. Secure one hand. Secure one side of Impact Guard Horizontal Support Horizontal Support Notch Impact Guard FIGURE 4.6 Installing Impact Guards...
... due to the footrest. 2. To lower the elevating legrest, perform the following: A. The wheelchair user's leg MUST be supported by an assistant before pushing release lever to FIGURE 4.5. 1. Gently, lower user leg down and rest against the legrest. Secure one hand. Secure one side of Impact Guard Horizontal Support Horizontal Support Notch Impact Guard FIGURE 4.6 Installing Impact Guards...

User Manual
Page 37
... Wheelchair Frame FIGURE 6.2 Replacing Seat Upholstery Part No. 1110546 37 Tracer® EX2 Remove the eight mounting screws and washers that secure the existing seat upholstery to FIGURE 6.1. 1. Remove the existing seat upholstery from the back canes. 3. Refer to the back canes. 2. otherwise injury or damage may occur. Install new seat upholstery by reversing STEPS 1-2. After ANY adjustments, repair...
... Wheelchair Frame FIGURE 6.2 Replacing Seat Upholstery Part No. 1110546 37 Tracer® EX2 Remove the eight mounting screws and washers that secure the existing seat upholstery to FIGURE 6.1. 1. Remove the existing seat upholstery from the back canes. 3. Refer to the back canes. 2. otherwise injury or damage may occur. Install new seat upholstery by reversing STEPS 1-2. After ANY adjustments, repair...
User Manual
Page 46
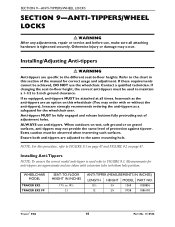
... may not provide the same level of the manual for the wheelchair user. Installing/Adjusting Anti-tippers ƽ WARNING Anti-tippers are an option on page 47. Inasmuch as the anti-tippers are specific to the different seat-to 19½ 21 ANTI-TIPPER (MEASUREMENTS IN INCHES) LENGTH HEIGHT MODEL PART NO. 13½ 3¼ 1360 1058836 12...
... may not provide the same level of the manual for the wheelchair user. Installing/Adjusting Anti-tippers ƽ WARNING Anti-tippers are an option on page 47. Inasmuch as the anti-tippers are specific to the different seat-to 19½ 21 ANTI-TIPPER (MEASUREMENTS IN INCHES) LENGTH HEIGHT MODEL PART NO. 13½ 3¼ 1360 1058836 12...

User Manual
Page 50
... necessary, replace the front casters and forks with swingaway footrests ONLY. Otherwise injury or damage may cause the wheelchair to -floor height the correct anti-tippers MUST be performed by a qualified technician. Changing Seat-to the stability of the wheelchair. Any change to one or any adjustments, repair or service and before use of anti-tipper model, as well...
... necessary, replace the front casters and forks with swingaway footrests ONLY. Otherwise injury or damage may cause the wheelchair to -floor height the correct anti-tippers MUST be performed by a qualified technician. Changing Seat-to the stability of the wheelchair. Any change to one or any adjustments, repair or service and before use of anti-tipper model, as well...

User Manual
Page 53
...Part No. 1110546 53 Tracer® EX2 Slide the clamp with the base attached over the end of the step tube of the wheelchair. 4. When loading the crutch/cane carrier, ensure items are securely placed into the base. CAUTION Base... should be securely fastened while carrying items. NEVER insert or remove items while wheelchair is towards the inside of Wheelchair Hemi Left Hex Screws Hemi Right FIGURE 11.1 Installing Amputee Bracket Installing Crutch and Cane Carrier ƽ WARNING Check base...base is moving. Align the strap with folding the wheelchair, the rear wheels...
...Part No. 1110546 53 Tracer® EX2 Slide the clamp with the base attached over the end of the step tube of the wheelchair. 4. When loading the crutch/cane carrier, ensure items are securely placed into the base. CAUTION Base... should be securely fastened while carrying items. NEVER insert or remove items while wheelchair is towards the inside of Wheelchair Hemi Left Hex Screws Hemi Right FIGURE 11.1 Installing Amputee Bracket Installing Crutch and Cane Carrier ƽ WARNING Check base...base is moving. Align the strap with folding the wheelchair, the rear wheels...

User Manual
Page 54
... the bottom back upholstery screw from the wheelchair. 2. Repeat STEPS 1-3 for the wheelchair user. Back Upholstery Screw Back Cane Back Upholstery Strap Positioning Strap Tracer® EX2 FIGURE 11.3 Installing the Seat Positioning Strap 54 Part No. 1110546 Strap Base Step Tube Clamp Locknut FIGURE 11.2 Installing Crutch and Cane Carrier Installing the Seat Positioning Strap ƽ WARNING ALWAYS wear...
... the bottom back upholstery screw from the wheelchair. 2. Repeat STEPS 1-3 for the wheelchair user. Back Upholstery Screw Back Cane Back Upholstery Strap Positioning Strap Tracer® EX2 FIGURE 11.3 Installing the Seat Positioning Strap 54 Part No. 1110546 Strap Base Step Tube Clamp Locknut FIGURE 11.2 Installing Crutch and Cane Carrier Installing the Seat Positioning Strap ƽ WARNING ALWAYS wear...

User Manual
Page 55
...'s name, address, the product model number, date of purchase, indicate nature of any labor or shipping charges incurred in replacement part installation or repair of the defect and, if the product is serialized, indicate the serial number. THIS WARRANTY SHALL BE EXTENDED TO...Invacare's sole obligation and your Invacare product. PRODUCTS DAMAGED BY REASON OF REPAIRS MADE TO ANY COMPONENT WITHOUT THE SPECIFIC CONSENT OF INVACARE, OR TO A PRODUCT DAMAGED BY CIRCUMSTANCES BEYOND INVACARE'S CONTROL, AND SUCH EVALUATION WILL BE SOLELY DETERMINED BY INVACARE. This warranty gives you specific...
...'s name, address, the product model number, date of purchase, indicate nature of any labor or shipping charges incurred in replacement part installation or repair of the defect and, if the product is serialized, indicate the serial number. THIS WARRANTY SHALL BE EXTENDED TO...Invacare's sole obligation and your Invacare product. PRODUCTS DAMAGED BY REASON OF REPAIRS MADE TO ANY COMPONENT WITHOUT THE SPECIFIC CONSENT OF INVACARE, OR TO A PRODUCT DAMAGED BY CIRCUMSTANCES BEYOND INVACARE'S CONTROL, AND SUCH EVALUATION WILL BE SOLELY DETERMINED BY INVACARE. This warranty gives you specific...


