
User Guide
Page 2
...Intel's own chassis are designed and tested to specifications and product descriptions at any other application in which the failure of the Intel product could create a situation where personal injury or death may occur. Intel, Intel Pentium, and Intel Xeon are not designed, intended or authorized for use of Intel...and environmental conditions. Copyright © 2010, Intel Corporation. No license, express or implied, by this document is granted by estoppel or otherwise, to any of others. All Rights Reserved ii Server System User Guide Disclaimer Information in this document....
...Intel's own chassis are designed and tested to specifications and product descriptions at any other application in which the failure of the Intel product could create a situation where personal injury or death may occur. Intel, Intel Pentium, and Intel Xeon are not designed, intended or authorized for use of Intel...and environmental conditions. Copyright © 2010, Intel Corporation. No license, express or implied, by this document is granted by estoppel or otherwise, to any of others. All Rights Reserved ii Server System User Guide Disclaimer Information in this document....

User Guide
Page 3
...Intel Server Boards and Server Chassis Safety Information on the Intel® Server Deployment Toolkit 2.0 CD and/or at http://support.intel.com/support/ motherboards/server/sb/cs-010770.htm. Vea Intel Server Boards and Server Chassis Safety Information en el Intel® Server Deployment Toolkit 2.0 CD y/o en http:// support.intel.com/support/motherboards/server...Read all caution and safety statements in diesem Dokument, bevor Sie eine der Anweisungen ausführen. Server System User Guide iii Consignes de sécurité Lisez attention toutes les consignes de sécurit&#...
...Intel Server Boards and Server Chassis Safety Information on the Intel® Server Deployment Toolkit 2.0 CD and/or at http://support.intel.com/support/ motherboards/server/sb/cs-010770.htm. Vea Intel Server Boards and Server Chassis Safety Information en el Intel® Server Deployment Toolkit 2.0 CD y/o en http:// support.intel.com/support/motherboards/server...Read all caution and safety statements in diesem Dokument, bevor Sie eine der Anweisungen ausführen. Server System User Guide iii Consignes de sécurité Lisez attention toutes les consignes de sécurit&#...

User Guide
Page 4
http://support.intel.com/support/motherboards/server/sb/CS-010770.htm 上的 Intel Server Boards and Server Chassis Safety Information(《Intel iv Server System User Guide
http://support.intel.com/support/motherboards/server/sb/CS-010770.htm 上的 Intel Server Boards and Server Chassis Safety Information(《Intel iv Server System User Guide

User Guide
Page 5
...intermittent problems with the function controlled by that you can result. Installing or removing jumpers: A jumper is sold. If your server when handling parts. Server System User Guide v Use of fine needle nosed pliers. After removing a board from its protective wrapper or from the wall ... tool you open the chassis, add, or remove any components. Gripping the wide sides can be present on /off: The power button DOES NOT turn off the server and disconnect the power cord, telecommunications systems, networks, and modems attached to ESD. System power on power, telephone...
...intermittent problems with the function controlled by that you can result. Installing or removing jumpers: A jumper is sold. If your server when handling parts. Server System User Guide v Use of fine needle nosed pliers. After removing a board from its protective wrapper or from the wall ... tool you open the chassis, add, or remove any components. Gripping the wide sides can be present on /off: The power button DOES NOT turn off the server and disconnect the power cord, telecommunications systems, networks, and modems attached to ESD. System power on power, telephone...

User Guide
Page 7
... step by -step instructions and diagrams for step-by step instructions on the server system. Chapter 2 provides instructions on using the Intel® Server System SR1530CL / SR1530HCL / SR1530HCLS and/or the Intel® Server System SR1530CLR / SR1530HCLR / SR1530HCLSR. This manual is available in the Intel® Server Board S5000VCL Technical Product Specification. Information about the specific BIOS settings and screens is...
... step by -step instructions and diagrams for step-by step instructions on the server system. Chapter 2 provides instructions on using the Intel® Server System SR1530CL / SR1530HCL / SR1530HCLS and/or the Intel® Server System SR1530CLR / SR1530HCLR / SR1530HCLSR. This manual is available in the Intel® Server Board S5000VCL Technical Product Specification. Information about the specific BIOS settings and screens is...
User Guide
Page 8
... attaching the bracket to the chassis - Two M1.5 screws for attaching the hard disk drives to the slimline optical drive - Intel® Server System Contents Your Intel® Server System SR1530CL / SR1530HCL / SR1530HCLS and/or the Intel® Server System SR1530CLR / SR1530HCLR / SR1530HCLSR ships with the following items: • One Intel® Server Board S5000VCL/S5000VCLR, installed in the server system • One 400-watt...
... attaching the bracket to the chassis - Two M1.5 screws for attaching the hard disk drives to the slimline optical drive - Intel® Server System Contents Your Intel® Server System SR1530CL / SR1530HCL / SR1530HCLS and/or the Intel® Server System SR1530CLR / SR1530HCLR / SR1530HCLSR ships with the following items: • One Intel® Server Board S5000VCL/S5000VCLR, installed in the server system • One 400-watt...

User Guide
Page 9
... can be used with this Document or Software Intel® Server Chassis SR1530 Technical Product Specification Found at: http://support.intel.com/support/motherboards/server/ S5000VCL/ Intel® Server Board S5000VCL Technical Product Specification Found at: http://support.intel.com/support/motherboards/server/ S5000VCL/ Intel® Server System SR1530CL / SR1530HCL / SR1530HCLS Quick Start User's Guide Intel® Server System SR1530CLR / SR1530HCLR / SR1530HCLSR Quick Start User's Guide...
... can be used with this Document or Software Intel® Server Chassis SR1530 Technical Product Specification Found at: http://support.intel.com/support/motherboards/server/ S5000VCL/ Intel® Server Board S5000VCL Technical Product Specification Found at: http://support.intel.com/support/motherboards/server/ S5000VCL/ Intel® Server System SR1530CL / SR1530HCL / SR1530HCLS Quick Start User's Guide Intel® Server System SR1530CLR / SR1530HCLR / SR1530HCLSR Quick Start User's Guide...

User Guide
Page 11
... importantes iii Warnings ...v Preface ...vii About this Manual ...vii Manual Organization ...vii Product Contents ...vii Intel® Server System Contents viii Server System References ix Chapter 1: Server System Features 1 Chassis Component Identification 4 Front Control Panel (SR1530CL/SR1530CLR 4 Front Control Panel (SR1530HCL/SR1530HCLS and SR1530HCLR/SR1530HCLSR) 5 System Rear ...6 Peripheral Devices ...7 Internal Components 10 Configuration Jumpers ...13 RAID Support ...14 Rack-Mounted...
... importantes iii Warnings ...v Preface ...vii About this Manual ...vii Manual Organization ...vii Product Contents ...vii Intel® Server System Contents viii Server System References ix Chapter 1: Server System Features 1 Chassis Component Identification 4 Front Control Panel (SR1530CL/SR1530CLR 4 Front Control Panel (SR1530HCL/SR1530HCLS and SR1530HCLR/SR1530HCLSR) 5 System Rear ...6 Peripheral Devices ...7 Internal Components 10 Configuration Jumpers ...13 RAID Support ...14 Rack-Mounted...
User Guide
Page 19
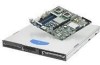
...) 8 Figure 8. Installing the Processor Air Duct (SR1530HCL/SR1530HCLS and SR1530HCLR/ SR1530HCLSR)...34 Figure 28. Removing the Shipping Cover 39 Figure 32. Intel® Server System SR1530CL/SR1530CLR 1 Figure 2. Front Controls and LEDs (SR1530CL/SR1530CLR 4 Figure 4. Chassis Components (SR1530CL/SR1530CLR 10 Figure 9. Removing the Front Bezel (SR1530HCL/SR1530HCLS and SR1530HCLR/ SR1530HCLSR)...27 Figure 18. Installing the Processor 39...
...) 8 Figure 8. Installing the Processor Air Duct (SR1530HCL/SR1530HCLS and SR1530HCLR/ SR1530HCLSR)...34 Figure 28. Removing the Shipping Cover 39 Figure 32. Intel® Server System SR1530CL/SR1530CLR 1 Figure 2. Front Controls and LEDs (SR1530CL/SR1530CLR 4 Figure 4. Chassis Components (SR1530CL/SR1530CLR 10 Figure 9. Removing the Front Bezel (SR1530HCL/SR1530HCLS and SR1530HCLR/ SR1530HCLSR)...27 Figure 18. Installing the Processor 39...

User Guide
Page 26
... are near the system, you identify the components of your server system. Front Control Panel (SR1530CL/SR1530CLR) The front control panel of the chassis cover to assist in identifying components. System Power LED E. Chassis Component Identification This section helps you can also use the Quick Reference Label provided on the inside of the Intel® Server System SR1530CL/SR1530CLR includes the...
... are near the system, you identify the components of your server system. Front Control Panel (SR1530CL/SR1530CLR) The front control panel of the chassis cover to assist in identifying components. System Power LED E. Chassis Component Identification This section helps you can also use the Quick Reference Label provided on the inside of the Intel® Server System SR1530CL/SR1530CLR includes the...

User Guide
Page 32
PCI Cooling Fan C. Processor Air Duct D. Processor Sockets (two) H. System Blowers (two) I A E F G H AF001185 A. Hard Drive Brackets (two) J. Internal Components D C B A K J I . Rack Handles (two) B. PCI Add-in Card Bracket E. System Memory DIMM Sockets F. Control Panel K. Slimline Optical Drive Bay Figure 8. Chassis Components (SR1530CL/SR1530CLR) 10 Server System User Guide Power Supply G.
PCI Cooling Fan C. Processor Air Duct D. Processor Sockets (two) H. System Blowers (two) I A E F G H AF001185 A. Hard Drive Brackets (two) J. Internal Components D C B A K J I . Rack Handles (two) B. PCI Add-in Card Bracket E. System Memory DIMM Sockets F. Control Panel K. Slimline Optical Drive Bay Figure 8. Chassis Components (SR1530CL/SR1530CLR) 10 Server System User Guide Power Supply G.

User Guide
Page 33
Server Board H. Hard Disk Drives (3) Figure 9. PCI Add-in Card Bracket G. Control Panel K. F B A E D C K J I . PCI Cooling Baffle D. System Blowers (2) E. Power Supply I A G H AF001612 A. Chassis Components (SR1530HCL/SR1530HCLS and SR1530HCLR/SR1530HCLSR) Server System User Guide 11 Control Panel Board J. Rack Handles (two) B. Processor Air Duct F. Slimline Optical Drive Bay C.
Server Board H. Hard Disk Drives (3) Figure 9. PCI Add-in Card Bracket G. Control Panel K. F B A E D C K J I . PCI Cooling Baffle D. System Blowers (2) E. Power Supply I A G H AF001612 A. Chassis Components (SR1530HCL/SR1530HCLS and SR1530HCLR/SR1530HCLSR) Server System User Guide 11 Control Panel Board J. Rack Handles (two) B. Processor Air Duct F. Slimline Optical Drive Bay C.

User Guide
Page 36
.... Rack-Mounted Systems The Intel® Server System SR1530CL / SR1530HCL / SR1530HCLS and the Intel® Server System SR1530CLR / SR1530HCLR / SR1530HCLSR can be set to either a 2-post or 4-post cabinet: AXXBRACKETS • Basic slide rail kit designed to enable or disable "AHCI Mode" or "Configure SATA as RAID". When the enhanced mode is required for installing your chassis into a rack...
.... Rack-Mounted Systems The Intel® Server System SR1530CL / SR1530HCL / SR1530HCLS and the Intel® Server System SR1530CLR / SR1530HCLR / SR1530HCLSR can be set to either a 2-post or 4-post cabinet: AXXBRACKETS • Basic slide rail kit designed to enable or disable "AHCI Mode" or "Configure SATA as RAID". When the enhanced mode is required for installing your chassis into a rack...

User Guide
Page 43
... Figure 13. Close the server chassis. 9. Open the server chassis. 3. PASSWORD CLR J1C4 3 1-2: Normal Operation (Default) 2-3: CLEAR PASSWORD 3 Figure 13. Power up the server. Reconnect the AC power and power up the system. 6. Reconnect the AC power. 5. Power down the system and disconnect the AC power. 2. Server System User Guide 21 Power down the system and disconnect the AC power...
... Figure 13. Close the server chassis. 9. Open the server chassis. 3. PASSWORD CLR J1C4 3 1-2: Normal Operation (Default) 2-3: CLEAR PASSWORD 3 Figure 13. Power up the server. Reconnect the AC power and power up the system. 6. Reconnect the AC power. 5. Power down the system and disconnect the AC power. 2. Server System User Guide 21 Power down the system and disconnect the AC power...

User Guide
Page 44
... 8. CMOS CLR J1C2 3 1-2: Normal Operation (Default) 2-3: CLEAR CMOS 3 Figure 14. Power up the system. 22 Server System User Guide Return the jumper to reset the configuration RAM. 1. Clear CMOS Jumper AF000658 4. Move the jumper from the Normal Operation position, covering pins 1 and 2... pins 2 and 3. Power down and disconnect the AC power. 7. Open the server. 3. Reconnect the AC power 5. When the system begins beeping, power it down the system and disconnect the AC power. 2. Reconnect the AC power and power up the system. 6. Close the server chassis. 9.
... 8. CMOS CLR J1C2 3 1-2: Normal Operation (Default) 2-3: CLEAR CMOS 3 Figure 14. Power up the system. 22 Server System User Guide Return the jumper to reset the configuration RAM. 1. Clear CMOS Jumper AF000658 4. Move the jumper from the Normal Operation position, covering pins 1 and 2... pins 2 and 3. Power down and disconnect the AC power. 7. Open the server. 3. Reconnect the AC power 5. When the system begins beeping, power it down the system and disconnect the AC power. 2. Reconnect the AC power and power up the system. 6. Close the server chassis. 9.

User Guide
Page 45
Close the server chassis. 9. When the system begins beeping, power it down the system and disconnect the AC power. 2. Server System User Guide 23 Power up the system. Open the server. 3. Move the jumper from the Disabled position, covering pins 1 and 2 to the Disabled location, covering pins 1 and 2. 8. Reconnect the AC power 5. Force Update J3A1 3 1-2: Disabled (...
Close the server chassis. 9. When the system begins beeping, power it down the system and disconnect the AC power. 2. Server System User Guide 23 Power up the system. Open the server. 3. Move the jumper from the Disabled position, covering pins 1 and 2 to the Disabled location, covering pins 1 and 2. 8. Reconnect the AC power 5. Force Update J3A1 3 1-2: Disabled (...

User Guide
Page 50
None of the chassis (see letter "B"). Slide the cover back until it .. Turn off all peripheral devices and the AC power cable. Note: A nonskid surface or a stop behind the server system may be operated with the server system cover in the following figure). Turn off the server. 3. Disconnect the AC power cord. 4. (SR1530CL/SR1530CLR) Remove the two screws...
None of the chassis (see letter "B"). Slide the cover back until it .. Turn off all peripheral devices and the AC power cable. Note: A nonskid surface or a stop behind the server system may be operated with the server system cover in the following figure). Turn off the server. 3. Disconnect the AC power cord. 4. (SR1530CL/SR1530CLR) Remove the two screws...

User Guide
Page 52
... Install the two screws at the front of the server. Push rearward on page iii. 2. (SR1530CL/SR1530CLR) Place the cover over the server system so that the side edges of the cover sit just inside the server system sidewalls. Slide the cover forward (see letter "A" ...server (see letter "B"). B A AF001615 Figure 21. Removing the Server System Cover (SR1530HCL/SR1530HCLS and SR1530HCLR/SR1530HCLSR) Installing the Server System Cover 1. Tighten the screw at the beginning of this book. 5. (SR1530HCL/SR1530HCLS and SR1530HCLR/SR1530HCLSR) Remove the four screws at the front of the chassis ...
... Install the two screws at the front of the server. Push rearward on page iii. 2. (SR1530CL/SR1530CLR) Place the cover over the server system so that the side edges of the cover sit just inside the server system sidewalls. Slide the cover forward (see letter "A" ...server (see letter "B"). B A AF001615 Figure 21. Removing the Server System Cover (SR1530HCL/SR1530HCLS and SR1530HCLR/SR1530HCLSR) Installing the Server System Cover 1. Tighten the screw at the beginning of this book. 5. (SR1530HCL/SR1530HCLS and SR1530HCLR/SR1530HCLSR) Remove the four screws at the front of the chassis ...

User Guide
Page 59
... the DIMM sockets. Holding the DIMM by doing the following: (1) Touch the metal chassis before touching the processor or server board. Server System User Guide 37 Installing the Processor To install a processor, follow these instructions: 1. Install the server system cover. Power down the server and unplug all peripheral devices and the AC power cable. 3. See "Safety Information...
... the DIMM sockets. Holding the DIMM by doing the following: (1) Touch the metal chassis before touching the processor or server board. Server System User Guide 37 Installing the Processor To install a processor, follow these instructions: 1. Install the server system cover. Power down the server and unplug all peripheral devices and the AC power cable. 3. See "Safety Information...

User Guide
Page 64
...the safety and ESD precautions at the left side of the chassis. For instructions, see "Removing the Server System Cover" on page ix" for instructions first. The HDD0 drive bay is at the right side of the chassis, underneath the optional CD-ROM drive. The HDD1 drive bay ...a replacement processor, see "Removing a Hard Disk Drive (SR1530CL/ SR1530CLR)" on page 46 for an Internet link to be installed. Locate the drive position you want to the system, turn off all peripheral devices connected to use. 42 Server System User Guide Before removing or replacing a hard drive, you ...
...the safety and ESD precautions at the left side of the chassis. For instructions, see "Removing the Server System Cover" on page ix" for instructions first. The HDD0 drive bay is at the right side of the chassis, underneath the optional CD-ROM drive. The HDD1 drive bay ...a replacement processor, see "Removing a Hard Disk Drive (SR1530CL/ SR1530CLR)" on page 46 for an Internet link to be installed. Locate the drive position you want to the system, turn off all peripheral devices connected to use. 42 Server System User Guide Before removing or replacing a hard drive, you ...