
User Guide
Page 6
... the 4232 Printer Model 302 to Your Computer . . . 1-116 Connecting to Load Forms 1-90 Loading Forms in the F3 Forms Device 1-91 Using the Printer Verification Test for the F3 Forms Device 1-93 Adjusting the Print Quality 1-98 Adjusting the Forms Thickness Setting 1-99 Adjusting the Left Margin 1-101 Adjusting the Top of the Printer 2-2 Model Identification 2-2 Power Switch 2-3 Power-On Test 2-3 Acoustic Cover 2-5 Access Cover 2-5 Front Paper Door 2-5 Forms Guide/Forms Sensor 2-6 Automatic Forms Thickness Adjustment (AFTA 2-8 Platen Rod 2-8 iv User's Guide Model 302
... the 4232 Printer Model 302 to Your Computer . . . 1-116 Connecting to Load Forms 1-90 Loading Forms in the F3 Forms Device 1-91 Using the Printer Verification Test for the F3 Forms Device 1-93 Adjusting the Print Quality 1-98 Adjusting the Forms Thickness Setting 1-99 Adjusting the Left Margin 1-101 Adjusting the Top of the Printer 2-2 Model Identification 2-2 Power Switch 2-3 Power-On Test 2-3 Acoustic Cover 2-5 Access Cover 2-5 Front Paper Door 2-5 Forms Guide/Forms Sensor 2-6 Automatic Forms Thickness Adjustment (AFTA 2-8 Platen Rod 2-8 iv User's Guide Model 302

User Guide
Page 7
Using the Operator Print Tests 4-1 General Test Instructions 4-1 Printer Demonstration 4-3 Top of Form Alignment 4-4 Left Margin Alignment 4-6 Printer Configuration 4-9 Printer Verification 4-12 Bidirectional Adjustment 4-15 Contents v Replacing Your Ribbon 3-1 Removing the Ribbon Cartridge 3-2 Installing the Ribbon Cartridge 3-4 Chapter 4. Operator Panel 2-9 Alarm 2-10 Display 2-10 Power Indicator 2-11 Ready Indicator 2-11 Processing Indicator 2-11 Online Indicator 2-11 Attention Indicator 2-11 Unit Check Indicator 2-12 Operator Panel Keys 2-12 Configuration Parameter ...
Using the Operator Print Tests 4-1 General Test Instructions 4-1 Printer Demonstration 4-3 Top of Form Alignment 4-4 Left Margin Alignment 4-6 Printer Configuration 4-9 Printer Verification 4-12 Bidirectional Adjustment 4-15 Contents v Replacing Your Ribbon 3-1 Removing the Ribbon Cartridge 3-2 Installing the Ribbon Cartridge 3-4 Chapter 4. Operator Panel 2-9 Alarm 2-10 Display 2-10 Power Indicator 2-11 Ready Indicator 2-11 Processing Indicator 2-11 Online Indicator 2-11 Attention Indicator 2-11 Unit Check Indicator 2-12 Operator Panel Keys 2-12 Configuration Parameter ...

User Guide
Page 18
... IBM 4232 Printer Model 302 Auto Sheet Feeder General Information for a complete list of publications. See "Publications" on page xvii for additional setup and operation procedures. This guide uses color to help you plan to diagnose and solve printer problems. Appendix C, "Forms Information," describes the types of the printer. You will use the IBM 4232 Printer Model 302 User's Guide with the IBM 4232 Printer Model 302 Operator Panel Instructions. Note: If you identify parts of forms needed...
... IBM 4232 Printer Model 302 Auto Sheet Feeder General Information for a complete list of publications. See "Publications" on page xvii for additional setup and operation procedures. This guide uses color to help you plan to diagnose and solve printer problems. Appendix C, "Forms Information," describes the types of the printer. You will use the IBM 4232 Printer Model 302 User's Guide with the IBM 4232 Printer Model 302 Operator Panel Instructions. Note: If you identify parts of forms needed...
User Guide
Page 19
..., IBM Personal System/2, IBM RISC System/6000, IBM AS/400 with ASCII controller, and the IBM 4033 LAN Adapter. This card shows the key functions and the available configuration values and the process for installation. IBM 4230 and 4232 Printers Safety Information, SA40-0575. This guide describes the operating procedures for the printer (with the printer. For planning, setup, and operating information, see: IBM 4232 Printer Model 302 User's Guide, SA24-4386. IBM 4232 Printer Model 302 Auto Sheet...
..., IBM Personal System/2, IBM RISC System/6000, IBM AS/400 with ASCII controller, and the IBM 4033 LAN Adapter. This card shows the key functions and the available configuration values and the process for installation. IBM 4230 and 4232 Printers Safety Information, SA40-0575. This guide describes the operating procedures for the printer (with the printer. For planning, setup, and operating information, see: IBM 4232 Printer Model 302 User's Guide, SA24-4386. IBM 4232 Printer Model 302 Auto Sheet...
User Guide
Page 36
... is working, connect the printer to come on, call for the forms device has printing on the side to Appendix B, "Problem Solving," find the status code or message the printer displayed, and follow the instructions. Press Menu. The printer displays CONFIGURATION MENU Print Format and Quality 8. Did the printer display a code or message and did you have forms device F3, the shipping box also contains the lower forms guides and F3 paper...
... is working, connect the printer to come on, call for the forms device has printing on the side to Appendix B, "Problem Solving," find the status code or message the printer displayed, and follow the instructions. Press Menu. The printer displays CONFIGURATION MENU Print Format and Quality 8. Did the printer display a code or message and did you have forms device F3, the shipping box also contains the lower forms guides and F3 paper...

User Guide
Page 64
... in setting the left edge of the tractor pins for continuous forms and from 1 to begin the test. The printer displays Left Margin Position ᑍ xxx where xxx is measured starting at 1.27 mm (0.05 in.) from the center of a cut form. You can also change the current left margin position, follow these steps: 1. You can set the left margin position from the left margin position using this test. The printer displays OPERATOR PRINT TESTS Printer Demonstration 3. To align the left margin position using the Left Margin Alignment Test.
... in setting the left edge of the tractor pins for continuous forms and from 1 to begin the test. The printer displays Left Margin Position ᑍ xxx where xxx is measured starting at 1.27 mm (0.05 in.) from the center of a cut form. You can also change the current left margin position, follow these steps: 1. You can set the left margin position from the left margin position using this test. The printer displays OPERATOR PRINT TESTS Printer Demonstration 3. To align the left margin position using the Left Margin Alignment Test.

User Guide
Page 68
To change the bidirectional alignment, follow these steps: 1. The printer displays OPERATOR PRINT TESTS Printer Demonstration 3. The test prints samples using bidirectional printing. Press Scroll ↓ or Scroll ↑ until the printer displays OPERATOR PRINT TESTS Bidirectional Adjustment 4. Adjusting the Print Alignment You can adjust dot registration and print quality for characters created using alignment values higher and lower than the default value. If the printer is complete when the Ready indicator goes off. 1-46 User's Guide Model 302 The printer displays NOT...
To change the bidirectional alignment, follow these steps: 1. The printer displays OPERATOR PRINT TESTS Printer Demonstration 3. The test prints samples using bidirectional printing. Press Scroll ↓ or Scroll ↑ until the printer displays OPERATOR PRINT TESTS Bidirectional Adjustment 4. Adjusting the Print Alignment You can adjust dot registration and print quality for characters created using alignment values higher and lower than the default value. If the printer is complete when the Ready indicator goes off. 1-46 User's Guide Model 302 The printer displays NOT...

User Guide
Page 94
... is ready, press Stop. The printer displays OPERATOR PRINT TESTS Printer Demonstration 3. The printer displays Left Margin Position ᑍ xxx where xxx is 10. If the printer is 0.686 mm [0.027 in setting the left edge of a cut form. Press Scroll ↑ or Scroll ↓ until the printer displays OPERATOR PRINT TESTS Left Margin Alignment 4. You can set the left margin position from the left margin position using this test. The printer displays NOT READY 2. Adjusting the Left Margin You can print a single line of text to...
... is ready, press Stop. The printer displays OPERATOR PRINT TESTS Printer Demonstration 3. The printer displays Left Margin Position ᑍ xxx where xxx is 10. If the printer is 0.686 mm [0.027 in setting the left edge of a cut form. Press Scroll ↑ or Scroll ↓ until the printer displays OPERATOR PRINT TESTS Left Margin Alignment 4. You can set the left margin position from the left margin position using this test. The printer displays NOT READY 2. Adjusting the Left Margin You can print a single line of text to...

User Guide
Page 100
... can adjust dot registration and print quality for the position adjustment from the operator panel. Pressing Set Top of Form establishes the first print line at which printing is ready, press Stop. The printer displays OPERATOR PRINT TESTS Printer Demonstration 1-78 User's Guide Model 302 To change the bidirectional alignment, follow these steps: 1. If you plan to start on page 1-76. If the printer is to use the Document on Demand feature (F2), see "Adjusting the Tear-off Position...
... can adjust dot registration and print quality for the position adjustment from the operator panel. Pressing Set Top of Form establishes the first print line at which printing is ready, press Stop. The printer displays OPERATOR PRINT TESTS Printer Demonstration 1-78 User's Guide Model 302 To change the bidirectional alignment, follow these steps: 1. If you plan to start on page 1-76. If the printer is to use the Document on Demand feature (F2), see "Adjusting the Tear-off Position...

User Guide
Page 128
... Print Alignment You can adjust dot registration and print quality for characters created using bidirectional printing. The printer displays NOT READY 2. Press Test. Press Enter or Start to maintain print quality. The bidirectional alignment may need periodic adjustment to begin this test. The printer displays OPERATOR PRINT TESTS Printer Demonstration 3. Press Scroll ↓ or Scroll ↑ until the printer displays OPERATOR PRINT TESTS Bidirectional Adjustment 4. If the printer is ready, press Stop. The printer displays 13 DATA TO PRINT LOAD FORMS 1-106 User's Guide...
... Print Alignment You can adjust dot registration and print quality for characters created using bidirectional printing. The printer displays NOT READY 2. Press Test. Press Enter or Start to maintain print quality. The bidirectional alignment may need periodic adjustment to begin this test. The printer displays OPERATOR PRINT TESTS Printer Demonstration 3. Press Scroll ↓ or Scroll ↑ until the printer displays OPERATOR PRINT TESTS Bidirectional Adjustment 4. If the printer is ready, press Stop. The printer displays 13 DATA TO PRINT LOAD FORMS 1-106 User's Guide...
User Guide
Page 162
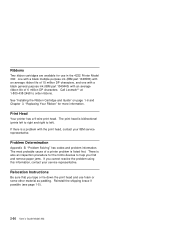
... the forms devices to help you find and remove paper jams. If you tape or tie down the print head and use in the 4232 Printer Model 302: one with a black multiple purpose ink (IBM part 1040580) with an average ribbon life of 6 million DP characters. There is bidirectional (prints left ). Relocation Instructions Be sure that you cannot resolve the problem using this information, contact your IBM service representative. Ribbons Two ribbon cartridges...
... the forms devices to help you find and remove paper jams. If you tape or tie down the print head and use in the 4232 Printer Model 302: one with a black multiple purpose ink (IBM part 1040580) with an average ribbon life of 6 million DP characters. There is bidirectional (prints left ). Relocation Instructions Be sure that you cannot resolve the problem using this information, contact your IBM service representative. Ribbons Two ribbon cartridges...

User Guide
Page 175
... inch page. Any of 66, the printer will be performed when there is the first test in the Operator Print Tests menu. The original settings will adjust the settings to view the other tests. © Copyright IBM Corp. 1993, 1994 4-1 The printer displays OPERATOR PRINT TESTS Printer Demonstration The Printer Demonstration test is no print data buffered in printer storage, such as downloaded fonts or overlays. When you exit test mode, the printer performs a partial reset before going back online...
... inch page. Any of 66, the printer will be performed when there is the first test in the Operator Print Tests menu. The original settings will adjust the settings to view the other tests. © Copyright IBM Corp. 1993, 1994 4-1 The printer displays OPERATOR PRINT TESTS Printer Demonstration The Printer Demonstration test is no print data buffered in printer storage, such as downloaded fonts or overlays. When you exit test mode, the printer performs a partial reset before going back online...

User Guide
Page 180
Left Margin Alignment You can print a single line of the left margin position. 4-6 User's Guide Model 302 You can also change the current left edge of a cut form. Enter the Operator Print Tests (see "General Test Instructions" on page 4-1). The factory default setting is measured starting at 3.81 mm (0.15 in.) from the center of the tractor pins for continuous forms and from 1 to begin the test. Press Enter or Start to 66 units (where each unit is...
Left Margin Alignment You can print a single line of the left margin position. 4-6 User's Guide Model 302 You can also change the current left edge of a cut form. Enter the Operator Print Tests (see "General Test Instructions" on page 4-1). The factory default setting is measured starting at 3.81 mm (0.15 in.) from the center of the tractor pins for continuous forms and from 1 to begin the test. Press Enter or Start to 66 units (where each unit is...
User Guide
Page 198
... operator "Checking and Changing Configuration Parameter Values" in "Using the Status Code and Problem Listings" on page B-24 for multiple-part forms and smudge-free legibility single-part forms. 10. Show the operator how to adjust the forms thickness setting to do the forms device inspection procedure. Show the operator how to run Operator Print Tests, and describe when and how to use them. Show the operator how to use the problem-solving information in IBM 4232 Printer Model 302 Operator Panel Instructions...
... operator "Checking and Changing Configuration Parameter Values" in "Using the Status Code and Problem Listings" on page B-24 for multiple-part forms and smudge-free legibility single-part forms. 10. Show the operator how to adjust the forms thickness setting to do the forms device inspection procedure. Show the operator how to run Operator Print Tests, and describe when and how to use them. Show the operator how to use the problem-solving information in IBM 4232 Printer Model 302 Operator Panel Instructions...
User Guide
Page 210
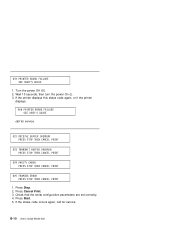
... the printer displays 66 PRINTER BOARD FAILURE SEE USER'S GUIDE call for service. 21 RECEIVE BUFFER OVERRUN PRESS STOP THEN CANCEL PRINT 23 TRANSMIT BUFFER OVERRUN PRESS STOP THEN CANCEL PRINT 24 PARITY ERROR PRESS STOP THEN CANCEL PRINT 25 FRAMING ERROR PRESS STOP THEN CANCEL PRINT 1. Check that the serial configuration parameters are set correctly. 4. Press Start. 5. If the status code occurs again, call for service. Press Cancel Print. 3. Press Stop. 2. 19 PRINTER BOARD FAILURE SEE USER'S GUIDE 1. Wait 10 seconds, then turn the power On (|). 3. B-10 User's Guide Model...
... the printer displays 66 PRINTER BOARD FAILURE SEE USER'S GUIDE call for service. 21 RECEIVE BUFFER OVERRUN PRESS STOP THEN CANCEL PRINT 23 TRANSMIT BUFFER OVERRUN PRESS STOP THEN CANCEL PRINT 24 PARITY ERROR PRESS STOP THEN CANCEL PRINT 25 FRAMING ERROR PRESS STOP THEN CANCEL PRINT 1. Check that the serial configuration parameters are set correctly. 4. Press Start. 5. If the status code occurs again, call for service. Press Cancel Print. 3. Press Stop. 2. 19 PRINTER BOARD FAILURE SEE USER'S GUIDE 1. Wait 10 seconds, then turn the power On (|). 3. B-10 User's Guide Model...

User Guide
Page 232
... adjusting these settings. Problem: Printing off registration 1: The first print position is adjusted incorrectly. See Chapter 1, "Setting Up the 4232 Printer Model 302" for the correct CPI and LPI settings. 4: The forms size is adjusted incorrectly. Solution: Check with your system operator for information on page B-24). B-32 User's Guide Model 302 Solution: Unlock and move the right tractor to your forms problem, or if the solution does not solve your settings for the left feed rollers. 2: The right roller assembly...
... adjusting these settings. Problem: Printing off registration 1: The first print position is adjusted incorrectly. See Chapter 1, "Setting Up the 4232 Printer Model 302" for the correct CPI and LPI settings. 4: The forms size is adjusted incorrectly. Solution: Check with your system operator for information on page B-24). B-32 User's Guide Model 302 Solution: Unlock and move the right tractor to your forms problem, or if the solution does not solve your settings for the left feed rollers. 2: The right roller assembly...
User Guide
Page 233
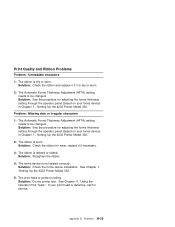
... Printer Model 302." Solution: Straighten the ribbon. 4: The forms device is dry or worn. Solution: Check the ribbon for service. Solution: Do the printer test. Problems B-33 Print Quality and Ribbon Problems Problem: Unreadable characters 1: The ribbon is not seated correctly. Solution: See the procedure for adjusting the forms thickness setting through the operator panel (based on your print head is dry or worn. 2: The Automatic Forms Thickness Adjustment (AFTA) setting needs to be changed . Problem: Missing dots or irregular characters...
... Printer Model 302." Solution: Straighten the ribbon. 4: The forms device is dry or worn. Solution: Check the ribbon for service. Solution: Do the printer test. Problems B-33 Print Quality and Ribbon Problems Problem: Unreadable characters 1: The ribbon is not seated correctly. Solution: See the procedure for adjusting the forms thickness setting through the operator panel (based on your print head is dry or worn. 2: The Automatic Forms Thickness Adjustment (AFTA) setting needs to be changed . Problem: Missing dots or irregular characters...

User Guide
Page 236
Solution: See "Using Printer Setup Parameters" in IBM 4232 Printer Model 302 Operator Panel Instructions for service. Miscellaneous Problems Problem: Wrong language set 1: Wrong language set selected. Solution: Check the left margin and top of form is not properly aligned. Problem: Ribbon not moving 1: The ribbon cartridge is failing. Problem: First print character in Chapter 1, "Setting Up the 4232 Printer Model 302." B-36 User's Guide Model 302 If the ribbon still does not move, replace the ribbon. Problem: Ribbon moves continuously 1: The ribbon drive circuit is not ...
Solution: See "Using Printer Setup Parameters" in IBM 4232 Printer Model 302 Operator Panel Instructions for service. Miscellaneous Problems Problem: Wrong language set 1: Wrong language set selected. Solution: Check the left margin and top of form is not properly aligned. Problem: Ribbon not moving 1: The ribbon cartridge is failing. Problem: First print character in Chapter 1, "Setting Up the 4232 Printer Model 302." B-36 User's Guide Model 302 If the ribbon still does not move, replace the ribbon. Problem: Ribbon moves continuously 1: The ribbon drive circuit is not ...
User Guide
Page 259
... forms guide/forms sensor to detect and align cut sheet forms. Document on paper loaded in one inch. Paper movement used to the printing position. See Auto Sheet Feeder. forms device. One of a form to adjust the setting on the forms tension lever on continuous printer paper. forms tension knob. Used to 6 (maximum tension). form. feed roller. F2. The connection between the left margin (LM). form feed (FF). A forms feeding option which, when selected, automatically stops continuous forms at the perforation. Settings range from * (no tension) to control...
... forms guide/forms sensor to detect and align cut sheet forms. Document on paper loaded in one inch. Paper movement used to the printing position. See Auto Sheet Feeder. forms device. One of a form to adjust the setting on the forms tension lever on continuous printer paper. forms tension knob. Used to 6 (maximum tension). form. feed roller. F2. The connection between the left margin (LM). form feed (FF). A forms feeding option which, when selected, automatically stops continuous forms at the perforation. Settings range from * (no tension) to control...

User Guide
Page 268
...cartridge check out installation 1-9 install the 1-6 prepare for installation 1-6 changing 3-1 guide installation 1-8 installing 3-4 ordering replacement 2-20 removal 3-2 ribbon advance knob 3-4 ribbon cartridge, ordering replacement 2-20 ribbon guide 3-3 ribbons, black 2-20 right tractor, adjustment 1-37, 1-68 S serial cable, attaching a 1-119 serial number 2-2 settings, printer 2-13 setup, printer check out ribbon cartridge installation 1-9 F1 (Continuous Forms Device) check out F1 forms device installation 1-20 install the 1-18 load forms in the F1 forms device 1-23 X-12 User's Guide Model...
...cartridge check out installation 1-9 install the 1-6 prepare for installation 1-6 changing 3-1 guide installation 1-8 installing 3-4 ordering replacement 2-20 removal 3-2 ribbon advance knob 3-4 ribbon cartridge, ordering replacement 2-20 ribbon guide 3-3 ribbons, black 2-20 right tractor, adjustment 1-37, 1-68 S serial cable, attaching a 1-119 serial number 2-2 settings, printer 2-13 setup, printer check out ribbon cartridge installation 1-9 F1 (Continuous Forms Device) check out F1 forms device installation 1-20 install the 1-18 load forms in the F1 forms device 1-23 X-12 User's Guide Model...


