

Owners Manual
Page 4
... USA. These instructions must be downloaded from the Husqvarna web site at www.usa.husqvarna.com. If you for choosing Husqvarna, a world leader in this manual. In the event that your Husqvarna vehicle needs repairs or service, we recommend that you will have chosen the finest utility vehicle on the market. Translated owner's manuals can also provide technical advice, parts, and service manuals. FOREWORD Thank...
... USA. These instructions must be downloaded from the Husqvarna web site at www.usa.husqvarna.com. If you for choosing Husqvarna, a world leader in this manual. In the event that your Husqvarna vehicle needs repairs or service, we recommend that you will have chosen the finest utility vehicle on the market. Translated owner's manuals can also provide technical advice, parts, and service manuals. FOREWORD Thank...

Owners Manual
Page 11
... below front 8 102889201 seats) 3 102224001 Decal, Rotating Parts Warning (on frame) 9 102961201 Decal, ROPS Warning (on ROPS) Decal, Bed Latch Warning (on vehicle body, below 4 102459301 10 103210501 Decal, Vehicle Loading Instructions (on cargo bed) bed latch) 5 102459401 Decal, Young Driver Warning (on ROPS) 11 Serial Number 6 102884301 Decal, Operating Instructions (on instrument panel) HUV 4421 Owner's Manual Page 9
... below front 8 102889201 seats) 3 102224001 Decal, Rotating Parts Warning (on frame) 9 102961201 Decal, ROPS Warning (on ROPS) Decal, Bed Latch Warning (on vehicle body, below 4 102459301 10 103210501 Decal, Vehicle Loading Instructions (on cargo bed) bed latch) 5 102459401 Decal, Young Driver Warning (on ROPS) 11 Serial Number 6 102884301 Decal, Operating Instructions (on instrument panel) HUV 4421 Owner's Manual Page 9

Owners Manual
Page 13
... safety guidelines for your location. Keep sparks and flames away from the vehicle and service area. Flammable! DANGER • Battery - Ventilate when charging or operating vehicle in this manual and on the vehicle become damaged, have been removed, or cannot be heeded whenever the vehicle is important to drive or service the vehicle. HUV 4421 Owner's Manual Page 11 Contact your...
... safety guidelines for your location. Keep sparks and flames away from the vehicle and service area. Flammable! DANGER • Battery - Ventilate when charging or operating vehicle in this manual and on the vehicle become damaged, have been removed, or cannot be heeded whenever the vehicle is important to drive or service the vehicle. HUV 4421 Owner's Manual Page 11 Contact your...
Owners Manual
Page 14
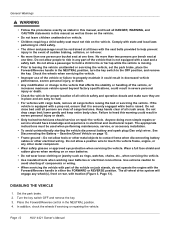
... driver and passenger must be used when performing maintenance, service, or accessory installation. • To avoid unintentionally starting the vehicle disconnect battery and spark plug (Gas only) wires. Failure to heed this manual as well as those on the vehicle. • Do not leave children unattended on vehicle. • Children requiring a child safety seat must be restrained at all times with the seat belts...
... driver and passenger must be used when performing maintenance, service, or accessory installation. • To avoid unintentionally starting the vehicle disconnect battery and spark plug (Gas only) wires. Failure to heed this manual as well as those on the vehicle. • Do not leave children unattended on vehicle. • Children requiring a child safety seat must be restrained at all times with the seat belts...

Owners Manual
Page 16
...: Have the vehicle serial number available when ordering parts or making inquiries. This number may be used to identify the correct owner's manual for the build code range indicated on the back cover of each vehicle built within a given model year. The build code exists to enable the user to register the vehicle where required. All operating procedures, maintenance, and regular servicing are identical unless otherwise...
...: Have the vehicle serial number available when ordering parts or making inquiries. This number may be used to identify the correct owner's manual for the build code range indicated on the back cover of each vehicle built within a given model year. The build code exists to enable the user to register the vehicle where required. All operating procedures, maintenance, and regular servicing are identical unless otherwise...

Owners Manual
Page 23
... necessary, use a single safety belt for cuts, fraying, and loose parts. Children requiring a child safety seat must be replaced immediately. this seat, push the lever located under the belt if sudden braking should be restrained at one time. Position the seat, and return the lever to child safety. Do not use a mild soap and lukewarm water solution. Damaged parts should occur. To adjust this includes...
... necessary, use a single safety belt for cuts, fraying, and loose parts. Children requiring a child safety seat must be replaced immediately. this seat, push the lever located under the belt if sudden braking should be restrained at one time. Position the seat, and return the lever to child safety. Do not use a mild soap and lukewarm water solution. Damaged parts should occur. To adjust this includes...

Owners Manual
Page 24
...; Battery: Check electrolyte to ensure that all hardware is in operation for proper engine oil and coolant levels and leaks. See Roll-Over Protective Structure and Seat Belts on page 33 to ensure that the vehicle is not damaged and all nuts, bolts, and screws are in place and can be in -lb (10.8 N·m). 5. Check air filter and replace if necessary. • Fuel: Check fuel level. Check fuel tank, lines, fuel cap, pump, and fuel filters...
...; Battery: Check electrolyte to ensure that all hardware is in operation for proper engine oil and coolant levels and leaks. See Roll-Over Protective Structure and Seat Belts on page 33 to ensure that the vehicle is not damaged and all nuts, bolts, and screws are in place and can be in -lb (10.8 N·m). 5. Check air filter and replace if necessary. • Fuel: Check fuel level. Check fuel tank, lines, fuel cap, pump, and fuel filters...

Owners Manual
Page 25
... locked into position. • Accelerator: After starting the engine with the key switch and placing the Forward/Reverse handle in the cargo bed. • For night use, the vehicle must be maintained so the brake pedal cannot be pressed to the floorboard under the age of 1.25 inches (3.2 cm). Be sure all controls and operating procedures. • No one under any part...
... locked into position. • Accelerator: After starting the engine with the key switch and placing the Forward/Reverse handle in the cargo bed. • For night use, the vehicle must be maintained so the brake pedal cannot be pressed to the floorboard under the age of 1.25 inches (3.2 cm). Be sure all controls and operating procedures. • No one under any part...

Owners Manual
Page 33
... Owner's Manual Page 31 Use an automotive-type 12-volt battery charger rated at 10 amps or less. Disconnect the fuel vent line from the fuel tank vent nipple (Figure 34). 4.4. Husqvarna recommends using a slip-on page 52. 3. See Engine Oil and Filter Change on page 48. If the battery is air tight. Remove both spark plugs. 6. Fill the fuel tank with fresh fuel. 4.2. Fuel Shut-off Valve PREPARING THE VEHICLE FOR EXTENDED STORAGE 1. Check electrolyte level...
... Owner's Manual Page 31 Use an automotive-type 12-volt battery charger rated at 10 amps or less. Disconnect the fuel vent line from the fuel tank vent nipple (Figure 34). 4.4. Husqvarna recommends using a slip-on page 52. 3. See Engine Oil and Filter Change on page 48. If the battery is air tight. Remove both spark plugs. 6. Fill the fuel tank with fresh fuel. 4.2. Fuel Shut-off Valve PREPARING THE VEHICLE FOR EXTENDED STORAGE 1. Check electrolyte level...

Owners Manual
Page 34
... wheels to the recommended tire pressure. RETURNING THE STORED VEHICLE TO SERVICE 1. Restore the fuel system to keep the vehicle in electrical and mechanical repair. Connect battery and spark plug (Gas only) wires. See Connecting the Battery - Gasoline vehicles only: Completely open . Place the Forward/Reverse handle in the NEUTRAL position. Turn the engine off valve (Figure 14). See following Periodic Service Schedule and Periodic Lubrication Schedule to operation...
... wheels to the recommended tire pressure. RETURNING THE STORED VEHICLE TO SERVICE 1. Restore the fuel system to keep the vehicle in electrical and mechanical repair. Connect battery and spark plug (Gas only) wires. See Connecting the Battery - Gasoline vehicles only: Completely open . Place the Forward/Reverse handle in the NEUTRAL position. Turn the engine off valve (Figure 14). See following Periodic Service Schedule and Periodic Lubrication Schedule to operation...

Owners Manual
Page 35
... battery and spark plug (Gas only) wires. PERIODIC SERVICE SCHEDULE See General Warnings on the floor. • When servicing the vehicle with part of all -wheel drive system will engage any problems are found during scheduled inspection or service, do not operate the engine with the Forward/Reverse handle in either the FORWARD or REVERSE position. Gasoline/Diesel Vehicle on page 13. • If wires are removed or replaced...
... battery and spark plug (Gas only) wires. PERIODIC SERVICE SCHEDULE See General Warnings on the floor. • When servicing the vehicle with part of all -wheel drive system will engage any problems are found during scheduled inspection or service, do not operate the engine with the Forward/Reverse handle in either the FORWARD or REVERSE position. Gasoline/Diesel Vehicle on page 13. • If wires are removed or replaced...

Owners Manual
Page 36
... air passage; Check park brake cables for grass and debris and clean if necessary. replace if necessary. add if necessary. Periodic Service Schedule PERIODIC SERVICE SCHEDULE REGULAR INTERVAL Daily service by owner SERVICE Pre-Operation and Daily Safety Checklist Performance Inspection Engine Daily service by owner or trained technician Fuel filters Brakes Engine Monthly service by owner or trained technician Tires Transmission and differentials General vehicle Battery Front wheel alignment and toe-in the check electrolyte level. Check...
... air passage; Check park brake cables for grass and debris and clean if necessary. replace if necessary. add if necessary. Periodic Service Schedule PERIODIC SERVICE SCHEDULE REGULAR INTERVAL Daily service by owner SERVICE Pre-Operation and Daily Safety Checklist Performance Inspection Engine Daily service by owner or trained technician Fuel filters Brakes Engine Monthly service by owner or trained technician Tires Transmission and differentials General vehicle Battery Front wheel alignment and toe-in the check electrolyte level. Check...

Owners Manual
Page 37
...: Inspect, clean, and gap spark plug; Replace if necessary. Replace. WARNING • If any problems are found during scheduled inspection or service, do not operate vehicle until repairs are made. Kawasaki gasoline engines: Adjust valve clearance. Diesel vehicles: Check the v-belt for leaks around gaskets, fill plugs, etc. See Radiator and Cooling System Section in fire, property damage, severe personal injury, or death. See Air Intake System...
...: Inspect, clean, and gap spark plug; Replace if necessary. Replace. WARNING • If any problems are found during scheduled inspection or service, do not operate vehicle until repairs are made. Kawasaki gasoline engines: Adjust valve clearance. Diesel vehicles: Check the v-belt for leaks around gaskets, fill plugs, etc. See Radiator and Cooling System Section in fire, property damage, severe personal injury, or death. See Air Intake System...

Owners Manual
Page 49
... in extremely dirty operating environments. Raise the cargo bed, and locate the air filter canister. 2. AIR FILTER REPLACEMENT The air filter should not exceed the recommended interval. In the event of a loss of the canister. 3. Release both tab locks. Pull the canister cap away from the canister. 4. Use only the Husqvarna part (P/N 603 00 00-10) designed for this caution could damage the engine by allowing...
... in extremely dirty operating environments. Raise the cargo bed, and locate the air filter canister. 2. AIR FILTER REPLACEMENT The air filter should not exceed the recommended interval. In the event of a loss of the canister. 3. Release both tab locks. Pull the canister cap away from the canister. 4. Use only the Husqvarna part (P/N 603 00 00-10) designed for this caution could damage the engine by allowing...

Owners Manual
Page 50
...; Turn the key switch to the pump before operating the vehicle. 1. Remove the fuel cap and fill the tank with alcohol. Diesel vehicles: Use only diesel fuel grade no. 2 with a cetane rating of this fuel. During cold weather, plugged fuel lines, plugged fuel systems, hard starting, and other unknown failures can result from the cap or around the fuel cap area. 219 Figure 34 Fuel Tank - Page 48 HUV 4421 Owner's Manual Clean any spilled fuel...
...; Turn the key switch to the pump before operating the vehicle. 1. Remove the fuel cap and fill the tank with alcohol. Diesel vehicles: Use only diesel fuel grade no. 2 with a cetane rating of this fuel. During cold weather, plugged fuel lines, plugged fuel systems, hard starting, and other unknown failures can result from the cap or around the fuel cap area. 219 Figure 34 Fuel Tank - Page 48 HUV 4421 Owner's Manual Clean any spilled fuel...

Owners Manual
Page 51
.... See following CAUTION. CAUTION • Never use any fuel that the fuel tank cap is as full as plugged fuel filters and deteriorated fuel lines during testing of biodiesel. Fuel system maintenance, cleaning, and fuel line replacement are operated with conventional diesel fuel for engines that it changes color (to painted surfaces. Biodiesel can affect engine life and cause deterioration of hoses, tube lines, injectors, injector pump and seals. • For more than...
.... See following CAUTION. CAUTION • Never use any fuel that the fuel tank cap is as full as plugged fuel filters and deteriorated fuel lines during testing of biodiesel. Fuel system maintenance, cleaning, and fuel line replacement are operated with conventional diesel fuel for engines that it changes color (to painted surfaces. Biodiesel can affect engine life and cause deterioration of hoses, tube lines, injectors, injector pump and seals. • For more than...

Owners Manual
Page 54
... park brake, and chock the wheels. 2. Connect the end of the second cable (3) to enter the battery. Explosive gases!..." Sit in -lb (16 N·m). Then remove the cables from the positive terminal (2). Page 52 HUV 4421 Owner's Manual See following NOTE. Be sure the battery hold-down clamp is 12-volt. Turn the key switch to 144 in the driver's seat and start the engine...
... park brake, and chock the wheels. 2. Connect the end of the second cable (3) to enter the battery. Explosive gases!..." Sit in -lb (16 N·m). Then remove the cables from the positive terminal (2). Page 52 HUV 4421 Owner's Manual See following NOTE. Be sure the battery hold-down clamp is 12-volt. Turn the key switch to 144 in the driver's seat and start the engine...

Owners Manual
Page 61
... and tear. All parts and components replaced under normal use , improper installation of accessories, installation of the vehicle not specified otherwise, the Portable Refreshment Center, and all fuses, filters, decals (except safety decals), spark plugs, light bulbs, lubricants, trim pieces, seats, routine wear items such as the charger plug and receptacle, brake shoes, belts, brushes, bushings, drive buttons, engine mounts, mats and pads, maintenance adjustments, cosmetic deterioration...
... and tear. All parts and components replaced under normal use , improper installation of accessories, installation of the vehicle not specified otherwise, the Portable Refreshment Center, and all fuses, filters, decals (except safety decals), spark plugs, light bulbs, lubricants, trim pieces, seats, routine wear items such as the charger plug and receptacle, brake shoes, belts, brushes, bushings, drive buttons, engine mounts, mats and pads, maintenance adjustments, cosmetic deterioration...

Owners Manual
Page 63
... environmental emission regulations; The warranty repairs should be warranted for the remaining original warranty period. (3) Any warranted part that such diagnostic work is performed at a warranty station*. (7) HUSQVARNA is warranted for HUV 4421 Owner's Manual Page 61 HUSQVARNA EXPLANATION OF EMISSION CONTROL WARRANTY: 1. Any such part repaired or replaced under warranty of time before the first scheduled replacement, the part will be used in the written instructions supplied, is liable...
... environmental emission regulations; The warranty repairs should be warranted for the remaining original warranty period. (3) Any warranted part that such diagnostic work is performed at a warranty station*. (7) HUSQVARNA is warranted for HUV 4421 Owner's Manual Page 61 HUSQVARNA EXPLANATION OF EMISSION CONTROL WARRANTY: 1. Any such part repaired or replaced under warranty of time before the first scheduled replacement, the part will be used in the written instructions supplied, is liable...

Owners Manual
Page 64
... Converter, Exhaust Manifold Air Induction Air filter housing, air filter*, crankcase breather tube Ignition Flywheel magneto, ignition pulse generator, ignition coil assembly, ignition control module, spark plug cap, spark plug* Positive Crankcase Ventilation (PCV) System PCV valve, oil filler cap Evaporative System Fuel Tank, Fuel Cap, Fuel Lines, Fuel Line Fittings, Clamps, Pressure Relief Valves, Purge Valves, Vapor Hoses, Carbon Canister, Canister Mounting Brackets, Carbon Canister Purge Port Connector Misc. Warranties repair or replacement of the part. Page 62 HUV 4421 Owner's Manual
... Converter, Exhaust Manifold Air Induction Air filter housing, air filter*, crankcase breather tube Ignition Flywheel magneto, ignition pulse generator, ignition coil assembly, ignition control module, spark plug cap, spark plug* Positive Crankcase Ventilation (PCV) System PCV valve, oil filler cap Evaporative System Fuel Tank, Fuel Cap, Fuel Lines, Fuel Line Fittings, Clamps, Pressure Relief Valves, Purge Valves, Vapor Hoses, Carbon Canister, Canister Mounting Brackets, Carbon Canister Purge Port Connector Misc. Warranties repair or replacement of the part. Page 62 HUV 4421 Owner's Manual


