Installation Instructions
Page 1
...Broiling 13, 14 Broiling Guide 14 Oven Control 11 Power Outage 11 Preheating 12 Surface Cooking 8, 9 Thermostat Adjustment . . . .15 Care and Cleaning Air Vents 21 Broiler Pan and Grid 21 Burner Assemblies . . . . . .16-18 Burner Caps and Heads . . . .18 Burner Grates 17 Control Panel and Knobs . . .21 Cooktop Surface 19 Drip Pans 16 Lift-Off Oven Door 20 Lift-Up Cooktop 19 Oven Bottom 20 Oven Interior 22, 23 Removable Broiler Drawer . .21 Racks 22 Stainless Steel Surfaces . . . . .19 Installation Instructions 24-39 Anti-Tip Device . . . . .28, 38, 39 Connect the Range to Gas...
...Broiling 13, 14 Broiling Guide 14 Oven Control 11 Power Outage 11 Preheating 12 Surface Cooking 8, 9 Thermostat Adjustment . . . .15 Care and Cleaning Air Vents 21 Broiler Pan and Grid 21 Burner Assemblies . . . . . .16-18 Burner Caps and Heads . . . .18 Burner Grates 17 Control Panel and Knobs . . .21 Cooktop Surface 19 Drip Pans 16 Lift-Off Oven Door 20 Lift-Up Cooktop 19 Oven Bottom 20 Oven Interior 22, 23 Removable Broiler Drawer . .21 Racks 22 Stainless Steel Surfaces . . . . .19 Installation Instructions 24-39 Anti-Tip Device . . . . .28, 38, 39 Connect the Range to Gas...
Installation Instructions
Page 3
... specifically recommended in accordance with the National Electrical Code. If in carbon monoxide poisoning and overheating of potential exposure to repair or replace any part of natural gas or LP fuels. Doing so may result in doubt about the grounding of the range gas shut-off if necessary. Any adjustment and service should be performed only by qualified gas range installers or service technicians. Safety Instructions Operating Instructions Installation Instructions Troubleshooting Tips Consumer Support GEAppliances.com WARNING! Gas...
... specifically recommended in accordance with the National Electrical Code. If in carbon monoxide poisoning and overheating of potential exposure to repair or replace any part of natural gas or LP fuels. Doing so may result in doubt about the grounding of the range gas shut-off if necessary. Any adjustment and service should be performed only by qualified gas range installers or service technicians. Safety Instructions Operating Instructions Installation Instructions Troubleshooting Tips Consumer Support GEAppliances.com WARNING! Gas...
Installation Instructions
Page 4
... be hot. I Flaming grease outside a pan can reach them. I Do not allow anyone to follow these instructions could be put out by covering it directly over , causing severe personal injury. I Large scratches or impacts to glass doors can be seriously burned. Flammable material could be converted for the conversion. See the Installation of this Owner's Manual. Turn the controls off or by using the appliance. I Clean only parts listed...
... be hot. I Flaming grease outside a pan can reach them. I Do not allow anyone to follow these instructions could be put out by covering it directly over , causing severe personal injury. I Large scratches or impacts to glass doors can be seriously burned. Flammable material could be converted for the conversion. See the Installation of this Owner's Manual. Turn the controls off or by using the appliance. I Clean only parts listed...
Installation Instructions
Page 5
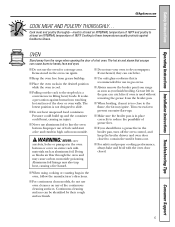
... the oven door closed to dry newspapers. Improper use your oven to contain fire until it burns out. I Do not use of a hot oven. Trim excess fat to slide. Continuous cleaning surfaces can cause burns to these temperatures usually protects against burns from grease buildup. I Always remove the broiler pan from range as soon as aluminum foil. WARNING: NEVER cover any of grease fires. Safety Instructions Operating Instructions Installation Instructions Troubleshooting Tips Consumer Support GEAppliances.com COOK...
... the oven door closed to dry newspapers. Improper use your oven to contain fire until it burns out. I Do not use of a hot oven. Trim excess fat to slide. Continuous cleaning surfaces can cause burns to these temperatures usually protects against burns from grease buildup. I Always remove the broiler pan from range as soon as aluminum foil. WARNING: NEVER cover any of grease fires. Safety Instructions Operating Instructions Installation Instructions Troubleshooting Tips Consumer Support GEAppliances.com COOK...
Installation Instructions
Page 6
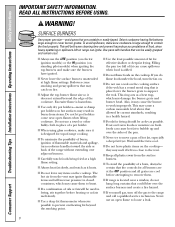
... handles toward the side or back of hot fat, especially a deep fat fryer. I Adjust the top burner flame size so it heats. they may cause the burner to support the wok. I Use the least possible amount of -range cooking. This ring acts as it does not extend beyond the smoking point. Wait until the fat is placed over adjacent burners. I Do not use an open flames...
... handles toward the side or back of hot fat, especially a deep fat fryer. I Adjust the top burner flame size so it heats. they may cause the burner to support the wok. I Use the least possible amount of -range cooking. This ring acts as it does not extend beyond the smoking point. Wait until the fat is placed over adjacent burners. I Do not use an open flames...
Installation Instructions
Page 11
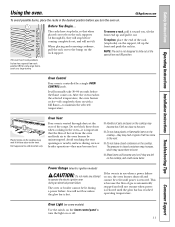
... the glow bar has reached operating temperature. To replace, place the end of gas is automatically stopped and will not resume when power is not designed to the vent. To remove a rack, pull it toward you turn the light on . I Handles of hot air from the oven and fresh air to maintain the selected temperature. Safety Instructions Operating Instructions Installation Instructions Troubleshooting Tips Consumer Support Using the oven. Before You Begin... The oven has 5 rack positions. Do not block...
... the glow bar has reached operating temperature. To replace, place the end of gas is automatically stopped and will not resume when power is not designed to the vent. To remove a rack, pull it toward you turn the light on . I Handles of hot air from the oven and fresh air to maintain the selected temperature. Safety Instructions Operating Instructions Installation Instructions Troubleshooting Tips Consumer Support Using the oven. Before You Begin... The oven has 5 rack positions. Do not block...
Installation Instructions
Page 12
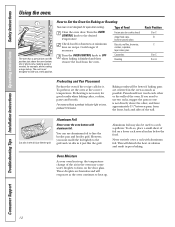
... other , and leave approximately 11⁄2″ between pans, from the oven. Turn the OVEN CONTROL knob to catch a spillover. Baking results will disturb the heat circulation and result in the oven may also be better if baking pans are harmless and will evaporate as possible. Use it . Never entirely cover a rack with aluminum foil. Check food for doneness at the correct temperature. Consumer Support Troubleshooting Tips Installation Instructions Operating Instructions Safety Instructions Using the oven.
... other , and leave approximately 11⁄2″ between pans, from the oven. Turn the OVEN CONTROL knob to catch a spillover. Baking results will disturb the heat circulation and result in the oven may also be better if baking pans are harmless and will evaporate as possible. Use it . Never entirely cover a rack with aluminum foil. Check food for doneness at the correct temperature. Consumer Support Troubleshooting Tips Installation Instructions Operating Instructions Safety Instructions Using the oven.
Installation Instructions
Page 16
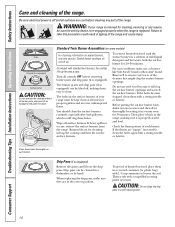
... surface burners. Clean these holes. Be sure electrical power is properly seated and level. Lift up . Soak the surface burner for cleaning. Before putting the surface burner back, shake out excess water and then dry it will clog the surface burner openings and scratch the surface burners. Consumer Support Troubleshooting Tips Installation Instructions Operating Instructions Safety Instructions Care and cleaning of the range. Grate Drip pan (if so equipped) Surface burner CAUTION: Do not operate the cooktop without all times for 30 minutes. Sealed burner cooktops...
... surface burners. Clean these holes. Be sure electrical power is properly seated and level. Lift up . Soak the surface burner for cleaning. Before putting the surface burner back, shake out excess water and then dry it will clog the surface burner openings and scratch the surface burners. Consumer Support Troubleshooting Tips Installation Instructions Operating Instructions Safety Instructions Care and cleaning of the range. Grate Drip pan (if so equipped) Surface burner CAUTION: Do not operate the cooktop without all times for 30 minutes. Sealed burner cooktops...
Installation Instructions
Page 17
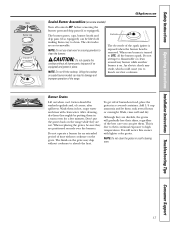
... the grate may result, which could cause you can give them. This is on the range while they are not removable. Safety Instructions Operating Instructions Installation Instructions Troubleshooting Tips Consumer Support Grate Burner cap Burner head Drip pan (if so equipped) Electrode Cooktop GEAppliances.com Sealed Burner Assemblies (on some models) Turn all the burners spark. Grates should be lifted off, making them in place. Wash, rinse well and dry...
... the grate may result, which could cause you can give them. This is on the range while they are not removable. Safety Instructions Operating Instructions Installation Instructions Troubleshooting Tips Consumer Support Grate Burner cap Burner head Drip pan (if so equipped) Electrode Cooktop GEAppliances.com Sealed Burner Assemblies (on some models) Turn all the burners spark. Grates should be lifted off, making them in place. Wash, rinse well and dry...
Installation Instructions
Page 19
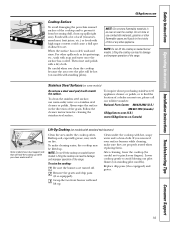
... hot (on fire. Be careful when you clean the cooktop because the area over the pilot will be lifted up . Remove the grates and drip pans (if so equipped). Clean under the cooktop often. Lower cooktop gently to set. For other appliance. Follow the cleaner instructions for cleaning the stainless steel surface. Lifting the cooktop can lead to damage and improper operation of the range. Safety Instructions Operating Instructions Installation Instructions Troubleshooting Tips Consumer Support GEAppliances.com Cooktop Surface...
... hot (on fire. Be careful when you clean the cooktop because the area over the pilot will be lifted up . Remove the grates and drip pans (if so equipped). Clean under the cooktop often. Lower cooktop gently to set. For other appliance. Follow the cleaner instructions for cleaning the stainless steel surface. Lifting the cooktop can lead to damage and improper operation of the range. Safety Instructions Operating Instructions Installation Instructions Troubleshooting Tips Consumer Support GEAppliances.com Cooktop Surface...
Installation Instructions
Page 20
... oven, resulting in the door. Consumer Support Troubleshooting Tips Installation Instructions Operating Instructions Safety Instructions Care and cleaning of the door squarely over both hinges at the bottom of the door. We don't recommend using aluminum foil on . Oven Bottom The oven bottom has a porcelain enamel finish. You may also use soap and water, an abrasive cleaner or soap-filled scouring pad. Remove the oven bottom for proper air circulation. Lift the door...
... oven, resulting in the door. Consumer Support Troubleshooting Tips Installation Instructions Operating Instructions Safety Instructions Care and cleaning of the door squarely over both hinges at the bottom of the door. We don't recommend using aluminum foil on . Oven Bottom The oven bottom has a porcelain enamel finish. You may also use soap and water, an abrasive cleaner or soap-filled scouring pad. Remove the oven bottom for proper air circulation. Lift the door...

Installation Instructions
Page 21
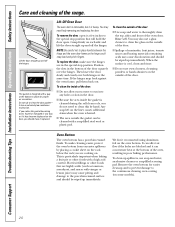
... knobs can damage the gas valve shaft. Clean the broiler drawer with a soft cloth. 21 Do not store a soiled broiler pan and grid If food has burned on the model). Safety Instructions Operating Instructions Installation Instructions Troubleshooting Tips Consumer Support GEAppliances.com Grid Broiler Pan and Grid After broiling, remove the broiler pan from the pan. Grasp the handle, lift and pull the broiler drawer out. They provide the air inlet and outlet that are located at the rear of the cooktop...
... knobs can damage the gas valve shaft. Clean the broiler drawer with a soft cloth. 21 Do not store a soiled broiler pan and grid If food has burned on the model). Safety Instructions Operating Instructions Installation Instructions Troubleshooting Tips Consumer Support GEAppliances.com Grid Broiler Pan and Grid After broiling, remove the broiler pan from the pan. Grasp the handle, lift and pull the broiler drawer out. They provide the air inlet and outlet that are located at the rear of the cooktop...
Installation Instructions
Page 22
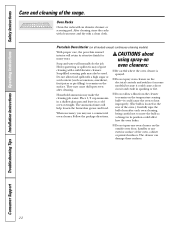
... could cause the oven to remain on the outside oven door, handles or any oven cleaner on the surface. I Do not spray any exterior surface of the range. Consumer Support Troubleshooting Tips Installation Instructions Operating Instructions Safety Instructions Care and cleaning of the oven, cabinet or painted surfaces. Oven Racks Clean the racks with a mild abrasive cleanser. After cleaning, rinse the racks with clean water and dry with a high sugar or acid content (such as a change in its attractive...
... could cause the oven to remain on the outside oven door, handles or any oven cleaner on the surface. I Do not spray any exterior surface of the range. Consumer Support Troubleshooting Tips Installation Instructions Operating Instructions Safety Instructions Care and cleaning of the oven, cabinet or painted surfaces. Oven Racks Clean the racks with a mild abrasive cleanser. After cleaning, rinse the racks with clean water and dry with a high sugar or acid content (such as a change in its attractive...
Installation Instructions
Page 26
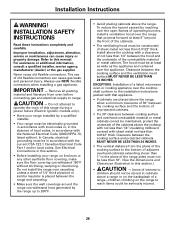
... the open flames of 1/4″ thick plywood or similar insulator is placed between the range and carpeting. • Make sure the wall coverings around the range can withstand 180°F without shrinking, warping or discoloring. EXCEPTION: Installation of a listed microwave oven or cooking appliance over carpeting unless a sheet of operating burners, install a ventilation hood over the appliance. Improper installation, adjustment, alteration, service or maintenance can cause gas leaks...
... the open flames of 1/4″ thick plywood or similar insulator is placed between the range and carpeting. • Make sure the wall coverings around the range can withstand 180°F without shrinking, warping or discoloring. EXCEPTION: Installation of a listed microwave oven or cooking appliance over carpeting unless a sheet of operating burners, install a ventilation hood over the appliance. Improper installation, adjustment, alteration, service or maintenance can cause gas leaks...
Installation Instructions
Page 29
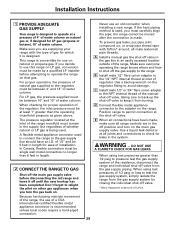
... the range and individual shut-off position and turn the gas back on. To prevent gas leaks, put pipe joint compound on, or wrap pipe thread tape with the type of water column. E When all connections have an I.D. DO NOT USE A FLAME TO CHECK FOR GAS LEAKS. For proper operation, the pressure of natural gas supplied to the regulator must be made . Installation Instructions 1 PROVIDE ADEQUATE GAS SUPPLY Your range...
... the range and individual shut-off position and turn the gas back on. To prevent gas leaks, put pipe joint compound on, or wrap pipe thread tape with the type of water column. E When all connections have an I.D. DO NOT USE A FLAME TO CHECK FOR GAS LEAKS. For proper operation, the pressure of natural gas supplied to the regulator must be made . Installation Instructions 1 PROVIDE ADEQUATE GAS SUPPLY Your range...
Installation Instructions
Page 36
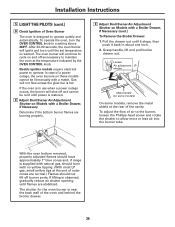
... the oven and behind the broiler drawer. 36 Installation Instructions 5 LIGHT THE PILOTS (cont.) D Check Ignition of Oven Burner The oven is designed to a setting above 260°F. To operate the oven, turn the OVEN CONTROL knob to operate quietly and automatically. Gas will ignite and burn until it stops, then push it back in use when a power outage occurs, the burner will continue to cycle on Models with a Broiler Drawer, if Necessary (cont.) To Remove the Broiler Drawer: 1. E Adjust Broil Burner Air Adjustment Shutter...
... the oven and behind the broiler drawer. 36 Installation Instructions 5 LIGHT THE PILOTS (cont.) D Check Ignition of Oven Burner The oven is designed to a setting above 260°F. To operate the oven, turn the OVEN CONTROL knob to operate quietly and automatically. Gas will ignite and burn until it stops, then push it back in use when a power outage occurs, the burner will continue to cycle on Models with a Broiler Drawer, if Necessary (cont.) To Remove the Broiler Drawer: 1. E Adjust Broil Burner Air Adjustment Shutter...
Installation Instructions
Page 40
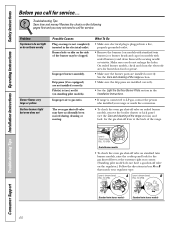
... OPEN. Improper air to call for burned-on food or grease. • Make sure the burner parts are installed correctly. Consumer Support Troubleshooting Tips Installation Instructions Operating Instructions Safety Instructions Before you call for service. Troubleshooting Tips Save time and money! Lever is not completely inserted in box A or B that match your range or made the conversion. • To check the oven gas shut-off valve on sealed burner models, remove the broiler drawer or kick panel (see the Care and cleaning...
... OPEN. Improper air to call for burned-on food or grease. • Make sure the burner parts are installed correctly. Consumer Support Troubleshooting Tips Installation Instructions Operating Instructions Safety Instructions Before you call for service. Troubleshooting Tips Save time and money! Lever is not completely inserted in box A or B that match your range or made the conversion. • To check the oven gas shut-off valve on sealed burner models, remove the broiler drawer or kick panel (see the Care and cleaning...
Installation Instructions
Page 41
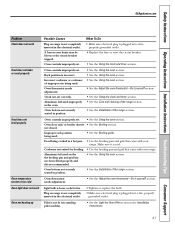
Safety Instructions Operating Instructions Installation Instructions Troubleshooting Tips Consumer Support GEAppliances.com Problem Clock does not work Food does not bake or roast properly Food does not broil properly Oven temperature too hot or too cold Oven light does not work Oven not heating up Possible Causes Plug on standing pilot models). • See the Light the Oven Pilot section in the Installation Instructions. 41 Oven controls improperly set correctly. Clock not set . Oven thermostat needs adjustment. • See the Adjust the oven thermostat-Do it is loose or ...
Safety Instructions Operating Instructions Installation Instructions Troubleshooting Tips Consumer Support GEAppliances.com Problem Clock does not work Food does not bake or roast properly Food does not broil properly Oven temperature too hot or too cold Oven light does not work Oven not heating up Possible Causes Plug on standing pilot models). • See the Light the Oven Pilot section in the Installation Instructions. 41 Oven controls improperly set correctly. Clock not set . Oven thermostat needs adjustment. • See the Adjust the oven thermostat-Do it is loose or ...
Installation Instructions
Page 46
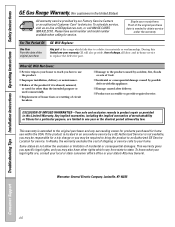
... succeeding owner for products purchased for other rights which fails due to obtain service under the warranty. During this limited one year or the shortest period allowed by accident, fire, floods or acts of the range which vary from state to replace the defective part. I Damage to provide required service. Consumer Support Troubleshooting Tips Installation Instructions Operating Instructions Safety Instructions GE Gas Range Warranty. (For customers in the United States) All warranty service...
... succeeding owner for products purchased for other rights which fails due to obtain service under the warranty. During this limited one year or the shortest period allowed by accident, fire, floods or acts of the range which vary from state to replace the defective part. I Damage to provide required service. Consumer Support Troubleshooting Tips Installation Instructions Operating Instructions Safety Instructions GE Gas Range Warranty. (For customers in the United States) All warranty service...
Installation Instructions
Page 47
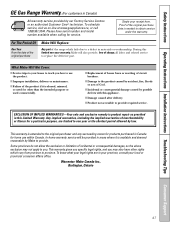
... original purchase Mabe Will Replace: Any part of the original purchase date is product repair as provided in materials or workmanship. EXCLUSION OF IMPLIED WARRANTIES-Your sole and exclusive remedy is needed to obtain service under the warranty. Proof of the range which vary from province to province. Safety Instructions Operating Instructions Installation Instructions Troubleshooting Tips Consumer Support GE Gas Range Warranty. (For customers in Canada) All warranty service provided by possible...
... original purchase Mabe Will Replace: Any part of the original purchase date is product repair as provided in materials or workmanship. EXCLUSION OF IMPLIED WARRANTIES-Your sole and exclusive remedy is needed to obtain service under the warranty. Proof of the range which vary from province to province. Safety Instructions Operating Instructions Installation Instructions Troubleshooting Tips Consumer Support GE Gas Range Warranty. (For customers in Canada) All warranty service provided by possible...


