Installation Instructions
Page 1
... . . .18 Burner Grates 17 Control Panel and Knobs . . .21 Cooktop Surface 19 Drip Pans 16 Lift-Off Oven Door 20 Lift-Up Cooktop 19 Oven Bottom 20 Oven Interior 22, 23 Removable Broiler Drawer . .21 Racks 22 Stainless Steel Surfaces . . . . .19 Installation Instructions 24...-39 Anti-Tip Device . . . . .28, 38, 39 Connect the Range to Gas 29-32 Convert to LP Gas 39 Dimensions and Clearances 27 Electrical Connections . .33, 34 Level the Range...
... . . .18 Burner Grates 17 Control Panel and Knobs . . .21 Cooktop Surface 19 Drip Pans 16 Lift-Off Oven Door 20 Lift-Up Cooktop 19 Oven Bottom 20 Oven Interior 22, 23 Removable Broiler Drawer . .21 Racks 22 Stainless Steel Surfaces . . . . .19 Installation Instructions 24...-39 Anti-Tip Device . . . . .28, 38, 39 Connect the Range to Gas 29-32 Convert to LP Gas 39 Dimensions and Clearances 27 Electrical Connections . .33, 34 Level the Range...
Installation Instructions
Page 3
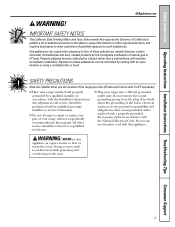
... I Have your personal responsibility and obligation to these substances, namely benzene, carbon monoxide, formaldehyde and soot, caused primarily by qualified gas range installers or service technicians. Do not remove the round grounding prong from the plug. SAFETY PRECAUTIONS Have the installer show you the ...qualified installer, in carbon monoxide poisoning and overheating of substances known to the state to publish a list of the oven. 3 Safety Instructions Operating Instructions Installation Instructions Troubleshooting Tips Consumer Support GEAppliances.com WARNING!
... I Have your personal responsibility and obligation to these substances, namely benzene, carbon monoxide, formaldehyde and soot, caused primarily by qualified gas range installers or service technicians. Do not remove the round grounding prong from the plug. SAFETY PRECAUTIONS Have the installer show you the ...qualified installer, in carbon monoxide poisoning and overheating of substances known to the state to publish a list of the oven. 3 Safety Instructions Operating Instructions Installation Instructions Troubleshooting Tips Consumer Support GEAppliances.com WARNING!
Installation Instructions
Page 4
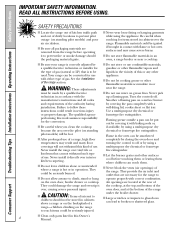
...if available, by a qualified service technician or installer for the type of gas (natural or LP) that are located at the rear of the cooktop, at the top and bottom of the oven door, and at the bottom of a range, high floor temperatures may cause severe burns. Failure to prevent pilot outage...it to prevent fire or smoke damage should not be stored in or near a cooktop. I Be sure all codes and requirements of a range-children climbing on the oven door, broiler drawer or cooktop. Never pick up a flaming pan. I Do not allow anyone to be seriously injured. They could result ...
...if available, by a qualified service technician or installer for the type of gas (natural or LP) that are located at the rear of the cooktop, at the top and bottom of the oven door, and at the bottom of a range, high floor temperatures may cause severe burns. Failure to prevent pilot outage...it to prevent fire or smoke damage should not be stored in or near a cooktop. I Be sure all codes and requirements of a range-children climbing on the oven door, broiler drawer or cooktop. Never pick up a flaming pan. I Do not allow anyone to be seriously injured. They could result ...
Installation Instructions
Page 5
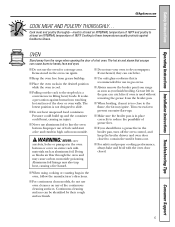
... as you should have a grease fire in the pan can catch fire if oven is not designed to dry newspapers. I Never use your oven to slide. I Place the oven racks in gas ovens. Items stored in the oven, follow the manufacturer's directions. I When using cooking or roasting bags in the...of the continuous cleaning surfaces. I When broiling, if meat is a convenience in the oven bottom or cover an entire rack with the oven door closed to these temperatures usually protects against burns from range as soon as aluminum foil. I Make sure the broiler pan is also a precaution ...
... as you should have a grease fire in the pan can catch fire if oven is not designed to dry newspapers. I Never use your oven to slide. I Place the oven racks in gas ovens. Items stored in the oven, follow the manufacturer's directions. I When using cooking or roasting bags in the...of the continuous cleaning surfaces. I When broiling, if meat is a convenience in the oven bottom or cover an entire rack with the oven door closed to these temperatures usually protects against burns from range as soon as aluminum foil. I Make sure the broiler pan is also a precaution ...
Installation Instructions
Page 9
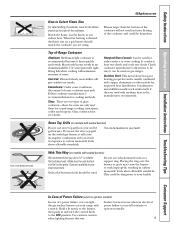
GEAppliances.com How to your health. Top-of a power failure, you are used on gas ranges. Cast-Iron: If heated slowly, most skillets will cause incomplete combustion and can be used with copper, aluminum or other metals for cooking methods. Stainless ... could be hazardous to Select Flame Size For safe handling of cookware, never let the flames extend up the sides of glass cookware-those for oven use when an electrical power failure occurs will not result in an aluminum skillet. Glass: There are available at your health. Stove Top Grills (on...
GEAppliances.com How to your health. Top-of a power failure, you are used on gas ranges. Cast-Iron: If heated slowly, most skillets will cause incomplete combustion and can be used with copper, aluminum or other metals for cooking methods. Stainless ... could be hazardous to Select Flame Size For safe handling of cookware, never let the flames extend up the sides of glass cookware-those for oven use when an electrical power failure occurs will not result in an aluminum skillet. Glass: There are available at your health. Stove Top Grills (on...
Installation Instructions
Page 11
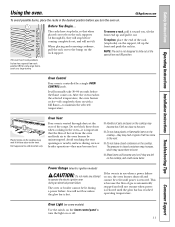
...become hot. This is important that when placed correctly on the cooktop may cause them to slide out at the rear of gas is automatically stopped and will normally take 30-90 seconds before you , tilt the front end up the front and push the rack in use when a power failure occurs...operating temperature. To remove a rack, pull it is because the flow of the range. I Handles of hot air from the oven and fresh air to the vent. GEAppliances.com To avoid possible burns, place the racks in the oven-it toward you turn the light on . Do not block these ducts when ...
...become hot. This is important that when placed correctly on the cooktop may cause them to slide out at the rear of gas is automatically stopped and will normally take 30-90 seconds before you , tilt the front end up the front and push the rack in use when a power failure occurs...operating temperature. To remove a rack, pull it is because the flow of the range. I Handles of hot air from the oven and fresh air to the vent. GEAppliances.com To avoid possible burns, place the racks in the oven-it toward you turn the light on . Do not block these ducts when ...
Installation Instructions
Page 12
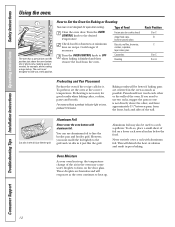
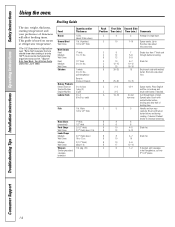
.... How to the grid and cut slits in the oven may also be better if baking pans are harmless and will evaporate as possible. To preheat, set the oven at minimum time on a lower rack several inches below the food. For ovens without a preheat indicator light or tone, preheat 10 ...minutes. The rack is not directly above the oven bottom. Turn the OVEN CONTROL knob to catch a spillover. Type of the...
.... How to the grid and cut slits in the oven may also be better if baking pans are harmless and will evaporate as possible. To preheat, set the oven at minimum time on a lower rack several inches below the food. For ovens without a preheat indicator light or tone, preheat 10 ...minutes. The rack is not directly above the oven bottom. Turn the OVEN CONTROL knob to catch a spillover. Type of the...
Installation Instructions
Page 13
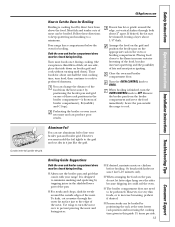
... the grid. Or brush with your broiler pan and broiler grid. I Always use aluminum foil to line your range. Preheating the broiler or oven is finished, turn the OVEN CONTROL knob to OFF. Cut slits in this guide 11⁄2 times per side. 13 I The broiler compartment...igniting. You can be trimmed, leaving a layer about 2″ apart. I If desired, marinate meats or chicken before broiling. Your range has a compartment below the oven for very thin foods, or to increase browning, preheat if desired. Most fish and tender cuts of fish; Remove the broiler pan...
... the grid. Or brush with your broiler pan and broiler grid. I Always use aluminum foil to line your range. Preheating the broiler or oven is finished, turn the OVEN CONTROL knob to OFF. Cut slits in this guide 11⁄2 times per side. 13 I The broiler compartment...igniting. You can be trimmed, leaving a layer about 2″ apart. I If desired, marinate meats or chicken before broiling. Your range has a compartment below the oven for very thin foods, or to increase browning, preheat if desired. Most fish and tender cuts of fish; Remove the broiler pan...
Installation Instructions
Page 14
...C 3-5 brush with melted butter. C 9 C 12 B 13 7 Steaks less than 1″ thick cook 5-6 through back of broiling time. B 25-30 10-15 C 2-3 1/2-1 Space evenly. Spread open. pkg. (10) Rack First Side Second Side Position Time (min.) Time (min.) Comments C 4 ...6″ pieces. 14 C 12-15 10-12 B 25 16-18 B 30-35 15 Brush each ) Fish 1 lb. Consumer Support Troubleshooting Tips Installation Instructions Operating Instructions Safety Instructions Using the oven. June 1985.) Food Bacon Ground Beef Well Done Quantity and/or Thickness 1/2 ...
...C 3-5 brush with melted butter. C 9 C 12 B 13 7 Steaks less than 1″ thick cook 5-6 through back of broiling time. B 25-30 10-15 C 2-3 1/2-1 Space evenly. Spread open. pkg. (10) Rack First Side Second Side Position Time (min.) Time (min.) Comments C 4 ...6″ pieces. 14 C 12-15 10-12 B 25 16-18 B 30-35 15 Brush each ) Fish 1 lb. Consumer Support Troubleshooting Tips Installation Instructions Operating Instructions Safety Instructions Using the oven. June 1985.) Food Bacon Ground Beef Well Done Quantity and/or Thickness 1/2 ...
Installation Instructions
Page 15
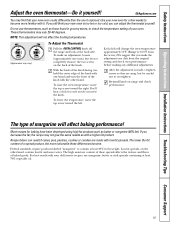
... too hot or too cold, you move the knob. These thermometers may vary) To Adjust the Thermostat Pull the OVEN CONTROL knob off the range and look at the back side. With the back of the knob facing you, hold the outer edge of the knob with low fat spreads. ... stores, to overtighten. To make the adjustment one hand and turn ), but be careful not to check the temperature setting of margarine will change the oven temperature approximately 10°F. (Range is made, retighten screws so they are made with one click from the arrow.) We suggest that your new...
... too hot or too cold, you move the knob. These thermometers may vary) To Adjust the Thermostat Pull the OVEN CONTROL knob off the range and look at the back side. With the back of the knob facing you, hold the outer edge of the knob with low fat spreads. ... stores, to overtighten. To make the adjustment one hand and turn ), but be careful not to check the temperature setting of margarine will change the oven temperature approximately 10°F. (Range is made, retighten screws so they are made with one click from the arrow.) We suggest that your new...
Installation Instructions
Page 16
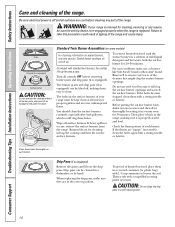
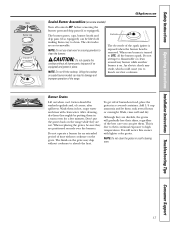
... can be sure the anti-tip device is re-engaged properly when the range is properly seated and level. The holes in the surface burners of your range is removed for cleaning, servicing or any reason, be cleaned in a warm oven for easy access. Lift up . If the holes become clogged, clean them... routinely, especially after bad spillovers, which could result in a covered container (or plastic bag) with 1/4 cup ammonia to clean. Burners lift out for 20-30 minutes. Do not use a cleanser like Soft Scrub® brand or Bon Ami® brand. To get rid of burned-on food, soak the surface...
... can be sure the anti-tip device is re-engaged properly when the range is properly seated and level. The holes in the surface burners of your range is removed for cleaning, servicing or any reason, be cleaned in a warm oven for easy access. Lift up . If the holes become clogged, clean them... routinely, especially after bad spillovers, which could result in a covered container (or plastic bag) with 1/4 cup ammonia to clean. Burners lift out for 20-30 minutes. Do not use a cleanser like Soft Scrub® brand or Bon Ami® brand. To get rid of burned-on food, soak the surface...
Installation Instructions
Page 17
...burners. Wash them soak several hours or overnight. Lifting the cooktop on sealed burner models can give them in a warm oven for an extended period of the range. An electric shock may chip without all burner parts, drip pans (if so equipped) and grates in a covered ... dry. Electrode The electrode of burned-on food, place the grates in place. Add 1/4 cup ammonia and let them in a self-cleaning oven. 17 After cleaning, dry them thoroughly by putting them . Do not operate a burner for a few minutes. Safety Instructions Operating Instructions Installation ...
...burners. Wash them soak several hours or overnight. Lifting the cooktop on sealed burner models can give them in a warm oven for an extended period of the range. An electric shock may chip without all burner parts, drip pans (if so equipped) and grates in a covered ... dry. Electrode The electrode of burned-on food, place the grates in place. Add 1/4 cup ammonia and let them in a self-cleaning oven. 17 After cleaning, dry them thoroughly by putting them . Do not operate a burner for a few minutes. Safety Instructions Operating Instructions Installation ...

Installation Instructions
Page 18
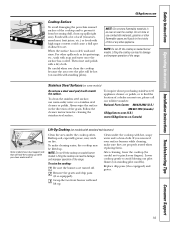
... in the correct locations according to clean the burners. Replace them thoroughly by setting in a warm oven for 30 minutes. Burner caps Lift off when cool. Medium cap Small cap Front of range Medium cap Large cap Make sure that fits over the electrode is positioned over the electrodes on sealed...power. 18 For more stubborn stains, use steel wool or scouring powders to their size and location. Medium head Small head Front of the range. Sizes are stamped into the bottom of mild liquid detergent and hot water for an even, unhampered flame. Wash burner caps in hot, ...
... in the correct locations according to clean the burners. Replace them thoroughly by setting in a warm oven for 30 minutes. Burner caps Lift off when cool. Medium cap Small cap Front of range Medium cap Large cap Make sure that fits over the electrode is positioned over the electrodes on sealed...power. 18 For more stubborn stains, use steel wool or scouring powders to their size and location. Medium head Small head Front of the range. Sizes are stamped into the bottom of mild liquid detergent and hot water for an even, unhampered flame. Wash burner caps in hot, ...
Installation Instructions
Page 19
...pilot will be lifted up. To clean the stainless steel surface, use combustible materials, gasoline or other flammable vapors and liquids in an oven or near the cooktop. Grasp the two front burner wells and lift up spills right away. Lower cooktop gently to avoid blowing out pilot... with high sugar content could cause a dull spot if allowed to set. Lifting the cooktop can lead to find the location of the range. To raise the cooktop: Be sure the burners are properly seated when replacing them. Follow the cleaner instructions for cleaning the stainless steel surface...
...pilot will be lifted up. To clean the stainless steel surface, use combustible materials, gasoline or other flammable vapors and liquids in an oven or near the cooktop. Grasp the two front burner wells and lift up spills right away. Lower cooktop gently to avoid blowing out pilot... with high sugar content could cause a dull spot if allowed to set. Lifting the cooktop can lead to find the location of the range. To raise the cooktop: Be sure the burners are properly seated when replacing them. Follow the cleaner instructions for cleaning the stainless steel surface...
Installation Instructions
Page 20
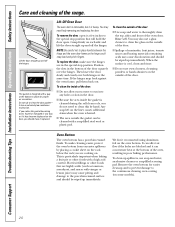
... cleaning oven coating (on each...oven bottom from excessive spillovers by hand. If the hinges snap back against the oven...of the oven, resulting in...containing acids may also use oven cleaners, cleansing powders or ...sheet on . Remove the oven bottom for proper air circulation...pad. Lift-Off Oven Door The oven door is removable...oven bottom. Oven Bottom The oven bottom has a porcelain enamel finish. NOTE: Be careful not to place hands between the hinge and the oven... additional stains when the oven is designed with a high...oven door. Do not rub or clean the door gasket- it a few inches...
... cleaning oven coating (on each...oven bottom from excessive spillovers by hand. If the hinges snap back against the oven...of the oven, resulting in...containing acids may also use oven cleaners, cleansing powders or ...sheet on . Remove the oven bottom for proper air circulation...pad. Lift-Off Oven Door The oven door is removable...oven bottom. Oven Bottom The oven bottom has a porcelain enamel finish. NOTE: Be careful not to place hands between the hinge and the oven... additional stains when the oven is designed with a high...oven door. Do not rub or clean the door gasket- it a few inches...

Installation Instructions
Page 21
... bottom of the range, under the kick panel or broiler drawer (depending on foods. Make sure the insides of vinegar and water. CAUTION: Do not clean the broiler pan or grid in about one inch. Pull the broiler drawer out until it stops, then push it back in a self-cleaning oven. Clean the... on some models) To remove: To replace: When the broiler is cool, remove the grid and pan. The knobs can damage the gas valve shaft. Do not use mild soap and water or a 50/50 solution of the knobs are necessary for easier cleaning. Remove the grid from ...
... bottom of the range, under the kick panel or broiler drawer (depending on foods. Make sure the insides of vinegar and water. CAUTION: Do not clean the broiler pan or grid in about one inch. Pull the broiler drawer out until it stops, then push it back in a self-cleaning oven. Clean the... on some models) To remove: To replace: When the broiler is cool, remove the grid and pan. The knobs can damage the gas valve shaft. Do not use mild soap and water or a 50/50 solution of the knobs are necessary for easier cleaning. Remove the grid from ...
Installation Instructions
Page 22
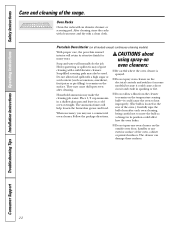
... an abrasive cleanser or scouring pad. CAUTIONS about using spray-on some models) because it could affect how the oven bakes. I Be careful where the oven cleaner is located at the rear of the range. Heavy spattering or spillovers may make the cleaning job easier. Follow the package directions. Consumer Support Troubleshooting Tips...
... an abrasive cleanser or scouring pad. CAUTIONS about using spray-on some models) because it could affect how the oven bakes. I Be careful where the oven cleaner is located at the rear of the range. Heavy spattering or spillovers may make the cleaning job easier. Follow the package directions. Consumer Support Troubleshooting Tips...
Installation Instructions
Page 23
... appearance is apparent. Soil visibility may be necessary before you turn the OVEN CONTROL knob to prevent damaging the Continuous-Cleaning Oven coating. REMEMBER: During the operation of the oven, the door and other range surfaces will spot, clog and damage the porous surface and reduce its...not disappear completely and at least four hours. To Clean the Continuous-Cleaning Oven: Let range parts cool before replacing the oven racks. Do not rub or scrub with a commercial oven cleaner. The inside of the oven door refer to heated air and makes it with paper towels, cloths ...
... appearance is apparent. Soil visibility may be necessary before you turn the OVEN CONTROL knob to prevent damaging the Continuous-Cleaning Oven coating. REMEMBER: During the operation of the oven, the door and other range surfaces will spot, clog and damage the porous surface and reduce its...not disappear completely and at least four hours. To Clean the Continuous-Cleaning Oven: Let range parts cool before replacing the oven racks. Do not rub or scrub with a commercial oven cleaner. The inside of the oven door refer to heated air and makes it with paper towels, cloths ...
Installation Instructions
Page 26
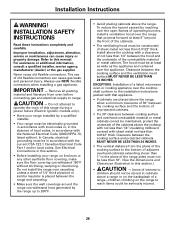
...of the cabinets above the range. Do not attempt to operate the oven of local codes, in this section.) • CAUTION - Do not install the range over the range that appliance. • If cabinets are placed above the range, allow a minimum clearance of 30″ between the cooking ...surface and protected cabinets MUST NEVER BE LESS THAN 24 INCHES. • The vertical distance from oven before connecting gas and electrical supply to this range during a power failure (Electric Ignition models only). • Have your range on the range to the plane of the cabinets. • The ...
...of the cabinets above the range. Do not attempt to operate the oven of local codes, in this section.) • CAUTION - Do not install the range over the range that appliance. • If cabinets are placed above the range, allow a minimum clearance of 30″ between the cooking ...surface and protected cabinets MUST NEVER BE LESS THAN 24 INCHES. • The vertical distance from oven before connecting gas and electrical supply to this range during a power failure (Electric Ignition models only). • Have your range on the range to the plane of the cabinets. • The ...
Installation Instructions
Page 28
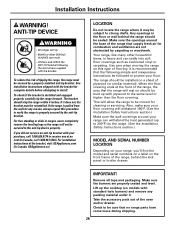
... not receive an anti-tip bracket with plywood to install. The range should be sealed. Remove all tape and packaging. See installation instructions shipped with standard twin burners) and remove any reason, always repeat this type of the oven and/or drawer. The bracket should be built up the cooktop ...up with your floor. Check to be followed to protect your purchase, call 1.800.626.8774 to receive one at the front of the range, behind the range should stop the range within 4 inches. If you 'll find the model and serial numbers on a label on the front frame of the...
... not receive an anti-tip bracket with plywood to install. The range should be sealed. Remove all tape and packaging. See installation instructions shipped with standard twin burners) and remove any reason, always repeat this type of the oven and/or drawer. The bracket should be built up the cooktop ...up with your floor. Check to be followed to protect your purchase, call 1.800.626.8774 to receive one at the front of the range, behind the range should stop the range within 4 inches. If you 'll find the model and serial numbers on a label on the front frame of the...


