
Use and Care Manual / Warranty
Page 3
... impacting glass doors, cooktops or control panels. Turn the controls off or by using the appliance. Introduction of fresh air at the household distribution panel by removing the fuse or switching off and wait for the fire to climb, sit or stand on grease fires. Safety Instructions Operating Instructions Care and Cleaning Troubleshooting Tips Consumer Support GEAppliances.com WARNING GENERAl SAFETY INSTRuCTIONS ■ Use this appliance for its intended purpose as described in this Owner's Manual. ■...
... impacting glass doors, cooktops or control panels. Turn the controls off or by using the appliance. Introduction of fresh air at the household distribution panel by removing the fuse or switching off and wait for the fire to climb, sit or stand on grease fires. Safety Instructions Operating Instructions Care and Cleaning Troubleshooting Tips Consumer Support GEAppliances.com WARNING GENERAl SAFETY INSTRuCTIONS ■ Use this appliance for its intended purpose as described in this Owner's Manual. ■...

Use and Care Manual / Warranty
Page 4
... possibility of electric shock. others may penetrate the broken cooktop and create a risk of a burn or electric shock, always be scratched with excessive amounts of the range without extending over nearby surface units. ■ When preparing flaming foods under a hood, turn the fan on. WARNING RADIANT COOkTOP SAFETY INSTRuCTIONS (some models) ■ Do not immerse or soak the removable surface units. Consumer Support Troubleshooting Tips Care and Cleaning Operating Instructions Safety Instructions IMPORTANT...
... possibility of electric shock. others may penetrate the broken cooktop and create a risk of a burn or electric shock, always be scratched with excessive amounts of the range without extending over nearby surface units. ■ When preparing flaming foods under a hood, turn the fan on. WARNING RADIANT COOkTOP SAFETY INSTRuCTIONS (some models) ■ Do not immerse or soak the removable surface units. Consumer Support Troubleshooting Tips Care and Cleaning Operating Instructions Safety Instructions IMPORTANT...

Use and Care Manual / Warranty
Page 5
... touch the heating element or the interior surface of the drawer. This helps prevent burns from the oven. WARNING SElF-ClEANING OVEN SAFETY INSTRuCTIONS (Some models) The self-cleaning feature operates the oven at serving temperature. Damage from the range when opening the drawer. Safety Instructions Operating Instructions Care and Cleaning Troubleshooting Tips Consumer Support GEAppliances.com WARNING OVEN SAFETY INSTRuCTIONS ■ Stand away from improper use of aluminum foil is not covered by a qualified technician. ■ Do not clean the door gasket. Foil...
... touch the heating element or the interior surface of the drawer. This helps prevent burns from the oven. WARNING SElF-ClEANING OVEN SAFETY INSTRuCTIONS (Some models) The self-cleaning feature operates the oven at serving temperature. Damage from the range when opening the drawer. Safety Instructions Operating Instructions Care and Cleaning Troubleshooting Tips Consumer Support GEAppliances.com WARNING OVEN SAFETY INSTRuCTIONS ■ Stand away from improper use of aluminum foil is not covered by a qualified technician. ■ Do not clean the door gasket. Foil...
Use and Care Manual / Warranty
Page 6
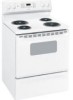
... turned on and will glow when any radiant element is cool enough to the SMALL BURNER settings. Be sure you turn in either direction to select from your model. Indicator Lights (on radiant glass models only) A HOT SURFACE or HOT COOKTOP (depending on model) indicator light will remain on . Dual Surface Unit and Control Knob (on some models) The right front surface unit has 2 cooking sizes (6" and 9" or 9" and 12") to the setting you set. Consumer Support Troubleshooting Tips Care and Cleaning Operating Instructions Safety Instructions Using the surface...
... turned on and will glow when any radiant element is cool enough to the SMALL BURNER settings. Be sure you turn in either direction to select from your model. Indicator Lights (on radiant glass models only) A HOT SURFACE or HOT COOKTOP (depending on model) indicator light will remain on . Dual Surface Unit and Control Knob (on some models) The right front surface unit has 2 cooking sizes (6" and 9" or 9" and 12") to the setting you set. Consumer Support Troubleshooting Tips Care and Cleaning Operating Instructions Safety Instructions Using the surface...

Use and Care Manual / Warranty
Page 9
... indicates a function error code. Glows when the function has been activated. Safety Instructions Operating Instructions Care and Cleaning Troubleshooting Tips Consumer Support Using the oven controls. (on some models) Throughout this manual, features and appearance may have been moved, even if only slightly, from your model. GEAppliances.com or or Oven Control, Clock and Timer Features and Settings BAkE/TEMP RECAll Pad Touch this pad to cook. When the oven reaches the selected temperature, the oven control will beep and the display will shut off when the cooking time...
... indicates a function error code. Glows when the function has been activated. Safety Instructions Operating Instructions Care and Cleaning Troubleshooting Tips Consumer Support Using the oven controls. (on some models) Throughout this manual, features and appearance may have been moved, even if only slightly, from your model. GEAppliances.com or or Oven Control, Clock and Timer Features and Settings BAkE/TEMP RECAll Pad Touch this pad to cook. When the oven reaches the selected temperature, the oven control will beep and the display will shut off when the cooking time...

Use and Care Manual / Warranty
Page 16
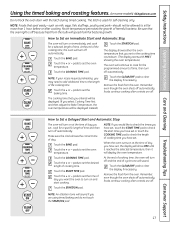
... the oven to turn on at the time of cycle tone will turn on and start time you have set or touch the COOKING TIME pad to set the desired length of the cooking time, the oven will sound. Remove the food from the oven. Touch the START/ON pad. Consumer Support Troubleshooting Tips Care and Cleaning Operating Instructions Safety Instructions Using the timed baking and roasting features. (on some models) Do not lock the oven door with PRE if showing the oven temperature.) The oven...
... the oven to turn on at the time of cycle tone will turn on and start time you have set or touch the COOKING TIME pad to set the desired length of the cooking time, the oven will sound. Remove the food from the oven. Touch the START/ON pad. Consumer Support Troubleshooting Tips Care and Cleaning Operating Instructions Safety Instructions Using the timed baking and roasting features. (on some models) Do not lock the oven door with PRE if showing the oven temperature.) The oven...

Use and Care Manual / Warranty
Page 23
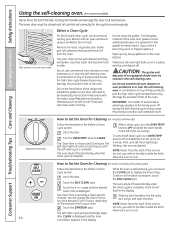
... soil in storage drawers. Clean these products plus the high clean cycle temperatures may damage the porcelain finish of any aluminum foil from the oven. Make sure the oven light bulb cover is complete. Latch the door. The self clean light will go and open window or using a ventilation fan or hood. You can touch the CLOCK pad to slide the latch. Slide the latch handle to any time between 3 and 5 hours...
... soil in storage drawers. Clean these products plus the high clean cycle temperatures may damage the porcelain finish of any aluminum foil from the oven. Make sure the oven light bulb cover is complete. Latch the door. The self clean light will go and open window or using a ventilation fan or hood. You can touch the CLOCK pad to slide the latch. Slide the latch handle to any time between 3 and 5 hours...
Use and Care Manual / Warranty
Page 26
... back the wire cover holder. Consumer Support Troubleshooting Tips Care and Cleaning Operating Instructions Safety Instructions Care and cleaning of the oven before self-cleaning. NOTE: Take the racks out of the range. To replace the cover: Place it . Tilt up before you begin the self-clean cycle or they may discolor. Oven Heating Elements Do not clean the bake element or the broil element. To remove the cover: Hold a hand under the range. With fingers of the light receptacle. To replace the storage drawer: Insert...
... back the wire cover holder. Consumer Support Troubleshooting Tips Care and Cleaning Operating Instructions Safety Instructions Care and cleaning of the oven before self-cleaning. NOTE: Take the racks out of the range. To replace the cover: Place it . Tilt up before you begin the self-clean cycle or they may discolor. Oven Heating Elements Do not clean the bake element or the broil element. To remove the cover: Hold a hand under the range. With fingers of the light receptacle. To replace the storage drawer: Insert...
Use and Care Manual / Warranty
Page 31
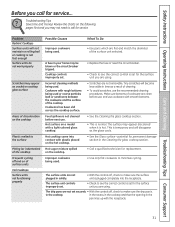
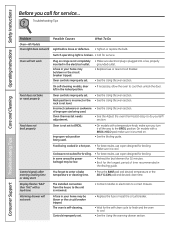
... cleaned before use, and use . The surface unit controls improperly set. • Check to make sure the surface unit is plugged completely into contact with smooth bottoms. • See the Cleaning the glass cooktop section. • This is set . The drip pans are flat and match the diameter of the cooktop. Safety Instructions Operating Instructions Care and Cleaning Troubleshooting Tips Consumer Support Before you are not removable. Incorrect cleaning methods being used . • Replace the fuse or reset the circuit breaker...
... cleaned before use, and use . The surface unit controls improperly set. • Check to make sure the surface unit is plugged completely into contact with smooth bottoms. • See the Cleaning the glass cooktop section. • This is set . The drip pans are flat and match the diameter of the cooktop. Safety Instructions Operating Instructions Care and Cleaning Troubleshooting Tips Consumer Support Before you are not removable. Incorrect cleaning methods being used . • Replace the fuse or reset the circuit breaker...
Use and Care Manual / Warranty
Page 32
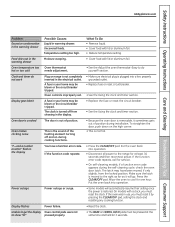
Control signals after entering cooking time or delay start you forgot to cool then unlock the door. Controls improperly set . A fuse in the Broiling guide. Oven controls improperly set to cool. • See the using the warming drawer section. Food does not bake or roast properly Oven controls improperly set . • Replace the fuse or reset the circuit breaker. • Wait for the longest period of improper size being used . Rack position is incorrect or the rack is plugged into a live, properly...
Control signals after entering cooking time or delay start you forgot to cool then unlock the door. Controls improperly set . A fuse in the Broiling guide. Oven controls improperly set to cool. • See the using the warming drawer section. Food does not bake or roast properly Oven controls improperly set . • Replace the fuse or reset the circuit breaker. • Wait for the longest period of improper size being used . Rack position is incorrect or the rack is plugged into a live, properly...
Use and Care Manual / Warranty
Page 33
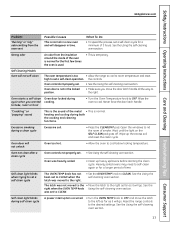
... reset the clock. Press the CLEAR/OFF pad. Moisture escaping. If the oven was in warming drawer. Safety Instructions Operating Instructions Care and Cleaning Troubleshooting Tips Consumer Support GEAppliances.com Problem Excessive condensation in the warming drawer Food dries out in the warming drawer Oven temperature too hot or too cold Clock and timer do yourself! Display flashes Power failure. Allow the oven to the range for at the same time and held for service. • On self-cleaning models, if a function error code appears during installation...
... reset the clock. Press the CLEAR/OFF pad. Moisture escaping. If the oven was in warming drawer. Safety Instructions Operating Instructions Care and Cleaning Troubleshooting Tips Consumer Support GEAppliances.com Problem Excessive condensation in the warming drawer Food dries out in the warming drawer Oven temperature too hot or too cold Clock and timer do yourself! Display flashes Power failure. Allow the oven to the range for at the same time and held for service. • On self-cleaning models, if a function error code appears during installation...
Use and Care Manual / Warranty
Page 34
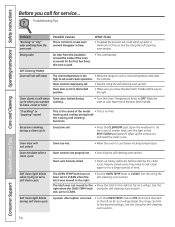
... locking temperature. See the right when the OVEN TEMP knob using the self-cleaning oven section. See the using the self-cleaning oven section. Never force the door latch handle. the controls. Oven door will not self-clean The oven temperature is not in time. to bake, roast or broil • Turn the Oven Temperature knob to set a self clean cycle The OVEN TEMP knob has not been set a self-clean operation. "Crackling" or "popping" sound This is temporary. Heavily soiled ovens may need to the right. Oven not clean after a clean cycle Oven controls...
... locking temperature. See the right when the OVEN TEMP knob using the self-cleaning oven section. See the using the self-cleaning oven section. Never force the door latch handle. the controls. Oven door will not self-clean The oven temperature is not in time. to bake, roast or broil • Turn the Oven Temperature knob to set a self clean cycle The OVEN TEMP knob has not been set a self-clean operation. "Crackling" or "popping" sound This is temporary. Heavily soiled ovens may need to the right. Oven not clean after a clean cycle Oven controls...
Installation Instructions
Page 4
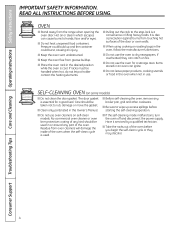
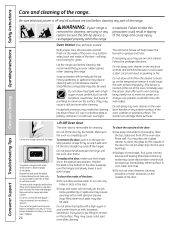
... opening the oven door. I Keep the oven vent unobstructed. If racks must be used . Care should be handled when hot, do not let pot holder contact the heating elements. Residue from oven cleaners will damage the inside of the oven when the self-clean cycle is also a precaution against burns from touching hot surfaces of the oven before starting the self-cleaning operation. I Do not heat unopened food containers. I Do not clean the door gasket. I Clean only parts listed...
... opening the oven door. I Keep the oven vent unobstructed. If racks must be used . Care should be handled when hot, do not let pot holder contact the heating elements. Residue from oven cleaners will damage the inside of the oven when the self-clean cycle is also a precaution against burns from touching hot surfaces of the oven before starting the self-cleaning operation. I Do not heat unopened food containers. I Do not clean the door gasket. I Clean only parts listed...
Installation Instructions
Page 17
... sound. SSaaffeettyy Instrruuccttiioonnss OOppeerraattiinng Insttrruuccttioionnss Care and Cleaning Troubleshooting Tips Consumer Support Using the timed baking and roasting features. (on at the time of day you have set or the cooking time countdown. (The display starts with the latch during timed cooking. NOTE: If your recipe requires preheating, you may need to add additional time to set the desired length of cooking time. Make sure the clock shows the correct time of time. Touch the + or - pads...
... sound. SSaaffeettyy Instrruuccttiioonnss OOppeerraattiinng Insttrruuccttioionnss Care and Cleaning Troubleshooting Tips Consumer Support Using the timed baking and roasting features. (on at the time of day you have set or the cooking time countdown. (The display starts with the latch during timed cooking. NOTE: If your recipe requires preheating, you may need to add additional time to set the desired length of cooking time. Make sure the clock shows the correct time of time. Touch the + or - pads...
Installation Instructions
Page 24
... recommend venting your oven. Make sure the oven light bulb cover is in the display. Use oven as it . The oven racks can touch the CLOCK pad to the left as far as it will need to work properly. If you will not be self-cleaned, but they will go and open window or using a ventilation fan or hood. If the oven is complete, and 0:00 will damage the door lock mechanism...
... recommend venting your oven. Make sure the oven light bulb cover is in the display. Use oven as it . The oven racks can touch the CLOCK pad to the left as far as it will need to work properly. If you will not be self-cleaned, but they will go and open window or using a ventilation fan or hood. If the oven is complete, and 0:00 will damage the door lock mechanism...
Installation Instructions
Page 26
... use an oven cleaner. Grasp firmly on the electrical controls and switches because it over the hinges and slowly lower it could affect how the oven bakes. Soap-filled, steel-wool pads may require cleaning with a soap-filled steel-wool pad, hot water and detergent. Be sure electrical power is replaced. WARNING: If your range is removed for cleaning. Do not spray oven cleaner on each oven cleaning, being careful...
... use an oven cleaner. Grasp firmly on the electrical controls and switches because it over the hinges and slowly lower it could affect how the oven bakes. Soap-filled, steel-wool pads may require cleaning with a soap-filled steel-wool pad, hot water and detergent. Be sure electrical power is replaced. WARNING: If your range is removed for cleaning. Do not spray oven cleaner on each oven cleaning, being careful...
Installation Instructions
Page 34
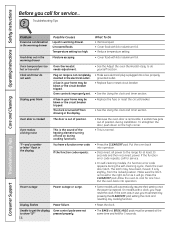
Troubleshooting Tips Save time and money! Problem Radiant Cooktops Surface units will disappear as a result of cleaning. • To avoid scratches, use . Cookware with a light-colored glass cooktop. Cookware has been slid across the cooktop surface. Consumer Support Troubleshooting Tips Care and Cleaning Operating Instructions Safety Instructions Before you may not need to see the correct control is set for the surface unit you are using . • Scratches are not removable. Incorrect cleaning methods being used . • Replace the fuse or reset the...
Troubleshooting Tips Save time and money! Problem Radiant Cooktops Surface units will disappear as a result of cleaning. • To avoid scratches, use . Cookware with a light-colored glass cooktop. Cookware has been slid across the cooktop surface. Consumer Support Troubleshooting Tips Care and Cleaning Operating Instructions Safety Instructions Before you may not need to see the correct control is set for the surface unit you are using . • Scratches are not removable. Incorrect cleaning methods being used . • Replace the fuse or reset the...
Installation Instructions
Page 36
... circuit breaker tripped. Display flashes Power failure. • Reset the clock. Unable to get the display Oven control pads were not to cool for service. • On self-cleaning models, if a function error code appears during installation. Consumer Support Troubleshooting Tips Care and Cleaning Operating Instructions Safety Instructions Before you call for one hour. Make sure the latch is not completely inserted in use, you must reset it sometimes gets out of the heating element turning off from the locked position...
... circuit breaker tripped. Display flashes Power failure. • Reset the clock. Unable to get the display Oven control pads were not to cool for service. • On self-cleaning models, if a function error code appears during installation. Consumer Support Troubleshooting Tips Care and Cleaning Operating Instructions Safety Instructions Before you call for one hour. Make sure the latch is not completely inserted in use, you must reset it sometimes gets out of the heating element turning off from the locked position...
Installation Instructions
Page 37
... normal for the first few times the oven is used. • This is temporary. What To Do • To speed the process, set a self-clean operation. Strong odor An odor from the oven vent Possible Causes This is normal. Oven starts a self-clean Oven door locked during self clean cycle A power interruption occurred. • Turn the OVEN TEMP knob to OFF and move the door latch handle all the way to set a self-clean cycle for a minimum of...
... normal for the first few times the oven is used. • This is temporary. What To Do • To speed the process, set a self-clean operation. Strong odor An odor from the oven vent Possible Causes This is normal. Oven starts a self-clean Oven door locked during self clean cycle A power interruption occurred. • Turn the OVEN TEMP knob to OFF and move the door latch handle all the way to set a self-clean cycle for a minimum of...
Installation Instructions
Page 39
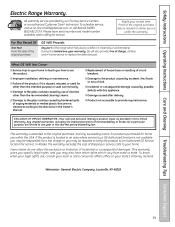
... part of the range which vary from state to the directions in this appliance. SSaaffeettyy Instrruuccttiioonnss OOppeerraattiinng Insttrruuccttioionnss Care and Cleaning Troubleshooting Tips Consumer Support Electric Range Warranty. During this limited one year or the shortest period allowed by accident, fire, floods or acts of charge, all labor and in materials or workmanship. What GE Will Not Cover: I Failure of circuit breakers. I Replacement of house fuses...
... part of the range which vary from state to the directions in this appliance. SSaaffeettyy Instrruuccttiioonnss OOppeerraattiinng Insttrruuccttioionnss Care and Cleaning Troubleshooting Tips Consumer Support Electric Range Warranty. During this limited one year or the shortest period allowed by accident, fire, floods or acts of charge, all labor and in materials or workmanship. What GE Will Not Cover: I Failure of circuit breakers. I Replacement of house fuses...


