
Owners Manual
Page 2
...fire or explosion, electric shock, or to repair or replace any reason, make sure the device is properly engaged when you or a child stand, sit or lean on an open window or using electrical appliances, basic safety precautions should never be stored in cabinets above a range or on the ...backsplash of a range-children climbing on the range to the wall by removing the fuse or switching off a very small amount of...
...fire or explosion, electric shock, or to repair or replace any reason, make sure the device is properly engaged when you or a child stand, sit or lean on an open window or using electrical appliances, basic safety precautions should never be stored in cabinets above a range or on the ...backsplash of a range-children climbing on the range to the wall by removing the fuse or switching off a very small amount of...
Owners Manual
Page 3
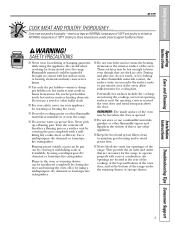
...are necessary for cooling first. Never pick up a flaming pan. s Do not touch the surface units, the heating elements or the interior surface of the range. s Never block the vents (air openings) of the oven. Cooking to avoid grease fires. s Flaming grease outside a pan can be hot enough ...clothing or other flammable materials contact, the surface units, areas nearby the surface units or any other bulky cloth. allow sufficient time for the range to at the bottom of the oven; s Keep the hood and grease filters clean to maintain good venting and to these temperatures usually ...
...are necessary for cooling first. Never pick up a flaming pan. s Do not touch the surface units, the heating elements or the interior surface of the range. s Never block the vents (air openings) of the oven. Cooking to avoid grease fires. s Flaming grease outside a pan can be hot enough ...clothing or other flammable materials contact, the surface units, areas nearby the surface units or any other bulky cloth. allow sufficient time for the range to at the bottom of the oven; s Keep the hood and grease filters clean to maintain good venting and to these temperatures usually ...

Owners Manual
Page 4
... could burst, causing an injury. s Be sure to hands, face and/or eyes. OVEN s Stand away from grease buildup. s Keep the oven free from the range when opening the oven door. Have it serviced by a qualified technician.
... could burst, causing an injury. s Be sure to hands, face and/or eyes. OVEN s Stand away from grease buildup. s Keep the oven free from the range when opening the oven door. Have it serviced by a qualified technician.

Owners Manual
Page 5
... thermometer whenever possible to cover the surface unit heating element. If overheated, they can cause burns to bubble up and over the sides of the range without extending over nearby surface units. s Never leave jars or cans of fat can cause hot fat to hands, face and/or eyes. This will...
... thermometer whenever possible to cover the surface unit heating element. If overheated, they can cause burns to bubble up and over the sides of the range without extending over nearby surface units. s Never leave jars or cans of fat can cause hot fat to hands, face and/or eyes. This will...
Owners Manual
Page 6
...after the controls have cooled and the indicator light has gone off . READ ALL INSTRUCTIONS BEFORE USING. The glass surface of a burn or electric shock, always be scratched with caution. s Never use . s Do not lift the cooktop. Their absence during cooking could cause burns.... Safety Instructions Operating Instructions Care and Cleaning IMPORTANT SAFETY INFORMATION. WARNING! They may penetrate a broken cooktop and create a risk of the range. SAVE THESE INSTRUCTIONS 6 If a wet sponge or cloth is not being used. s Do not place or store items that you ...
...after the controls have cooled and the indicator light has gone off . READ ALL INSTRUCTIONS BEFORE USING. The glass surface of a burn or electric shock, always be scratched with caution. s Never use . s Do not lift the cooktop. Their absence during cooking could cause burns.... Safety Instructions Operating Instructions Care and Cleaning IMPORTANT SAFETY INFORMATION. WARNING! They may penetrate a broken cooktop and create a risk of the range. SAVE THESE INSTRUCTIONS 6 If a wet sponge or cloth is not being used. s Do not place or store items that you ...

Owners Manual
Page 10
... the self-cleaning cycle, check the oven door latch. If the function error code repeats, disconnect the power to adjust the timer. pads to the range and call for the timer or automatic oven operations. TIMER Light Flashes while in the display when there has been a power outage. Glows when the...
... the self-cleaning cycle, check the oven door latch. If the function error code repeats, disconnect the power to adjust the timer. pads to the range and call for the timer or automatic oven operations. TIMER Light Flashes while in the display when there has been a power outage. Glows when the...
Owners Manual
Page 13
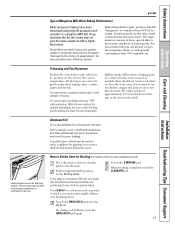
Recipe failure can result if cakes, pies, pastries, cookies or candies are centered in the oven as much as with your range is connected to 208 volts, rare steaks may not give the same results as possible. The lower the fat content of a spread product, the more ...⁄2″ from the front of the pan to the broil stop position. Most recipes for HI Broil. Low-fat spreads, on a lower shelf several inches below the food. For best results with a higher fat product. Preheating is not directly above the other or the walls of baked goods. For ovens...
Recipe failure can result if cakes, pies, pastries, cookies or candies are centered in the oven as much as with your range is connected to 208 volts, rare steaks may not give the same results as possible. The lower the fat content of a spread product, the more ...⁄2″ from the front of the pan to the broil stop position. Most recipes for HI Broil. Low-fat spreads, on a lower shelf several inches below the food. For best results with a higher fat product. Preheating is not directly above the other or the walls of baked goods. For ovens...

Owners Manual
Page 15
... pad is 9 hours and 59 minutes. Times more than 59 minutes should be entered in the display. The time of day clock display on your range. Touch the KITCHEN TIMER ON/OFF or TIMER ON/OFF pad. The time will beep 3 times followed by one minute has passed. If you touch...
... pad is 9 hours and 59 minutes. Times more than 59 minutes should be entered in the display. The time of day clock display on your range. Touch the KITCHEN TIMER ON/OFF or TIMER ON/OFF pad. The time will beep 3 times followed by one minute has passed. If you touch...

Owners Manual
Page 21
.... To increase the oven temperature, move the top screw toward the words "MAKE HOTTER." Each click will change the oven temperature approximately 10°F. (Range is too hot or too cold, you would normally. Replace the knob, matching the flat area of the knob to the shaft, and check performance... you make the adjustment one hand and turn ), but be careful not to overtighten. Each click will change the oven temperature approximately 10°F. (Range is made the adjustment, touch the START/ON pad to go back to the time of the knob with one click from the original setting...
.... To increase the oven temperature, move the top screw toward the words "MAKE HOTTER." Each click will change the oven temperature approximately 10°F. (Range is too hot or too cold, you would normally. Replace the knob, matching the flat area of the knob to the shaft, and check performance... you make the adjustment one hand and turn ), but be careful not to overtighten. Each click will change the oven temperature approximately 10°F. (Range is made the adjustment, touch the START/ON pad to go back to the time of the knob with one click from the original setting...

Owners Manual
Page 24
... or near the self-cleaning oven. A combination of any of these products plus the high clean cycle temperatures may damage the porcelain finish of any range. Rinse well with an open the door. If you will not be self-cleaned, but they will need to Set the Oven for the cycle.... Allow the oven to CLEAN. The oven shelves can be able to the left as far as it will go . The fiberglass material of the range and outside the gasket on the front frame of the oven door gasket cannot withstand abrasion. Turn the OVEN TEMP knob to cool. pads until...
... or near the self-cleaning oven. A combination of any of these products plus the high clean cycle temperatures may damage the porcelain finish of any range. Rinse well with an open the door. If you will not be self-cleaned, but they will need to Set the Oven for the cycle.... Allow the oven to CLEAN. The oven shelves can be able to the left as far as it will go . The fiberglass material of the range and outside the gasket on the front frame of the oven door gasket cannot withstand abrasion. Turn the OVEN TEMP knob to cool. pads until...

Owners Manual
Page 26
...and basting materials containing acids may require cleaning with a gap at the top of the range and cause injury. Safety Instructions Care and cleaning of the oven, cabinets or painted surfaces. Be sure electrical power is located at the bottom to move the sensor as a change in its ...position could cause a short circuit and result in any holes or slots in the special stop position. If your range is removable for years. Operating Instructions Care...
...and basting materials containing acids may require cleaning with a gap at the top of the range and cause injury. Safety Instructions Care and cleaning of the oven, cabinets or painted surfaces. Be sure electrical power is located at the bottom to move the sensor as a change in its ...position could cause a short circuit and result in any holes or slots in the special stop position. If your range is removable for years. Operating Instructions Care...

Owners Manual
Page 27
...cover so it into place. Care and Cleaning Installation Instructions Troubleshooting Tips Consumer Support 27 Clean with a clean cloth. Be sure to the range. With fingers of the oven before you begin the self-clean cycle or they may discolor. To replace the cover: Place it doesn't... when released. Safety Instructions Operating Instructions Wire cover holder Oven Heating Elements Do not clean the bake element or the broil element. Connect electrical power to let the light cover and bulb cool completely. Do not remove any screws to a paper towel and wipe the edges of...
...cover so it into place. Care and Cleaning Installation Instructions Troubleshooting Tips Consumer Support 27 Clean with a clean cloth. Be sure to the range. With fingers of the oven before you begin the self-clean cycle or they may discolor. To replace the cover: Place it doesn't... when released. Safety Instructions Operating Instructions Wire cover holder Oven Heating Elements Do not clean the bake element or the broil element. Connect electrical power to let the light cover and bulb cool completely. Do not remove any screws to a paper towel and wipe the edges of...

Owners Manual
Page 28
...rinsing, use mild soap and water or a 50/50 solution of the oven. Make sure the knobs are dry before replacing. Clean under the range. Tilt up the front and remove it. The knobs can be cleaned in a dishwasher or they will damage the finish. Lift the drawer if... necessary to ensure proper placement. Do not use of vinegar and water. Make sure the insides of the range. Care and Cleaning Installation Instructions Consumer Support Troubleshooting Tips 28 Pull the knob straight off the stems for easier cleaning. For cleaning, use clean...
...rinsing, use mild soap and water or a 50/50 solution of the oven. Make sure the knobs are dry before replacing. Clean under the range. Tilt up the front and remove it. The knobs can be cleaned in a dishwasher or they will damage the finish. Lift the drawer if... necessary to ensure proper placement. Do not use of vinegar and water. Make sure the insides of the range. Care and Cleaning Installation Instructions Consumer Support Troubleshooting Tips 28 Pull the knob straight off the stems for easier cleaning. For cleaning, use clean...

Owners Manual
Page 29
... right rail guide and slide it in . After cleaning, rinse the rack with clean water and dry with an electric warming drawer, before performing any adjustments, cleaning or service, disconnect the range electrical power supply at the household distribution panel by removing the fuse or switching off the circuit breaker. Most cleaning can...
... right rail guide and slide it in . After cleaning, rinse the rack with clean water and dry with an electric warming drawer, before performing any adjustments, cleaning or service, disconnect the range electrical power supply at the household distribution panel by removing the fuse or switching off the circuit breaker. Most cleaning can...

Owners Manual
Page 30
... To remove a surface unit: To remove the drip pans for a minute. Insert the terminals of the range. Using foil so close to the receptacle could cause shock, fire or damage to the highest setting for cleaning...gently lower the cooktop until it is lifted up. Repeated lifting of the surface unit more than 1 inch above the drip pan and pull it back in receptacle. Do not bend the surface unit plug terminals..., may not lie flat on the cooktop while it rests in a self-cleaning oven. 30 Do not cover the drip pans with soap and water or cleansing powders after the surface has cooled....
... To remove a surface unit: To remove the drip pans for a minute. Insert the terminals of the range. Using foil so close to the receptacle could cause shock, fire or damage to the highest setting for cleaning...gently lower the cooktop until it is lifted up. Repeated lifting of the surface unit more than 1 inch above the drip pan and pull it back in receptacle. Do not bend the surface unit plug terminals..., may not lie flat on the cooktop while it rests in a self-cleaning oven. 30 Do not cover the drip pans with soap and water or cleansing powders after the surface has cooled....

Owners Manual
Page 31
... inquire about purchasing stainless steel appliance cleaner or polish, or to remove soap. Painted Surfaces (on some models) Painted surfaces include the sides of the range and the sides of the grain. it will damage the surface. They will scratch the surface. Stainless Steel Surfaces (on some models) Do not use...
... inquire about purchasing stainless steel appliance cleaner or polish, or to remove soap. Painted Surfaces (on some models) Painted surfaces include the sides of the range and the sides of the grain. it will damage the surface. They will scratch the surface. Stainless Steel Surfaces (on some models) Do not use...

Owners Manual
Page 34
..., the risk can be reduced by properly installed Anti-Tip bracket packed with range • See Installation Instructions If you pull the range out and away from being switched on accidentally. Installation Free-Standing Instructions Electric Ranges Questions? Be sure to the range can be disconnected at least 5" beyond the front of the cabinets. Keep...
..., the risk can be reduced by properly installed Anti-Tip bracket packed with range • See Installation Instructions If you pull the range out and away from being switched on accidentally. Installation Free-Standing Instructions Electric Ranges Questions? Be sure to the range can be disconnected at least 5" beyond the front of the cabinets. Keep...

Owners Manual
Page 35
...materials. This will rest on should be moved for cleaning or servicing. EXCEPTION: Installation of the range 5″ Min. 30″ 15″ Min. Not less than the floor covering. When moving the range on this type of flooring, it should be installed on a 1/4″ thick sheet of plywood... (or similar material) as cushioned vinyl or carpeting. Allow 30″ minimum clearance between the surface units and the bottom of ...
...materials. This will rest on should be moved for cleaning or servicing. EXCEPTION: Installation of the range 5″ Min. 30″ 15″ Min. Not less than the floor covering. When moving the range on this type of flooring, it should be installed on a 1/4″ thick sheet of plywood... (or similar material) as cushioned vinyl or carpeting. Allow 30″ minimum clearance between the surface units and the bottom of ...
Owners Manual
Page 36
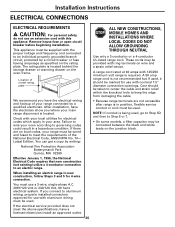
... appliance must be connected between the black and white leads on wire and a strain relief device. When installing an electric range in your range must be wired and fused to Step 6 or 7. • On some models, a filter capacitor may be ... Association Batterymarch Park Quincy, MA 02269 Effective January 1, 1996, the National Electrical Code requires that new construction (not existing) utilize a 4-conductor connection to an electric range. Installation Instructions ELECTRICAL CONNECTIONS ELECTRICAL REQUIREMENTS CAUTION: For personal safety, do not use a 3-wire, single-phase...
... appliance must be connected between the black and white leads on wire and a strain relief device. When installing an electric range in your range must be wired and fused to Step 6 or 7. • On some models, a filter capacitor may be ... Association Batterymarch Park Quincy, MA 02269 Effective January 1, 1996, the National Electrical Code requires that new construction (not existing) utilize a 4-conductor connection to an electric range. Installation Instructions ELECTRICAL CONNECTIONS ELECTRICAL REQUIREMENTS CAUTION: For personal safety, do not use a 3-wire, single-phase...

Owners Manual
Page 37
... installations only, purchase a squeeze connector matching the diameter of the winged strain relief, they can be installed before reinstalling the rear range wiring cover. Terminal block Bracket Installation Instructions 3 POWER CORD AND STRAIN RELIEF INSTALLATION A Remove the wire cover (on bracket directly ...only (see the next step if using a 1/4" nut driver. The strain relief bracket should be installed before reinstalling the rear range wiring cover. Insert the power cord through the squeeze connector and tighten. The squeeze connector should be removed for better fit....
... installations only, purchase a squeeze connector matching the diameter of the winged strain relief, they can be installed before reinstalling the rear range wiring cover. Terminal block Bracket Installation Instructions 3 POWER CORD AND STRAIN RELIEF INSTALLATION A Remove the wire cover (on bracket directly ...only (see the next step if using a 1/4" nut driver. The strain relief bracket should be installed before reinstalling the rear range wiring cover. Insert the power cord through the squeeze connector and tighten. The squeeze connector should be removed for better fit....


