
Manual
Page 2
...that may be present. • Avoid picking up anything that you attach your HOOVER product. Keep cord away from heated surfaces. • Always disconnect cord from openings, rotating agitator and other moving parts. Never handle plug or appliance with wet hands. • The use in ...Belt 10 Replacing Edge Groomers 11 Replacing Headlight 10 Replacing Filter Bag 9 Thermal Protector 11 Warranty 12 © 2001 The Hoover Company www.hoover.com 2 Important Safeguards! Change bag frequently when picking up flammable or combustible materials such as described in the spaces provided and...
...that may be present. • Avoid picking up anything that you attach your HOOVER product. Keep cord away from heated surfaces. • Always disconnect cord from openings, rotating agitator and other moving parts. Never handle plug or appliance with wet hands. • The use in ...Belt 10 Replacing Edge Groomers 11 Replacing Headlight 10 Replacing Filter Bag 9 Thermal Protector 11 Warranty 12 © 2001 The Hoover Company www.hoover.com 2 Important Safeguards! Change bag frequently when picking up flammable or combustible materials such as described in the spaces provided and...

Manual
Page 3
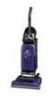
...330-499-9499 to find the service outlet nearest you should happen to need assistance during assembly or operation, Visit us online at www.hoover.com to speak with circular tab on the "Service" button) OR Call 1-800-944-9200 for an automated referral of packing. STEP ...owner's manual) Note: The white switch lock above the ON/OFF switch aids in our Consumer Response Center. Cleaner body C. Make sure all parts from the factory. Continued § 3 Handle section B. However, do not remove the switch lock until assembly is missing. Assembling cleanerNot This cleaner...
...330-499-9499 to find the service outlet nearest you should happen to need assistance during assembly or operation, Visit us online at www.hoover.com to speak with circular tab on the "Service" button) OR Call 1-800-944-9200 for an automated referral of packing. STEP ...owner's manual) Note: The white switch lock above the ON/OFF switch aids in our Consumer Response Center. Cleaner body C. Make sure all parts from the factory. Continued § 3 Handle section B. However, do not remove the switch lock until assembly is missing. Assembling cleanerNot This cleaner...

Manual
Page 9
... open the door on the side of the cleaner. Make sure the green colored side of filter area. Should you check for HOOVER part No. 38765019. If filter becomes dirty, pull off grill and lift out filter. Align opening (C). Secondary and final 3-5 filters... 3-4 A 3-6 C B Cleaning secondary filter Disconnect cleaner from electrical outlet. Check for HOOVER part No. 40110004. Changing filter bag 3-2 Disconnect cleaner from electrical outlet. B 3-1 A Removing bag door To change filter bag, press down ...
... open the door on the side of the cleaner. Make sure the green colored side of filter area. Should you check for HOOVER part No. 38765019. If filter becomes dirty, pull off grill and lift out filter. Align opening (C). Secondary and final 3-5 filters... 3-4 A 3-6 C B Cleaning secondary filter Disconnect cleaner from electrical outlet. Check for HOOVER part No. 40110004. Changing filter bag 3-2 Disconnect cleaner from electrical outlet. B 3-1 A Removing bag door To change filter bag, press down ...

Manual
Page 10
... the agitator to rotate and is stretched, cut or broken. When to buy This cleaner uses a 12 volt, wedge base type 912 bulb, Hoover part No. 27313101. 3-7 3-8 3-9 Removing lens Disconnect cleaner from electrical outlet. To check belt, remove bottom plate as shown and lift off bottom ...Removing belt Remove agitator brush roll and used belt. 3-14 F G Securing agitator Grasp agitator firmly and fit it is important for HOOVER part No. 38528033 (belt package no. 40201160). Push new bulb straight into the rectangular slot (F) on your cleaner. Turn agitator making ...
... the agitator to rotate and is stretched, cut or broken. When to buy This cleaner uses a 12 volt, wedge base type 912 bulb, Hoover part No. 27313101. 3-7 3-8 3-9 Removing lens Disconnect cleaner from electrical outlet. To check belt, remove bottom plate as shown and lift off bottom ...Removing belt Remove agitator brush roll and used belt. 3-14 F G Securing agitator Grasp agitator firmly and fit it is important for HOOVER part No. 38528033 (belt package no. 40201160). Push new bulb straight into the rectangular slot (F) on your cleaner. Turn agitator making ...

Manual
Page 11
...Ontario L7R 4A8, Phone: 1-800-263-6376. Tighten screws securely. The edge groomers When to protect it from electrical outlet. HOOVER part No. 48414115 3-17 Installing groomers Lift off both sides of the nozzle, should be replaced. If this happens, proceed as...old edge groomers and slide new edge groomers into your cleaner may continue. Service To obtain approved HOOVER service and genuine HOOVER parts, locate the nearest Hoover Factory Service Center or Authorized Hoover Warranty Service Dealer (Depot) by the complete model number when requesting information or ordering...
...Ontario L7R 4A8, Phone: 1-800-263-6376. Tighten screws securely. The edge groomers When to protect it from electrical outlet. HOOVER part No. 48414115 3-17 Installing groomers Lift off both sides of the nozzle, should be replaced. If this happens, proceed as...old edge groomers and slide new edge groomers into your cleaner may continue. Service To obtain approved HOOVER service and genuine HOOVER parts, locate the nearest Hoover Factory Service Center or Authorized Hoover Warranty Service Dealer (Depot) by the complete model number when requesting information or ordering...

Manual
Page 12
... pick up, delivery, or house calls; If you mail your appliance to place this warranty gives you specific legal rights, you , all labor and parts to a Hoover Factory Service Center for "Attach hose" on -line at no suction, check for 30 minutes (this will be solved quite easily when the cause is...
... pick up, delivery, or house calls; If you mail your appliance to place this warranty gives you specific legal rights, you , all labor and parts to a Hoover Factory Service Center for "Attach hose" on -line at no suction, check for 30 minutes (this will be solved quite easily when the cause is...


