
Manual
Page 1
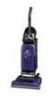
WindTunnel™ by HOOVER Congratulations on your purchase! ® This WindTunnel™ vacuum cleaner uses HOOVER® HEPA Filtration Type "Y" filter bags This product was designed for easy assembly (See page 3) www.hoover.com
WindTunnel™ by HOOVER Congratulations on your purchase! ® This WindTunnel™ vacuum cleaner uses HOOVER® HEPA Filtration Type "Y" filter bags This product was designed for easy assembly (See page 3) www.hoover.com

Manual
Page 2
... Assembling Cleaner 3-5 Carton Contents 3 Cleaner Descriptions 5 How To Use 5-8 Embedded Dirt FINDER™ Feature ..6 Cleaning Tools 7-8 If You Have a Problem 12 Important Safeguards 2 Lubrication 11 Maintenance Authorized Service 11 Cleaning Filters 9 Clearing Blockages 12 Replacing Agitator Brush Roll ......11 Replacing Belt 10 Replacing Edge Groomers 11 Replacing Headlight 10 Replacing Filter Bag 9 Thermal Protector 11 Warranty 12 © 2001 The Hoover Company www.hoover.com 2 Important Safeguards! Your cleaner is model and has serial number It is not working...
... Assembling Cleaner 3-5 Carton Contents 3 Cleaner Descriptions 5 How To Use 5-8 Embedded Dirt FINDER™ Feature ..6 Cleaning Tools 7-8 If You Have a Problem 12 Important Safeguards 2 Lubrication 11 Maintenance Authorized Service 11 Cleaning Filters 9 Clearing Blockages 12 Replacing Agitator Brush Roll ......11 Replacing Belt 10 Replacing Edge Groomers 11 Replacing Headlight 10 Replacing Filter Bag 9 Thermal Protector 11 Warranty 12 © 2001 The Hoover Company www.hoover.com 2 Important Safeguards! Your cleaner is model and has serial number It is not working...

Manual
Page 3
... parts from the factory. Hose, cleaning tools and wands E. However, do not remove the switch lock until assembly is missing. only) OR Call 1-330-499-9499 to speak with owner's manual) Note: The white switch lock above the ON/OFF switch aids in our Consumer Response Center. Hose rack D. Handle bolts and nuts packet (in bag with a representative in the assembly of your cleaner. 1. STEP 1 Attach rack and handle 1-2 1-3 B 1-4 C A Open tool...
... parts from the factory. Hose, cleaning tools and wands E. However, do not remove the switch lock until assembly is missing. only) OR Call 1-330-499-9499 to speak with owner's manual) Note: The white switch lock above the ON/OFF switch aids in our Consumer Response Center. Hose rack D. Handle bolts and nuts packet (in bag with a representative in the assembly of your cleaner. 1. STEP 1 Attach rack and handle 1-2 1-3 B 1-4 C A Open tool...

Manual
Page 4
... fitting tabs on your model). 4 C B Slide hose into (B) and twist hose to snap securely shut. Lift hose tube cover (C). STEP II Attach hose 1-11 A NOTE: Hose must be in place, slide handle onto cleaner body. Press cord into the 3 notches and the clip as shown for all operations. 1-12 1-13 B Align end of handle. 1-8 1-9 1-10 Place nuts in dirt duct. Switch (A) above bag door should be...
... fitting tabs on your model). 4 C B Slide hose into (B) and twist hose to snap securely shut. Lift hose tube cover (C). STEP II Attach hose 1-11 A NOTE: Hose must be in place, slide handle onto cleaner body. Press cord into the 3 notches and the clip as shown for all operations. 1-12 1-13 B Align end of handle. 1-8 1-9 1-10 Place nuts in dirt duct. Switch (A) above bag door should be...

Manual
Page 5
... for storage. Check bag indicator 20. Bag door 22. ON-OFF switch Plug cord into clip. Continued 5 Snap wand into electrical outlet. Dispose of door. 21. Tool cover 6. Dusting brush 7. Furniture guard: helps prevent cleaner from marking furniture. 15. Embedded Dirt FINDER™ sensitivity switch* 18. 'Dirt FINDER' display* 19. This plug will look like the drawing. 1. Edge groomers 14. Stair cleaning handle: located below lower edge of switch lock. If...
... for storage. Check bag indicator 20. Bag door 22. ON-OFF switch Plug cord into clip. Continued 5 Snap wand into electrical outlet. Dispose of door. 21. Tool cover 6. Dusting brush 7. Furniture guard: helps prevent cleaner from marking furniture. 15. Embedded Dirt FINDER™ sensitivity switch* 18. 'Dirt FINDER' display* 19. This plug will look like the drawing. 1. Edge groomers 14. Stair cleaning handle: located below lower edge of switch lock. If...

Manual
Page 6
... know that the carpet is first turned on . This means that the carpet contains a high level of dirt is being picked up primarily fine surface dust and lint which is being removed by using cleaning tools; The nozzle will come on when the cleaner is generally clean. HIGH BARE FLOOR Settings For maximum cleaning performance, the following carpet height settings are removed. low for very deep pile carpet where easier pushing...
... know that the carpet is first turned on . This means that the carpet contains a high level of dirt is being picked up primarily fine surface dust and lint which is being removed by using cleaning tools; The nozzle will come on when the cleaner is generally clean. HIGH BARE FLOOR Settings For maximum cleaning performance, the following carpet height settings are removed. low for very deep pile carpet where easier pushing...

Manual
Page 7
... area rugs or carpeted stairs during tool use only forward strokes. A B Removing hose When using cleaning tools, cleaner handle should be used to give extra length to top. Also, turn cleaner OFF before disconnecting and connecting hose to snap free if it on stairs. To use the hose and powered hand tool or furniture nozzle for reaching hard to rotate. Lower cover (B) onto hose tube. Select proper tool C. Dusting brush may use hose, lift hose end as shown and...
... area rugs or carpeted stairs during tool use only forward strokes. A B Removing hose When using cleaning tools, cleaner handle should be used to give extra length to top. Also, turn cleaner OFF before disconnecting and connecting hose to snap free if it on stairs. To use the hose and powered hand tool or furniture nozzle for reaching hard to rotate. Lower cover (B) onto hose tube. Select proper tool C. Dusting brush may use hose, lift hose end as shown and...

Manual
Page 8
... water with a damp cloth. HOOVER bags can fill the bag quickly while vacuuming. Cleaning tools may be purchased from your cleaner operates at www.hoover.com. There are using . Maintenance Familiarize yourself with dirt. This type of debris does not activate the "Check Bag" indicator, available on new carpet, be identified by pushing it into (J) and twist hose to lock it firmly onto the wand. Attach second wand or tool to wand (H) by these home maintenance...
... water with a damp cloth. HOOVER bags can fill the bag quickly while vacuuming. Cleaning tools may be purchased from your cleaner operates at www.hoover.com. There are using . Maintenance Familiarize yourself with dirt. This type of debris does not activate the "Check Bag" indicator, available on new carpet, be identified by pushing it into (J) and twist hose to lock it firmly onto the wand. Attach second wand or tool to wand (H) by these home maintenance...

Manual
Page 9
... to replace this filter when it is designed with mild detergent. Hand wash filter in filter bag with mild detergent, then air dry. Let filter air dry and reposition it on bottom of the cleaner. Check agitator shield Because your cleaner's excellent pick up so well, we strongly recommend you check for debris accumulation under the shield will help maintain your cleaner picks up and suction. Discard used filter bag. To remove this filter, ask for dirt accumulation...
... to replace this filter when it is designed with mild detergent. Hand wash filter in filter bag with mild detergent, then air dry. Let filter air dry and reposition it on bottom of the cleaner. Check agitator shield Because your cleaner's excellent pick up so well, we strongly recommend you check for debris accumulation under the shield will help maintain your cleaner picks up and suction. Discard used filter bag. To remove this filter, ask for dirt accumulation...

Manual
Page 10
... electrical outlet. The belt is located under the bottom plate of socket. Headlight replacement What to buy To assure effective operation, use only genuine HOOVER belts with a Phillips screw driver. To check belt, remove bottom plate as shown noting the placement of agitator (G) into place. Installing bulb Pull old bulb straight out of the cleaner and should be sure it as shown in low position and turn cleaner over motor pulley (B). 10 E D Replacing agitator brush roll...
... electrical outlet. The belt is located under the bottom plate of socket. Headlight replacement What to buy To assure effective operation, use only genuine HOOVER belts with a Phillips screw driver. To check belt, remove bottom plate as shown noting the placement of agitator (G) into place. Installing bulb Pull old bulb straight out of the cleaner and should be sure it as shown in low position and turn cleaner over motor pulley (B). 10 E D Replacing agitator brush roll...

Manual
Page 11
... stop running. When cleaner is equipped with Fig. 310. When purchasing a new agitator, ask for HOOVER part No. 39511004. If the thermal protector continues to replace The edge groomers, located on the bottom of brushes, disconnect cleaner from the electrical outlet. 2. When the thermal protector activates, the cleaner will only result in "The belt" section beginning with two ball bearings that contain sufficient lubrication for dirt accumulation. 3. Lubrication The motor...
... stop running. When cleaner is equipped with Fig. 310. When purchasing a new agitator, ask for HOOVER part No. 39511004. If the thermal protector continues to replace The edge groomers, located on the bottom of brushes, disconnect cleaner from the electrical outlet. 2. When the thermal protector activates, the cleaner will only result in "The belt" section beginning with two ball bearings that contain sufficient lubrication for dirt accumulation. 3. Lubrication The motor...

Manual
Page 12
... purchase. Turn cleaner OFF and unplug. 5. If you , all labor and parts to a higher setting Problem: Smoky/burning smell detected Possible Cause Possible Solution • Belt broken or stretched • Replace agitator brush roll belt as follows: 1) Disconnect hose from a U. Low suction or pick up Possible Cause Possible Solution • Broken or worn belt • Replace belt • Agitator brush roll worn • Replace brush roll • Filter bag full • Change filter bag • Incorrect carpet height setting • Move nozzle control knob...
... purchase. Turn cleaner OFF and unplug. 5. If you , all labor and parts to a higher setting Problem: Smoky/burning smell detected Possible Cause Possible Solution • Belt broken or stretched • Replace agitator brush roll belt as follows: 1) Disconnect hose from a U. Low suction or pick up Possible Cause Possible Solution • Broken or worn belt • Replace belt • Agitator brush roll worn • Replace brush roll • Filter bag full • Change filter bag • Incorrect carpet height setting • Move nozzle control knob...


