
Owner's Manual
Page 1
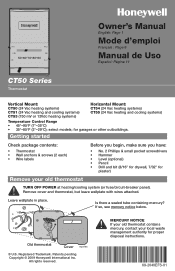
... M23786 ® U.S. Leave wallplate in place. Is there a sealed tube containing mercury? Copyright © 2009 Honeywell International Inc. Remove cover and thermostat, but leave wallplate with wires attached. MERCURY NOTICE If your old thermostat contains mercury, contact your old thermostat Before you begin, make sure you have: • No. 2 Phillips & small pocket screwdrivers •...
... M23786 ® U.S. Leave wallplate in place. Is there a sealed tube containing mercury? Copyright © 2009 Honeywell International Inc. Remove cover and thermostat, but leave wallplate with wires attached. MERCURY NOTICE If your old thermostat contains mercury, contact your old thermostat Before you begin, make sure you have: • No. 2 Phillips & small pocket screwdrivers •...
Owner's Manual
Page 2
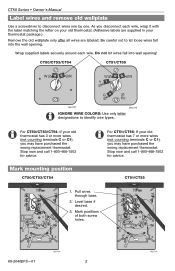
... base if desired. 3. Mark mounting position CT50/CT53/CT54 For CT51/CT55: If your old thermostat has 7 or more wires (not counting terminals C or C1), you may have purchased the wrong replacement thermostat. Stop now and call 1-800-468-1502 for advice. CT50/CT53/CT54 CT51/CT55 M23787 M23788...wire, wrap it with the label matching the letter on your old thermostat. (Adhesive labels are labeled. For CT50/CT53/CT54: If your thermostat package.) Remove the old wallplate only after all wires are supplied in your old thermostat has 3 or more wires (not counting terminals C or C1), ...
... base if desired. 3. Mark mounting position CT50/CT53/CT54 For CT51/CT55: If your old thermostat has 7 or more wires (not counting terminals C or C1), you may have purchased the wrong replacement thermostat. Stop now and call 1-800-468-1502 for advice. CT50/CT53/CT54 CT51/CT55 M23787 M23788...wire, wrap it with the label matching the letter on your old thermostat. (Adhesive labels are labeled. For CT50/CT53/CT54: If your thermostat package.) Remove the old wallplate only after all wires are supplied in your old thermostat has 3 or more wires (not counting terminals C or C1), ...
Owner's Manual
Page 3
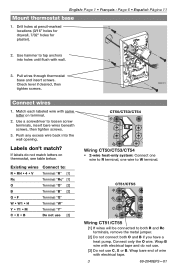
...screws, then tighten screws. 3. Check level if desired, then tighten screws. Wrap bare end of wire with same letter on thermostat, see table below. Labels don't match? Connect only the O wire. Wrap B wire with wall. 3. Drill holes at ...pencil-marked locations (3/16" holes for drywall, 7/32" holes for plaster). 2. Pull wires through thermostat base and insert screws. Existing wires Connect to: R • RH • 4 • V Terminal "R" [1] Rc Terminal "Rc" [1] O Terminal "O" [2] B Terminal "B" [2] G •...
...screws, then tighten screws. 3. Check level if desired, then tighten screws. Wrap bare end of wire with same letter on thermostat, see table below. Labels don't match? Connect only the O wire. Wrap B wire with wall. 3. Drill holes at ...pencil-marked locations (3/16" holes for drywall, 7/32" holes for plaster). 2. Pull wires through thermostat base and insert screws. Existing wires Connect to: R • RH • 4 • V Terminal "R" [1] Rc Terminal "Rc" [1] O Terminal "O" [2] B Terminal "B" [2] G •...
Owner's Manual
Page 4
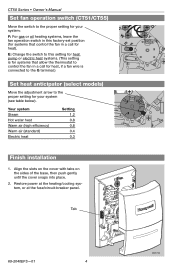
... the cover snaps into place. 2. Tab 69-2040EFS-01 4 M23 M23795 M23796 E: Change the switch to this factory-set position (for systems that allow the thermostat to control the fan in a call for heat, if a fan wire is for systems that control the fan in a call for your system (see table...
... the cover snaps into place. 2. Tab 69-2040EFS-01 4 M23 M23795 M23796 E: Change the switch to this factory-set position (for systems that allow the thermostat to control the fan in a call for heat, if a fan wire is for systems that control the fan in a call for your system (see table...


