
Owner's Manual
Page 1
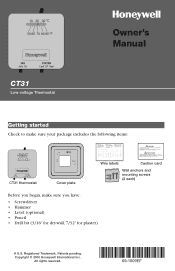
All rights reserved. Copyright © 2005 Honeywell International Inc. Owner's Manual CT31 Low-voltage Thermostat Getting started Check to make sure your package includes the following items: CT31 thermostat Cover plate Wire labels Caution card Wall anchors and mounting screws (2 each) Before you begin, make sure you have: • Screwdriver • Hammer • Level (optional) • Pencil • Drill bit (3/16" for drywall, 7/32" for plaster) ® U.S. Patents pending. Registered Trademark.
All rights reserved. Copyright © 2005 Honeywell International Inc. Owner's Manual CT31 Low-voltage Thermostat Getting started Check to make sure your package includes the following items: CT31 thermostat Cover plate Wire labels Caution card Wall anchors and mounting screws (2 each) Before you begin, make sure you have: • Screwdriver • Hammer • Level (optional) • Pencil • Drill bit (3/16" for drywall, 7/32" for plaster) ® U.S. Patents pending. Registered Trademark.
Owner's Manual
Page 2
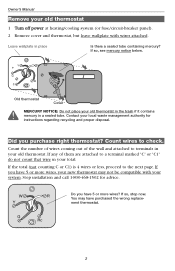
... so, see mercury notice below. Leave wallplate in a sealed tube. If the total (not counting C or C1) is 4 wires or less, proceed to check. Owner's Manual Remove your old thermostat 1 Turn off power at heating/cooling system (or fuse/circuit-breaker panel). 2 Remove cover and thermostat, but leave wallplate with your...
... so, see mercury notice below. Leave wallplate in a sealed tube. If the total (not counting C or C1) is 4 wires or less, proceed to check. Owner's Manual Remove your old thermostat 1 Turn off power at heating/cooling system (or fuse/circuit-breaker panel). 2 Remove cover and thermostat, but leave wallplate with your...
Owner's Manual
Page 4
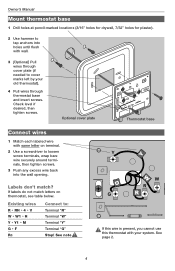
... present, you cannot use this thermostat with your old thermostat). 4 Pull wires through cover plate (if needed to cover marks left by your system. Owner's Manual Mount thermostat base 1 Drill holes at pencil-marked locations (3/16" holes for drywall, 7/32" holes for plaster). 2 Use hammer to tap anchors into the wall...
... present, you cannot use this thermostat with your old thermostat). 4 Pull wires through cover plate (if needed to cover marks left by your system. Owner's Manual Mount thermostat base 1 Drill holes at pencil-marked locations (3/16" holes for drywall, 7/32" holes for plaster). 2 Use hammer to tap anchors into the wall...
Owner's Manual
Page 6
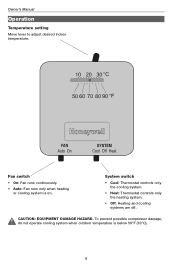
System switch • Cool: Thermostat controls only the cooling system. • Heat: Thermostat controls only the heating system. • Off: Heating and cooling systems are off. CAUTION: EQUIPMENT DAMAGE HAZARD. To prevent possible compressor damage, do not operate cooling system when outdoor temperature is on. Owner's Manual Operation Temperature setting Move lever to adjust desired indoor temperature. Fan switch • On: Fan runs continuously. • Auto: Fan runs only when heating or cooling system is below 50°F (10°C). 6
System switch • Cool: Thermostat controls only the cooling system. • Heat: Thermostat controls only the heating system. • Off: Heating and cooling systems are off. CAUTION: EQUIPMENT DAMAGE HAZARD. To prevent possible compressor damage, do not operate cooling system when outdoor temperature is on. Owner's Manual Operation Temperature setting Move lever to adjust desired indoor temperature. Fan switch • On: Fan runs continuously. • Auto: Fan runs only when heating or cooling system is below 50°F (10°C). 6


