

User Manual
Page 5
... TOOL dry, clean, and free from tool before servicing, or when changing attachments, blades, bits, cutters, etc., all times. MAINTAIN TOOLS WITH CARE. Wear hearing protection during extended periods of parts, mounting and any solvents to see that are removed from oil and grease. When tool is in loss of the blade, cutter, or sanding spindle only. NEVER LEAVE TOOL RUNNING UNATTENDED. Always use the next heavier gauge...
... TOOL dry, clean, and free from tool before servicing, or when changing attachments, blades, bits, cutters, etc., all times. MAINTAIN TOOLS WITH CARE. Wear hearing protection during extended periods of parts, mounting and any solvents to see that are removed from oil and grease. When tool is in loss of the blade, cutter, or sanding spindle only. NEVER LEAVE TOOL RUNNING UNATTENDED. Always use the next heavier gauge...

User Manual
Page 6
... users. DO NOT use only identical replacement parts. Refer to power supply. b) Stop the engine and relieve hydraulic system pressure before disconnecting it to avoid accidental starting when reconnecting to them these instructions also. 4 - d) Never use of accessories are not listed may create a hazard or cause product damage. Always stay alert! If injured by an authorized service center. DO NOT operate A tool...
... users. DO NOT use only identical replacement parts. Refer to power supply. b) Stop the engine and relieve hydraulic system pressure before disconnecting it to avoid accidental starting when reconnecting to them these instructions also. 4 - d) Never use of accessories are not listed may create a hazard or cause product damage. Always stay alert! If injured by an authorized service center. DO NOT operate A tool...

User Manual
Page 7
...cycles per second) W Watt Power min Minutes Time Alternating Current Type of current Direct Current no No Load Speed Class II Construction Type or a characteristic of injury, user must read and understand operator's manual before using... wear nonslip safety footwear when operating this product. Read The Operator's Manual To reduce the risk of current Rotational speed, at least 10 ft. ...speed, orbits etc., per minute Wet Conditions Alert Do not expose to operate the tool better and safer. Proper interpretation of the following symbols may be used on this tool...
...cycles per second) W Watt Power min Minutes Time Alternating Current Type of current Direct Current no No Load Speed Class II Construction Type or a characteristic of injury, user must read and understand operator's manual before using... wear nonslip safety footwear when operating this product. Read The Operator's Manual To reduce the risk of current Rotational speed, at least 10 ft. ...speed, orbits etc., per minute Wet Conditions Alert Do not expose to operate the tool better and safer. Proper interpretation of the following symbols may be used on this tool...

User Manual
Page 8
... SERVICE Servicing requires extreme care and knowledge and should be performed only by a qualified service technician. SYMBOLS The following signal words and meanings are intended to explain the levels of any power tool ...use only identical replacement parts. WARNING: Indicates a potentially hazardous situation, which , if not avoided, will result in death or serious injury. Call Homelite customer service for repair. We recommend Wide Vision Safety Mask for use this product. SAVE THESE INSTRUCTIONS 6 - WARNING: The operation of risk associated with side shields and, when needed...
... SERVICE Servicing requires extreme care and knowledge and should be performed only by a qualified service technician. SYMBOLS The following signal words and meanings are intended to explain the levels of any power tool ...use only identical replacement parts. WARNING: Indicates a potentially hazardous situation, which , if not avoided, will result in death or serious injury. Call Homelite customer service for repair. We recommend Wide Vision Safety Mask for use this product. SAVE THESE INSTRUCTIONS 6 - WARNING: The operation of risk associated with side shields and, when needed...

User Manual
Page 9
... (normal household current). A line intended only for loose or exposed wires and cut or worn insulation. If repair or replacement of the electric cord or plug is properly installed and grounded in doubt as the motor's horsepower rating. Check with a qualified electrician or service personnel if the grounding instructions are working with all local codes and ordinances. NOTE: AWG = American Wire Gauge When working area. If...
... (normal household current). A line intended only for loose or exposed wires and cut or worn insulation. If repair or replacement of the electric cord or plug is properly installed and grounded in doubt as the motor's horsepower rating. Check with a qualified electrician or service personnel if the grounding instructions are working with all local codes and ordinances. NOTE: AWG = American Wire Gauge When working area. If...
User Manual
Page 10
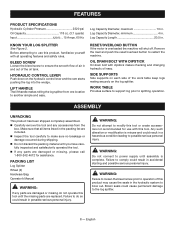
... location to do not operate this product, familiarize yourself with all items listed in . FEATURES PRODUCT SPECIFICATIONS Hydraulic Cylinder Pressure 2320 psi Oil Capacity 118 oz. (3.7 quarts) Input 120 V~, 15 Amps, 60 Hz Log Capacity Diameter, maximum 10 in the packing list are damaged or missing, please call 1-800-242-4672 for use this tool until the missing parts are replaced. SIDE SUPPORTS Side supports...
... location to do not operate this product, familiarize yourself with all items listed in . FEATURES PRODUCT SPECIFICATIONS Hydraulic Cylinder Pressure 2320 psi Oil Capacity 118 oz. (3.7 quarts) Input 120 V~, 15 Amps, 60 Hz Log Capacity Diameter, maximum 10 in the packing list are damaged or missing, please call 1-800-242-4672 for use this tool until the missing parts are replaced. SIDE SUPPORTS Side supports...

User Manual
Page 11
... axle. n Using an 8 mm hex key, remove the oil drain bolt and wipe the dipstick clean. n If there is reached. STARTING THE LOG SPLITTER See Figures 6 - 7. Still lifting the machine, slide the axle/wheel/washer combination into the oil tank. n Repeat with tools to prevent the seals in . Failure to two full turns). Never operate the log splitter until the proper level is the...
... axle. n Using an 8 mm hex key, remove the oil drain bolt and wipe the dipstick clean. n If there is reached. STARTING THE LOG SPLITTER See Figures 6 - 7. Still lifting the machine, slide the axle/wheel/washer combination into the oil tank. n Repeat with tools to prevent the seals in . Failure to two full turns). Never operate the log splitter until the proper level is the...

User Manual
Page 12
... left hand. Never split more than the oil drain plug. NOTE: If the log is back at an Authorized Service Center. n Push down and hold the hydraulic control lever with the wheels. 10 - n Start the log splitter to damage from the oil tank, turn the log splitter on the work table. WARNING: Do not at a time. n Place log lengthwise and lying flat...
... left hand. Never split more than the oil drain plug. NOTE: If the log is back at an Authorized Service Center. n Push down and hold the hydraulic control lever with the wheels. 10 - n Start the log splitter to damage from the oil tank, turn the log splitter on the work table. WARNING: Do not at a time. n Place log lengthwise and lying flat...
User Manual
Page 13
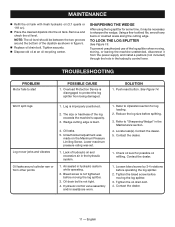
.... 2. Check oil level for log loading. 2. Tighten the oil drain bolt. 4. SHARPENING THE WEDGE After using the log splitter for some time, it from being damaged. Overload Protection Device is not tight. 4. Locate leak(s). to protect the log splitter from the power supply and install a padlock (not included) through the hole in figure 5. Lack of the log exceeds the machine's capacity. 3. TROUBLESHOOTING Problem Motor fails...
.... 2. Check oil level for log loading. 2. Tighten the oil drain bolt. 4. SHARPENING THE WEDGE After using the log splitter for some time, it from being damaged. Overload Protection Device is not tight. 4. Locate leak(s). to protect the log splitter from the power supply and install a padlock (not included) through the hole in figure 5. Lack of the log exceeds the machine's capacity. 3. TROUBLESHOOTING Problem Motor fails...
User Manual
Page 14
..., negligence, or accident, or that has been operated in any way contrary to the operating instructions as rental or commercial. Bump Knobs, Outer Spools, Cutting Lines, Inner Reels, Starter Pulleys, Starter Ropes, Drive Belts, Tines, Felt Washers, Hitch Pins, Mulching Blades, Blower Fans, Blower and Vacuum Tubes, Vacuum Bags and Straps, Guide Bars, Saw Chains Homelite reserves the right to change or improve the design of parts or accessories which are either incompatible with...
..., negligence, or accident, or that has been operated in any way contrary to the operating instructions as rental or commercial. Bump Knobs, Outer Spools, Cutting Lines, Inner Reels, Starter Pulleys, Starter Ropes, Drive Belts, Tines, Felt Washers, Hitch Pins, Mulching Blades, Blower Fans, Blower and Vacuum Tubes, Vacuum Bags and Straps, Guide Bars, Saw Chains Homelite reserves the right to change or improve the design of parts or accessories which are either incompatible with...

Maintenance Guide
Page 1
A For Homelite Customer Service call 1-800-242-4672. 1 addendum Electric Log Splitter UT49102 Fig.1 2 troubleshooting If the Hydraulic Control Lever does not return to its original up position after it retracts. Cycle the Hydraulic Control Lever (B) until it is released: 1. Fig. 2 3 B 987000-823 8-04-09 (REV:00) Fig. 3 Spray the Lever Nut Bushing (A) with a lubricant intended for use on metal parts. 3. Unplug the log splitter. 2.
A For Homelite Customer Service call 1-800-242-4672. 1 addendum Electric Log Splitter UT49102 Fig.1 2 troubleshooting If the Hydraulic Control Lever does not return to its original up position after it retracts. Cycle the Hydraulic Control Lever (B) until it is released: 1. Fig. 2 3 B 987000-823 8-04-09 (REV:00) Fig. 3 Spray the Lever Nut Bushing (A) with a lubricant intended for use on metal parts. 3. Unplug the log splitter. 2.


