
Owners Guide
Page 2
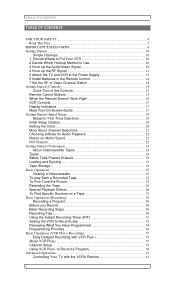
... Power Supply 13 6 Install Batteries in the Remote Control 14 7 Set the RF or Video Channel Switch 14 Getting Started (Controls 15 Quick Tour of the Controls 15 Remote Control Buttons 15 When the Remote Doesn't Work Right 16 VCR Controls ...17 Display Indicators ...17 Meet Your On-Screen Guide 17 Getting Started (Initial Setup 19 Setup for First-Time Operation 19 Initial Setup Options 19 Setting the Clock...20 More About Channel Selections 21 Choosing a Mode for Audio Playback 21 Stereo...
... Power Supply 13 6 Install Batteries in the Remote Control 14 7 Set the RF or Video Channel Switch 14 Getting Started (Controls 15 Quick Tour of the Controls 15 Remote Control Buttons 15 When the Remote Doesn't Work Right 16 VCR Controls ...17 Display Indicators ...17 Meet Your On-Screen Guide 17 Getting Started (Initial Setup 19 Setup for First-Time Operation 19 Initial Setup Options 19 Setting the Clock...20 More About Channel Selections 21 Choosing a Mode for Audio Playback 21 Stereo...

Owners Guide
Page 3
... Routine Cleaning ...49 Head Cleaning ...49 Periodic Maintenance 49 If the VCR Doesn't Work Right 49 Don't Attempt Repairs Yourself 49 Technical Specifications 50 Care and Servicing (Problems 51 Often Encountered Problems 51 Hitachi Service Hotline 52 3 Advanced Hookup (Cable Box to unscramble only pay channels 44 Advanced Operations (Stereo System 45 Integrating Your Stereo System 45 Hookup ...45 Recording from Your Stereo System 45 Advanced Operations (Second VCR 46 Integrating a Second VCR 46 Hookup ...46 To Control Both VCRs with the Remote Control...
... Routine Cleaning ...49 Head Cleaning ...49 Periodic Maintenance 49 If the VCR Doesn't Work Right 49 Don't Attempt Repairs Yourself 49 Technical Specifications 50 Care and Servicing (Problems 51 Often Encountered Problems 51 Hitachi Service Hotline 52 3 Advanced Hookup (Cable Box to unscramble only pay channels 44 Advanced Operations (Stereo System 45 Integrating Your Stereo System 45 Hookup ...45 Recording from Your Stereo System 45 Advanced Operations (Second VCR 46 Integrating a Second VCR 46 Hookup ...46 To Control Both VCRs with the Remote Control...
Owners Guide
Page 5
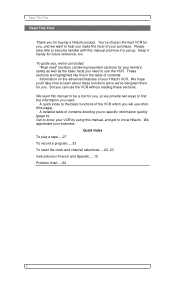
... two ways to find the information you need to know your purchase. Quick Index To play a tape.....27 To record a program.....33 To reset the clock and channel selections.....22, 23 Instructions in the table of contents: Information on the advanced features of contents directing you need : A quick index to the basic functions of your VCR by using this manual to be a tool for you, so...
... two ways to find the information you need to know your purchase. Quick Index To play a tape.....27 To record a program.....33 To reset the clock and channel selections.....22, 23 Instructions in the table of contents: Information on the advanced features of contents directing you need : A quick index to the basic functions of your VCR by using this manual to be a tool for you, so...
Owners Guide
Page 10
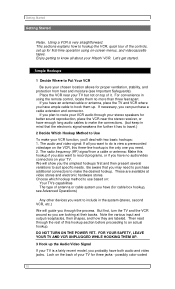
... also want to make the connections. (but not on top of it has to travel.) 2 Decide Which Hookup Method to hook them no audio/video connectors on the back of the controls, set up . Enjoy getting to hookup the VCR, quick tour of your Hitachi VCR. If you plan to route your VCR audio through the process. Note the various input and output receptacles, their shapes...
... also want to make the connections. (but not on top of it has to travel.) 2 Decide Which Hookup Method to hook them no audio/video connectors on the back of the controls, set up . Enjoy getting to hookup the VCR, quick tour of your Hitachi VCR. If you plan to route your VCR audio through the process. Note the various input and output receptacles, their shapes...
Owners Guide
Page 16
... insert two fresh batteries. If the remote works now, you want such as a stereo system. Getting Started (Controls) CLEAR Used in on-screen programming. Press PAUSE again (or PLAY) to resume. 0 to 9 Number buttons used to control one convenient dial. LAST CHANNEL Switches to the next lower channel. For these possibilities: Low Battery If the remote is set the remote to change channels. (Simply press 2 or 3 digits for the channel you know that...
... insert two fresh batteries. If the remote works now, you want such as a stereo system. Getting Started (Controls) CLEAR Used in on-screen programming. Press PAUSE again (or PLAY) to resume. 0 to 9 Number buttons used to control one convenient dial. LAST CHANNEL Switches to the next lower channel. For these possibilities: Low Battery If the remote is set the remote to change channels. (Simply press 2 or 3 digits for the channel you know that...

Owners Guide
Page 19
... your own setup: To change a setting, press the button that item. Options are and . 4 HIFI/LINEAR Press 4 to control how the audio signal is set up the Initial Setup screen. Getting Started (Initial Setup) Getting Started (Initial Setup) Setup for First-Time Operation Before you use the cable box, you need to set items 1 and 8 the first time you want prerecorded movies (safety tab removed) to play automatically when loaded, and then rewind, eject, and turn them...
... your own setup: To change a setting, press the button that item. Options are and . 4 HIFI/LINEAR Press 4 to control how the audio signal is set up the Initial Setup screen. Getting Started (Initial Setup) Getting Started (Initial Setup) Setup for First-Time Operation Before you use the cable box, you need to set items 1 and 8 the first time you want prerecorded movies (safety tab removed) to play automatically when loaded, and then rewind, eject, and turn them...

Owners Guide
Page 20
... SETUP VCR PLUS message continues flashing, set VCR Plus+ channels referring to the procedure in "Matching Broadcast CH numbers to VCR Plus+ channels" on the remote control to set the current time two digits for the hour and two for AM or PM, respectively. To set the clock, press GUIDE, then press 6 to bring up a screen that come in on the screen as you go. 20 When you are ready to record a second audio program...
... SETUP VCR PLUS message continues flashing, set VCR Plus+ channels referring to the procedure in "Matching Broadcast CH numbers to VCR Plus+ channels" on the remote control to set the current time two digits for the hour and two for AM or PM, respectively. To set the clock, press GUIDE, then press 6 to bring up a screen that come in on the screen as you go. 20 When you are ready to record a second audio program...
Owners Guide
Page 25
... the instructions you would select channel 3 or 4 on the screen. Press PLAY to use the VCR when you 've rented - If this with the remote control. To Fine Tune the Picture Auto Tracking Pressing PLAY starts the auto tracking feature, which adjusts the tuning to eliminate static lines that may require additional picture adjustment. Turn on the TV and select the video channel (3 or 4) using the number buttons on the display. 2. Get a blank tape and try recording a TV...
... the instructions you would select channel 3 or 4 on the screen. Press PLAY to use the VCR when you 've rented - If this with the remote control. To Fine Tune the Picture Auto Tracking Pressing PLAY starts the auto tracking feature, which adjusts the tuning to eliminate static lines that may require additional picture adjustment. Turn on the TV and select the video channel (3 or 4) using the number buttons on the display. 2. Get a blank tape and try recording a TV...

Owners Guide
Page 28
... resets the counter to access specific program segments is with indexing. Press DISPLAY again and an "M" will automatically stop at the spot where you enter a wrong digit, press CLEAR and enter the correct one digit for hours, then two digits for a spot a certain number of the video that you know you set a new one or until you are done recording or playing back the tape...
... resets the counter to access specific program segments is with indexing. Press DISPLAY again and an "M" will automatically stop at the spot where you enter a wrong digit, press CLEAR and enter the correct one digit for hours, then two digits for a spot a certain number of the video that you know you set a new one or until you are done recording or playing back the tape...
Owners Guide
Page 30
... a direct audio/video cable, set the VCR for longest recording time on the VCR's display. You must be viewing through the channels, or use , as long as you do this manual. Load the videocassette into the matter if you have set the TV to AUX or VIDEO. 3. Press DISPLAY, then press 5 when the SP/EP message appears on the TV screen, to record from. the VCR indicator will light up on a single tape). If...
... a direct audio/video cable, set the VCR for longest recording time on the VCR's display. You must be viewing through the channels, or use , as long as you do this manual. Load the videocassette into the matter if you have set the TV to AUX or VIDEO. 3. Press DISPLAY, then press 5 when the SP/EP message appears on the TV screen, to record from. the VCR indicator will light up on a single tape). If...

Owners Guide
Page 31
... stop recording. Make sure that you are recording. Press PAUSE to use the programming timer. Press PAUSE to indicate the recording time on the display. 31 such as in the recording mode. This is on that STEREO/MONO selection is useful when you are recording several programs on the same tape. To Record a Second Audio Program (SAP) Some stations transmit a Second Audio Program - Using the Instant Recording Timer (IRT) The Instant Recording Timer (REC/IRT button on the VCR...
... stop recording. Make sure that you are recording. Press PAUSE to use the programming timer. Press PAUSE to indicate the recording time on the display. 31 such as in the recording mode. This is on that STEREO/MONO selection is useful when you are recording several programs on the same tape. To Record a Second Audio Program (SAP) Some stations transmit a Second Audio Program - Using the Instant Recording Timer (IRT) The Instant Recording Timer (REC/IRT button on the VCR...

Owners Guide
Page 32
...) Delayed Recording Steps You set up your timed recording setup will work. Recording is shown in the IRT mode, press the POWER button and then press the STOP button (this section. That way, when an important show is set to 8 programs on -screen Easy Guide System. To stop and the VCR will read about VCR Plus+ beginning on screen to complete the programming. You can record a program one and half hours, two hours, three hours...
...) Delayed Recording Steps You set up your timed recording setup will work. Recording is shown in the IRT mode, press the POWER button and then press the STOP button (this section. That way, when an important show is set to 8 programs on -screen Easy Guide System. To stop and the VCR will read about VCR Plus+ beginning on screen to complete the programming. You can record a program one and half hours, two hours, three hours...

Owners Guide
Page 36
... local channels to VCR Plus+ channels in your TV program guide to your home, for your VCR is connected directly to cable without a cable box. Basic Operations (VCR Plus + Recording) 4. This should get the same channels as you receive them in your list of hookup. Now you receive at home. You should list all channels) Cable with a cable box and splitter (Cable box to unscramble only pay channels) Home Antenna If your VCR is hooked up directly to your cable company's channel...
... local channels to VCR Plus+ channels in your TV program guide to your home, for your VCR is connected directly to cable without a cable box. Basic Operations (VCR Plus + Recording) 4. This should get the same channels as you receive them in your list of hookup. Now you receive at home. You should list all channels) Cable with a cable box and splitter (Cable box to unscramble only pay channels) Home Antenna If your VCR is hooked up directly to your cable company's channel...

Owners Guide
Page 38
... VCR Plus+ program recording. Enter your cable box type from channel 02 to channel 09 when you cam use the remote's channel up / down control to channel 02. 6. Turn on the TV screen. 9. Press GUIDE to enter the output channel of your cable box and tune it to change the channels on your cable box. 11. Your cable box and VCR are now set for channel 3. 7. Press GUIDE to channel 9: Press number 2 on the remote. If these codes do not work: Try repositioning the cable box on...
... VCR Plus+ program recording. Enter your cable box type from channel 02 to channel 09 when you cam use the remote's channel up / down control to channel 02. 6. Turn on the TV screen. 9. Press GUIDE to enter the output channel of your cable box and tune it to change the channels on your cable box. 11. Your cable box and VCR are now set for channel 3. 7. Press GUIDE to channel 9: Press number 2 on the remote. If these codes do not work: Try repositioning the cable box on...

Owners Guide
Page 40
... unnecessary program(s), please cancel or correct it to the channel you select one on the cable box and tune it (them). 40 When the next screen comes up all the timed recordings you need to begin . If using a cable box the VCR cannot control, turn off the power on the VCR Plus+ recording After entering a VCR Plus + number, check the information displayed with the safety tab still attached) to begin . Review the screen to...
... unnecessary program(s), please cancel or correct it to the channel you select one on the cable box and tune it (them). 40 When the next screen comes up all the timed recordings you need to begin . If using a cable box the VCR cannot control, turn off the power on the VCR Plus+ recording After entering a VCR Plus + number, check the information displayed with the safety tab still attached) to begin . Review the screen to...

Owners Guide
Page 41
... need to program the VCR's remote control to send signals that your TV will not work for you. Aim the VCR's remote control at the same time. If that matches your TV, the channel will not be able to control the television. TV Brands Press TV and This Number Hitachi 1 Zenith 2 Sony 3 Magnavox 4 41 The remote control is compatible with a remote control is set up a cable box and how to do : Programming the Remote Control Turn the television...
... need to program the VCR's remote control to send signals that your TV will not work for you. Aim the VCR's remote control at the same time. If that matches your TV, the channel will not be able to control the television. TV Brands Press TV and This Number Hitachi 1 Zenith 2 Sony 3 Magnavox 4 41 The remote control is compatible with a remote control is set up a cable box and how to do : Programming the Remote Control Turn the television...
Owners Guide
Page 45
... tape deck for a second tape deck - Press REC/IRT on your VCR for further information. With the power off: Connect the right (red) and left (white) AUDIO OUT on the VCR to consider hooking up your stereo system with the options on the remote control to select SP or EP. The EP setting gives you can record stereo audio on the VCR and start the stereo playing. To play times, or use your stereo...
... tape deck for a second tape deck - Press REC/IRT on your VCR for further information. With the power off: Connect the right (red) and left (white) AUDIO OUT on the VCR to consider hooking up your stereo system with the options on the remote control to select SP or EP. The EP setting gives you can record stereo audio on the VCR and start the stereo playing. To play times, or use your stereo...
Owners Guide
Page 46
... set CODE to the other VCR's manual). Connect the AUDIO OUT jacks (left and right) on VCR1's display and you can view the picture being recorded. 46 To switch control from One VCR to your remote to operate both audio and video jacks Study the back of VCR2 (VT-F382A) to record in the other , simply press VCR1 or VCR2 on VCR1. The VCR indicator will light up the Initial Setup screen. Press GUIDE...
... set CODE to the other VCR's manual). Connect the AUDIO OUT jacks (left and right) on VCR1's display and you can view the picture being recorded. 46 To switch control from One VCR to your remote to operate both audio and video jacks Study the back of VCR2 (VT-F382A) to record in the other , simply press VCR1 or VCR2 on VCR1. The VCR indicator will light up the Initial Setup screen. Press GUIDE...
Owners Guide
Page 49
... VCR when you turn the power off. Your Hitachi VCR automatically cleans the video heads whenever a cassette is loaded or ejected and when a cassette is a precision electro-mechanical device which requires professional maintenance after a period of these parts are easily remedied by an untrained user. The exposed uninsulated voltage in the VCR that pick up on page 62 covers the more common problems that new VCR owners encounter. this unit may need...
... VCR when you turn the power off. Your Hitachi VCR automatically cleans the video heads whenever a cassette is loaded or ejected and when a cassette is a precision electro-mechanical device which requires professional maintenance after a period of these parts are easily remedied by an untrained user. The exposed uninsulated voltage in the VCR that pick up on page 62 covers the more common problems that new VCR owners encounter. this unit may need...

Owners Guide
Page 51
... TAPE PROTECTION MECHANISM IS WORKING. IS VCR REMOTE CONTROL PROGRAMMED FOR YOUR TV? SET TV TO CHANNEL 3 OR 4 AS CORRECT FOR YOUR AREA/ IS TV CORRECTLY TUNED? IF USING VCR PLUS+, CHECK DOES NOT WORK THE CHANNEL SETUP. SAFETY TAB REMOVED FROM THE VIDEOCASSEETTE? IS REMOTE CONTROL SET TO CONTROL THE TV. TURN POWER OFF TO ACTIVATE THE TIMER? TV CHANNEL SELECTOR ON THE PROPER CHANNNEL? NO PICTURE DURING PLAYBACk? MECHANICAL SOUNDS DURING PLAYBACK. REVIEW HOOKUP DIRECTIONS AND MAKE CORRECT FRIM CONNECTIONS...
... TAPE PROTECTION MECHANISM IS WORKING. IS VCR REMOTE CONTROL PROGRAMMED FOR YOUR TV? SET TV TO CHANNEL 3 OR 4 AS CORRECT FOR YOUR AREA/ IS TV CORRECTLY TUNED? IF USING VCR PLUS+, CHECK DOES NOT WORK THE CHANNEL SETUP. SAFETY TAB REMOVED FROM THE VIDEOCASSEETTE? IS REMOTE CONTROL SET TO CONTROL THE TV. TURN POWER OFF TO ACTIVATE THE TIMER? TV CHANNEL SELECTOR ON THE PROPER CHANNNEL? NO PICTURE DURING PLAYBACk? MECHANICAL SOUNDS DURING PLAYBACK. REVIEW HOOKUP DIRECTIONS AND MAKE CORRECT FRIM CONNECTIONS...


