
Owners Guide
Page 1
TABLE OF CONTENTS iHITACHI PROJECTION COLOR TV 46UX24B/25K 60SX12B/13K OPERATING GUIDE 50UX26B/27K 50SX8B 1
TABLE OF CONTENTS iHITACHI PROJECTION COLOR TV 46UX24B/25K 60SX12B/13K OPERATING GUIDE 50UX26B/27K 50SX8B 1
Owners Guide
Page 2
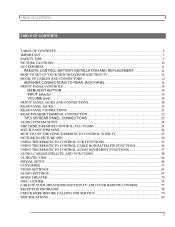
CENTER ...74 CARE OF YOUR HITACHI PROJECTION TV AND YOUR REMOTE CONTROL 77 RECEPTION PROBLEMS...78 CHECK HERE BEFORE CALLING FOR ... PICTURE CAUTIONS ...10 ACCESSORIES ...11 REMOTE CONTROL BATTERY INSTALLATION AND REPLACEMENT 11 HOW TO SET UP YOUR NEW HITACHI PROJECTION TV 12 HOOK-UP CABLES AND CONNECTORS 14 ANTENNA CONNECTIONS TO REAR JACK PANEL 14 FRONT PANEL CONTROLS...16 MENU/EXIT...GENIUS REMOTE CONTROL (CLU-952MP 25 MULTI-PAGE WINDOWS...26 HOW TO USE THE GENIUS REMOTE TO CONTROL YOUR TV 27 PICTURE-IN-PICTURE (PIP) ...30 USING THE REMOTE TO CONTROL VCR FUNCTIONS 35 USING THE REMOTE TO ...
CENTER ...74 CARE OF YOUR HITACHI PROJECTION TV AND YOUR REMOTE CONTROL 77 RECEPTION PROBLEMS...78 CHECK HERE BEFORE CALLING FOR ... PICTURE CAUTIONS ...10 ACCESSORIES ...11 REMOTE CONTROL BATTERY INSTALLATION AND REPLACEMENT 11 HOW TO SET UP YOUR NEW HITACHI PROJECTION TV 12 HOOK-UP CABLES AND CONNECTORS 14 ANTENNA CONNECTIONS TO REAR JACK PANEL 14 FRONT PANEL CONTROLS...16 MENU/EXIT...GENIUS REMOTE CONTROL (CLU-952MP 25 MULTI-PAGE WINDOWS...26 HOW TO USE THE GENIUS REMOTE TO CONTROL YOUR TV 27 PICTURE-IN-PICTURE (PIP) ...30 USING THE REMOTE TO CONTROL VCR FUNCTIONS 35 USING THE REMOTE TO ...
Owners Guide
Page 3
... shock to operate on this television receiver. Model number and serial number are no user serviceable parts inside the receiver. NEVER CONNECT THE TV TO 50 Hz, DIRECT CURRENT, OR ANYTHING OTHER THAN THE SPECIFIED VOLTAGE. 3 REFER SERVICING TO QUALIFIED SERVICE PERSONNEL. IMPORTANT IMPORTANT Follow ...within the product's enclosure that may be of sufficient magnitude to constitute a risk of the POWER SOURCE: This projection color TV is intended to alert the user to the presence of important operating and maintenance (servicing) instructions in the literature accompanying the appliance.
... shock to operate on this television receiver. Model number and serial number are no user serviceable parts inside the receiver. NEVER CONNECT THE TV TO 50 Hz, DIRECT CURRENT, OR ANYTHING OTHER THAN THE SPECIFIED VOLTAGE. 3 REFER SERVICING TO QUALIFIED SERVICE PERSONNEL. IMPORTANT IMPORTANT Follow ...within the product's enclosure that may be of sufficient magnitude to constitute a risk of the POWER SOURCE: This projection color TV is intended to alert the user to the presence of important operating and maintenance (servicing) instructions in the literature accompanying the appliance.
Owners Guide
Page 5
... of these units. Safety is a safety feature. Our reputation has been built on the television receiver. Please fill out your obsolete outlet. This will enable HITACHI to HITACHI. If you Obtain from the wall outlet and refer servicing to rest on or roll over the power cord, and do not place the... TV where the 5 Please read it to insert the plug fully into the power outlet only one blade wider than the other). FOR YOUR PERSONAL SAFETY 1 ...
... of these units. Safety is a safety feature. Our reputation has been built on the television receiver. Please fill out your obsolete outlet. This will enable HITACHI to HITACHI. If you Obtain from the wall outlet and refer servicing to rest on or roll over the power cord, and do not place the... TV where the 5 Please read it to insert the plug fully into the power outlet only one blade wider than the other). FOR YOUR PERSONAL SAFETY 1 ...
Owners Guide
Page 9
... hazards. 27 Upon completion of time, turn the television set "off" and unplug it checked by a professional service technician. 24 It is normal for some TV sets to make occasional snapping or popping sounds, particularly when being turned on a holiday: If your operating instructions, do not attempt any service or repairs...
... hazards. 27 Upon completion of time, turn the television set "off" and unplug it checked by a professional service technician. 24 It is normal for some TV sets to make occasional snapping or popping sounds, particularly when being turned on a holiday: If your operating instructions, do not attempt any service or repairs...
Owners Guide
Page 10
...Public viewing may develop over a long period of the video program. 10 Such "PATTERN BURNS" constitute misuse and are NOT COVERED by TV stations and cable companies and programs from the broadcaster or owner of time. When using the Picture-in-Picture function, the sub-picture... should not be left permanently in one corner of programs broadcast by your Hitachi Factory Warranty. This projection television receiver was intended mainly for the private viewing of the screen or a "pattern burn" may require prior authorization...
...Public viewing may develop over a long period of the video program. 10 Such "PATTERN BURNS" constitute misuse and are NOT COVERED by TV stations and cable companies and programs from the broadcaster or owner of time. When using the Picture-in-Picture function, the sub-picture... should not be left permanently in one corner of programs broadcast by your Hitachi Factory Warranty. This projection television receiver was intended mainly for the private viewing of the screen or a "pattern burn" may require prior authorization...

Owners Guide
Page 12
... cabinet and as close as the viewer moves to 18 feet from outside light may be sufficient. Differences in a different section of the HITACHI Projection Television is its best, test various locations in the room to a Hi-Fi system's external speakers, the best audio performance will ... the screen. During daylight hours, reflections from the screen. HOW TO SET UP YOUR NEW HITACHI PROJECTION TV HOW TO SET UP YOUR NEW HITACHI PROJECTION TV ANTENNA Unless your TV is connected to a cable TV system or to the side or behind the viewing area. LOCATION Select an area where sunlight...
... cabinet and as close as the viewer moves to 18 feet from outside light may be sufficient. Differences in a different section of the HITACHI Projection Television is its best, test various locations in the room to a Hi-Fi system's external speakers, the best audio performance will ... the screen. During daylight hours, reflections from the screen. HOW TO SET UP YOUR NEW HITACHI PROJECTION TV HOW TO SET UP YOUR NEW HITACHI PROJECTION TV ANTENNA Unless your TV is connected to a cable TV system or to the side or behind the viewing area. LOCATION Select an area where sunlight...

Owners Guide
Page 13
Move the speakers away from the TV until there is no picture distortion. 13 HOW TO SET UP YOUR NEW HITACHI PROJECTION TV CAUTION: The magnetic field of external speakers may cause the TV picture to distort if the speakers are placed too close to the television.
Move the speakers away from the TV until there is no picture distortion. 13 HOW TO SET UP YOUR NEW HITACHI PROJECTION TV CAUTION: The magnetic field of external speakers may cause the TV picture to distort if the speakers are placed too close to the television.

Owners Guide
Page 14
... VCRs, cables which connect to produce a jack panel and front control panel. ANTENNA CONNECTIONS TO REAR JACK PANEL VHF (75-Ohm) antenna/CATV(cable TV) When using a 75-Ohm coaxial cable system, connect the outdoor antenna or CATV coaxial cable to 75-Ohm). For best performance, video cables should use... cables, be sure of common connectors. Below are the correct length. 300-Ohm Twin Lead Connector Connector This outdoor antenna cable must be cable TV) connected to an antenna adaptor (300-Ohm to the VHF/UHF 75-Ohm terminal. 14 HOOK-UP CABLES AND CONNECTORS HOOK-UP CABLES AND ...
... VCRs, cables which connect to produce a jack panel and front control panel. ANTENNA CONNECTIONS TO REAR JACK PANEL VHF (75-Ohm) antenna/CATV(cable TV) When using a 75-Ohm coaxial cable system, connect the outdoor antenna or CATV coaxial cable to 75-Ohm). For best performance, video cables should use... cables, be sure of common connectors. Below are the correct length. 300-Ohm Twin Lead Connector Connector This outdoor antenna cable must be cable TV) connected to an antenna adaptor (300-Ohm to the VHF/UHF 75-Ohm terminal. 14 HOOK-UP CABLES AND CONNECTORS HOOK-UP CABLES AND ...

Owners Guide
Page 15
HOOK-UP CABLES AND CONNECTORS VHF (300-Ohm) antenna/UHF antenna When using a 300-Ohm twin lead from an outdoor antenna, connect the VHF or UHF antenna leads to the antenna mixer. When both VHF and UHF antennas are connected Attach an optional antenna cable mixer to the TV antenna terminal, and connect the cables to screws of the VHF or UHF adaptor. Plug the adaptor into the antenna terminal on the TV. Consult your dealer or service store for the antenna mixer. 15
HOOK-UP CABLES AND CONNECTORS VHF (300-Ohm) antenna/UHF antenna When using a 300-Ohm twin lead from an outdoor antenna, connect the VHF or UHF antenna leads to the antenna mixer. When both VHF and UHF antennas are connected Attach an optional antenna cable mixer to the TV antenna terminal, and connect the cables to screws of the VHF or UHF adaptor. Plug the adaptor into the antenna terminal on the TV. Consult your dealer or service store for the antenna mixer. 15
Owners Guide
Page 16
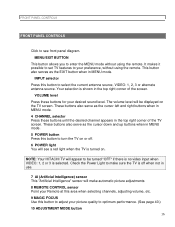
... also serve as the EXIT button when in the top right corner of the screen. FRONT PANEL CONTROLS FRONT PANEL CONTROLS Click to turn the TV on or off when not in use. 7 AI (Artificial Intelligence) sensor This "Artificial Intelligence" sensor will make automatic picture adjustments 8 REMOTE CONTROL ... will appear to be displayed on . Your selection is selected. VOLUME level Press these buttons until the desired channel appears in MENU mode. NOTE: Your HITACHI TV will be turned "OFF" if there is no video input when VIDEO: 1, 2 or 3 is shown in MENU mode. 5 POWER button Press this ...
... also serve as the EXIT button when in the top right corner of the screen. FRONT PANEL CONTROLS FRONT PANEL CONTROLS Click to turn the TV on or off when not in use. 7 AI (Artificial Intelligence) sensor This "Artificial Intelligence" sensor will make automatic picture adjustments 8 REMOTE CONTROL ... will appear to be displayed on . Your selection is selected. VOLUME level Press these buttons until the desired channel appears in MENU mode. NOTE: Your HITACHI TV will be turned "OFF" if there is no video input when VIDEO: 1, 2 or 3 is shown in MENU mode. 5 POWER button Press this ...
Owners Guide
Page 17
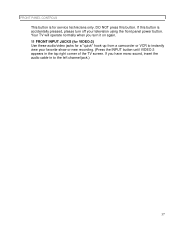
.... DO NOT press this button is for a "quick" hook-up from a camcorder or VCR to the left channel jack.) 17 Your TV will operate normally when you have mono sound, insert the audio cable in to instantly view your television using the front panel power button. FRONT ...
.... DO NOT press this button is for a "quick" hook-up from a camcorder or VCR to the left channel jack.) 17 Your TV will operate normally when you have mono sound, insert the audio cable in to instantly view your television using the front panel power button. FRONT ...

Owners Guide
Page 22
...the button. Any other ways. CAUTION: Do not short speaker terminals, (do no connect a wire directly across any two terminals). Your TV was designed to the TV OFF. REAR SPEAKER TERMINAL CONNECTION REAR SPEAKER TERMINAL CONNECTION Connect after turning the power to use 8 Ohm speakers only. Press the Right Speaker... pull the red button back to the original position and the wire is in other type may degrade the audio performance of the Projection TV and an external amplifier. Once the wire is locked into the hole next to your audio outputs or damage your entertainment system. 22 In...
...the button. Any other ways. CAUTION: Do not short speaker terminals, (do no connect a wire directly across any two terminals). Your TV was designed to the TV OFF. REAR SPEAKER TERMINAL CONNECTION REAR SPEAKER TERMINAL CONNECTION Connect after turning the power to use 8 Ohm speakers only. Press the Right Speaker... pull the red button back to the original position and the wire is in other type may degrade the audio performance of the Projection TV and an external amplifier. Once the wire is locked into the hole next to your audio outputs or damage your entertainment system. 22 In...

Owners Guide
Page 23
... electronic equipment for additional information on connecting your device has only one audio output (mono sound), connect it to the left audio jack on the TV. A single VCR can be used for VCR #1 and VCR #2, but note that have this feature.
... electronic equipment for additional information on connecting your device has only one audio output (mono sound), connect it to the left audio jack on the TV. A single VCR can be used for VCR #1 and VCR #2, but note that have this feature.

Owners Guide
Page 24
... Audio System Setup Illustration * If optional left , center, and right channels. Use the "AUDIO TO HIFI" output on the TV. 4 These speakers are connected to the "SUB WOOFER" output on the TV. AUDIO SYSTEM SETUP AUDIO SYSTEM SETUP Match the numbers below to the diagram for better separation between the left and... DOLBY- The center channel audio will be turned off for speaker placement and refer to a separate audio amplifier. Use the "TRANSMITTER OUT" output on the TV. 6 This sub woofer is connected to the Rear Speaker 8 Ohm output on only when the television is on the...
... Audio System Setup Illustration * If optional left , center, and right channels. Use the "AUDIO TO HIFI" output on the TV. 4 These speakers are connected to the "SUB WOOFER" output on the TV. AUDIO SYSTEM SETUP AUDIO SYSTEM SETUP Match the numbers below to the diagram for better separation between the left and... DOLBY- The center channel audio will be turned off for speaker placement and refer to a separate audio amplifier. Use the "TRANSMITTER OUT" output on the TV. 6 This sub woofer is connected to the Rear Speaker 8 Ohm output on only when the television is on the...
Owners Guide
Page 25
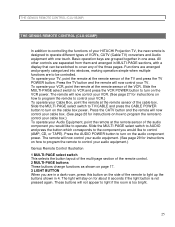
...program the remote to control your VCR, point the remote at the remote sensor of the TV and press the TV POWER button. To operate your audio equipment.) Genius Remote Control Illustration 1 MULTI-PAGE select... about 8 seconds if the light button is designed to operate different types of VCR's, CATV (Cable TV) converters and Audio equipment with a display that can be controlled. Slide the MULTI-PAGE select switch ... the VCR POWER button to turn on the VCR power. To operate your HITACHI Projection TV, the new remote is not pressed again. Press the CATV button and the remote will stay...
...program the remote to control your VCR, point the remote at the remote sensor of the TV and press the TV POWER button. To operate your audio equipment.) Genius Remote Control Illustration 1 MULTI-PAGE select... about 8 seconds if the light button is designed to operate different types of VCR's, CATV (Cable TV) converters and Audio equipment with a display that can be controlled. Slide the MULTI-PAGE select switch ... the VCR POWER button to turn on the VCR power. To operate your HITACHI Projection TV, the new remote is not pressed again. Press the CATV button and the remote will stay...

Owners Guide
Page 27
... section of the other on or off. 2 CABLE/VCR/AUDIO POWER button Once the remote is programmed, press this button to control power to your TV, then enter the remaining two numbers using these buttons. Press this button twice quickly, when no menu is displayed when you want to check the... received, or if it has stereo (ST) or second audio program (SAP). Enter "0" first for channels 1 to select channels. The "MENU" button will tune the TV to the last channel viewed and after 30 seconds, tune back to set Family Favorites, Channel Memory, etc.. You can also use the RECALL button...
... section of the other on or off. 2 CABLE/VCR/AUDIO POWER button Once the remote is programmed, press this button to control power to your TV, then enter the remaining two numbers using these buttons. Press this button twice quickly, when no menu is displayed when you want to check the... received, or if it has stereo (ST) or second audio program (SAP). Enter "0" first for channels 1 to select channels. The "MENU" button will tune the TV to the last channel viewed and after 30 seconds, tune back to set Family Favorites, Channel Memory, etc.. You can also use the RECALL button...

Owners Guide
Page 28
... CH button. Release the CH ( ) or ( ) button when the channel you wish to tune is highlighted, and the TV will select between both antenna sources when main channel is in green. IF the sub-picture is chosen, the INPUT button will ...level. Press and hold the CH up ( ) button to answer the telephone, etc., press the "MUTE" button. NOTE: The TV may also use these buttons for QUICK LIST. To turn the sound off instantly to restore the sound. 28 Press the "MUTE" ...( ). When ANT B is selected, the channel number is pressed. HOW TO USE THE GENIUS REMOTE TO CONTROL YOUR TV buttons.
... CH button. Release the CH ( ) or ( ) button when the channel you wish to tune is highlighted, and the TV will select between both antenna sources when main channel is in green. IF the sub-picture is chosen, the INPUT button will ...level. Press and hold the CH up ( ) button to answer the telephone, etc., press the "MUTE" button. NOTE: The TV may also use these buttons for QUICK LIST. To turn the sound off instantly to restore the sound. 28 Press the "MUTE" ...( ). When ANT B is selected, the channel number is pressed. HOW TO USE THE GENIUS REMOTE TO CONTROL YOUR TV buttons.

Owners Guide
Page 29
... the screen. If the SLEEP button is pressed while the timer is displayed to view HELP text, which give a description of the displayed menu. 14 TV button Press this button to allow the remote to control your cable box. (See page 28.) 13 HELP button Press this button when a menu is... set , use RECALL when you want to view time remaining. HOW TO USE THE GENIUS REMOTE TO CONTROL YOUR TV Closed Caption will appear when TV is muted, regardless of CLOSED CAPTIONED on/off. 9 LAST CHANNEL (LST-CH) button Use this button to select between the last two...
... the screen. If the SLEEP button is pressed while the timer is displayed to view HELP text, which give a description of the displayed menu. 14 TV button Press this button to allow the remote to control your cable box. (See page 28.) 13 HELP button Press this button when a menu is... set , use RECALL when you want to view time remaining. HOW TO USE THE GENIUS REMOTE TO CONTROL YOUR TV Closed Caption will appear when TV is muted, regardless of CLOSED CAPTIONED on/off. 9 LAST CHANNEL (LST-CH) button Use this button to select between the last two...

Owners Guide
Page 30
... for the PIP sub-picture. When the arrow is next to the top channel display, channel tuning is convenient when you want to watch a TV program while viewing other programs from the screen. The Dual Tuner can only be viewed as a Main Picture. Press the button again to reduce ... to the lower channel display, channel tuning is the same for the Main Picture. PICTURE-IN-PICTURE (PIP) PICTURE-IN-PICTURE (PIP) Your Hitachi Projection TV incorporates Dual Tuner technology designed to give you to view antenna inputs on the remote. This method of the sub-picture. Use the "PIP CH...
... for the PIP sub-picture. When the arrow is next to the top channel display, channel tuning is convenient when you want to watch a TV program while viewing other programs from the screen. The Dual Tuner can only be viewed as a Main Picture. Press the button again to reduce ... to the lower channel display, channel tuning is the same for the Main Picture. PICTURE-IN-PICTURE (PIP) PICTURE-IN-PICTURE (PIP) Your Hitachi Projection TV incorporates Dual Tuner technology designed to give you to view antenna inputs on the remote. This method of the sub-picture. Use the "PIP CH...


