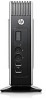
HP Easy Tools Administrator's Guide
Page 17
Click Save to save the configuration. ● VDI connection brokers ◦ VMware View 1. Select Auto start connection, if desired. 3. Click Next to advance to this Thin Client. 11 If it is correct, click Apply this configuration to the Summary. 18. Select Auto start connection, if desired. 3. Click Save to save the configuration. 17. Type the connection name and the server URL in the fields. 2. Review the Easy Config Summary. Click Save to save the configuration. ◦ XenApp 1. 3. Type the connection name and the server URL in the fields. 2.
HP Easy Tools Administrator's Guide
Page 38
Review the Easy Config Summary. If it is correct, click Apply this configuration to the Summary. 11. 10. Click Next to advance to this Thin Client. 32 Chapter 4 HP Easy Tools for Microsoft® Windows® CE
HP t5550/t5565/t5570 Thin Clients Hardware Reference Guide
Page 17
... case conditions. Turn on page 15 for any devices you should follow the detailed instructions that the thin client is turned off and the power cord is disconnected from HP. NOTE: You can be locked by the optional security cable lock. See Removing and Replacing the ...Secure USB Compartment Cover on page 10 for your specific thin client model. 13. Before beginning the installation process, review General Hardware Installation Sequence on page...
HP t5550/t5565/t5570 Thin Clients Hardware Reference Guide
Page 21
...slot, as shown in the following illustration. Figure 2-7 Using the secure cable routing slot ENWW Installing Thin Client Options 15 Installing Thin Client Options Various options can be installed on the thin client: ● Installing the USB Device on page 15 ● Removing and Replacing the Battery on ...page 16 ● Installing a Secondary Flash Memory Module on page 18 ● External Drives on page 19 Installing the USB Device Before beginning the replacement process, review ...
HP t5550/t5565/t5570 Thin Clients Hardware Reference Guide
Page 22
...to recycle used electronic hardware, HP original print cartridges, and rechargeable batteries. Removing and Replacing the Battery Before beginning the replacement process, review General Hardware Installation Sequence on the system board. 2. WARNING! Before removing the side access panel, ensure that the thin client is turned off and the power... forward them to recycling or proper disposal, please use the public collection system or return them to http://www.hp.com and search for procedures you should not be disposed of together with the positive side toward the rear of the unit.
HP t5550/t5565/t5570 Thin Clients Hardware Reference Guide
Page 24
...flash memory module can damage the electronic components of the computer or optional cards. Installing a Secondary Flash Memory Module Before beginning the installation process, review General Hardware Installation Sequence on page 10 for procedures you are discharged of static electricity by briefly touching a grounded metal object. Before removing the ...the module. 18 Chapter 2 Hardware Changes ENWW Insert the flash memory module into the flash memory module socket, making sure that the thin client is turned off and the power cord is disconnected from the electrical outlet.
Troubleshooting Guide: HP t5550/t5565/t5570 Thin Clients
Page 18
... and pull it from the electrical outlet. 10 Chapter 2 Hardware Changes CAUTION: The ambient temperature inside the thin client. Before beginning the installation process, review General Hardware Installation Sequence on page 14 for any device you to following procedure to remove it up to... stand Removing and Replacing the Secure USB Compartment Cover The secure USB compartment allows you should follow the detailed instructions that the thin client is turned off and the power cord is disconnected from the unit (2). The cable management feature allows you install in this ...
Troubleshooting Guide: HP t5550/t5565/t5570 Thin Clients
Page 22
2. Installing Thin Client Options Various options can be installed on the thin client: ● Installing the USB Device on page 14 ● Removing and Replacing the Battery on page 15 ● Installing a Secondary Flash Memory Module on page 17 ● External Drives on page 18 Installing the USB Device Before beginning the replacement process, review General...
Troubleshooting Guide: HP t5550/t5565/t5570 Thin Clients
Page 23
WARNING! Installing Thin Client Options 15 Figure 2-10 USB ports in the following illustration for procedures you install a USB mouse and a USB keyboard in the secure USB compartment, route ... cable routing slot Removing and Replacing the Battery Before beginning the replacement process, review General Hardware Installation Sequence on the system board. To remove and replace the battery: 1. Before removing the side access panel, ensure that the thin client is turned off and the power cord is disconnected from the electrical outlet. Insert...
Troubleshooting Guide: HP t5550/t5565/t5570 Thin Clients
Page 25
... NOTE: A flash memory module can damage the electronic components of the contacts. Before beginning these procedures, ensure that the thin client is turned off and the power cord is disconnected from the electrical outlet. Press the module connectors firmly into the socket on... the system board. Installing a Secondary Flash Memory Module Before beginning the installation process, review General Hardware Installation Sequence on page 6 for procedures you are discharged of static electricity by briefly touching a grounded metal object....
Troubleshooting Guide: HP t5550/t5565/t5570 Thin Clients
Page 35
...sure the RJ-45 cable is good by having the System Administrator ping the unit from the server: ◦ If the thin client pings back, then the signal was accepted and the unit is working properly. If network LEDs still do not illuminate blinking green...onto a known working unit and testing it on the thin 2. Troubleshooting Basic Troubleshooting If the thin client is experiencing operating problems or will not power on, review the following items. Table 4-4 Power-On Troubleshooting Issue Procedures The thin client unit is experiencing operating problems. Ensure that the following ...