

User Manual
Page 3
...5 Remote Control 6 Description of Buttons 7 General Navigation 9 Rotating Pictures 9 Quadrant Display 9 Single Display 10 Standby 10 Picture Frame 11 Top View 11 Left Side 11 Right Side 12 Back 12 Initial Frame Setup 13 Clock Info 13 Setup Wizard 13 Running the Wireless Network Configuration Wizard on ... Settings 17 Description of Main Menu 18 Frame Content 18 Internet Content 19 Home Network 19 Favorites 19 Time 20 Network Signal Icon 21 Viewing Photos 22 Photo/Picture Slide Show 22 Photo Viewing Options 23 Printing a Photo 23 Configuring Access to Online Content 24 ...
...5 Remote Control 6 Description of Buttons 7 General Navigation 9 Rotating Pictures 9 Quadrant Display 9 Single Display 10 Standby 10 Picture Frame 11 Top View 11 Left Side 11 Right Side 12 Back 12 Initial Frame Setup 13 Clock Info 13 Setup Wizard 13 Running the Wireless Network Configuration Wizard on ... Settings 17 Description of Main Menu 18 Frame Content 18 Internet Content 19 Home Network 19 Favorites 19 Time 20 Network Signal Icon 21 Viewing Photos 22 Photo/Picture Slide Show 22 Photo Viewing Options 23 Printing a Photo 23 Configuring Access to Online Content 24 ...

User Manual
Page 4
...Media from your PC to your HP Smart Wi-Fi Display ...........34 Enabling Windows Media Player 11 UPnP 34 Connecting your HP Smart Wi-Fi Display to your Computer with the USB Cable 38 Using Headphones or Speakers with your HP Smart Wi-Fi Display........38 Resetting the Frame 39 Cleaning and Care Tips 39... Cleaning the screen 39 Cleaning the frame and backing 39 Feedback 40 ...
...Media from your PC to your HP Smart Wi-Fi Display ...........34 Enabling Windows Media Player 11 UPnP 34 Connecting your HP Smart Wi-Fi Display to your Computer with the USB Cable 38 Using Headphones or Speakers with your HP Smart Wi-Fi Display........38 Resetting the Frame 39 Cleaning and Care Tips 39... Cleaning the screen 39 Cleaning the frame and backing 39 Feedback 40 ...

User Manual
Page 6
What's in the Box Qty Item 1 HP Smart Wi-Fi Display Image ENGLISH 1 Remote Control (Replacement Battery = CR2025) 1 Universal Power Adapter 1 USB 2.0 Cable 1 User Manual 1 Quick Start Guide 1 Warranty Document 1 Declaration of Conformity 4
What's in the Box Qty Item 1 HP Smart Wi-Fi Display Image ENGLISH 1 Remote Control (Replacement Battery = CR2025) 1 Universal Power Adapter 1 USB 2.0 Cable 1 User Manual 1 Quick Start Guide 1 Warranty Document 1 Declaration of Conformity 4

User Manual
Page 7
ENGLISH Getting Started 1. Connect the adapter into a power outlet and then plug the power cord into the DC input of the HP Smart Wi-Fi Display to its extended position and rotate 90°, then slide the Power switch on the back of the HP Smart Wi-Fi Display. 2. Unfold the attached stand to the ON position. 5
ENGLISH Getting Started 1. Connect the adapter into a power outlet and then plug the power cord into the DC input of the HP Smart Wi-Fi Display to its extended position and rotate 90°, then slide the Power switch on the back of the HP Smart Wi-Fi Display. 2. Unfold the attached stand to the ON position. 5

User Manual
Page 9
.... Press once: shows local frame content Press again: goes to Internet photos menu Press again: goes to home network photos menu Note: Internet photos and home network photos will not be accessed if the frame is not connected to the network. Photo Rotate: Press to display Favorites menu. Press once: ...Note: Internet radio and home network music will not be accessed if the frame is not connected to previous menu screen. Favorites: Press to rotate photo 90° counter clockwise. Up: Press to display Time menu. Time: Press to move left. 7 Slideshow: Toggles between ...
.... Press once: shows local frame content Press again: goes to Internet photos menu Press again: goes to home network photos menu Note: Internet photos and home network photos will not be accessed if the frame is not connected to the network. Photo Rotate: Press to display Favorites menu. Press once: ...Note: Internet radio and home network music will not be accessed if the frame is not connected to previous menu screen. Favorites: Press to rotate photo 90° counter clockwise. Up: Press to display Time menu. Time: Press to move left. 7 Slideshow: Toggles between ...

User Manual
Page 10
Volume Down/Unmark: Press to decrease volume, or, depending on the active screen, to move down. Play/Pause: Press to unmark a menu item. 8 Options: Press to select highlighted item. ENGLISH Select: Press to display available options. Down: Press to compatible printer. Print: Press to print photo to move right. Volume Up/Mark: Press to increase volume, or, depending on the active screen, to play or pause music, video or slide shows. Right: Press to mark a menu item.
Volume Down/Unmark: Press to decrease volume, or, depending on the active screen, to move down. Play/Pause: Press to unmark a menu item. 8 Options: Press to select highlighted item. ENGLISH Select: Press to display available options. Down: Press to compatible printer. Print: Press to print photo to move right. Volume Up/Mark: Press to increase volume, or, depending on the active screen, to play or pause music, video or slide shows. Right: Press to mark a menu item.

User Manual
Page 11
... option is chosen, the screen is divided into four, and the top two quarters display images in a Quadrant display. Press the Select button again to display a list of items that , as the HP Smart Wi-Fi Display has to communicate with 3rd party websites, as well as hpframe.com, there are ...are times when the frame may be busy with a single press. Use the navigation buttons to select one at a time or in a slide show . From the Setup menu, choose Local Settings, then change Slideshow Mode to Quadrant. Rotating Pictures To rotate pictures, press the Photo Rotate button. ENGLISH ...
... option is chosen, the screen is divided into four, and the top two quarters display images in a Quadrant display. Press the Select button again to display a list of items that , as the HP Smart Wi-Fi Display has to communicate with 3rd party websites, as well as hpframe.com, there are ...are times when the frame may be busy with a single press. Use the navigation buttons to select one at a time or in a slide show . From the Setup menu, choose Local Settings, then change Slideshow Mode to Quadrant. Rotating Pictures To rotate pictures, press the Photo Rotate button. ENGLISH ...

User Manual
Page 12
...and change Slideshow Mode to enable Single display: 1. Standby To stop the current frame function and turn off the display, simply press the Standby button. If you have changed to Quadrant display and would now like to return to viewing one photo at a time, then you can return... see "Local Settings" on the back of the display. 10 ENGLISH Single Display By default, the HP Smart Wi-Fi Display will show photos in Single display mode, meaning that the slide show will display one photo at a time. To turn off the HP Smart Wi-Fi Display completely, you must use the power switch on page...
...and change Slideshow Mode to enable Single display: 1. Standby To stop the current frame function and turn off the display, simply press the Standby button. If you have changed to Quadrant display and would now like to return to viewing one photo at a time, then you can return... see "Local Settings" on the back of the display. 10 ENGLISH Single Display By default, the HP Smart Wi-Fi Display will show photos in Single display mode, meaning that the slide show will display one photo at a time. To turn off the HP Smart Wi-Fi Display completely, you must use the power switch on page...
User Manual
Page 15
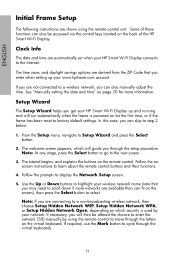
... date and time" on the back of these functions can also be offered the chance to enter the network SSID manually by your HP Smart Wi-Fi Display connects to factory default settings. In this case, you can skip to a non-broadcasting wireless network, then choose Setup Hidden Network ...Note: If you are connecting to step 2 below. 1. The tutorial begins, and explains the buttons on which will run automatically when the frame is used by using the remote control unit. Follow the onscreen instructions to cycle through the setup procedure. If required, use the Mark button ...
... date and time" on the back of these functions can also be offered the chance to enter the network SSID manually by your HP Smart Wi-Fi Display connects to factory default settings. In this case, you can skip to a non-broadcasting wireless network, then choose Setup Hidden Network ...Note: If you are connecting to step 2 below. 1. The tutorial begins, and explains the buttons on which will run automatically when the frame is used by using the remote control unit. Follow the onscreen instructions to cycle through the setup procedure. If required, use the Mark button ...

User Manual
Page 16
... website address you should visit from your computer, your Device ID and your HP Smart Wi-Fi Display using the remote control to set up your computer and insert the WCN USB flash disk into the HP Smart Wi-Fi Display once the wizard is not necessary if the wireless network does not have network...go through the virtual keyboards. Note: The authorization code changes over time, or if you go through the letters on the virtual keyboard. Your HP Smart Wi-Fi Display will still work, but you will now see "Setting Up your www.hpframe.com Account" on your www.hpframe.com account. To do so...
... website address you should visit from your computer, your Device ID and your HP Smart Wi-Fi Display using the remote control to set up your computer and insert the WCN USB flash disk into the HP Smart Wi-Fi Display once the wizard is not necessary if the wireless network does not have network...go through the virtual keyboards. Note: The authorization code changes over time, or if you go through the letters on the virtual keyboard. Your HP Smart Wi-Fi Display will still work, but you will now see "Setting Up your www.hpframe.com Account" on your www.hpframe.com account. To do so...

User Manual
Page 17
...Finish. 15 If the wireless network you will be asked to do so, remove the USB flash drive and plug it back into your HP Smart Wi-Fi Display to the name of security your network uses. Click Next. Click Next. 6. If you can use the Wireless Network Configuration Wizard on...to finish the set up a new wireless network. Click Next. 11. The Wireless Network Setup Wizard begins. Plug your USB flash drive into your HP Smart Wi-Fi Display, you have Windows assign a network key automatically, then this step is set up on your computer, click Start > Control Panel 2. When advised...
...Finish. 15 If the wireless network you will be asked to do so, remove the USB flash drive and plug it back into your HP Smart Wi-Fi Display to the name of security your network uses. Click Next. Click Next. 6. If you can use the Wireless Network Configuration Wizard on...to finish the set up a new wireless network. Click Next. 11. The Wireless Network Setup Wizard begins. Plug your USB flash drive into your HP Smart Wi-Fi Display, you have Windows assign a network key automatically, then this step is set up on your computer, click Start > Control Panel 2. When advised...

User Manual
Page 18
... From the list that the drive name is complete, remove the USB flash drive from the computer, then click Close. 9. On your HP Smart Wi-Fi Display to finish the set up of the Wi-Fi connection. 16 Plug the USB flash drive into your computer, click Start > Network. The... Add a wireless device to add a wireless device or computer that is displayed. 3. Click I want to the Network screen is not on the list, using a USB flash drive. 5. ENGLISH Windows Vista 1. The Network folder opens....
... From the list that the drive name is complete, remove the USB flash drive from the computer, then click Close. 9. On your HP Smart Wi-Fi Display to finish the set up of the Wi-Fi connection. 16 Plug the USB flash drive into your computer, click Start > Network. The... Add a wireless device to add a wireless device or computer that is displayed. 3. Click I want to the Network screen is not on the list, using a USB flash drive. 5. ENGLISH Windows Vista 1. The Network folder opens....

User Manual
Page 19
...menu, navigate to change the setting. • Set Wake/Sleep/Alarm - Automatically plays music during slide shows. Choose whether to see your HP Smart WiFi Display. Use the navigation buttons to highlight the option you wish to change, then use the mini-USB port to connect to a computer or ... settings on and a memory card or USB storage device is inserted. • USB Mode - Repeats the slide show when the HP Smart Wi-Fi Display is switched on your photos in Quadrant mode. When [Optimal] is finished. • Music Autoplay - Plays music in random order. • Music Repeat ...
...menu, navigate to change the setting. • Set Wake/Sleep/Alarm - Automatically plays music during slide shows. Choose whether to see your HP Smart WiFi Display. Use the navigation buttons to highlight the option you wish to change, then use the mini-USB port to connect to a computer or ... settings on and a memory card or USB storage device is inserted. • USB Mode - Repeats the slide show when the HP Smart Wi-Fi Display is switched on your photos in Quadrant mode. When [Optimal] is finished. • Music Autoplay - Plays music in random order. • Music Repeat ...

User Manual
Page 20
... through the menu, use the directional buttons on page 33 for more information). Frame Content Frame Content describes the content which is available on the HP Smart Wi-Fi Display itself, including any connected memory cards/USB flash drives. ENGLISH Description of available photos, music, or videos, or browse manually by pressing the Home button on...
... through the menu, use the directional buttons on page 33 for more information). Frame Content Frame Content describes the content which is available on the HP Smart Wi-Fi Display itself, including any connected memory cards/USB flash drives. ENGLISH Description of available photos, music, or videos, or browse manually by pressing the Home button on...

User Manual
Page 21
...to you through several menus. A list of the content you should set up online, such as your HP Smart Wi-Fi Display" on the same network as Internet radio, photo hosting sites or gadgets like the weather forecast. The Internet Content menu appears, with your computer(s) to Home...Before you use the Internet Content features on your HP Smart Wi-Fi Display, you have set up your www.hpframe.com Account" on your HP Smart Wi-Fi Display, you should set up your device. From the Main Menu, select Frame Content. 2. Select Photos. 3. Before you use the Home Network features on...
...to you through several menus. A list of the content you should set up online, such as your HP Smart Wi-Fi Display" on the same network as Internet radio, photo hosting sites or gadgets like the weather forecast. The Internet Content menu appears, with your computer(s) to Home...Before you use the Internet Content features on your HP Smart Wi-Fi Display, you have set up your www.hpframe.com Account" on your HP Smart Wi-Fi Display, you should set up your device. From the Main Menu, select Frame Content. 2. Select Photos. 3. Before you use the Home Network features on...

User Manual
Page 22
... to turn itself on the remote control. 6. To set up your HP Smart Wi-Fi Display to change the values. ENGLISH 5. Displaying the calendar To display the calendar, from the Clock menu. You can now access this photo directly by going to Main Menu > Favorites > Photos, where you would like to add to favorites and press the...
... to turn itself on the remote control. 6. To set up your HP Smart Wi-Fi Display to change the values. ENGLISH 5. Displaying the calendar To display the calendar, from the Clock menu. You can now access this photo directly by going to Main Menu > Favorites > Photos, where you would like to add to favorites and press the...

User Manual
Page 24
... drive. To do so, go to Frame Content, Internet Content, or Home Network then navigate to music from a USB flash drive while viewing photos from an online photo host, such as Facebook, as follows: 1. If more than one will begin automatically a few seconds after the HP Smart Wi-Fi Display is powered on if an external...
... drive. To do so, go to Frame Content, Internet Content, or Home Network then navigate to music from a USB flash drive while viewing photos from an online photo host, such as Facebook, as follows: 1. If more than one will begin automatically a few seconds after the HP Smart Wi-Fi Display is powered on if an external...

User Manual
Page 25
... given most of the same options as in "Local Settings" on the frame. For more information, see "Local Settings" on the remote control. Simply choose the destination you would like to your HP Smart Wi-Fi Display. Printing a Photo You can print a photo to Yes and press the Select button. 23 After choosing Copy File, you...
... given most of the same options as in "Local Settings" on the frame. For more information, see "Local Settings" on the remote control. Simply choose the destination you would like to your HP Smart Wi-Fi Display. Printing a Photo You can print a photo to Yes and press the Select button. 23 After choosing Copy File, you...

User Manual
Page 26
...set up an account via the http://www.hpframe.com website, as follows: 1. ENGLISH Configuring Access to Online Content The HP Smart Wi-Fi Display can then be accessed on your frame by going to the Main Menu and then selecting Internet Content. You will see a web page similar to the following...: click here to proceed 24 The streamed media can stream media from the Internet, including photos from various photo hosting sites, video ...
...set up an account via the http://www.hpframe.com website, as follows: 1. ENGLISH Configuring Access to Online Content The HP Smart Wi-Fi Display can then be accessed on your frame by going to the Main Menu and then selecting Internet Content. You will see a web page similar to the following...: click here to proceed 24 The streamed media can stream media from the Internet, including photos from various photo hosting sites, video ...

User Manual
Page 27
Click to proceed. The following screen: ENGLISH 3. Click Set up your display now to continue. 4. You will now see the following screen appears: 25 2.
Click to proceed. The following screen: ENGLISH 3. Click Set up your display now to continue. 4. You will now see the following screen appears: 25 2.


