Drives
Page 4
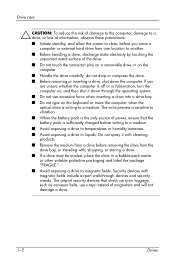
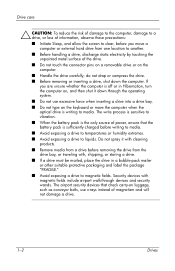
...drive bay. ■ Do not type on the computer. ■ Handle the drive carefully; do not drop or compress the drive. ■ Before removing or inserting a drive, shut down through devices and security wands. The airport security devices that the battery pack is off or in a bubble-pack ...the operating system. ■ Do not use x-rays instead of the drive. ■ Do not touch the connector pins on a removable drive or on the keyboard or move the computer when the optical drive is writing to another. ■ Before handling a drive, discharge static electricity by touching the...
...drive bay. ■ Do not type on the computer. ■ Handle the drive carefully; do not drop or compress the drive. ■ Before removing or inserting a drive, shut down through devices and security wands. The airport security devices that the battery pack is off or in a bubble-pack ...the operating system. ■ Do not use x-rays instead of the drive. ■ Do not touch the connector pins on a removable drive or on the keyboard or move the computer when the optical drive is writing to another. ■ Before handling a drive, discharge static electricity by touching the...
Drives - Windows Vista
Page 4
...that check carry-on luggage, such as conveyor belts, use excessive force when inserting a drive into a drive bay. ■ Do not type on the keyboard or move a computer or external hard drive from the drive bay, or traveling with, shipping, or storing a drive. ■ If a drive must be... devices and security wands. If you move the computer when the optical drive is writing to media. Security devices with cleaning products. ■ Remove media from a drive before you are unsure whether the computer is sufficiently charged before writing to media. ■ Avoid exposing a drive to...
...that check carry-on luggage, such as conveyor belts, use excessive force when inserting a drive into a drive bay. ■ Do not type on the keyboard or move a computer or external hard drive from the drive bay, or traveling with, shipping, or storing a drive. ■ If a drive must be... devices and security wands. If you move the computer when the optical drive is writing to media. Security devices with cleaning products. ■ Remove media from a drive before you are unsure whether the computer is sufficiently charged before writing to media. ■ Avoid exposing a drive to...

Memory Modules
Page 3
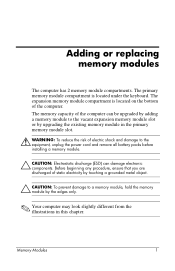
... damage to the vacant expansion memory module slot or by adding a memory module to the equipment, unplug the power cord and remove all battery packs before installing a memory module. Ä CAUTION: Electrostatic discharge (ESD) can damage electronic components. The expansion... memory module compartment is located under the keyboard. 1 Adding or replacing memory modules The computer has 2 memory module compartments. Before beginning any procedure, ensure that you are discharged ...
... damage to the vacant expansion memory module slot or by adding a memory module to the equipment, unplug the power cord and remove all battery packs before installing a memory module. Ä CAUTION: Electrostatic discharge (ESD) can damage electronic components. The expansion... memory module compartment is located under the keyboard. 1 Adding or replacing memory modules The computer has 2 memory module compartments. Before beginning any procedure, ensure that you are discharged ...
Memory Modules
Page 10
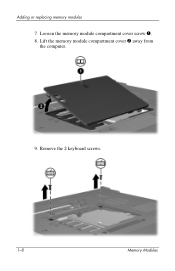
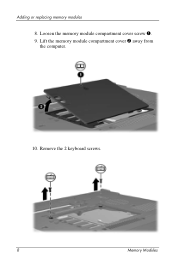
Adding or replacing memory modules 7. Remove the 2 keyboard screws. 1-8 Memory Modules Lift the memory module compartment cover 2 away from the computer. 9. Loosen the memory module compartment cover screw 1. 8.
Adding or replacing memory modules 7. Remove the 2 keyboard screws. 1-8 Memory Modules Lift the memory module compartment cover 2 away from the computer. 9. Loosen the memory module compartment cover screw 1. 8.
Memory Modules - Windows Vista
Page 3
... of static electricity by touching a grounded metal object. Ä CAUTION: To prevent damage to the equipment, unplug the power cord and remove all battery packs before installing a memory module. Ä CAUTION: Electrostatic discharge (ESD) can damage electronic components. The primary memory module ...Modules 1 Adding or replacing memory modules The computer has 2 memory module compartments. The expansion memory module compartment is located under the keyboard. The memory capacity of the computer can be upgraded by adding a memory module to the vacant expansion memory module slot or by...
... of static electricity by touching a grounded metal object. Ä CAUTION: To prevent damage to the equipment, unplug the power cord and remove all battery packs before installing a memory module. Ä CAUTION: Electrostatic discharge (ESD) can damage electronic components. The primary memory module ...Modules 1 Adding or replacing memory modules The computer has 2 memory module compartments. The expansion memory module compartment is located under the keyboard. The memory capacity of the computer can be upgraded by adding a memory module to the vacant expansion memory module slot or by...
Memory Modules - Windows Vista
Page 10
Loosen the memory module compartment cover screw 1. 9. Remove the 2 keyboard screws. 8 Memory Modules Lift the memory module compartment cover 2 away from the computer. 10. Adding or replacing memory modules 8.
Loosen the memory module compartment cover screw 1. 9. Remove the 2 keyboard screws. 8 Memory Modules Lift the memory module compartment cover 2 away from the computer. 10. Adding or replacing memory modules 8.
Memory Modules - Windows Vista
Page 17
C compartment, memory module 1 E electrostatic discharge (ESD) 1 ESD (electrostatic discharge) 1 L latches, keyboard 9 M memory module compartment 1 memory module compartment, expansion 2 memory module, removing or inserting 2 Index Memory Modules Index-1
C compartment, memory module 1 E electrostatic discharge (ESD) 1 ESD (electrostatic discharge) 1 L latches, keyboard 9 M memory module compartment 1 memory module compartment, expansion 2 memory module, removing or inserting 2 Index Memory Modules Index-1
Pointing Devices and Keyboard
Page 17
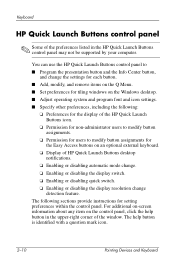
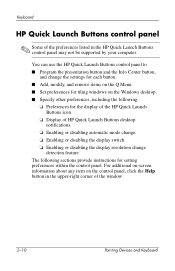
... HP Quick Launch Buttons desktop notifications. ❏ Enabling or disabling automatic mode change. ❏ Enabling or disabling the display switch. ❏ Enabling or disabling quick switch. ❏ Enabling or disabling the display resolution change the settings for each button. ■ Add, modify, and remove...button and the Info Center button, and change detection feature. The help button in the HP Quick Launch Buttons control panel may not be supported by your computer. Keyboard HP Quick Launch Buttons control panel ✎ Some of the preferences listed in the upper-right...
... HP Quick Launch Buttons desktop notifications. ❏ Enabling or disabling automatic mode change. ❏ Enabling or disabling the display switch. ❏ Enabling or disabling quick switch. ❏ Enabling or disabling the display resolution change the settings for each button. ■ Add, modify, and remove...button and the Info Center button, and change detection feature. The help button in the HP Quick Launch Buttons control panel may not be supported by your computer. Keyboard HP Quick Launch Buttons control panel ✎ Some of the preferences listed in the upper-right...

Pointing Devices and Keyboard
Page 21
... remove an item from the Items to display on Q Menu list. The items on the Q Menu are displayed by default. On the Items to display on Q Menu list, clear the check box for each item you want to display them. In the HP Quick Launch Buttons control panel, click the Q Menu tab. 2. Keyboard... items. Several system-defined items are managed from the Q Menu: 1. To save your preferences and close the control panel, click OK. 2-14 Pointing Devices and Keyboard Only user-defined items can choose to display these items or choose not to remove. 3. You can be added, modified, and...
... remove an item from the Items to display on Q Menu list. The items on the Q Menu are displayed by default. On the Items to display on Q Menu list, clear the check box for each item you want to display them. In the HP Quick Launch Buttons control panel, click the Q Menu tab. 2. Keyboard... items. Several system-defined items are managed from the Q Menu: 1. To save your preferences and close the control panel, click OK. 2-14 Pointing Devices and Keyboard Only user-defined items can choose to display these items or choose not to remove. 3. You can be added, modified, and...

Pointing Devices and Keyboard
Page 24
... control panel, click OK. To remove a user-defined item: 1. In the HP Quick Launch Buttons control panel, click the Q Menu tab. 2. Removing an item from the Items to display on Q Menu list System-defined items cannot be removed from the Items to remove. 3. Pointing Devices and Keyboard 2-17 In the HP Quick Launch Buttons control panel, click...
... control panel, click OK. To remove a user-defined item: 1. In the HP Quick Launch Buttons control panel, click the Q Menu tab. 2. Removing an item from the Items to display on Q Menu list System-defined items cannot be removed from the Items to remove. 3. Pointing Devices and Keyboard 2-17 In the HP Quick Launch Buttons control panel, click...
Pointing Devices and Keyboard - Windows Vista
Page 17
...■ Program the presentation button and the Info Center button, and change detection feature. Keyboard HP Quick Launch Buttons control panel ✎ Some of the preferences listed in the upper-right corner of HP Quick Launch Buttons desktop notifications. ❏ Enabling or disabling automatic mode change. ❏... change the settings for each button. ■ Add, modify, and remove items on the Q Menu. ■ Set preferences for tiling windows on the control panel, click the Help button in the HP Quick Launch Buttons control panel may not be supported by your computer. ...
...■ Program the presentation button and the Info Center button, and change detection feature. Keyboard HP Quick Launch Buttons control panel ✎ Some of the preferences listed in the upper-right corner of HP Quick Launch Buttons desktop notifications. ❏ Enabling or disabling automatic mode change. ❏... change the settings for each button. ■ Add, modify, and remove items on the Q Menu. ■ Set preferences for tiling windows on the control panel, click the Help button in the HP Quick Launch Buttons control panel may not be supported by your computer. ...

Pointing Devices and Keyboard - Windows Vista
Page 19
... file, or the URL of the system tasks accessed with the buttons, keys, or hotkeys found on Q Menu list. 2-12 Pointing Devices and Keyboard Only user-defined items can choose to display these items or choose not to display on most computers. Click the Configure button.... Keyboard ❏ To open a program, folder, file, or Web site when the button is pressed: a. d. You can be added, modified, and removed. To display the Q Menu on the desktop: » Right-click the HP Quick Launch Buttons icon, and select Launch Q Menu. ...
... file, or the URL of the system tasks accessed with the buttons, keys, or hotkeys found on Q Menu list. 2-12 Pointing Devices and Keyboard Only user-defined items can choose to display these items or choose not to display on most computers. Click the Configure button.... Keyboard ❏ To open a program, folder, file, or Web site when the button is pressed: a. d. You can be added, modified, and removed. To display the Q Menu on the desktop: » Right-click the HP Quick Launch Buttons icon, and select Launch Q Menu. ...

Pointing Devices and Keyboard - Windows Vista
Page 20
... Devices and Keyboard 2-13 Keyboard Removing a Q Menu item To remove an item from the Items to display on Q Menu list to the Q Menu: 1. In the HP Quick Launch Buttons control panel, click the Q Menu tab. 2. In the HP Quick Launch ... To save your preferences and close the control panel, click Apply, and then click OK. In the HP Quick Launch Buttons control panel, click the Q Menu tab. 2. Click Add. Adding a user-defined item...display on Q Menu list and to the Q Menu when it is not on the Items to remove. 3. On the Items to display on Q Menu list, clear the check box for example, an...
... Devices and Keyboard 2-13 Keyboard Removing a Q Menu item To remove an item from the Items to display on Q Menu list to the Q Menu: 1. In the HP Quick Launch Buttons control panel, click the Q Menu tab. 2. In the HP Quick Launch ... To save your preferences and close the control panel, click Apply, and then click OK. In the HP Quick Launch Buttons control panel, click the Q Menu tab. 2. Click Add. Adding a user-defined item...display on Q Menu list and to the Q Menu when it is not on the Items to remove. 3. On the Items to display on Q Menu list, clear the check box for example, an...

Pointing Devices and Keyboard - Windows Vista
Page 23
... and then click OK. 2-16 Pointing Devices and Keyboard In the HP Quick Launch Buttons control panel, click the Quick Tile tab. 2. To save your preferences and close the control panel, click Apply, and then click OK. Click Remove. 4. Keyboard Removing an item from the Items to display on Q... Menu list System-defined items cannot be tiled in the Applications currently running box. 3. Click the item you want to be removed from the Items to display on the Windows desktop...
... and then click OK. 2-16 Pointing Devices and Keyboard In the HP Quick Launch Buttons control panel, click the Quick Tile tab. 2. To save your preferences and close the control panel, click Apply, and then click OK. Click Remove. 4. Keyboard Removing an item from the Items to display on Q... Menu list System-defined items cannot be tiled in the Applications currently running box. 3. Click the item you want to be removed from the Items to display on the Windows desktop...

HP Compaq nx6310, nx6320, nc6320 Notebook PC - Getting Started - Enhanced for Accessibility
Page 39
...button for at least 5 seconds. 3. If you cannot shut down the computer by using the power button, unplug the computer from external power and remove the battery pack. ✎ If you cannot turn the computer back on after shutting it down, refer to "Is the computer unable to a ... Turn Off. (If you have been registered to start up?" Troubleshooting Is the computer turned on, but is not responding to software applications or keyboard commands, try the emergency shutdown procedures in Windows, press ctrl+alt+delete. If the computer is turned on, but is in the following sequence: ...
...button for at least 5 seconds. 3. If you cannot shut down the computer by using the power button, unplug the computer from external power and remove the battery pack. ✎ If you cannot turn the computer back on after shutting it down, refer to "Is the computer unable to a ... Turn Off. (If you have been registered to start up?" Troubleshooting Is the computer turned on, but is not responding to software applications or keyboard commands, try the emergency shutdown procedures in Windows, press ctrl+alt+delete. If the computer is turned on, but is in the following sequence: ...

Maintenance and Service Guide
Page 28
...for disassembly steps. These conditions are affected by a temperature sensor and is designed to identify replacement parts, and Chapter 5, "Removal and Replacement Procedures," for ventilation. Exhaust air is controlled by high external temperatures, system power consumption, power management/battery conservation...; Display ■ Hard drive ■ Intel Dual Core, Solo Core, and Celeron M processors ■ Keyboard and TouchPad ■ Memory module ■ Mini Card module ■ PC Card Ä CAUTION: To properly ventilate the computer, allow at least a 7.6-cm (3-inch) clearance on...
...for disassembly steps. These conditions are affected by a temperature sensor and is designed to identify replacement parts, and Chapter 5, "Removal and Replacement Procedures," for ventilation. Exhaust air is controlled by high external temperatures, system power consumption, power management/battery conservation...; Display ■ Hard drive ■ Intel Dual Core, Solo Core, and Celeron M processors ■ Keyboard and TouchPad ■ Memory module ■ Mini Card module ■ PC Card Ä CAUTION: To properly ventilate the computer, allow at least a 7.6-cm (3-inch) clearance on...

Maintenance and Service Guide
Page 106
... Procedures Disassembly Sequence Chart (Continued) Section 5.10 5.11 5.12 5.13 5.14 5.15 5.16 5.17 5.18 5.19 5.20 5.21 5.22 5.23 5.24 5.25 Description # of Screws Removed Keyboard 2 Fan 2 loosened Heat Sink 4 loosened Processor 1 loosened RTC Battery 0 Internal Memory Module 0 Mini Card WWAN Module 2 Å To prevent an unresponsive system and the display...
... Procedures Disassembly Sequence Chart (Continued) Section 5.10 5.11 5.12 5.13 5.14 5.15 5.16 5.17 5.18 5.19 5.20 5.21 5.22 5.23 5.24 5.25 Description # of Screws Removed Keyboard 2 Fan 2 loosened Heat Sink 4 loosened Processor 1 loosened RTC Battery 0 Internal Memory Module 0 Mini Card WWAN Module 2 Å To prevent an unresponsive system and the display...

Maintenance and Service Guide
Page 125
5.10 Keyboard Removal and Replacement Procedures Keyboard Spare Part Number Information For use with computer models with pointing stick and fingerprint reader Belgium Brazil The Czech Republic Denmark Europe France French Canada ...
5.10 Keyboard Removal and Replacement Procedures Keyboard Spare Part Number Information For use with computer models with pointing stick and fingerprint reader Belgium Brazil The Czech Republic Denmark Europe France French Canada ...

Maintenance and Service Guide
Page 126
Removal and Replacement Procedures Keyboard Spare Part Number Information (Continued) Keyboards (Continued) For use with computer models with TouchPad and fingerprint reader Belgium Brazil The Czech Republic Denmark Europe France French Canada Germany Greece Hungary Iceland ...-131 416039-251 416039-171 416039-231 416039-BA1 416039-071 416039-B71 416039-111 416039-AB1 416039-281 416039-141 416039-031 416039-001 1. Remove the memory/Mini Card module cover (Section 5.7). 5-24 Maintenance and Service Guide Prepare the computer for disassembly (Section 5.3). 2.
Removal and Replacement Procedures Keyboard Spare Part Number Information (Continued) Keyboards (Continued) For use with computer models with TouchPad and fingerprint reader Belgium Brazil The Czech Republic Denmark Europe France French Canada Germany Greece Hungary Iceland ...-131 416039-251 416039-171 416039-231 416039-BA1 416039-071 416039-B71 416039-111 416039-AB1 416039-281 416039-141 416039-031 416039-001 1. Remove the memory/Mini Card module cover (Section 5.7). 5-24 Maintenance and Service Guide Prepare the computer for disassembly (Section 5.3). 2.

Maintenance and Service Guide
Page 127
Removing the Keyboard Screws Maintenance and Service Guide 5-25 Remove the two Torx8 T8M2.0×9.0 screws that secure the keyboard to the computer. Removal and Replacement Procedures 3.
Removing the Keyboard Screws Maintenance and Service Guide 5-25 Remove the two Torx8 T8M2.0×9.0 screws that secure the keyboard to the computer. Removal and Replacement Procedures 3.


