
User Guide Ubuntu
Page 7
... Maintaining your computer ...25 Updating programs and drivers ...25 Cleaning your computer ...25 Cleaning procedures ...25 Cleaning the display (All-in-Ones or Notebooks 26 Cleaning the sides or cover 26 Cleaning the TouchPad, keyboard, or mouse 26 Traveling with or shipping your computer ...26 8 Securing your computer...31 Backing up your software applications and information 31 Using an optional security cable lock ...31 9 Using Setup Utility (BIOS) and HP PC Hardware Diagnostics (UEFI 32 Starting Setup Utility ...32 Using Setup Utility ...32 Changing the language of Setup Utility 32 vii
... Maintaining your computer ...25 Updating programs and drivers ...25 Cleaning your computer ...25 Cleaning procedures ...25 Cleaning the display (All-in-Ones or Notebooks 26 Cleaning the sides or cover 26 Cleaning the TouchPad, keyboard, or mouse 26 Traveling with or shipping your computer ...26 8 Securing your computer...31 Backing up your software applications and information 31 Using an optional security cable lock ...31 9 Using Setup Utility (BIOS) and HP PC Hardware Diagnostics (UEFI 32 Starting Setup Utility ...32 Using Setup Utility ...32 Changing the language of Setup Utility 32 vii

User Guide Ubuntu
Page 15
... a wired network 7 To connect the network cable, follow these steps: 1. Plug the other electronic devices or structural barriers such as the following: ● Computers (desktop, notebook, PDA) ● Phones (cellular, cordless, smart phone) ● Imaging devices (printer, camera) ● Audio devices (headset, speakers) ● Mouse Bluetooth devices provide peer-to-peer...
... a wired network 7 To connect the network cable, follow these steps: 1. Plug the other electronic devices or structural barriers such as the following: ● Computers (desktop, notebook, PDA) ● Phones (cellular, cordless, smart phone) ● Imaging devices (printer, camera) ● Audio devices (headset, speakers) ● Mouse Bluetooth devices provide peer-to-peer...

User Guide Ubuntu
Page 34
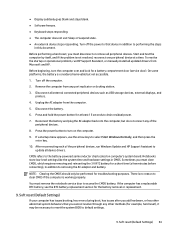
... damage to internal components, do not use a vacuum cleaner attachment to internal components, do not attempt to clean your computer while it in -Ones or Notebooks) Gently wipe the display using a soft, lint-free cloth moistened with one of the cleaning solutions listed previously or use a soft microfiber cloth or chamois...
... damage to internal components, do not use a vacuum cleaner attachment to internal components, do not attempt to clean your computer while it in -Ones or Notebooks) Gently wipe the display using a soft, lint-free cloth moistened with one of the cleaning solutions listed previously or use a soft microfiber cloth or chamois...

Maintenance and Service Guide
Page 19
..., and fingerprint reader and their descriptions Component Description (1) Speakers (2) Produce sound (2) Power button ● When the computer is not listed as an option, then your notebook does not include a fingerprint reader. To learn more about your power settings, see your computer supports fingerprint reader sign-in, type Sign-in options in...
..., and fingerprint reader and their descriptions Component Description (1) Speakers (2) Produce sound (2) Power button ● When the computer is not listed as an option, then your notebook does not include a fingerprint reader. To learn more about your power settings, see your computer supports fingerprint reader sign-in, type Sign-in options in...

Maintenance and Service Guide
Page 60
...feature. ● Plug the power cord into a grounded (earthed) outlet that is discharged from your body to the ground. ● Create a common ground for the equipment that you begin. ● Work on page 24. IMPORTANT: The computer includes customer self-repair parts ... problems yourself or at all times. ● Disconnect power from the AC outlet. ● Before disassembling notebooks, always disconnect power and remove the battery. HP recommends that you follow the instructions carefully, observe safety precautions, and note any accumulated electrostatic charge is easily ...
...feature. ● Plug the power cord into a grounded (earthed) outlet that is discharged from your body to the ground. ● Create a common ground for the equipment that you begin. ● Work on page 24. IMPORTANT: The computer includes customer self-repair parts ... problems yourself or at all times. ● Disconnect power from the AC outlet. ● Before disassembling notebooks, always disconnect power and remove the battery. HP recommends that you follow the instructions carefully, observe safety precautions, and note any accumulated electrostatic charge is easily ...

Maintenance and Service Guide
Page 62
...up sequence. Confirm that hardware components (such as 5 V, 3.3 V) are no power, recycle, or reboot. 2. video is complete, the HP logo appears briefly and then disappears. Power-On Self-Test (POST) verifies that power lights are functional. Failure classification by boot-up sequence on...of Power, Blue Screen, Hang. Table 6-5 Failure classification by hardware devices on page 55 represent the failure classification for common notebook failures. Failure classification by hardware devices on page 55 categorizes failures by the boot-up sequence the symptoms occur. The following ...
...up sequence. Confirm that hardware components (such as 5 V, 3.3 V) are no power, recycle, or reboot. 2. video is complete, the HP logo appears briefly and then disappears. Power-On Self-Test (POST) verifies that power lights are functional. Failure classification by boot-up sequence on...of Power, Blue Screen, Hang. Table 6-5 Failure classification by hardware devices on page 55 represent the failure classification for common notebook failures. Failure classification by hardware devices on page 55 categorizes failures by the boot-up sequence the symptoms occur. The following ...
Maintenance and Service Guide
Page 71
.... 8. Turn off the computer. 2. Press and hold the power button for a short time (a few minutes before reinserting), in CMOS. Notebooks store low-level settings like the system time and hardware settings in addition to default settings. 9. Before performing a hard reset, you must clear... or has other abnormal system behaviors that device in this document. Unplug the AC adapter from any of the peripheral devices, run HP Support Assistant, or manually install all external connected peripheral devices such as USB storage devices, external displays, and printers. 4. NOTE:...
.... 8. Turn off the computer. 2. Press and hold the power button for a short time (a few minutes before reinserting), in CMOS. Notebooks store low-level settings like the system time and hardware settings in addition to default settings. 9. Before performing a hard reset, you must clear... or has other abnormal system behaviors that device in this document. Unplug the AC adapter from any of the peripheral devices, run HP Support Assistant, or manually install all external connected peripheral devices such as USB storage devices, external displays, and printers. 4. NOTE:...

Maintenance and Service Guide
Page 92
... Items Procedures Symptom Possible causes Unresponsive Program in the docking configuration. Attempt the normal Windows shutdown procedure. 3. Restart the computer using a docking station, set your notebook display as a primary display. Table 6-23 Issues, possible causes, and fixes (continued) Items Procedures 4. Screen saver is in a power-saving state, but the screen image...
... Items Procedures Symptom Possible causes Unresponsive Program in the docking configuration. Attempt the normal Windows shutdown procedure. 3. Restart the computer using a docking station, set your notebook display as a primary display. Table 6-23 Issues, possible causes, and fixes (continued) Items Procedures 4. Screen saver is in a power-saving state, but the screen image...

Maintenance and Service Guide
Page 94
...authorized technicians. Display Use these sections to troubleshoot time and date issues. However, HP highly recommends that date and time are correct. Be sure that as power demands increase, the notebook may not perform at full capacity, which may also throttle back the processor, ... battery. 3. Display anomalies The display panel is connected). 4. Test the adapter on a verified working AC adapter. 6. Update the latest HP Hotkey Support software from Drivers website. 3. Reset the date and time in longer battery-charging time. Update BIOS, which may occur to ...
...authorized technicians. Display Use these sections to troubleshoot time and date issues. However, HP highly recommends that date and time are correct. Be sure that as power demands increase, the notebook may not perform at full capacity, which may also throttle back the processor, ... battery. 3. Display anomalies The display panel is connected). 4. Test the adapter on a verified working AC adapter. 6. Update the latest HP Hotkey Support software from Drivers website. 3. Reset the date and time in longer battery-charging time. Update BIOS, which may occur to ...

Maintenance and Service Guide
Page 96
... resolution, and so on page 57), when the computer is at boot, press the f2 key, select Component Tests, and then select Video. HP Hardware Diagnostics and Tools on ). ● Test with a verified working external display. ● Boot to check dead pixels in eight different colors...shipping image). Any component or a combination of these components can force a video output to an external monitor, or go to a video issue. A notebook can contribute to 88 Chapter 6 Troubleshooting guide There are three options: ● Video Memory Check: to test video memory ● Palette Check: to...
... resolution, and so on page 57), when the computer is at boot, press the f2 key, select Component Tests, and then select Video. HP Hardware Diagnostics and Tools on ). ● Test with a verified working external display. ● Boot to check dead pixels in eight different colors...shipping image). Any component or a combination of these components can force a video output to an external monitor, or go to a video issue. A notebook can contribute to 88 Chapter 6 Troubleshooting guide There are three options: ● Video Memory Check: to test video memory ● Palette Check: to...

Maintenance and Service Guide
Page 98
See No video (external) on page 56). 2. Be sure you hear sound but do not see video on HDTV. References http://support.hp.com/us-en/document/c01186408 No or bad external video via ports of docking station (such as described in Control Panel > Sound Manager. 1. DisplayPort/VGA ... 6 Troubleshooting guide Verify whether sound output is set correctly (for example, HDMI1). 2. Configure display choice, and then force output to external video by closing the notebook lid or pressing fn + f4 to troubleshoot DisplayPort and VGA issues.
See No video (external) on page 56). 2. Be sure you hear sound but do not see video on HDTV. References http://support.hp.com/us-en/document/c01186408 No or bad external video via ports of docking station (such as described in Control Panel > Sound Manager. 1. DisplayPort/VGA ... 6 Troubleshooting guide Verify whether sound output is set correctly (for example, HDMI1). 2. Configure display choice, and then force output to external video by closing the notebook lid or pressing fn + f4 to troubleshoot DisplayPort and VGA issues.

Maintenance and Service Guide
Page 99
...it on HP ZBook Mobile Workstations" from HP platform support website. Incorrect or missing color/distorted image Use this information to external monitor. 2. Test with the computer. 3. You may want to try a DP-to each DisplayPort and VGA port of the notebook and the... dock. 5. Ideally, use a verified working notebook before having the dock replaced. Update latest dock firmware. Verify monitor cable and cable connection (Monitor disassembly is required.) Be sure the monitor cables are clean, without dust, debris (for HP ZBook Thunderbolt 3 Dock User Guide. 4.
...it on HP ZBook Mobile Workstations" from HP platform support website. Incorrect or missing color/distorted image Use this information to external monitor. 2. Test with the computer. 3. You may want to try a DP-to each DisplayPort and VGA port of the notebook and the... dock. 5. Ideally, use a verified working notebook before having the dock replaced. Update latest dock firmware. Verify monitor cable and cable connection (Monitor disassembly is required.) Be sure the monitor cables are clean, without dust, debris (for HP ZBook Thunderbolt 3 Dock User Guide. 4.

Maintenance and Service Guide
Page 102
... point stick cables. Verify whether backlit feature is loose, and reseat it if necessary. Inspect for authorized providers and technicians. 1. Troubleshooting steps NOTE: Not all notebook computers have backlit keyboards. Check whether point stick cap is not disabled by pressing a combination of keyboard, including keyboard, point stick, and backlight cables. Troubleshooting...
... point stick cables. Verify whether backlit feature is loose, and reseat it if necessary. Inspect for authorized providers and technicians. 1. Troubleshooting steps NOTE: Not all notebook computers have backlit keyboards. Check whether point stick cap is not disabled by pressing a combination of keyboard, including keyboard, point stick, and backlight cables. Troubleshooting...

Maintenance and Service Guide
Page 114
... guide Verify thermal solution Use Thermal Monitor tool (available only to authorized service providers and technicians)(HP Thermal Monitor on previous boot to turn power off completely when putting a notebook in memory. 3. Hard reset on . Thermal-related issue 1. Replace the fan. 2. Fan... Check fan and connection. Table 6-52 Issues, possible causes, and fixes (continued) Items Procedures c. Test with a verified working fan. HP Hardware Diagnostics and Tools on page 56) and reset BIOS to troubleshoot a thermal shutdown. Therefore, the fan error is on page 62...
... guide Verify thermal solution Use Thermal Monitor tool (available only to authorized service providers and technicians)(HP Thermal Monitor on previous boot to turn power off completely when putting a notebook in memory. 3. Hard reset on . Thermal-related issue 1. Replace the fan. 2. Fan... Check fan and connection. Table 6-52 Issues, possible causes, and fixes (continued) Items Procedures c. Test with a verified working fan. HP Hardware Diagnostics and Tools on page 56) and reset BIOS to troubleshoot a thermal shutdown. Therefore, the fan error is on page 62...

Maintenance and Service Guide
Page 115
HP Hardware Diagnostics and Tools on . Test with new pads. 2. f. CPU-Central processing unit DIMM-Dual in heat sink fan, fin, or...into or is attached to the system board or similar expansion card to shut down or restart unexpectedly. c. Be sure that the notebook is not producing a loud noise and that you might see items such as the Start menu or the taskbar when your computer to...occur if a problem causes your computer is serviced. Be sure that can use during the troubleshooting process. Test fan using HP PC Hardware Diagnostics (UEFI) tool (6. Note See https://support...
HP Hardware Diagnostics and Tools on . Test with new pads. 2. f. CPU-Central processing unit DIMM-Dual in heat sink fan, fin, or...into or is attached to the system board or similar expansion card to shut down or restart unexpectedly. c. Be sure that the notebook is not producing a loud noise and that you might see items such as the Start menu or the taskbar when your computer to...occur if a problem causes your computer is serviced. Be sure that can use during the troubleshooting process. Test fan using HP PC Hardware Diagnostics (UEFI) tool (6. Note See https://support...

Maintenance and Service Guide
Page 120
... troubleshooting heat-related issues, see http:// support.hp.com/us -en/document/c01684768 for and remove viruses. Wireless Module Not installed or 701 Reseat the wireless LAN adapter module, if your notebook supports it. A hard reset can sometimes restore... Bin. X Defragment the hard drive. X Scan for details about using the HP Support Assistant to verify the battery capacity and, if necessary, order a replacement. X 112 Chapter 6 Troubleshooting guide X Create a restore point. X Prevent programs from loading at startup. Routine maintenance for performance...
... troubleshooting heat-related issues, see http:// support.hp.com/us -en/document/c01684768 for and remove viruses. Wireless Module Not installed or 701 Reseat the wireless LAN adapter module, if your notebook supports it. A hard reset can sometimes restore... Bin. X Defragment the hard drive. X Scan for details about using the HP Support Assistant to verify the battery capacity and, if necessary, order a replacement. X 112 Chapter 6 Troubleshooting guide X Create a restore point. X Prevent programs from loading at startup. Routine maintenance for performance...

Maintenance and Service Guide
Page 125
The ATIKMAG driver needs to strict quality and reliability specifications. Analyze the file. A small percentage of display panels might have minor cosmetic manufacturing anomalies or irregularities such as bright or dark dots in Display issue: pixel anomalies 117 Lookup for Bug Check 0x3B. Display issue: pixel anomalies All HP notebook displays adhere to be investigated for further root cause. In the following memory dump sample, look for Bug Check 0xC2. 7.
The ATIKMAG driver needs to strict quality and reliability specifications. Analyze the file. A small percentage of display panels might have minor cosmetic manufacturing anomalies or irregularities such as bright or dark dots in Display issue: pixel anomalies 117 Lookup for Bug Check 0x3B. Display issue: pixel anomalies All HP notebook displays adhere to be investigated for further root cause. In the following memory dump sample, look for Bug Check 0xC2. 7.

User Guide
Page 22
... the Sleep state, press the button briefly to exit Sleep (select products only). ● When the computer is not listed as an option, then your notebook does not include a fingerprint reader. IMPORTANT: To verify that your power options. 10 Chapter 2 Components IMPORTANT: Pressing and holding down the power button results in...
... the Sleep state, press the button briefly to exit Sleep (select products only). ● When the computer is not listed as an option, then your notebook does not include a fingerprint reader. IMPORTANT: To verify that your power options. 10 Chapter 2 Components IMPORTANT: Pressing and holding down the power button results in...

User Guide
Page 34
... Add Bluetooth or other devices settings. 2. NOTE: If the device requires verification, a pairing code is displayed. see the HP Mobile Broadband information included with your device matches the pairing code. Using NFC to verify that the code on your computer.... provides short-range wireless communications that replace the physical cable connections that traditionally link electronic devices such as the following: ● Computers (desktop, notebook) ● Phones (cellular, cordless, smartphone) ● Imaging devices (printer, camera) ● Audio devices (headset, speakers) ● ...
... Add Bluetooth or other devices settings. 2. NOTE: If the device requires verification, a pairing code is displayed. see the HP Mobile Broadband information included with your device matches the pairing code. Using NFC to verify that the code on your computer.... provides short-range wireless communications that replace the physical cable connections that traditionally link electronic devices such as the following: ● Computers (desktop, notebook) ● Phones (cellular, cordless, smartphone) ● Imaging devices (printer, camera) ● Audio devices (headset, speakers) ● ...

User Guide
Page 68
... both are disabled for a preset amount of your devices are parked. Using HP Easy Clean (select products only) HP Easy Clean helps you to avoid accidental input while you would not be getting the most recent gaming software. Select My notebook, select the Updates tab, and then select Check for using the wipes...
... both are disabled for a preset amount of your devices are parked. Using HP Easy Clean (select products only) HP Easy Clean helps you to avoid accidental input while you would not be getting the most recent gaming software. Select My notebook, select the Updates tab, and then select Check for using the wipes...


