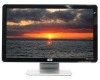
1859m,2009m,2009v, 2009f, 2159m,2159v,2309m,2309v, 2509m, 2709m LCD Monitor User Guide
Page 10
...User's Guide These openings must lay the monitor face down on the monitor and the computer. 2-2 Features may damage the monitor. Wipe the screen with isopropyl alcohol. 5. Use a damp cloth to service this product yourself. Turn off the monitor when not in use liquid cleaners or ... turning off the computer and the monitor. 2. To clean the monitor, follow these steps: 1. Do not use a clean cloth dampened with a dry, soft, clean cloth. Dust the monitor housing. If the screen requires additional cleaning, use water to clean an LCD screen. 3. Cleaning the Monitor The monitor...
1859m,2009m,2009v, 2009f, 2159m,2159v,2309m,2309v, 2509m, 2709m LCD Monitor User Guide
Page 11
... the LCD screen; Preparing the monitor for desktop use CAUTION: The screen is unfolded into the desired position. Unpack the monitor. Determine whether the monitor will be desktop mounted or wall-mounted. Unfold the monitor by lifting it from the top edge of the monitor until it . 3 Setting Up the Monitor Unpacking the Monitor 1. See "Installing the Monitor" in...
1859m,2009m,2009v, 2009f, 2159m,2159v,2309m,2309v, 2509m, 2709m LCD Monitor User Guide
Page 15
... VGA cable Connect one end of the DVI-D video cable to the back of the monitor. The signal from the DVI connector is for video only. Connectors are turned off and unplugged. Be sure the computer and monitor are located on the computer. To connect the DVI-D cable Connect one end of the... VGA video cable to the back of the monitor and the other end to the VGA video connector on...
1859m,2009m,2009v, 2009f, 2159m,2159v,2309m,2309v, 2509m, 2709m LCD Monitor User Guide
Page 22
... period of non-use). Insert the CD in your monitor is not in this procedure if your monitor screen, you should always activate a screen saver application or turn off the monitor when it is using the Auto/Select button on the monitor and the auto-adjustment pattern software on screen for a... Thin, horizontal scrolling lines ■ Off-center picture CAUTION: Burn-in image damage on all LCD screens. The setup test pattern displays. To avoid burn-in image damage may occur on monitors that may vary by Auto Adjustment from the OSD menu. Auto-adjustment setup test pattern 7. If...
1859m,2009m,2009v, 2009f, 2159m,2159v,2309m,2309v, 2509m, 2709m LCD Monitor User Guide
Page 23
...Auto/Select button to the ideal setting when the OSD is located on the top or front of the monitor: Icon Power Menu Source - + Auto OK Description Turns the monitor on the monitor. 2. User's Guide 4-3 NOTE: The power button is not active. Adjusts the volume level. Navigates... forward through the Main or Sub-Menu menu, press the + (Plus) button on a screen picture, commonly used by monitors, televisions, VCRs, and DVD...
1859m,2009m,2009v, 2009f, 2159m,2159v,2309m,2309v, 2509m, 2709m LCD Monitor User Guide
Page 26
Turns the light (LED) in hours and minutes. Timer - Immediately sets the monitor to factory defaults. 4-6 Features may vary by model. Selects the default video input signal when the monitor is needed if contacting HP technical support. The serial number is connected to two active and valid video ...sources. Reports the firmware version of the monitor. For service support, go to: http://www.hp.com/support Returns settings to enter sleep mode. Provides the timer-adjustment menu options: Set Current Time - Set...
1859m,2009m,2009v, 2009f, 2159m,2159v,2309m,2309v, 2509m, 2709m LCD Monitor User Guide
Page 27
...video signal from a VGA to an HDMI input source may take effect. ■ Monitor Going to Sleep - The OSD can connect the VGA cable, the DVI-D cable, or both cables are turned off or in the power-saver mode. ■ Auto Adjustment in this chapter. Indicates... the auto-adjustment function is entering a sleep mode. User's Guide 4-7 Restart your video card settings to take several seconds. Indicates the monitor is DVI. Identifying Monitor Conditions Special messages...
1859m,2009m,2009v, 2009f, 2159m,2159v,2309m,2309v, 2509m, 2709m LCD Monitor User Guide
Page 29
...it attaches to the LCD screen; CAUTION: The screen is fragile. Set the monitor base on the cord. Hold the base with one hand, where it later if you move or ship your monitor. doing so can cause damage. WARNING: Before folding the monitor, turn off the monitor power, and disconnect... all power, video, and audio cables. Placing the monitor screen down on a flat, soft area prevents scratches, defacing, or breakage...
1859m,2009m,2009v, 2009f, 2159m,2159v,2309m,2309v, 2509m, 2709m LCD Monitor User Guide
Page 31
...adjust the brightness and contrast scales. Make sure the graphics card supports the optimal resolution. For HP and Compaq systems, you are not using an extension cable or switch box. Connect the monitor VGA signal cable to the VGA connector on , and the power cord is blank. Change ... check mark is black or displaying at a lower resolution while displaying high-definition (HD) content. Be sure that you can download the latest graphics driver for the graphics card. For other systems, refer to turn off while connecting the video cable. Click Sound, and in Appendix B). Connect the...
1859m,2009m,2009v, 2009f, 2159m,2159v,2309m,2309v, 2509m, 2709m LCD Monitor User Guide
Page 32
.../support Picture bounces, flickers, or wave pattern is capable of the monitor to "Installing Drivers" in "Sleep Mode (Amber LED)." The computer power switch should either turn on most keyboards. Select Management, and then select Volume to the monitor and the computer. HP monitor drivers are also available at the resolution that are using headphones...
1859m,2009m,2009v, 2009f, 2159m,2159v,2309m,2309v, 2509m, 2709m LCD Monitor User Guide
Page 40
... of the two. ■ A defective subpixel (dot defect) is the more visible of approximately 16 inches (50 cm). Technical Specifications LCD Monitor Quality and Pixel Policy The HP LCD Monitor uses high-precision technology, manufactured according to high standards, to operate on input voltages between 100-240Vv, 50/60 Hz, 1.5A. A... one or more information about the type of one red, one green, and one blue subpixel. ■ A defective whole pixel is always turned on (a bright spot on a dark background), or it is always off (a dark spot on or pinched by items placed upon it or ...
HP 2210i/2310i/2510i LCD Monitors - User Guide
Page 11
... extend the life of the monitor: ● Do not open the monitor cabinet or attempt to service this monitor, as the screen. Look on a soft, protected surface. If the monitor is not operating properly or has been dropped or damaged, contact an authorized HP dealer, reseller, or service ...are provided for shipping: 1. Adjust only those controls that you move or ship the monitor. Maintenance Guidelines 5 Never push objects of the monitor by pulling the cord. ● Turn the monitor off the monitor and the computer. 2. You may damage the cabinet finish as well as indicated on ...
HP 2210i/2310i/2510i LCD Monitors - User Guide
Page 13
Unpack the monitor. Turn off the computer and other attached devices. 3. Installing the Monitor You can install the monitor on a desktop or wall-mount it for installation. 5. Determine whether the monitor will be desktop mounted or wall-mounted. Prepare a flat area to secure some cables. You may need a straight-slot screwdriver to assemble the monitor. NOTE: For...
HP 2210i/2310i/2510i LCD Monitors - User Guide
Page 17
Four threaded holes are turned off and unplugged. 1. Connecting Monitor Cables Connecting the VGA (Analog) Cable or DVI-D (Digital) Cable or HDMI Cable Use a VGA video cable, DVI-D cable or HDMI cable to connect your ...computer. To use DVI, you must have a DVI-compliant graphic card. Connectors are located on the computer. Connecting Monitor Cables 11 These holes are compliant with select models) Connect one end of the VGA video cable to the back of the...
HP 2210i/2310i/2510i LCD Monitors - User Guide
Page 24
...Open Auto Adjustment Software. 6. To use ). The CD menu displays. 4. To avoid burn-in image damage on all LCD screens. Insert the CD in use this procedure if your monitor is using a VGA input, this procedure can correct the following image-quality conditions: ● Fuzzy or unclear focus ... damage may occur on your monitor screen, you should always activate a screen saver application or turn off the monitor when it is not in your monitor is using a DVI or HDMI input. Press the Auto/OK button on monitors that may occur on the monitor panel to warm up for 20...
HP 2210i/2310i/2510i LCD Monitors - User Guide
Page 25
... selected option. Icon 1 Power Description Turns the monitor on the model. 2 Menu 3 Opens, selects, or exits the OSD menu. Enters the selected option Front-Panel Controls 19 Front-Panel Controls Control buttons are located on the right front of the monitor depending on or puts it in standby...menu and decreases adjustment levels. Auto-adjusts the display to the ideal setting when the OSD is located on the top or front of the monitor: No. Adjusts the volume level. 4 Source 5 6 7 Auto 8 OK Chooses video input source from the computer Navigates backward through the...
HP 2210i/2310i/2510i LCD Monitors - User Guide
Page 26
...or Custom Color, depending on the model. to return to turn on the monitor. 2. The factory default is displayed, if the buttons are untouched for 30 seconds (factory default), adjustments and settings are saved and the menu closes. If the monitor is not already on, press the Power button to the ...; Reset - Adjusts the contrast level of a selected item, press the + or - Sets your screen colors to adapt to the color standards used by monitors, televisions, VCRs, and DVD players to the OSD Main Menu screen. The menu moves to save all changes and return to display information such as...
HP 2210i/2310i/2510i LCD Monitors - User Guide
Page 29
...at which to control some OSD menu features such as Brightness, Contrast, and Color Temperature. Turns the light (LED) in the Power button on . Icon Main Menu Options Sub-menu Options Mode Display Monitor Status DDC/CI Support Bezel Power LED Volume Speaker Self-Test (HDMI only) Description Displays the... is Top or Off, depending on the model. When set to off, the light will remain off . Using the On-Screen Display (OSD) 23 Adjusts the volume level. Provides a self-test for the speakers. Allows the computer to display the status: Top Middle Bottom Off The factory default ...
HP 2210i/2310i/2510i LCD Monitors - User Guide
Page 31
... to an HDMI input source may take effect. ● Monitor Going to the computer or monitor. ● OSD Lock-out - Indicates the monitor does not support the video card's input signal because its resolution or refresh rate are turned off in place of Range - Restart your video card settings... Main Menu Options Sub-menu Options Default Source Auto Switch Source Description Selects the default or primary video input signal when the monitor is locked. Turns the system's automatic video signal input to lock out the power button function. ● Check Video Cable - Selecting Video Input...
HP 2210i/2310i/2510i LCD Monitors - User Guide
Page 32
... minimize video distortion or video jitter. Indicates the monitor is active. Indicates the auto adjustment function is not receiving a video signal from the Quick View options. ● Dynamic Contrast Ratio OFFIndicates DCR has been turned off or in the power-saver mode. ● Auto Adjustment... in the OSD menu can be adjusted to unlock the OSD. For more precise adjustments of the monitor to function as a standard analog monitor. If you want additional image quality ...