
Maintenance and Service Guide
Page 5
... contents 1 Product features ...1 Standard configuration features ...1 Front panel components (EliteDesk 800, ProDesk 600, and HP MP9 1 Front panel components (EliteDesk 705 and ProDesk 400 2 Rear panel components (EliteDesk 800, EliteDesk 705, ProDesk 600, and HP MP9 3 Rear panel components (ProDesk 400) ...4 Serial number location ...5 2 Illustrated parts catalog ...6 Desktop Mini (DM) chassis spare parts ...6 Computer major components ...6 Cables ...8 Misc parts...
... contents 1 Product features ...1 Standard configuration features ...1 Front panel components (EliteDesk 800, ProDesk 600, and HP MP9 1 Front panel components (EliteDesk 705 and ProDesk 400 2 Rear panel components (EliteDesk 800, EliteDesk 705, ProDesk 600, and HP MP9 3 Rear panel components (ProDesk 400) ...4 Serial number location ...5 2 Illustrated parts catalog ...6 Desktop Mini (DM) chassis spare parts ...6 Computer major components ...6 Cables ...8 Misc parts...

Maintenance and Service Guide
Page 6
... ...48 System board ...49 System board callouts, EliteDesk 800, ProDesk 600, and HP MP9 Retail System 51 System board callouts, EliteDesk 705 ...52 System board callouts, ProDesk 400 ...53 Internal WLAN antenna cable removal/installation ...54 Changing ...from desktop to tower configuration ...57 5 Computer Setup (F10) Utility ...58 Computer Setup (F10) Utilities ...58 Using Computer Setup (F10) Utilities ...58 Computer Setup-Main ...60 Computer Setup-Security ...62 Computer Setup-Advanced ...64 vi desktop mini...
... ...48 System board ...49 System board callouts, EliteDesk 800, ProDesk 600, and HP MP9 Retail System 51 System board callouts, EliteDesk 705 ...52 System board callouts, ProDesk 400 ...53 Internal WLAN antenna cable removal/installation ...54 Changing ...from desktop to tower configuration ...57 5 Computer Setup (F10) Utility ...58 Computer Setup (F10) Utilities ...58 Using Computer Setup (F10) Utilities ...58 Computer Setup-Main ...60 Computer Setup-Security ...62 Computer Setup-Advanced ...64 vi desktop mini...

Maintenance and Service Guide
Page 14
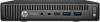
For complete and current information on supported parts for your computer, go to http://partsurfer.hp.com, select your country or region, and then follow the on-screen instructions. Computer major components Item Description (1) Top cover (2) Front bezel (ProDesk model shown) (3) External power supply, 90W 90 W 65 W (4) System board (includes replacement thermal material) 6 Chapter 2 Illustrated parts catalog 2 Illustrated parts catalog Desktop Mini (DM) chassis spare parts NOTE: HP continually improves and changes product parts.
For complete and current information on supported parts for your computer, go to http://partsurfer.hp.com, select your country or region, and then follow the on-screen instructions. Computer major components Item Description (1) Top cover (2) Front bezel (ProDesk model shown) (3) External power supply, 90W 90 W 65 W (4) System board (includes replacement thermal material) 6 Chapter 2 Illustrated parts catalog 2 Illustrated parts catalog Desktop Mini (DM) chassis spare parts NOTE: HP continually improves and changes product parts.

Maintenance and Service Guide
Page 15
... R7 HD Graphics AMD PRO A8 APU with AMD Radeon R6 HD Graphics AMD PRO A6 APU with AMD Radeon R5 HD Graphics Desktop Mini (DM) chassis spare parts 7 include replacement thermal material) Intel Core i7-6700 Intel Core i7-6700T Intel Core i5-6600 Intel Core...Intel Celeron G3900T Intel Celeron G3900TE (MP9 G2 models only) * AMD Processors (705 models; Item Description (5) Memory modules (DDR3, PC3-12800, 1600-MHz)(for use in EliteDesk 705 models) 8-GB 4-GB * Memory modules (DDR4, PC4-17000, 2133-MHz)(for use in EliteDesk 800, ProDesk 600, ProDesk 400, and MP9 models) 16-GB...
... R7 HD Graphics AMD PRO A8 APU with AMD Radeon R6 HD Graphics AMD PRO A6 APU with AMD Radeon R5 HD Graphics Desktop Mini (DM) chassis spare parts 7 include replacement thermal material) Intel Core i7-6700 Intel Core i7-6700T Intel Core i5-6600 Intel Core...Intel Celeron G3900T Intel Celeron G3900TE (MP9 G2 models only) * AMD Processors (705 models; Item Description (5) Memory modules (DDR3, PC3-12800, 1600-MHz)(for use in EliteDesk 705 models) 8-GB 4-GB * Memory modules (DDR4, PC4-17000, 2133-MHz)(for use in EliteDesk 800, ProDesk 600, ProDesk 400, and MP9 models) 16-GB...

Maintenance and Service Guide
Page 17
Misc parts Item Description (1) Heat sink (2) Fan (3) Secondary hard drive fan (for use in EliteDesk 800 and MP9, 65W models) (4) Speaker (5) Power switch/light cover (6) Option board, HDMI (7) Option board, serial port * Option board, DisplayPort (not illstrated) (8) Thermal sensor (9) Hood sensor assembly * Stand * Port cover * HP Ultraslim Keyed Cable Lock Desktop Mini (DM) chassis spare parts 9
Misc parts Item Description (1) Heat sink (2) Fan (3) Secondary hard drive fan (for use in EliteDesk 800 and MP9, 65W models) (4) Speaker (5) Power switch/light cover (6) Option board, HDMI (7) Option board, serial port * Option board, DisplayPort (not illstrated) (8) Thermal sensor (9) Hood sensor assembly * Stand * Port cover * HP Ultraslim Keyed Cable Lock Desktop Mini (DM) chassis spare parts 9

Maintenance and Service Guide
Page 19
..., 2280SS 128 GB solid-state drive (SSD), PCIe, 2280, NVMe 128 GB solid-state drive (SSD), PCIe, 2280SS External optical drive 8x DVD drive Desktop Mini (DM) chassis spare parts 11
..., 2280SS 128 GB solid-state drive (SSD), PCIe, 2280, NVMe 128 GB solid-state drive (SSD), PCIe, 2280SS External optical drive 8x DVD drive Desktop Mini (DM) chassis spare parts 11

Maintenance and Service Guide
Page 28
...as a USB flash drive, from the power outlet and disconnect any external devices. Disconnect the power cord from the computer. 3. desktop mini (DM) chassis 4 Removal and replacement procedures - Remove/disengage any cables. Beware of the power-on state, voltage is always present... on even when the computer is essential for initial safety procedures. 1. NOTE: HP continually improves and changes product parts. The power cord should always be disconnected before disconnecting any security devices that all removable media...
...as a USB flash drive, from the power outlet and disconnect any external devices. Disconnect the power cord from the computer. 3. desktop mini (DM) chassis 4 Removal and replacement procedures - Remove/disengage any cables. Beware of the power-on state, voltage is always present... on even when the computer is essential for initial safety procedures. 1. NOTE: HP continually improves and changes product parts. The power cord should always be disconnected before disconnecting any security devices that all removable media...

Maintenance and Service Guide
Page 30
Remove the top cover (Top cover on the bezel (1). 5. Pull down so you can access the inside of the bezel (2). 6. Position the top cover upside-down to the top cover by tabs. 1. Disengage the tabs on page 20). 2. To install the front bezel, reverse the removal procedure. 22 Chapter 4 Removal and replacement procedures - Front bezel The front bezel is secured to loose the bottom, interior on page 21). 3. Prepare the computer for disassembly (Preparation for disassembly on the top, interior of the bezel. 4. desktop mini (DM) chassis Remove the bezel from the top cover.
Remove the top cover (Top cover on the bezel (1). 5. Pull down so you can access the inside of the bezel (2). 6. Position the top cover upside-down to the top cover by tabs. 1. Disengage the tabs on page 20). 2. To install the front bezel, reverse the removal procedure. 22 Chapter 4 Removal and replacement procedures - Front bezel The front bezel is secured to loose the bottom, interior on page 21). 3. Prepare the computer for disassembly (Preparation for disassembly on the top, interior of the bezel. 4. desktop mini (DM) chassis Remove the bezel from the top cover.

Maintenance and Service Guide
Page 32
Align the guide screws with the slots on the chassis drive cage, press the HDD down into the cage, then slide it forward until it stops and locks in place (1). 24 Chapter 4 Removal and replacement procedures - 4. Pull the release lever next to the new HDD. 6. While pulling the release lever out, slide the drive back until it stops, then lift the HDD up and out of the HDD away from the old HDD to the rear of the cage (3). 5. desktop mini (DM) chassis To install a HDD, you must transfer the silver and blue isolation mounting guide screws from the HDD (2).
Align the guide screws with the slots on the chassis drive cage, press the HDD down into the cage, then slide it forward until it stops and locks in place (1). 24 Chapter 4 Removal and replacement procedures - 4. Pull the release lever next to the new HDD. 6. While pulling the release lever out, slide the drive back until it stops, then lift the HDD up and out of the HDD away from the old HDD to the rear of the cage (3). 5. desktop mini (DM) chassis To install a HDD, you must transfer the silver and blue isolation mounting guide screws from the HDD (2).

Maintenance and Service Guide
Page 34
... securing the secondary fan (2). 6. Prepare the computer for disassembly (Preparation for disassembly on page 23). 4. Secondary fan (EliteDesk 800 and MP9 models only) HP EliteDesk 800 G2 and HP MP9 G2 Retail System models include a secondary fan installed under the hard drive. 1. Lift the fan out of the chassis (3). To install the secondary fan...
... securing the secondary fan (2). 6. Prepare the computer for disassembly (Preparation for disassembly on page 23). 4. Secondary fan (EliteDesk 800 and MP9 models only) HP EliteDesk 800 G2 and HP MP9 G2 Retail System models include a secondary fan installed under the hard drive. 1. Lift the fan out of the chassis (3). To install the secondary fan...

Maintenance and Service Guide
Page 36
... socket. 28 Chapter 4 Removal and replacement procedures - NOTE: An SSD can be installed in only one way. 10. Locate the SSD on page 20). 2. desktop mini (DM) chassis Prepare the computer for disassembly (Preparation for disassembly on the system board. 7. M.2 PCIe solid state drive (SSD) Description 256 GB solid-state drive...
... socket. 28 Chapter 4 Removal and replacement procedures - NOTE: An SSD can be installed in only one way. 10. Locate the SSD on page 20). 2. desktop mini (DM) chassis Prepare the computer for disassembly (Preparation for disassembly on the system board. 7. M.2 PCIe solid state drive (SSD) Description 256 GB solid-state drive...

Maintenance and Service Guide
Page 38
... (Drive cage on page 21). 3. NOTE: You may need to use the included screw to disconnect and connect the antenna cables. 8. desktop mini (DM) chassis Disconnect both antenna cables from the WLAN module. Press the WLAN connectors firmly into the socket on the system board. Grasp the ...WLAN module Description Intel Dual Band Wireless-AC 7265 NV Intel Dual Band Wireless-AC 8260 + Bluetooth 4.0 Intel Dual Band Wireless-AC 3165 + Bluetooth 4.0 HP WLAN 802.11 a/b/g/n + Bluetooth 4.0 The WLAN module is an EliteDesk 800 or MP9, remove the secondary fan (Secondary fan (EliteDesk 800 and MP9 ...
... (Drive cage on page 21). 3. NOTE: You may need to use the included screw to disconnect and connect the antenna cables. 8. desktop mini (DM) chassis Disconnect both antenna cables from the WLAN module. Press the WLAN connectors firmly into the socket on the system board. Grasp the ...WLAN module Description Intel Dual Band Wireless-AC 7265 NV Intel Dual Band Wireless-AC 8260 + Bluetooth 4.0 Intel Dual Band Wireless-AC 3165 + Bluetooth 4.0 HP WLAN 802.11 a/b/g/n + Bluetooth 4.0 The WLAN module is an EliteDesk 800 or MP9, remove the secondary fan (Secondary fan (EliteDesk 800 and MP9 ...

Maintenance and Service Guide
Page 40
To install the antennas: 1. Remove the hard drive (Hard drive on page 20). 2. desktop mini (DM) chassis External antenna The antennas route from the WLAN module. Prepare the computer for disassembly (Preparation for disassembly on page 23). 4. Remove the drive ...
To install the antennas: 1. Remove the hard drive (Hard drive on page 20). 2. desktop mini (DM) chassis External antenna The antennas route from the WLAN module. Prepare the computer for disassembly (Preparation for disassembly on page 23). 4. Remove the drive ...

Maintenance and Service Guide
Page 42
... only with a 3-volt lithium coin cell battery. CAUTION: Before replacing the battery, it is a risk of the computer or optional equipment. HP encourages customers to recycle used when the computer is removed or replaced, the CMOS settings will be extended by briefly touching a grounded metal object.... desktop mini (DM) chassis When the battery is NOT connected to the battery originally installed in fire or water. Remove the top cover (Top ...
... only with a 3-volt lithium coin cell battery. CAUTION: Before replacing the battery, it is a risk of the computer or optional equipment. HP encourages customers to recycle used when the computer is removed or replaced, the CMOS settings will be extended by briefly touching a grounded metal object.... desktop mini (DM) chassis When the battery is NOT connected to the battery originally installed in fire or water. Remove the top cover (Top ...

Maintenance and Service Guide
Page 44
... procedures - To remove the thermal sensor: 1. If your model is secured to the chassis with adhesive. Adhesive secures the sensor to the computer chassis (2). desktop mini (DM) chassis Prepare the computer for disassembly (Preparation for disassembly on page 27). 6. Remove the drive cage (Drive cage on page 20). 2. Remove the hard...
... procedures - To remove the thermal sensor: 1. If your model is secured to the chassis with adhesive. Adhesive secures the sensor to the computer chassis (2). desktop mini (DM) chassis Prepare the computer for disassembly (Preparation for disassembly on page 27). 6. Remove the drive cage (Drive cage on page 20). 2. Remove the hard...

Maintenance and Service Guide
Page 46
Remove the fan (Fan on page 21). 3. Remove the top cover (Top cover on page 37). 4. Rotate the top of the computer, under the top cover. 1. Power switch/light cover The power switch/light cover is located at the front, right of the cover away from the computer and lift it off the system board. desktop mini (DM) chassis Prepare the computer for disassembly (Preparation for disassembly on page 20). 2. To install the power switch/light cover, reverse the removal procedure. 38 Chapter 4 Removal and replacement procedures -
Remove the fan (Fan on page 21). 3. Remove the top cover (Top cover on page 37). 4. Rotate the top of the computer, under the top cover. 1. Power switch/light cover The power switch/light cover is located at the front, right of the cover away from the computer and lift it off the system board. desktop mini (DM) chassis Prepare the computer for disassembly (Preparation for disassembly on page 20). 2. To install the power switch/light cover, reverse the removal procedure. 38 Chapter 4 Removal and replacement procedures -

Maintenance and Service Guide
Page 48
...one channel will operate in single channel mode if the SODIMM sockets are labeled DIMM1 and DIMM3. The DIMM1 socket operates in memory channel A. desktop mini (DM) chassis Populating SODIMM sockets There are two SODIMM sockets on how the SODIMMs are installed. ● The system will have more memory ...40 Chapter 4 Removal and replacement procedures - In flex mode, the channel populated with unsupported third-party memory. The DIMM3 socket operates in memory channel B. HP offers upgrade memory for this computer and advises that the consumer purchase it to single channel.
...one channel will operate in single channel mode if the SODIMM sockets are labeled DIMM1 and DIMM3. The DIMM1 socket operates in memory channel A. desktop mini (DM) chassis Populating SODIMM sockets There are two SODIMM sockets on how the SODIMMs are installed. ● The system will have more memory ...40 Chapter 4 Removal and replacement procedures - In flex mode, the channel populated with unsupported third-party memory. The DIMM3 socket operates in memory channel B. HP offers upgrade memory for this computer and advises that the consumer purchase it to single channel.

Maintenance and Service Guide
Page 50
NOTE: A memory module can be installed in place. The computer automatically recognizes the additional memory when you turn on each side of the SODIMM (1) then pull the SODIMM out of the socket (2). 6. desktop mini (DM) chassis To remove a SODIMM, press outward on the two latches on the computer. 42 Chapter 4 Removal and replacement procedures - Slide the new SODIMM into the socket at approximately a 30° angle (1) then press the SODIMM down (2) so that the latches lock it in only one way. Match the notch on the module with the tab on the memory socket. 5.
NOTE: A memory module can be installed in place. The computer automatically recognizes the additional memory when you turn on each side of the SODIMM (1) then pull the SODIMM out of the socket (2). 6. desktop mini (DM) chassis To remove a SODIMM, press outward on the two latches on the computer. 42 Chapter 4 Removal and replacement procedures - Slide the new SODIMM into the socket at approximately a 30° angle (1) then press the SODIMM down (2) so that the latches lock it in only one way. Match the notch on the module with the tab on the memory socket. 5.

Maintenance and Service Guide
Page 54
... BIOS can be installed within 24 hours of the BIOS is being used on the Web at: http://h18000.www1.hp.com/support/files. 46 Chapter 4 Removal and replacement procedures - desktop mini (DM) chassis 7. These pins are damaged it . Reverse the removal procedure to the processor's solder connections. Lift the processor (3) straight...
... BIOS can be installed within 24 hours of the BIOS is being used on the Web at: http://h18000.www1.hp.com/support/files. 46 Chapter 4 Removal and replacement procedures - desktop mini (DM) chassis 7. These pins are damaged it . Reverse the removal procedure to the processor's solder connections. Lift the processor (3) straight...

Maintenance and Service Guide
Page 56
... computer. Lift to the a connector on the rear I/O panel. Remove the top cover (Top cover on page 43). 4. To remove the expansion connector board: 1. desktop mini (DM) chassis Remove the heat sink (Heat sink on page 21). 3. Remove the fan (Fan on page 20). 2. To install the expansion connector board, reverse...
... computer. Lift to the a connector on the rear I/O panel. Remove the top cover (Top cover on page 43). 4. To remove the expansion connector board: 1. desktop mini (DM) chassis Remove the heat sink (Heat sink on page 21). 3. Remove the fan (Fan on page 20). 2. To install the expansion connector board, reverse...


