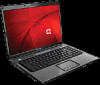
Security - Windows Vista
Page 8
... want to control access to your password will not be recognized if you subsequently try to enter it in a secure place. CAUTION: To prevent being locked out of the computer, record each password you set , changed, or deleted, it is essential to record each password immediately and store it with keyboard...
Security - Windows Vista
Page 15
Loop the security cable around a secured object. 2. Insert the cable lock into the cable lock (2). 3. NOTE: The location of the security cable slot varies by model. ENWW 9 6 Installing an optional security cable NOTE: A security cable is designed to act as a deterrent but may not prevent the computer from being mishandled or stolen. 1. Insert the key (1) into the security cable slot on the computer (3), and then lock the cable lock with the key.
Compaq Presario V6000 Notebook PC Maintenance and Service Guide
Page 20
... frequently used like the keys on an external numeric keypad. caps lock key Enables caps lock and turns on the num lock light. Maintenance and Service Guide 1-13 num lock key Enables numeric lock, turns on the embedded numeric keypad, and turns on the caps lock light. Windows logo key Displays the Microsoft Windows Start menu...
Compaq Presario V6000 Notebook PC Maintenance and Service Guide
Page 118
If you install a device and then receive a warning message, remove the device to remove the num lock board Keyboard 3 Maintenance and Service Guide 5-3 Optical Drive 1 to remove the optical drive 2 to remove the optical drive bracket Switch Cover 2 to remove the switch ...
Compaq Presario V6000 Notebook PC Maintenance and Service Guide
Page 139
... and disconnect the cable 2 from the LED board. 10. Remove the Phillips PM2.0×3.0 screw 4 that secures the num lock board to install the switch cover and num lock board. 5-24 Maintenance and Service Guide Release the zero insertion force (ZIF) connector 1 to which the LED board cable is... necessary to replace the num lock board, disconnect the num lock board cable 3 from the LED board. 9. Remove the switch cover. Removing the Num Lock Board Reverse the above procedure to the switch cover and remove the num...
Compaq Presario V6000 Notebook PC Maintenance and Service Guide
Page 181
Lift the processor 2 straight up and remove it. ✎ The gold triangle 3 on the processor should be aligned with the triangle icon 4 embossed on the processor socket when you hear a click. 3. Turn the processor locking screw 1 one-half turn counterclockwise until you install the processor. Removing the Processor Reverse the above procedure to install the processor. 5-66 Maintenance and Service Guide Removal and Replacement Procedures 2.
Compaq Presario V6000 Notebook PC Maintenance and Service Guide
Page 206
Length Thread Width Silver 12 3.0 mm 2.0 mm 4.0 mm Where used: One screw that secures the num lock board to the switch cover (documented in Section 5.10) Phillips PM2.0×3.0 Screw Location A-6 Maintenance and Service Guide Screw Listing Table A-3 Phillips PM2.0×3.0 Screw (Continued) Head mm Color Qty.
Compaq Presario V6000 Notebook PC Maintenance and Service Guide
Page 268
... latch 1-20 Bluetooth module removal 5-50 spare part number 3-8, 3-35, 5-50 bottom components 1-20 C Cable Kit, spare part number 3-20, 3-40 cables, service considerations 4-2 caps lock key 1-13 carrying case, spare part number 3-28, 3-35 CMOS clearing 1-4 components bottom 1-20 front 1-6 keyboard 1-12 left-side 1-8 rear 1-8 Maintenance and Service Guide Index-1
Compaq Presario V6000 Notebook PC Maintenance and Service Guide
Page 272
... 1-8 pin assignments D-4 mouse, spare part number 3-27, 3-28, 3-40 N network jack location 1-9 pin assignments D-2 network, troubleshooting 2-36 nonfunctioning device, troubleshooting 2-24, 2-33 num lock board, removal 5-24 num lock key 1-13 O optical drive location 1-11, 1-20 OS loading problems 2-30 precautions 4-3 removal 5-20 spare part numbers 3-10, 3-24, 5-20 specifications 6-8 optical drive...
Memory Modules - Windows Vista
Page 5
The memory capacity of electric shock and damage to the equipment, unplug the power cord and remove all external devices connected to the Lock button, and the click Shut Down. 3. Remove the battery from the AC outlet. 6. WARNING! Click Start, click the arrow next to the computer. 5. Close the ...
Power - Windows XP
Page 24
... To prevent loss of information when removing a battery that is seated (2). Slide the battery release latch (1) to release the battery. 3. The battery release latch (3) automatically locks the battery into the battery bay (1) and rotate it downward until it (3). 20 Chapter 7 Batteries ENWW
Power Management - Windows Vista
Page 5
... a hibernation file on battery power and 25 minutes of the following ways: ● Press the power button. ● If the display is saved to the Lock button, and then click Sleep. When you initiate Sleep, the power lights blink and the screen clears. ENWW Using power-saving states 1 When you initiate...
Power Management - Windows Vista
Page 6
... the screen. 2 Chapter 1 Setting power options ENWW To initiate Hibernation: Press fn+f5. - Click Hibernate. Click Start, and then click the arrow next to the Lock button. When the computer exits Sleep, the power lights turn on the remote control (select models only). ● Activate the TouchPad. Initiating and exiting Hibernation...
Power Management - Windows Vista
Page 13
... down the computer through Windows before removing the battery. Insert the battery into place. ENWW Inserting or removing the battery 9 The battery release latch (3) automatically locks the battery into the battery bay (1) and rotate it downward until it from you . 2. Slide the battery release latch (1) to release the battery. 3.
Power Management - Windows Vista
Page 25
... CAUTION Unsaved information will be lost when the computer is unresponsive and you are connecting an external hardware device that does not connect to the Lock button. 3. Save your work and close all open programs. 2. Click Shut Down. Click Start, and then click the arrow next to a USB port or a 1394...
Power
Page 22
Turn the computer upside down on a flat surface, with the battery bay away from you . 2. The battery release latch (3) automatically locks the battery into the battery bay (1) and rotate it downward until it from you . 2. To remove a battery: 1. Turn the computer upside down on a flat surface, ...
Notebook Tour - Windows Vista
Page 7
... . Blinking: A battery that is charging. Blinking: The volume scroll zone is being used to increase speaker volume. (9) Num lock light On: Num lock is open . When the battery reaches a critical battery level, the battery light begins blinking rapidly. Blinks once when the media button...on . (7) Volume down light Amber: Computer sound is turned off until the battery reaches a low battery level. (3) Drive light (4) Caps lock light (5) Media button light (6) Volume mute light Blinks when the hard drive or optical drive is being used to decrease speaker volume. (8) ...
Notebook Tour - Windows Vista
Page 23
... 5 expansion port, identifying 10 expansion port; input/output signals 18 ExpressCard slot, identifying 9 external monitor port, identifying 10 F fn key, identifying 5 function keys, identifying 5 C caps lock light, identifying 3 Certificate of Authenticity 15 modem approval 15 regulatory 15 service tag 15 wireless certification 15 WLAN 15 latch, battery release 11 ENWW Index...
Notebook Tour - Windows Vista
Page 24
... Media Slot 10 drive 3 media button 3 mute 3 num lock 3 optical drive 9 power 3 TouchPad 2 volume down 3 volume mute 3 volume up 3 wireless 7 M media button light, identifying 3 media button, identifying 4 memory module ...in) jack 7 Microsoft Certificate of Authenticity label 15 modem approval label 15 monitor port, external 10 mute button, identifying 4 mute light, identifying 3 N num lock light, identifying 3 O operating environment specifications 16 operating system Microsoft Certificate of Authenticity label 15 Product Key 15 optical drive light, identifying 9 optical drive, identifying ...
TouchPad and Keyboard - Windows Vista
Page 10
... level incrementally. Decreasing screen brightness (fn+f7) Press fn+f7 to Help and Support. Hold down the hotkey to display the Log On window and lock the computer. When Hibernation is saved to initiate Hibernation. The computer must set the fn+f5 hotkey to increase the brightness level incrementally. 6 Chapter 2 Keyboard...