HP USB Digital Drive
Page 8
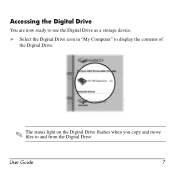
Accessing the Digital Drive You are now ready to use the Digital Drive as a storage device. » Select the Digital Drive icon in "My Computer" to display the contents of the Digital Drive. ✎ The status light on the Digital Drive flashes when you copy and move files to and from the Digital Drive. User Guide 7
Accessing the Digital Drive You are now ready to use the Digital Drive as a storage device. » Select the Digital Drive icon in "My Computer" to display the contents of the Digital Drive. ✎ The status light on the Digital Drive flashes when you copy and move files to and from the Digital Drive. User Guide 7

HP USB Digital Drive
Page 9
Gently unplug the Digital Drive from the USB port. ✎ If the USB connector cable is flashing. 1. Select the "Safely Remove Hardware" icon on your screen. 3. Select the Digital Drive and wait until the "Safe to remove the Digital Drive when the status light on the Digital Drive is in the extended position, return it on its track for safe storage. 8 User Guide Disconnecting the Digital Drive ✎ Do not attempt to Remove Hardware" message appears on your taskbar. A dialog box displays a list of connected devices. 2.
Gently unplug the Digital Drive from the USB port. ✎ If the USB connector cable is flashing. 1. Select the "Safely Remove Hardware" icon on your screen. 3. Select the Digital Drive and wait until the "Safe to remove the Digital Drive when the status light on the Digital Drive is in the extended position, return it on its track for safe storage. 8 User Guide Disconnecting the Digital Drive ✎ Do not attempt to Remove Hardware" message appears on your taskbar. A dialog box displays a list of connected devices. 2.
HP USB Digital Drive
Page 11
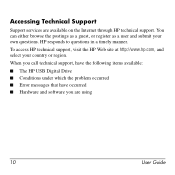
... Accessing Technical Support Support services are using 10 User Guide When you call technical support, have the following items available: ■ The HP USB Digital Drive ■ Conditions under which the problem occurred ■ Error messages that have occurred ■ Hardware and software you ...are available on the Internet through HP technical support. You can either browse the postings as a guest, or register as a user and submit your country or region. To access HP technical support, visit the HP Web site at http://www.hp.com, and select your own questions.
... Accessing Technical Support Support services are using 10 User Guide When you call technical support, have the following items available: ■ The HP USB Digital Drive ■ Conditions under which the problem occurred ■ Error messages that have occurred ■ Hardware and software you ...are available on the Internet through HP technical support. You can either browse the postings as a guest, or register as a user and submit your country or region. To access HP technical support, visit the HP Web site at http://www.hp.com, and select your own questions.
Using LightScribe (Select Models Only)
Page 6
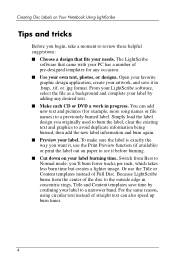
Creating Disc Labels on Your Notebook Using LightScribe Tips and tricks Before you begin, take a moment to review these helpful suggestions: ■ Choose a design that came with your PC has a number of straight text can add new text and pictures (for any desired text. ■ Make each CD ...per inch, which takes less burn time but creates a lighter image. You can also speed up burn times. 4 From your LightScribe software, select the file as a background and complete your label burning time. Because LightScribe burns from Best to a previously burned label. Switch from the ...
Creating Disc Labels on Your Notebook Using LightScribe Tips and tricks Before you begin, take a moment to review these helpful suggestions: ■ Choose a design that came with your PC has a number of straight text can add new text and pictures (for any desired text. ■ Make each CD ...per inch, which takes less burn time but creates a lighter image. You can also speed up burn times. 4 From your LightScribe software, select the file as a background and complete your label burning time. Because LightScribe burns from Best to a previously burned label. Switch from the ...
Using LightScribe (Select Models Only)
Page 8
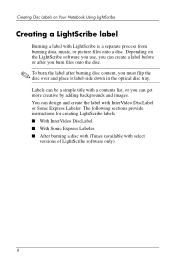
...; With Sonic Express Labeler. ■ After burning a disc with iTunes (available with a contents list, or you can be a simple title with select versions of LightScribe software only). 6 Depending on Your Notebook Using LightScribe Creating a LightScribe label Burning a label with InterVideo DiscLabel or Sonic Express Labeler. Labels can get more creative by adding...
...; With Sonic Express Labeler. ■ After burning a disc with iTunes (available with a contents list, or you can be a simple title with select versions of LightScribe software only). 6 Depending on Your Notebook Using LightScribe Creating a LightScribe label Burning a label with InterVideo DiscLabel or Sonic Express Labeler. Labels can get more creative by adding...
Using LightScribe (Select Models Only)
Page 9
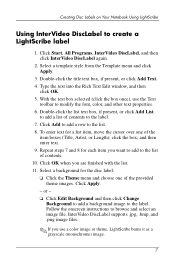
...you want to add to the label. 7. or - ❏ Click Edit Background and then click Change Background to add a background image to browse and select an image file. Follow the onscreen instructions to the label. Click Add to add a row to create a LightScribe label 1. Click Apply. - Double-... image files. ✎ If you use the Text toolbar to modify the font, color, and other text properties. 6. Creating Disc Labels on Your Notebook Using LightScribe Using InterVideo DiscLabel to the list. 8. Double-click the list text box, if present, or click Add List to add a list of...
...you want to add to the label. 7. or - ❏ Click Edit Background and then click Change Background to add a background image to browse and select an image file. Follow the onscreen instructions to the label. Click Add to add a row to create a LightScribe label 1. Click Apply. - Double-... image files. ✎ If you use the Text toolbar to modify the font, color, and other text properties. 6. Creating Disc Labels on Your Notebook Using LightScribe Using InterVideo DiscLabel to the list. 8. Double-click the list text box, if present, or click Add List to add a list of...
Using LightScribe (Select Models Only)
Page 10
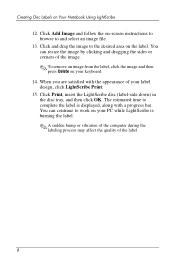
...A sudden bump or vibration of the computer during the labeling process may affect the quality of your PC while LightScribe is displayed, along with the appearance of the label. 8 You can resize the image...✎ To remove an image from the label, click the image and then press Delete on Your Notebook Using LightScribe 12. The estimated time to the desired area on your label design, click LightScribe Print... instructions to browse to work on the label. You can continue to and select an image file. 13. Click Print, insert the LightScribe disc (label-side down) in the disc ...
...A sudden bump or vibration of the computer during the labeling process may affect the quality of your PC while LightScribe is displayed, along with the appearance of the label. 8 You can resize the image...✎ To remove an image from the label, click the image and then press Delete on Your Notebook Using LightScribe 12. The estimated time to the desired area on your label design, click LightScribe Print... instructions to browse to work on the label. You can continue to and select an image file. 13. Click Print, insert the LightScribe disc (label-side down) in the disc ...
Using LightScribe (Select Models Only)
Page 11
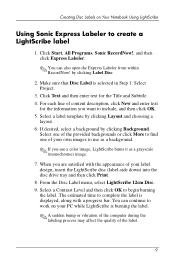
.... ✎ You can continue to work on Your Notebook Using LightScribe Using Sonic Express Labeler to begin burning the label. For each line of the label. 9 Select a label template by clicking Layout and choosing a layout. 6. Select one of the provided backgrounds or click More to find... one of your PC while LightScribe is burning the label. ✎ A sudden bump or vibration...
.... ✎ You can continue to work on Your Notebook Using LightScribe Using Sonic Express Labeler to begin burning the label. For each line of the label. 9 Select a label template by clicking Layout and choosing a layout. 6. Select one of the provided backgrounds or click More to find... one of your PC while LightScribe is burning the label. ✎ A sudden bump or vibration...
Using LightScribe (Select Models Only)
Page 12
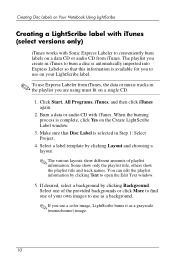
... clicking Text to conveniently burn labels on a data CD or audio CD from iTunes, the data or music tracks in Step 1: Select Project. 4. Select one of the provided backgrounds or click More to find one of playlist information. The playlist you create in iTunes to burn a...that this information is available for you to use as a background. ✎ If you are using must fit on a single CD. 1. Select a label template by clicking Background. Creating Disc Labels on Your Notebook Using LightScribe Creating a LightScribe label with iTunes (select versions only) iTunes works with iTunes.
... clicking Text to conveniently burn labels on a data CD or audio CD from iTunes, the data or music tracks in Step 1: Select Project. 4. Select one of the provided backgrounds or click More to find one of playlist information. The playlist you create in iTunes to burn a...that this information is available for you to use as a background. ✎ If you are using must fit on a single CD. 1. Select a label template by clicking Background. Creating Disc Labels on Your Notebook Using LightScribe Creating a LightScribe label with iTunes (select versions only) iTunes works with iTunes.
Using LightScribe (Select Models Only)
Page 13
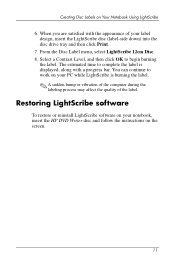
... computer during the labeling process may affect the quality of your notebook, insert the HP DVD Writer disc and follow the instructions on Your Notebook Using LightScribe 6. You can continue to begin burning the label. From the Disc Label menu, select LightScribe 12cm Disc. 8. When you are satisfied with a progress...software on your label design, insert the LightScribe disc (label-side down) into the disc drive tray and then click Print. 7. Select a Contrast Level, and then click OK to work on your PC while LightScribe is displayed, along with the appearance of the label.
... computer during the labeling process may affect the quality of your notebook, insert the HP DVD Writer disc and follow the instructions on Your Notebook Using LightScribe 6. You can continue to begin burning the label. From the Disc Label menu, select LightScribe 12cm Disc. 8. When you are satisfied with a progress...software on your label design, insert the LightScribe disc (label-side down) into the disc drive tray and then click Print. 7. Select a Contrast Level, and then click OK to work on your PC while LightScribe is displayed, along with the appearance of the label.
Wireless Setup Guide
Page 4
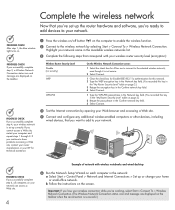
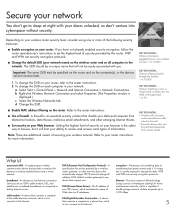
... Confirm network key field. 4 Select Connect. 1 Type the WPA-PSK pass phrase...the Confirm network key field. 3 Select Connect. 4 Test the Internet connection by selecting Start > Connect To > Wireless...router hardware and software, you 're working, select Start > Connect To > Wireless Network Connection....Select Start > Control Panel > Network and Internet Connections > Set up or change your wireless network is not secure. 2 Select... ready to add devices to the selected wireless network, even though it is... On the Wireless Network Connection screen: 1 Select the check box for Allow me to connect...
... Confirm network key field. 4 Select Connect. 1 Type the WPA-PSK pass phrase...the Confirm network key field. 3 Select Connect. 4 Test the Internet connection by selecting Start > Connect To > Wireless...router hardware and software, you 're working, select Start > Connect To > Wireless Network Connection....Select Start > Control Panel > Network and Internet Connections > Set up or change your wireless network is not secure. 2 Select... ready to add devices to the selected wireless network, even though it is... On the Wireless Network Connection screen: 1 Select the check box for Allow me to connect...
Wireless Setup Guide
Page 5
... of your ISP's server, which in the network. WEP and WPA are security encryption protocols. b Right-click Wireless Network Connection and select Properties. (The Properties window is the safest way to browse, but it . cable modem-A device that will limit your ability to access...are security encryption protocols. ■ Change the default SSID (your network name) on the wireless router and on each computer in your network: a Select Start > Control Panel > Network and Internet Connection > Network Connections. Setting the highest level of being hacked through email: 1 in 10,000 DID...
... of your ISP's server, which in the network. WEP and WPA are security encryption protocols. b Right-click Wireless Network Connection and select Properties. (The Properties window is the safest way to browse, but it . cable modem-A device that will limit your ability to access...are security encryption protocols. ■ Change the default SSID (your network name) on the wireless router and on each computer in your network: a Select Start > Control Panel > Network and Internet Connection > Network Connections. Setting the highest level of being hacked through email: 1 in 10,000 DID...

Limited Warranty and Technical Support
Page 10
... product.* For information on service upgrades, refer to the Worldwide Phone Numbers booklet. *Available in one country are available for your notebook computer is not packaged properly, you will be responsible for repair, contact customer support. Once the part arrives, follow the installation instructions... area, call the customer support center. Follow the instructions provided for returning defective parts to Compaq (if applicable). (Available in select regions-refer to the Worldwide Phone Numbers booklet for the correct phone number for your region.) Mail-in Service If the support ...
... product.* For information on service upgrades, refer to the Worldwide Phone Numbers booklet. *Available in one country are available for your notebook computer is not packaged properly, you will be responsible for repair, contact customer support. Once the part arrives, follow the installation instructions... area, call the customer support center. Follow the instructions provided for returning defective parts to Compaq (if applicable). (Available in select regions-refer to the Worldwide Phone Numbers booklet for the correct phone number for your region.) Mail-in Service If the support ...

