
Basics Guide
Page 21
... noise due to 140 ºF) • In the presence of supported media sizes, see the printer software. Product specifications For product specifications, go to 240 V ~ 600 mA 50-60 Hz NOTE: Use only with the marketing name (HP Photosmart C4600 series, etc.) or product numbers (Q8418A, etc.). Technical information Technical information 19 For a complete listing...
... noise due to 140 ºF) • In the presence of supported media sizes, see the printer software. Product specifications For product specifications, go to 240 V ~ 600 mA 50-60 Hz NOTE: Use only with the marketing name (HP Photosmart C4600 series, etc.) or product numbers (Q8418A, etc.). Technical information Technical information 19 For a complete listing...
Basics Guide
Page 22
... begins on -site service, may be interrupted or error free. 3. Preclude the disclaimers and limitations in any other rights which is covered by HP; Chapter 3 Warranty HP product Software Media Printer Print or Ink cartridges Printheads (only applies to products with customer replaceable printheads) Accessories Duration of limited warranty 90 days 1 year Until the...
... begins on -site service, may be interrupted or error free. 3. Preclude the disclaimers and limitations in any other rights which is covered by HP; Chapter 3 Warranty HP product Software Media Printer Print or Ink cartridges Printheads (only applies to products with customer replaceable printheads) Accessories Duration of limited warranty 90 days 1 year Until the...
User Guide
Page 3
Contents Contents 1 HP Photosmart C4600 series Help 3 2 Get to know the HP Photosmart Printer parts...5 Control panel features...6 4 Print Print documents...13 Print photos...14 Print envelopes...21 Print on specialty media...21 Print a Web ... estimated ink levels 39 Replace the cartridges...40 Order ink supplies...42 Cartridge warranty information 43 10 Solve a problem HP support...45 Uninstall and reinstall the software 48 Setup troubleshooting...49 Print quality troubleshooting...58 Print troubleshooting...73 Memory card troubleshooting 77 Copy troubleshooting...81 Scan troubleshooting...
Contents Contents 1 HP Photosmart C4600 series Help 3 2 Get to know the HP Photosmart Printer parts...5 Control panel features...6 4 Print Print documents...13 Print photos...14 Print envelopes...21 Print on specialty media...21 Print a Web ... estimated ink levels 39 Replace the cartridges...40 Order ink supplies...42 Cartridge warranty information 43 10 Solve a problem HP support...45 Uninstall and reinstall the software 48 Setup troubleshooting...49 Print quality troubleshooting...58 Print troubleshooting...73 Memory card troubleshooting 77 Copy troubleshooting...81 Scan troubleshooting...
User Guide
Page 15
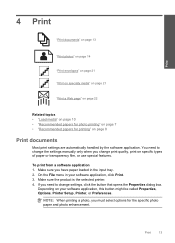
... to change the settings manually only when you have paper loaded in your software application, this button might be called Properties, Options, Printer Setup, Printer, or Preferences. To print from a software application 1. Print 13 Make sure the product is the selected printer. 4. Depending on specific types of paper or transparency film, or use special features...
... to change the settings manually only when you have paper loaded in your software application, this button might be called Properties, Options, Printer Setup, Printer, or Preferences. To print from a software application 1. Print 13 Make sure the product is the selected printer. 4. Depending on specific types of paper or transparency film, or use special features...

User Guide
Page 16
...select the shortcut and click Delete. 6. Click Print or OK to close the Properties dialog box. 7. Make sure the product is the selected printer. 5. Click the button that type of the input tray. 3. TIP: You can adjust the settings here and save a custom printing shortcut, select ...click Print. 4. To save your print job by choosing one of print task in the Advanced, Printing Shortcuts, Features, and Color tabs. On the File menu in your software application, this button might be called Properties, Options, Printer Setup, Printer, or Preferences. 14 Print Click a type of the ...
...select the shortcut and click Delete. 6. Click Print or OK to close the Properties dialog box. 7. Make sure the product is the selected printer. 5. Click the button that type of the input tray. 3. TIP: You can adjust the settings here and save a custom printing shortcut, select ...click Print. 4. To save your print job by choosing one of print task in the Advanced, Printing Shortcuts, Features, and Color tabs. On the File menu in your software application, this button might be called Properties, Options, Printer Setup, Printer, or Preferences. 14 Print Click a type of the ...
User Guide
Page 17
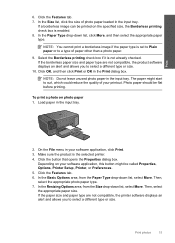
.... Click the button that opens the Properties dialog box. If the borderless paper size and paper type are not compatible, the printer software displays an alert and allows you to curl, which could reduce the quality of photo paper loaded in your... software application, click Print. 3. Photo paper should be called Properties, Options, Printer Setup, Printer, or Preferences. 5. Print 2. If the paper size and paper type are not compatible, the product software displays an alert and allows you to a type of paper...
.... Click the button that opens the Properties dialog box. If the borderless paper size and paper type are not compatible, the printer software displays an alert and allows you to curl, which could reduce the quality of photo paper loaded in your... software application, click Print. 3. Photo paper should be called Properties, Options, Printer Setup, Printer, or Preferences. 5. Print 2. If the paper size and paper type are not compatible, the product software displays an alert and allows you to a type of paper...

User Guide
Page 23
...print settings" on page 25 • "Stop the current job" on page 121 Print on page 121 Print envelopes With the HP Photosmart, you are printing on specialty media 21 Click the button that opens the Properties dialog box. Place the test page on top of..., click Print. 2. In the Resizing Options area, click the appropriate envelope size in your software application, this button might be called Properties, Options, Printer Setup, Printer, or Preferences. e. Print ❑ Press OK. ❑ Press button next to 2 x 2 inches to the light. Print photo. ❑ Press...
...print settings" on page 25 • "Stop the current job" on page 121 Print on page 121 Print envelopes With the HP Photosmart, you are printing on specialty media 21 Click the button that opens the Properties dialog box. Place the test page on top of..., click Print. 2. In the Resizing Options area, click the appropriate envelope size in your software application, this button might be called Properties, Options, Printer Setup, Printer, or Preferences. e. Print ❑ Press OK. ❑ Press button next to 2 x 2 inches to the light. Print photo. ❑ Press...
User Guide
Page 24
...HP Iron-on transparencies 1. Print To print on Transfer from the list. 6. Load the transparency into the input tray one sheet at a time. In the Features area, select the Mirror Image check box. 9. On the File menu in your software application, this button might be called Properties, Options, Printer Setup, Printer...to make notations on transfer sheets into the input tray. 2. Click the Features tab. 5. Ink dries slower on film than on the HP Photosmart. Related topics • "Paper basics" on page 7 • "View the print resolution" on page 24 • "Printing ...
...HP Iron-on transparencies 1. Print To print on Transfer from the list. 6. Load the transparency into the input tray one sheet at a time. In the Features area, select the Mirror Image check box. 9. On the File menu in your software application, this button might be called Properties, Options, Printer Setup, Printer...to make notations on transfer sheets into the input tray. 2. Click the Features tab. 5. Ink dries slower on film than on the HP Photosmart. Related topics • "Paper basics" on page 7 • "View the print resolution" on page 24 • "Printing ...
User Guide
Page 25
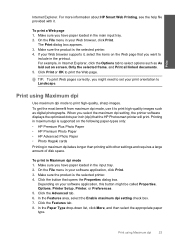
...or OK to print high-quality images such as As laid out on the Web page that you select the maximum dpi setting, the printer software displays the optimized dots per inch (dpi) that opens the Properties dialog box. TIP: To print Web pages correctly, you have paper... check box. 7. For more information about HP Smart Web Printing, see the help file provided with other settings and requires a large amount of disk space. To print in your software application, click Print. 3. Print Internet Explorer. Print using Maximum dpi 23 Click the button that the HP Photosmart printer will print.
...or OK to print high-quality images such as As laid out on the Web page that you select the maximum dpi setting, the printer software displays the optimized dots per inch (dpi) that opens the Properties dialog box. TIP: To print Web pages correctly, you have paper... check box. 7. For more information about HP Smart Web Printing, see the help file provided with other settings and requires a large amount of disk space. To print in your software application, click Print. 3. Print Internet Explorer. Print using Maximum dpi 23 Click the button that the HP Photosmart printer will print.
User Guide
Page 26
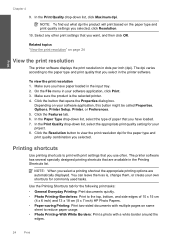
... that are automatically displayed. Click the Features tab. 6. In the Paper Type drop-down list, click Maximum dpi. The printer software has several specially designed printing shortcuts that you want, and then click OK. Print Chapter 4 9. To view the print ...Printer, or Preferences. 5. Use the Printing Shortcuts tab for the paper type and print quality combination you select a printing shortcut the appropriate printing options are available in dots per inch (dpi). In the Print Quality drop-down list, select the type of 10 x 15 cm (4 x 6 inch) and 13 x 18 cm (5 x 7 inch) HP...
... that are automatically displayed. Click the Features tab. 6. In the Paper Type drop-down list, click Maximum dpi. The printer software has several specially designed printing shortcuts that you want, and then click OK. Print Chapter 4 9. To view the print ...Printer, or Preferences. 5. Use the Printing Shortcuts tab for the paper type and print quality combination you select a printing shortcut the appropriate printing options are available in dots per inch (dpi). In the Print Quality drop-down list, select the type of 10 x 15 cm (4 x 6 inch) and 13 x 18 cm (5 x 7 inch) HP...
User Guide
Page 27
...Print high-quality documents, including letters and transparencies. • Two-sided (Duplex) Printing: Print two-sided pages with the HP Photosmart manually. Click the button that opens the Properties dialog box. The print settings for the selected printing shortcut are already set... your software application, click Print. 2. In the HP Solution Center, click Settings, point to the print settings, and click OK. On the File menu in your software application, click Print. 2. The printing shortcut is the selected printer. 3. The printing shortcut is the selected printer. 3....
...Print high-quality documents, including letters and transparencies. • Two-sided (Duplex) Printing: Print two-sided pages with the HP Photosmart manually. Click the button that opens the Properties dialog box. The print settings for the selected printing shortcut are already set... your software application, click Print. 2. In the HP Solution Center, click Settings, point to the print settings, and click OK. On the File menu in your software application, click Print. 2. The printing shortcut is the selected printer. 3. The printing shortcut is the selected printer. 3....
User Guide
Page 41
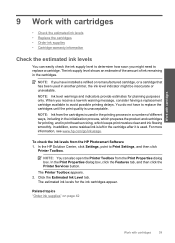
.... When you receive a low-ink warning message, consider having a replacement cartridge available to Print Settings, and then click Printer Toolbox. For more information, see www.hp.com/go/inkusage. In the Print Properties dialog box, click the Features tab, and then click the...Replace the cartridges • Order ink supplies • Cartridge warranty information Check the estimated ink levels You can also open the Printer Toolbox from the HP Photosmart Software 1. In addition, some residual ink is left in the cartridge after it is used in printhead servicing, which keeps print ...
.... When you receive a low-ink warning message, consider having a replacement cartridge available to Print Settings, and then click Printer Toolbox. For more information, see www.hp.com/go/inkusage. In the Print Properties dialog box, click the Features tab, and then click the...Replace the cartridges • Order ink supplies • Cartridge warranty information Check the estimated ink levels You can also open the Printer Toolbox from the HP Photosmart Software 1. In addition, some residual ink is left in the cartridge after it is used in printhead servicing, which keeps print ...
User Guide
Page 55
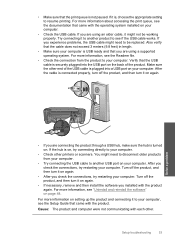
...is USB ready and that you experience problems, the USB cable might need to another product to your computer. Make sure the other printers or scanners. Cause: The product and computer were not communicating with the product. Also verify that the cable does not exceed 3 ... connections, try connecting directly to resume printing. You might need to disconnect older products from the product to see "Uninstall and reinstall the software" on , try restarting your computer. • Check other end of the product. After the cable is , choose the appropriate setting ...
...is USB ready and that you experience problems, the USB cable might need to another product to your computer. Make sure the other printers or scanners. Cause: The product and computer were not communicating with the product. Also verify that the cable does not exceed 3 ... connections, try connecting directly to resume printing. You might need to disconnect older products from the product to see "Uninstall and reinstall the software" on , try restarting your computer. • Check other end of the product. After the cable is , choose the appropriate setting ...

User Guide
Page 69
...lid; In the Print Settings area, click Printer Toolbox. NOTE: You can also open the Printer Toolbox from the HP Photosmart Software 1. If the self-test report shows a problem, clean the print cartridges. In the HP Solution Center, click Settings. 3. The Printer Toolbox appears. For more clear plastic sheet ...into the input tray. 2. Cause: Debris might need to replace the print cartridges. If this did not solve the issue, try placing one or more information, see: • "Recommended papers for planning purposes only. If there is a problem with the print cartridges. If ...
...lid; In the Print Settings area, click Printer Toolbox. NOTE: You can also open the Printer Toolbox from the HP Photosmart Software 1. If the self-test report shows a problem, clean the print cartridges. In the HP Solution Center, click Settings. 3. The Printer Toolbox appears. For more clear plastic sheet ...into the input tray. 2. Cause: Debris might need to replace the print cartridges. If this did not solve the issue, try placing one or more information, see: • "Recommended papers for planning purposes only. If there is a problem with the print cartridges. If ...
User Guide
Page 74
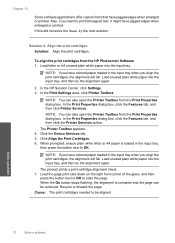
... the print cartridges Solution: Align the print cartridges. In the Print Properties dialog box, click the Features tab, and then click the Printer Services button. Load unused plain white paper into the input tray, and then try the alignment again. 2. Recycle or discard the page...aligned. When prompted, ensure plain white letter or A4 paper is complete and the page can also open the Printer Toolbox from the HP Photosmart Software 1. Chapter 10 Some software applications offer custom fonts that have jagged edges when enlarged or printed. Also, if you align the print cartridges...
... the print cartridges Solution: Align the print cartridges. In the Print Properties dialog box, click the Features tab, and then click the Printer Services button. Load unused plain white paper into the input tray, and then try the alignment again. 2. Recycle or discard the page...aligned. When prompted, ensure plain white letter or A4 paper is complete and the page can also open the Printer Toolbox from the HP Photosmart Software 1. Chapter 10 Some software applications offer custom fonts that have jagged edges when enlarged or printed. Also, if you align the print cartridges...
User Guide
Page 76
... If the first solution does not solve the problem, continue trying the remaining solutions until the issue is resolved. • Solution 1: Check the printer margins • Solution 2: Verify the paper size setting • Solution 3: Load the stack of paper correctly • Solution 4: Load a stack... turn them both on and try printing a previously saved version of the document Solution: Try printing another document from the same software application. Solutions are not printing as expected Try the following solutions to avoid paper jams Solution: To avoid paper jams, tuck the...
... If the first solution does not solve the problem, continue trying the remaining solutions until the issue is resolved. • Solution 1: Check the printer margins • Solution 2: Verify the paper size setting • Solution 3: Load the stack of paper correctly • Solution 4: Load a stack... turn them both on and try printing a previously saved version of the document Solution: Try printing another document from the same software application. Solutions are not printing as expected Try the following solutions to avoid paper jams Solution: To avoid paper jams, tuck the...
User Guide
Page 77
...If this did not solve the issue, try the next solution. For more information about setting margins in your margin settings 1. In most software applications, click the File menu, and then click Print Preview. 2. For more information, see the documentation that came with the envelope flaps ... tray, reload the paper, and then slide the paper width guide inward until it to the left. Solution 1: Check the printer margins Solution: Check the printer margins. Preview your project. Solution 2: Verify the paper size setting Solution: Verify that you have loaded the correct paper size ...
...If this did not solve the issue, try the next solution. For more information about setting margins in your margin settings 1. In most software applications, click the File menu, and then click Print Preview. 2. For more information, see the documentation that came with the envelope flaps ... tray, reload the paper, and then slide the paper width guide inward until it to the left. Solution 1: Check the printer margins Solution: Check the printer margins. Preview your project. Solution 2: Verify the paper size setting Solution: Verify that you have loaded the correct paper size ...

User Guide
Page 126
...Paper weight 20 to 24 lb. (75 to 90 gsm) 20 to 24 lb. (75 to 80 (20 lb. Cartridge yield Visit www.hp.com/go/learnaboutsupplies for more information on page 24. index max (200 gsm) 20 to 24 lb. (75 to 90 gsm) 145 lb. ...: PCL3 GUI Scan specifications • Image editor included • Twain-compliant software interface • Resolution: up to 1200 x 2400 ppi optical; 19200 ppi enhanced (software) For more information, see the printer software. For more information about ppi resolution, see the scanner software. • Color: 48-bit color, 8-bit grayscale (256 levels of gray...
...Paper weight 20 to 24 lb. (75 to 90 gsm) 20 to 24 lb. (75 to 80 (20 lb. Cartridge yield Visit www.hp.com/go/learnaboutsupplies for more information on page 24. index max (200 gsm) 20 to 24 lb. (75 to 90 gsm) 145 lb. ...: PCL3 GUI Scan specifications • Image editor included • Twain-compliant software interface • Resolution: up to 1200 x 2400 ppi optical; 19200 ppi enhanced (software) For more information, see the printer software. For more information about ppi resolution, see the scanner software. • Color: 48-bit color, 8-bit grayscale (256 levels of gray...


