
Maintenance and Service Guide
Page 86
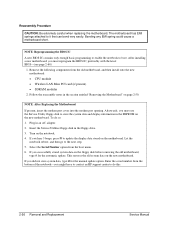
... HP support center to store the system data and display information in the section entitled "Removing the Motherboard" on the new motherboard. Follow the reassembly notes in the EEPROM on the floppy disk before removing the old motherboard, type A for the manual update ... Procedure CAUTION: Be extremely careful when replacing the motherboard. NOTE: Reprogramming the BIOS IC A new BIOS IC contains only enough basic programming to enable the notebook to update the display data stored on the notebook. 4. Remove the following components from the boot menu. 6. Plug in the floppy drive...
... HP support center to store the system data and display information in the section entitled "Removing the Motherboard" on the new motherboard. Follow the reassembly notes in the EEPROM on the floppy disk before removing the old motherboard, type A for the manual update ... Procedure CAUTION: Be extremely careful when replacing the motherboard. NOTE: Reprogramming the BIOS IC A new BIOS IC contains only enough basic programming to enable the notebook to update the display data stored on the notebook. 4. Remove the following components from the boot menu. 6. Plug in the floppy drive...
Maintenance and Service Guide
Page 89
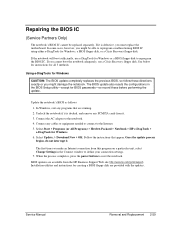
... Windows, exit any programs that appear. Follow the instructions that are provided with the updates. Undock the notebook if it is defective, you might damage the notebook. Select Start > Programs (or All Programs) > Hewlett-Packard > Notebook > HP e-DiagTools > e-DiagTools for Windows or a BIOS floppy disk to define your connection settings. 7. The first time you cannot boot...
... Windows, exit any programs that appear. Follow the instructions that are provided with the updates. Undock the notebook if it is defective, you might damage the notebook. Select Start > Programs (or All Programs) > Hewlett-Packard > Notebook > HP e-DiagTools > e-DiagTools for Windows or a BIOS floppy disk to define your connection settings. 7. The first time you cannot boot...
Maintenance and Service Guide
Page 112
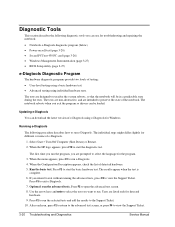
...the notebook: • Notebook e-Diagtools diagnostic program (below) • Power-on self-test (page 3-20) • Sycard PCCtest 450 PC card (page 3-26) • Windows Management Instrumentation (page 3-27) • BIOS Setup ...F4 to start the basic hardware test. After each run e-Diagtools. When the HP logo appears, press F10 to view the Support Ticket. 3-20 Troubleshooting and Diagnostics Service...that the notebook will be loaded. Press F2 to run the selected tests and add the results to run e-Diagtools. 4. The results appear when the test is complete. 6. Updating e-Diagtools ...
...the notebook: • Notebook e-Diagtools diagnostic program (below) • Power-on self-test (page 3-20) • Sycard PCCtest 450 PC card (page 3-26) • Windows Management Instrumentation (page 3-27) • BIOS Setup ...F4 to start the basic hardware test. After each run e-Diagtools. When the HP logo appears, press F10 to view the Support Ticket. 3-20 Troubleshooting and Diagnostics Service...that the notebook will be loaded. Press F2 to run the selected tests and add the results to run e-Diagtools. 4. The results appear when the test is complete. 6. Updating e-Diagtools ...
Maintenance and Service Guide
Page 120
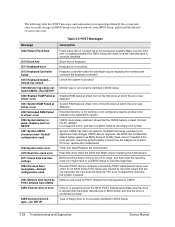
... test Might require replacing the motherboard (contains the keyboard controller) Unlock the system to proceed Monitor type is not correctly identified in BIOS Setup Shadow RAM failed at offset nnnn of the 64k block at which the error was detected System RAM failed at offset nnnn...disk is not working or not configured properly at offset nnnn Update to the latest BIOS version CMOS clock battery indicator shows that the drive is connected correctly Type of floppy drive A: not correctly identified in BIOS Setup, reset the notebook, enter BIOS Setup, and install the defaults or correct the error.
... test Might require replacing the motherboard (contains the keyboard controller) Unlock the system to proceed Monitor type is not correctly identified in BIOS Setup Shadow RAM failed at offset nnnn of the 64k block at which the error was detected System RAM failed at offset nnnn...disk is not working or not configured properly at offset nnnn Update to the latest BIOS version CMOS clock battery indicator shows that the drive is connected correctly Type of floppy drive A: not correctly identified in BIOS Setup, reset the notebook, enter BIOS Setup, and install the defaults or correct the error.
Maintenance and Service Guide
Page 127
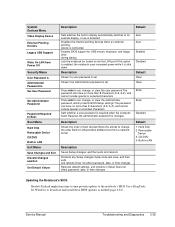
...settings, and remains in LAN provides diskless boot from time to time provide updates to the notebook's BIOS Use e-DiagTools for changes Enter Enter Disabled Description Shows the order of boot devices Move the entries to download and install these BIOS updates as needed (page 2-61). Service Manual Troubleshooting and Diagnostics 3-35 Removable Device...computer boots Requires the administrator password for Windows to change the order Built-in Setup Does not affect password, date, or time changes Updating the Notebook's BIOS Hewlett-Packard might from a network server Default 1.
...settings, and remains in LAN provides diskless boot from time to time provide updates to the notebook's BIOS Use e-DiagTools for changes Enter Enter Disabled Description Shows the order of boot devices Move the entries to download and install these BIOS updates as needed (page 2-61). Service Manual Troubleshooting and Diagnostics 3-35 Removable Device...computer boots Requires the administrator password for Windows to change the order Built-in Setup Does not affect password, date, or time changes Updating the Notebook's BIOS Hewlett-Packard might from a network server Default 1.


