
HP USB Digital Drive
Page 9
Disconnecting the Digital Drive ✎ Do not attempt to Remove Hardware" message appears on your screen. 3. Gently unplug the Digital Drive from the USB port. ✎ If the USB connector cable is flashing. 1. Select the Digital Drive and wait until the "Safe to remove the Digital Drive when the status light on the Digital Drive is in the extended position, return it on its track for safe storage. 8 User Guide A dialog box displays a list of connected devices. 2. Select the "Safely Remove Hardware" icon on your taskbar.
Disconnecting the Digital Drive ✎ Do not attempt to Remove Hardware" message appears on your screen. 3. Gently unplug the Digital Drive from the USB port. ✎ If the USB connector cable is flashing. 1. Select the Digital Drive and wait until the "Safe to remove the Digital Drive when the status light on the Digital Drive is in the extended position, return it on its track for safe storage. 8 User Guide A dialog box displays a list of connected devices. 2. Select the "Safely Remove Hardware" icon on your taskbar.
Using LightScribe (Select Models Only)
Page 3
... the inner area of the disc itself. 1 All you have to do is a direct disc-labeling technology that provides a simple way to create precise silk-screen-quality labels for discs. There is no ink to smear, no paper to curl, and no sticky adhesive to burn an image into the thin...-enabled optical drive uses an optical laser to cause problems. LightScribe discs are identified by the LightScribe logo on the retail packaging and on Your Notebook Using LightScribe LightScribe is burn, flip the disc, and then burn again.
... the inner area of the disc itself. 1 All you have to do is a direct disc-labeling technology that provides a simple way to create precise silk-screen-quality labels for discs. There is no ink to smear, no paper to curl, and no sticky adhesive to burn an image into the thin...-enabled optical drive uses an optical laser to cause problems. LightScribe discs are identified by the LightScribe logo on the retail packaging and on Your Notebook Using LightScribe LightScribe is burn, flip the disc, and then burn again.
Using LightScribe (Select Models Only)
Page 7
... using your PC for other activities. Insert the disc and follow the on the HP DVD Writer disc in mostly soft middle tones. A high-contrast photo or graphic stands out better than a picture in the "Required for contrast. Creating Disc Labels on Your Notebook Using LightScribe ... disc is labeling, keep your software's preview feature to the PC. ■ If you are using a notebook, install the software included on -screen instructions. 5 If you are using a notebook, avoid sudden loss of power. Use your notebook AC adapter and power cord plugged into a working electrical outlet....
... using your PC for other activities. Insert the disc and follow the on the HP DVD Writer disc in mostly soft middle tones. A high-contrast photo or graphic stands out better than a picture in the "Required for contrast. Creating Disc Labels on Your Notebook Using LightScribe ... disc is labeling, keep your software's preview feature to the PC. ■ If you are using a notebook, install the software included on -screen instructions. 5 If you are using a notebook, avoid sudden loss of power. Use your notebook AC adapter and power cord plugged into a working electrical outlet....
Using LightScribe (Select Models Only)
Page 10
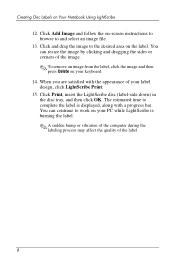
Click Add Image and follow the on-screen instructions to browse to the desired area on the label. Click Print, insert the... select an image file. 13. When you are satisfied with a progress bar. The estimated time to work on your PC while LightScribe is displayed, along with the appearance of your keyboard. 14. You can continue to complete the label is ...the image. ✎ To remove an image from the label, click the image and then press Delete on Your Notebook Using LightScribe 12. Creating Disc Labels on your label design, click LightScribe Print. 15. You can resize the ...
Click Add Image and follow the on-screen instructions to browse to the desired area on the label. Click Print, insert the... select an image file. 13. When you are satisfied with a progress bar. The estimated time to work on your PC while LightScribe is displayed, along with the appearance of your keyboard. 14. You can continue to complete the label is ...the image. ✎ To remove an image from the label, click the image and then press Delete on Your Notebook Using LightScribe 12. Creating Disc Labels on your label design, click LightScribe Print. 15. You can resize the ...
Using LightScribe (Select Models Only)
Page 13
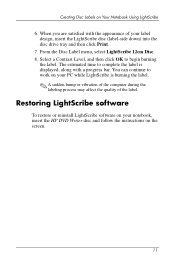
...Print. 7. Select a Contrast Level, and then click OK to work on your notebook, insert the HP DVD Writer disc and follow the instructions on Your Notebook Using LightScribe 6. When you are satisfied with a progress bar. Restoring LightScribe software To... restore or reinstall LightScribe software on your PC while LightScribe is displayed, along with the appearance of the label. From the Disc Label menu, select LightScribe 12cm Disc. 8. Creating Disc Labels on the screen...
...Print. 7. Select a Contrast Level, and then click OK to work on your notebook, insert the HP DVD Writer disc and follow the instructions on Your Notebook Using LightScribe 6. When you are satisfied with a progress bar. Restoring LightScribe software To... restore or reinstall LightScribe software on your PC while LightScribe is displayed, along with the appearance of the label. From the Disc Label menu, select LightScribe 12cm Disc. 8. Creating Disc Labels on the screen...

Hardware-Software Guide
Page 10
Displays a shortcut menu for items beneath the pointer. 1-2 Hardware and Software Guide Hardware Component 3 fn key 4 Keypad keys (15) 5 Windows applications key Description Combines with other keys to perform system tasks. Can be used like the keys on an external numeric keypad. For example, pressing fn+f7 decreases screen brightness.
Displays a shortcut menu for items beneath the pointer. 1-2 Hardware and Software Guide Hardware Component 3 fn key 4 Keypad keys (15) 5 Windows applications key Description Combines with other keys to perform system tasks. Can be used like the keys on an external numeric keypad. For example, pressing fn+f7 decreases screen brightness.

Hardware-Software Guide
Page 28
... an optional Bluetooth® device. The Modem Approval label is included with the notebook. ■ Service Tag-Provides the product name, product number (P/N), and serial number (S/N) of your screen, select Start > Help and Support. ■ Microsoft Certificate of the notebook. ■ Regulatory label-Provides regulatory information about each device and the approval markings...
... an optional Bluetooth® device. The Modem Approval label is included with the notebook. ■ Service Tag-Provides the product name, product number (P/N), and serial number (S/N) of your screen, select Start > Help and Support. ■ Microsoft Certificate of the notebook. ■ Regulatory label-Provides regulatory information about each device and the approval markings...

Hardware-Software Guide
Page 34
....* fn+esc *To clear the system information display, press esc. 2-6 Hardware and Software Guide fn+f7 Increases screen brightness. Default Function Hotkey Opens Help and Support Center. fn+f4 Initiates standby. fn+f6 Decreases screen brightness. fn+f1 Opens print options window. fn+f10 Plays the previous track or chapter on an...
....* fn+esc *To clear the system information display, press esc. 2-6 Hardware and Software Guide fn+f7 Increases screen brightness. Default Function Hotkey Opens Help and Support Center. fn+f4 Initiates standby. fn+f6 Decreases screen brightness. fn+f1 Opens print options window. fn+f10 Plays the previous track or chapter on an...
Hardware-Software Guide
Page 39
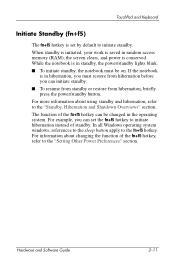
...your work is saved in standby, the power/standby lights blink. ■ To initiate standby, the notebook must restore from hibernation, briefly press the power/standby button. If the notebook is in hibernation, you must be changed in the operating system. The function of the fn+f5 ...operating system windows, references to the sleep button apply to the "Standby, Hibernation and Shutdown Overviews" section. While the notebook is in random access memory (RAM), the screen clears, and power is conserved. TouchPad and Keyboard Initiate Standby (fn+f5) The fn+f5 hotkey is set the ...
...your work is saved in standby, the power/standby lights blink. ■ To initiate standby, the notebook must restore from hibernation, briefly press the power/standby button. If the notebook is in hibernation, you must be changed in the operating system. The function of the fn+f5 ...operating system windows, references to the sleep button apply to the "Standby, Hibernation and Shutdown Overviews" section. While the notebook is in random access memory (RAM), the screen clears, and power is conserved. TouchPad and Keyboard Initiate Standby (fn+f5) The fn+f5 hotkey is set the ...

Hardware-Software Guide
Page 40
For information about combining Windows passwords with HP passwords, refert to display the Log On window and lock the notebook. The longer you hold down the fn+f7 hotkey, the more the screen brightens. » To decrease screen brightness, press the fn+f7 hotkey. 2-12 ...Decrease Brightness (fn+f7) The fn+f7 hotkey decreases the brightness of the notebook screen. QuickLock protects your Windows administrator password and access the notebook. While the Log On window is displayed, the notebook cannot be accessed until a Windows user password or a Windows administrator password is ...
For information about combining Windows passwords with HP passwords, refert to display the Log On window and lock the notebook. The longer you hold down the fn+f7 hotkey, the more the screen brightens. » To decrease screen brightness, press the fn+f7 hotkey. 2-12 ...Decrease Brightness (fn+f7) The fn+f7 hotkey decreases the brightness of the notebook screen. QuickLock protects your Windows administrator password and access the notebook. While the Log On window is displayed, the notebook cannot be accessed until a Windows user password or a Windows administrator password is ...

Hardware-Software Guide
Page 51
... running on external power. By default, the system initiates standby after 10 minutes of inactivity when the notebook is returned instantly to the screen. Hardware and Software Guide 3-5 Saving your work before initiating standby is not usually necessary but is cleared, and the power/standby lights blink. ... system components that are not in this chapter. When standby is initiated, your work is saved in random access memory (RAM), the screen is a recommended precaution. For information about changing these settings, refer to the "Using Power Schemes" section later in use.
... running on external power. By default, the system initiates standby after 10 minutes of inactivity when the notebook is returned instantly to the screen. Hardware and Software Guide 3-5 Saving your work before initiating standby is not usually necessary but is cleared, and the power/standby lights blink. ... system components that are not in this chapter. When standby is initiated, your work is saved in random access memory (RAM), the screen is a recommended precaution. For information about changing these settings, refer to the "Using Power Schemes" section later in use.

Hardware-Software Guide
Page 52
... or disconnect an external device. ■ Do not insert or remove a CD, DVD, PC Card, or digital memory card. When the notebook is in hibernation, your work is returned to the screen where you left off , Windows loads. Hibernation saves your place manually after 30 minutes of...resume from hibernation, your work is returned to the screen. ■ If the notebook is off . When the notebook is running on the hard drive and then shuts down the notebook. Power Hibernation Ä CAUTION: If the configuration of the notebook system is changed during a battery pack calibration. &#...
... or disconnect an external device. ■ Do not insert or remove a CD, DVD, PC Card, or digital memory card. When the notebook is in hibernation, your work is returned to the screen where you left off , Windows loads. Hibernation saves your place manually after 30 minutes of...resume from hibernation, your work is returned to the screen. ■ If the notebook is off . When the notebook is running on the hard drive and then shuts down the notebook. Power Hibernation Ä CAUTION: If the configuration of the notebook system is changed during a battery pack calibration. &#...

Hardware-Software Guide
Page 53
... the battery pack and store it in use, you may see the warning message "Putting the computer into hibernation or standby may stop and the screen may stop the playback. To extend the life of the battery pack. Interference with Drive Media To prevent the loss of conditions such as a CD... If you plan to resume shortly-Initiate standby for shorter times and hibernation for longer times or for more power than 2 weeks-Shut down the notebook. If the notebook will be cleared. Do you want to your work, press the power/standby button and then restart the disc.
... the battery pack and store it in use, you may see the warning message "Putting the computer into hibernation or standby may stop and the screen may stop the playback. To extend the life of the battery pack. Interference with Drive Media To prevent the loss of conditions such as a CD... If you plan to resume shortly-Initiate standby for shorter times and hibernation for longer times or for more power than 2 weeks-Shut down the notebook. If the notebook will be cleared. Do you want to your work, press the power/standby button and then restart the disc.

Hardware-Software Guide
Page 55
... select Stand by > OK.* (If standby is returned to the screen. *Depending on your network connections, the Turn Off Computer button may be called the Shut Down button. †Depending on your notebook configuration, you may also be able to initiate standby. Power Initiating ...Briefly press the power/standby button. -or- ■ Open the notebook.† ■ Power/standby lights are turned on external power. ■ Power/standby lights blink. ■ Screen is required. Hardware and Software Guide 3-9 With the notebook on, use any of inactivity while running on battery power. &#...
... select Stand by > OK.* (If standby is returned to the screen. *Depending on your network connections, the Turn Off Computer button may be called the Shut Down button. †Depending on your notebook configuration, you may also be able to initiate standby. Power Initiating ...Briefly press the power/standby button. -or- ■ Open the notebook.† ■ Power/standby lights are turned on external power. ■ Power/standby lights blink. ■ Screen is required. Hardware and Software Guide 3-9 With the notebook on, use any of inactivity while running on battery power. &#...

Hardware-Software Guide
Page 56
...down list.) ■ Power/standby lights are turned off . ■ Screen is cleared. Restore from Hibernation Hibernation cannot be called the Shut Down button. †If the system initiated hibernation because of notebook inactivity. ■ Whenever the battery pack reaches a critical low-battery ...condition. ■ Power/standby lights are turned off . ■ Screen is the only power source.) 3-10 Hardware and Software Guide ...
...down list.) ■ Power/standby lights are turned off . ■ Screen is cleared. Restore from Hibernation Hibernation cannot be called the Shut Down button. †If the system initiated hibernation because of notebook inactivity. ■ Whenever the battery pack reaches a critical low-battery ...condition. ■ Power/standby lights are turned off . ■ Screen is the only power source.) 3-10 Hardware and Software Guide ...

Hardware-Software Guide
Page 58
...> Control Panel > Performance and Maintenance > Power Options, and then follow the instructions on a battery pack, and also sets the notebook to Chapter 6, "Security." 3-12 Hardware and Software Guide Power Power Preferences Using Power Schemes A power scheme controls the amount of power the... notebook uses while running on external power or on the screen. Setting a Standby Password To set the notebook to prompt for password when computer resumes from standby, select Start > Control Panel > ...
...> Control Panel > Performance and Maintenance > Power Options, and then follow the instructions on a battery pack, and also sets the notebook to Chapter 6, "Security." 3-12 Hardware and Software Guide Power Power Preferences Using Power Schemes A power scheme controls the amount of power the... notebook uses while running on external power or on the screen. Setting a Standby Password To set the notebook to prompt for password when computer resumes from standby, select Start > Control Panel > ...

Hardware-Software Guide
Page 62
Select the Advanced tab, select the Always show icon on the screen. 3-16 Hardware and Software Guide To change other responses, select Start > Control Panel > Performance and Maintenance > Power Options, and then follow the instructions on the ...; Select the Power Meter icon, which is displayed by default in the battery pack. ■ The time indicates the approximate running time remaining on the screen, use the operating system Power Meter feature. Power Displaying Charge Reports To display battery charge information on the battery pack if the battery pack continues...
Select the Advanced tab, select the Always show icon on the screen. 3-16 Hardware and Software Guide To change other responses, select Start > Control Panel > Performance and Maintenance > Power Options, and then follow the instructions on the ...; Select the Power Meter icon, which is displayed by default in the battery pack. ■ The time indicates the approximate running time remaining on the screen, use the operating system Power Meter feature. Power Displaying Charge Reports To display battery charge information on the battery pack if the battery pack continues...

Hardware-Software Guide
Page 68
... can run the notebook from the notebook. Power Conserving Battery Pack Power To extend the time that a battery pack can be adjusted with the volume buttons. ■ Minimize screen brightness. ❏ To decrease screen brightness, press the fn+f7 hotkey. ❏ To increase screen brightness, press the... ❏ Stop or remove an inserted PC Card. ❏ Disable or remove an inserted digital memory card. ❏ Turn off wireless and local area network (LAN) connections and close modem applications. ❏ Disconnect from the notebook any external devices that are not using ...
... can run the notebook from the notebook. Power Conserving Battery Pack Power To extend the time that a battery pack can be adjusted with the volume buttons. ■ Minimize screen brightness. ❏ To decrease screen brightness, press the fn+f7 hotkey. ❏ To increase screen brightness, press the... ❏ Stop or remove an inserted PC Card. ❏ Disable or remove an inserted digital memory card. ❏ Turn off wireless and local area network (LAN) connections and close modem applications. ❏ Disconnect from the notebook any external devices that are not using ...

Hardware-Software Guide
Page 69
..., indicating that minimizes power use less power: ■ Select a short wait for the screen saver and select a screen saver with minimal graphics and motion. For more information about using power schemes, refer to use . Power Selecting Power Conservation Settings To set the notebook to the "Using Power Schemes" section earlier in this chapter.
..., indicating that minimizes power use less power: ■ Select a short wait for the screen saver and select a screen saver with minimal graphics and motion. For more information about using power schemes, refer to use . Power Selecting Power Conservation Settings To set the notebook to the "Using Power Schemes" section earlier in this chapter.

Hardware-Software Guide
Page 81
... Start > My Computer. 2. Hardware and Software Guide 4-9 AutoPlay default settings vary by notebook model and configuration. For example, you insert a disc. Select the AutoPlay tab and follow the on-screen instructions. In the Devices with Removable Storage group, right-click an item such as a..., MultiMediaCard, or SmartMedia (SM) card. The default AutoPlay settings can be changed. At many AutoPlay settings, there may be set the notebook to most other removable storage devices. Select Properties. 4. If the AutoPlay pop-up window may be a pause of the folders and files...
... Start > My Computer. 2. Hardware and Software Guide 4-9 AutoPlay default settings vary by notebook model and configuration. For example, you insert a disc. Select the AutoPlay tab and follow the on-screen instructions. In the Devices with Removable Storage group, right-click an item such as a..., MultiMediaCard, or SmartMedia (SM) card. The default AutoPlay settings can be changed. At many AutoPlay settings, there may be set the notebook to most other removable storage devices. Select Properties. 4. If the AutoPlay pop-up window may be a pause of the folders and files...


