Hardware-Software Guide
Page 5
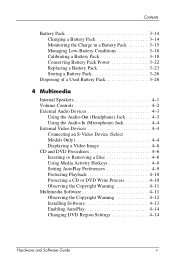
... Charge in a Battery Pack 3-15 Managing Low-Battery Conditions 3-16 Calibrating a Battery Pack 3-18 Conserving Battery Pack Power 3-22 Replacing a Battery Pack 3-23 Storing a Battery Pack 3-26 Disposing of a Used Battery Pack 3-26 4 Multimedia Internal Speakers 4-1 Volume Controls 4-2 External Audio Devices 4-3 Using the Audio-Out (Headphone) Jack 4-3 Using the Audio-In (Microphone) Jack 4-4 External Video Devices 4-4 Connecting an S-Video Device (Select Models Only 4-4 Displaying a Video Image 4-6 CD and DVD Procedures 4-6 Inserting or Removing a Disc 4-6 Using Media Activity...
... Charge in a Battery Pack 3-15 Managing Low-Battery Conditions 3-16 Calibrating a Battery Pack 3-18 Conserving Battery Pack Power 3-22 Replacing a Battery Pack 3-23 Storing a Battery Pack 3-26 Disposing of a Used Battery Pack 3-26 4 Multimedia Internal Speakers 4-1 Volume Controls 4-2 External Audio Devices 4-3 Using the Audio-Out (Headphone) Jack 4-3 Using the Audio-In (Microphone) Jack 4-4 External Video Devices 4-4 Connecting an S-Video Device (Select Models Only 4-4 Displaying a Video Image 4-6 CD and DVD Procedures 4-6 Inserting or Removing a Disc 4-6 Using Media Activity...

Hardware-Software Guide
Page 6
...5-6 Using Wireless Security Features 5-6 Identifying an 802.11 Wireless Device 5-7 Troubleshooting Devices 5-7 Bluetooth Wireless Devices (Select Models Only) . . . . . 5-8 Wireless Device Power States 5-10 Turning On the Devices 5-12 Turning Off and Disabling the Devices 5-13 6 Security Security Features 6-1 QuickLock 6-3 Setup Utility and Windows Passwords 6-3 Coordinating Passwords 6-5 Choosing a Password 6-5 Setup Utility Administrator Password 6-6 Setting an Administrator Password 6-7 Entering an Administrator Password 6-7 Setup Utility Power-On Password 6-8 Setting a Power...
...5-6 Using Wireless Security Features 5-6 Identifying an 802.11 Wireless Device 5-7 Troubleshooting Devices 5-7 Bluetooth Wireless Devices (Select Models Only) . . . . . 5-8 Wireless Device Power States 5-10 Turning On the Devices 5-12 Turning Off and Disabling the Devices 5-13 6 Security Security Features 6-1 QuickLock 6-3 Setup Utility and Windows Passwords 6-3 Coordinating Passwords 6-5 Choosing a Password 6-5 Setup Utility Administrator Password 6-6 Setting an Administrator Password 6-7 Entering an Administrator Password 6-7 Setup Utility Power-On Password 6-8 Setting a Power...
Hardware-Software Guide
Page 7
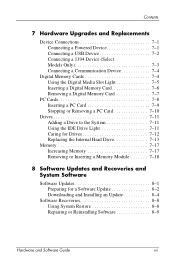
... a Powered Device 7-1 Connecting a USB Device 7-2 Connecting a 1394 Device (Select Models Only 7-3 Connecting a Communication Device 7-4 Digital Memory Cards 7-4 Using the Digital Media Slot Light 7-5 Inserting a Digital Memory Card 7-6 Removing a Digital Memory Card 7-7 PC Cards 7-8 Inserting a PC Card 7-9 Stopping or Removing a PC Card 7-10 Drives 7-11 Adding a Drive to the System 7-11 Using the IDE Drive Light 7-11 Caring for Drives 7-12 Replacing the Internal Hard Drive 7-13 Memory 7-17 Increasing Memory 7-17 Removing or Inserting a Memory Module 7-18 8 Software Updates...
... a Powered Device 7-1 Connecting a USB Device 7-2 Connecting a 1394 Device (Select Models Only 7-3 Connecting a Communication Device 7-4 Digital Memory Cards 7-4 Using the Digital Media Slot Light 7-5 Inserting a Digital Memory Card 7-6 Removing a Digital Memory Card 7-7 PC Cards 7-8 Inserting a PC Card 7-9 Stopping or Removing a PC Card 7-10 Drives 7-11 Adding a Drive to the System 7-11 Using the IDE Drive Light 7-11 Caring for Drives 7-12 Replacing the Internal Hard Drive 7-13 Memory 7-17 Increasing Memory 7-17 Removing or Inserting a Memory Module 7-18 8 Software Updates...
Hardware-Software Guide
Page 27
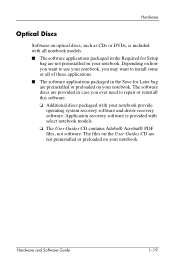
... Setup bag are not preinstalled on your notebook. The software discs are provided in case you may want to repair or reinstall this software. ❏ Additional discs packaged with select notebook models. ❏ The User Guides CD contains Adobe® Acrobat® PDF files, not software. The files on the User Guides CD are preinstalled or preloaded on your notebook. Depending on your notebook provide operating system recovery software and driver recovery software...
... Setup bag are not preinstalled on your notebook. The software discs are provided in case you may want to repair or reinstall this software. ❏ Additional discs packaged with select notebook models. ❏ The User Guides CD contains Adobe® Acrobat® PDF files, not software. The files on the User Guides CD are preinstalled or preloaded on your notebook. Depending on your notebook provide operating system recovery software and driver recovery software...
Hardware-Software Guide
Page 39
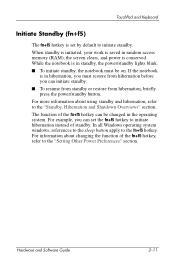
... set by default to initiate standby. Hardware and Software Guide 2-11 In all Windows operating system windows, references to the sleep button apply to the "Standby, Hibernation and Shutdown Overviews" section. When standby is initiated, your work is saved in random access memory (RAM), the screen clears, and power is set the fn+f5 hotkey to the "Setting Other Power Preferences" section. For more information about changing the function of the fn+f5 hotkey...
... set by default to initiate standby. Hardware and Software Guide 2-11 In all Windows operating system windows, references to the sleep button apply to the "Standby, Hibernation and Shutdown Overviews" section. When standby is initiated, your work is saved in random access memory (RAM), the screen clears, and power is set the fn+f5 hotkey to the "Setting Other Power Preferences" section. For more information about changing the function of the fn+f5 hotkey...

Hardware-Software Guide
Page 52
... notebook inactivity or whenever the notebook reaches a critical low-battery condition. Hibernation saves your work is returned to the screen. ■ If the notebook is in hibernation: ■ Do not add or remove a memory module. ■ Do not remove or replace the hard drive. ■ Do not connect or disconnect an external device. ■ Do not insert or remove a CD, DVD, PC Card, or digital memory card. When hibernation is selected. 3-6 Hardware and Software Guide Restoring...
... notebook inactivity or whenever the notebook reaches a critical low-battery condition. Hibernation saves your work is returned to the screen. ■ If the notebook is in hibernation: ■ Do not add or remove a memory module. ■ Do not remove or replace the hard drive. ■ Do not connect or disconnect an external device. ■ Do not insert or remove a CD, DVD, PC Card, or digital memory card. When hibernation is selected. 3-6 Hardware and Software Guide Restoring...

Hardware-Software Guide
Page 55
...; Power/standby lights blink. ■ Screen is required. With the notebook on, use any of inactivity while running on battery power. ■ After 20 minutes of the following procedures: ■ Press the fn+f5 hotkey. ■ Close the notebook. ■ Power/standby lights blink. ■ Screen is cleared. ✎ When the notebook is closed, the display presses the display switch, which then initiates standby. ■ In Windows XP Home, select Start > Turn...
...; Power/standby lights blink. ■ Screen is required. With the notebook on, use any of inactivity while running on battery power. ■ After 20 minutes of the following procedures: ■ Press the fn+f5 hotkey. ■ Close the notebook. ■ Power/standby lights blink. ■ Screen is cleared. ✎ When the notebook is closed, the display presses the display switch, which then initiates standby. ■ In Windows XP Home, select Start > Turn...

Hardware-Software Guide
Page 57
... hold down from external power and remove the battery pack. Then ❏ In Windows XP Home, select Shut Down > Turn Off. ❏ In Windows XP Professional, select Shut down the power/standby button for your operating system, try the following emergency shutdown procedures in this chapter. Hardware and Software Guide 3-11 Power Using Emergency Shutdown Procedures If the notebook does not respond to the "Replacing a Battery Pack" section...
... hold down from external power and remove the battery pack. Then ❏ In Windows XP Home, select Shut Down > Turn Off. ❏ In Windows XP Professional, select Shut down the power/standby button for your operating system, try the following emergency shutdown procedures in this chapter. Hardware and Software Guide 3-11 Power Using Emergency Shutdown Procedures If the notebook does not respond to the "Replacing a Battery Pack" section...

Hardware-Software Guide
Page 65
... power adapter. (The notebook battery light is on. Leave the notebook connected to Calibrate To calibrate a battery pack, you are using the notebook, but the battery pack will discharge faster if the notebook is turned off.) Discharging the Battery Pack Ä CAUTION: To prevent loss of work, save your work before beginning an unattended discharge procedure. Hardware and Software Guide 3-19 Insert the battery pack into the notebook. 2. The notebook must fully charge...
... power adapter. (The notebook battery light is on. Leave the notebook connected to Calibrate To calibrate a battery pack, you are using the notebook, but the battery pack will discharge faster if the notebook is turned off.) Discharging the Battery Pack Ä CAUTION: To prevent loss of work, save your work before beginning an unattended discharge procedure. Hardware and Software Guide 3-19 Insert the battery pack into the notebook. 2. The notebook must fully charge...

Hardware-Software Guide
Page 68
... S-Video-out jack. ■ Use optional, externally powered speakers instead of the internal speakers whenever possible. When you are not plugged into an external power source. ❏ Stop or remove an inserted PC Card. ❏ Disable or remove an inserted digital memory card. ❏ Turn off wireless and local area network (LAN) connections and close modem applications. ❏ Disconnect from the notebook any external devices that a battery pack can be adjusted with the volume buttons. ■ Minimize screen brightness. ❏...
... S-Video-out jack. ■ Use optional, externally powered speakers instead of the internal speakers whenever possible. When you are not plugged into an external power source. ❏ Stop or remove an inserted PC Card. ❏ Disable or remove an inserted digital memory card. ❏ Turn off wireless and local area network (LAN) connections and close modem applications. ❏ Disconnect from the notebook any external devices that a battery pack can be adjusted with the volume buttons. ■ Minimize screen brightness. ❏...

Hardware-Software Guide
Page 127
... notebook is the internal hard drive. Loosen the 2 hard drive security screws. Hardware Upgrades and Replacements Replacing the Internal Hard Drive The hard drive in the hard drive bay is off or in Chapter 3, "Power." To replace the internal hard drive: 1. If you ■ Save your work, close all external devices connected to the "Replacing a Battery Pack" section in hibernation, turn the notebook on and then shut it down through the operating system. ■ Disconnect all open applications, and shut down . 2. Turn the notebook...
... notebook is the internal hard drive. Loosen the 2 hard drive security screws. Hardware Upgrades and Replacements Replacing the Internal Hard Drive The hard drive in the hard drive bay is off or in Chapter 3, "Power." To replace the internal hard drive: 1. If you ■ Save your work, close all external devices connected to the "Replacing a Battery Pack" section in hibernation, turn the notebook on and then shut it down through the operating system. ■ Disconnect all open applications, and shut down . 2. Turn the notebook...

Hardware-Software Guide
Page 132
... "Replacing a Battery Pack" section in hibernation, turn the notebook on and then shut it down the notebook. If you are the only user-accessible internal compartments on the notebook. Save your work and close all external devices connected to the notebook. 4. Hardware Upgrades and Replacements Removing or Inserting a Memory Module Å WARNING: To prevent exposure to the "Electrostatic Discharge" chapter in Regulatory and Safety Notices on the User Guides CD. 1. For instructions, refer...
... "Replacing a Battery Pack" section in hibernation, turn the notebook on and then shut it down the notebook. If you are the only user-accessible internal compartments on the notebook. Save your work and close all external devices connected to the notebook. 4. Hardware Upgrades and Replacements Removing or Inserting a Memory Module Å WARNING: To prevent exposure to the "Electrostatic Discharge" chapter in Regulatory and Safety Notices on the User Guides CD. 1. For instructions, refer...
Hardware-Software Guide
Page 149
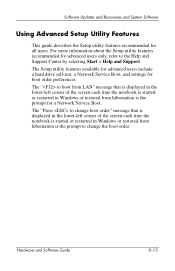
... for boot order preferences. The "Press to change the boot order. For more information about the Setup utility features recommended for all users. Software Updates and Recoveries and System Software Using Advanced Setup Utility Features This guide describes the Setup utility features recommended for advanced users only, refer to the Help and Support Center by selecting Start > Help and Support. The Setup utility features available for advanced users include a hard drive self-test, a Network Service Boot, and settings for a Network Service Boot. Hardware and Software Guide 8-13...
... for boot order preferences. The "Press to change the boot order. For more information about the Setup utility features recommended for all users. Software Updates and Recoveries and System Software Using Advanced Setup Utility Features This guide describes the Setup utility features recommended for advanced users only, refer to the Help and Support Center by selecting Start > Help and Support. The Setup utility features available for advanced users include a hard drive self-test, a Network Service Boot, and settings for a Network Service Boot. Hardware and Software Guide 8-13...
Hardware-Software Guide
Page 156
...-specific modem adapter 1-18 critical low-battery condition 3-17 D default settings, restoring in the Setup utility 8-12 device disabling 6-10 device security 6-10 device, connecting powered 7-1 Digital Media Slot 1-14, 7-4, 7-5 Digital Media Slot light 1-14 digital memory cards Digital Media Slot 7-4 inserting 7-6 removing 7-7 setting AutoPlay preferences 4-9 types supported 7-4 disc, optical. DVDs diskette affected by airport security 7-12 protecting playback 3-7 display release button 1-10 display switch identifying 1-4, 3-4 setting preferences 3-13 display, internal controlling brightness...
...-specific modem adapter 1-18 critical low-battery condition 3-17 D default settings, restoring in the Setup utility 8-12 device disabling 6-10 device security 6-10 device, connecting powered 7-1 Digital Media Slot 1-14, 7-4, 7-5 Digital Media Slot light 1-14 digital memory cards Digital Media Slot 7-4 inserting 7-6 removing 7-7 setting AutoPlay preferences 4-9 types supported 7-4 disc, optical. DVDs diskette affected by airport security 7-12 protecting playback 3-7 display release button 1-10 display switch identifying 1-4, 3-4 setting preferences 3-13 display, internal controlling brightness...

Hardware-Software Guide
Page 159
... label 1-20 Mini PCI compartment 1-16 model, identifying notebook 2-8, 8-2 modem country-specific adapter 1-18 documentation 7-4 Modem Approval label 1-20 modem cable 1-18 modem jack 1-12 monitor connecting 7-1 switching image 2-10, 7-1 monitor port 1-12 mouse, external setting preferences 2-3 USB 7-2 MultiMediaCard 7-4 mute button 1-7, 4-2 mute light 1-5, 4-2 N network cable 1-12 network documentation 7-4 network jack 1-12 Network Service Boot 8-13 Norton AntiVirus 6-11 notebook model, family, type, and serial number 2-8, 8-2 num lock key 2-16 num lock light 1-6, 2-16 numeric keypad.
... label 1-20 Mini PCI compartment 1-16 model, identifying notebook 2-8, 8-2 modem country-specific adapter 1-18 documentation 7-4 Modem Approval label 1-20 modem cable 1-18 modem jack 1-12 monitor connecting 7-1 switching image 2-10, 7-1 monitor port 1-12 mouse, external setting preferences 2-3 USB 7-2 MultiMediaCard 7-4 mute button 1-7, 4-2 mute light 1-5, 4-2 N network cable 1-12 network documentation 7-4 network jack 1-12 Network Service Boot 8-13 Norton AntiVirus 6-11 notebook model, family, type, and serial number 2-8, 8-2 num lock key 2-16 num lock light 1-6, 2-16 numeric keypad.
Hardware-Software Guide
Page 161
... or repairing software 1-19 release latch, battery pack 1-17, 3-24 reset (emergency shutdown procedures) 3-11 restore point 8-8 RJ-11 jack 1-12 RJ-45 jack 1-12 ROM determining current version of 8-3 downloading and installing 8-4 obtaining updates 8-4 ROMPaq 8-4 S scanner 7-3 screen saver 3-23 scroll lock key 2-7 scrolling regions, TouchPad 1-3, 2-2 Secure Digital Memory Card (SD Card) 7-4 security cable lock, connecting 6-14 security cable slot 1-15 security features 6-1 serial number, notebook 1-20, 2-8 series, notebook 8-2 Service Tag 1-20 Setup 6-4 Index-8 Hardware and Software Guide
... or repairing software 1-19 release latch, battery pack 1-17, 3-24 reset (emergency shutdown procedures) 3-11 restore point 8-8 RJ-11 jack 1-12 RJ-45 jack 1-12 ROM determining current version of 8-3 downloading and installing 8-4 obtaining updates 8-4 ROMPaq 8-4 S scanner 7-3 screen saver 3-23 scroll lock key 2-7 scrolling regions, TouchPad 1-3, 2-2 Secure Digital Memory Card (SD Card) 7-4 security cable lock, connecting 6-14 security cable slot 1-15 security features 6-1 serial number, notebook 1-20, 2-8 series, notebook 8-2 Service Tag 1-20 Setup 6-4 Index-8 Hardware and Software Guide
HP Pavilion ze2000 Notebook PC, Compaq Presario M2000 Notebook PC - Maintenance and Service Guide
Page 25
... turns on an external numeric keypad. When combined with other keys to perform system tasks. Windows logo key Displays the Windows Start menu. Maintenance and Service Guide 1-21 caps lock key Enables caps lock and turns on the caps lock light. For example, pressing fn+f7 decreases screen brightness. Arrow keys Moves the cursor around the screen. fn key Combines with the fn key, several keys perform additional tasks as hotkeys. Product Description Item 1 2 3 4 5 6 7 8 Table 1-9 Keyboard Components HP Pavilion ze2000 Component Function Function keys...
... turns on an external numeric keypad. When combined with other keys to perform system tasks. Windows logo key Displays the Windows Start menu. Maintenance and Service Guide 1-21 caps lock key Enables caps lock and turns on the caps lock light. For example, pressing fn+f7 decreases screen brightness. Arrow keys Moves the cursor around the screen. fn key Combines with the fn key, several keys perform additional tasks as hotkeys. Product Description Item 1 2 3 4 5 6 7 8 Table 1-9 Keyboard Components HP Pavilion ze2000 Component Function Function keys...

HP Pavilion ze2000 Notebook PC, Compaq Presario M2000 Notebook PC - Maintenance and Service Guide
Page 27
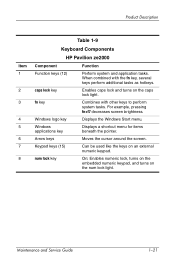
Windows logo key Displays the Windows Start menu. Maintenance and Service Guide 1-23 Fn key Combines with the Fn key, the function keys perform additional tasks as hotkeys. Windows applications key Displays a shortcut menu for items beneath the pointer. num lock key Enables numeric lock, turns on the embedded numeric keypad, and turns on the caps lock light. For example, pressing Fn+F7 decreases screen brightness. Arrow keys Move the cursor around the screen. Product Description Item 1 2 3 4 5 6 7 8 Table 1-10 Keyboard Components Compaq...
Windows logo key Displays the Windows Start menu. Maintenance and Service Guide 1-23 Fn key Combines with the Fn key, the function keys perform additional tasks as hotkeys. Windows applications key Displays a shortcut menu for items beneath the pointer. num lock key Enables numeric lock, turns on the embedded numeric keypad, and turns on the caps lock light. For example, pressing Fn+F7 decreases screen brightness. Arrow keys Move the cursor around the screen. Product Description Item 1 2 3 4 5 6 7 8 Table 1-10 Keyboard Components Compaq...
HP Pavilion ze2000 Notebook PC, Compaq Presario M2000 Notebook PC - Maintenance and Service Guide
Page 77
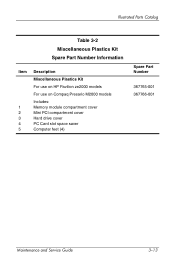
Illustrated Parts Catalog Table 3-2 Miscellaneous Plastics Kit Spare Part Number Information Item 1 2 3 4 5 Description Miscellaneous Plastics Kit For use on HP Pavilion ze2000 models For use on Compaq Presario M2000 models Includes: Memory module compartment cover Mini PCI compartment cover Hard drive cover PC Card slot space saver Computer feet (4) Spare Part Number 367765-001 367766-001 Maintenance and Service Guide 3-13
Illustrated Parts Catalog Table 3-2 Miscellaneous Plastics Kit Spare Part Number Information Item 1 2 3 4 5 Description Miscellaneous Plastics Kit For use on HP Pavilion ze2000 models For use on Compaq Presario M2000 models Includes: Memory module compartment cover Mini PCI compartment cover Hard drive cover PC Card slot space saver Computer feet (4) Spare Part Number 367765-001 367766-001 Maintenance and Service Guide 3-13

HP Pavilion ze2000 Notebook PC, Compaq Presario M2000 Notebook PC - Maintenance and Service Guide
Page 216
... part numbers 3-7, 3-23, 3-25, 3-26 TouchPad 1-24, 1-26 TouchPad buttons 1-24, 1-26 TouchPad horizontal scroll region 1-27 TouchPad vertical scroll region 1-25, 1-27 transporting precautions 4-5 troubleshooting audio 2-23 Computer Setup 2-2 docking device 2-16 flowcharts 2-7 keyboard 2-26 modem 2-28 network 2-28 nonfunctioning device 2-16, 2-25 OS loading 2-17 overview 2-1 pointing device 2-27 power 2-10 video 2-14 U Universal Serial Bus (USB) port location 1-11, 1-13, 1-15, 1-17 pin assignments A-1 USB digital drive, spare part number 3-15, 3-18 Index-6 Maintenance and Service Guide
... part numbers 3-7, 3-23, 3-25, 3-26 TouchPad 1-24, 1-26 TouchPad buttons 1-24, 1-26 TouchPad horizontal scroll region 1-27 TouchPad vertical scroll region 1-25, 1-27 transporting precautions 4-5 troubleshooting audio 2-23 Computer Setup 2-2 docking device 2-16 flowcharts 2-7 keyboard 2-26 modem 2-28 network 2-28 nonfunctioning device 2-16, 2-25 OS loading 2-17 overview 2-1 pointing device 2-27 power 2-10 video 2-14 U Universal Serial Bus (USB) port location 1-11, 1-13, 1-15, 1-17 pin assignments A-1 USB digital drive, spare part number 3-15, 3-18 Index-6 Maintenance and Service Guide


