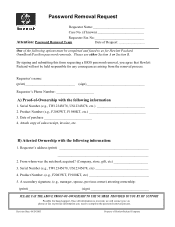
HP Omnibook PC - Password Removal Form
Page 1
...PLEASE FAX THE ABOVE PROOF-OF-OWNERSHIP TO THE NUMBER PROVIDED TO YOU BY HP SUPPORT Possible fee based support, Once all information is received, we will contact ...Attested Ownership with the following options must be held responsible for Hewlett Packard OmniBook/Pavilion password removals. From whom was the notebook acquired? (Company, store, gift, etc 3. Serial Number (e.g., TW12345678,... US12345678, etc 4. Please use either Section A or Section B. By signing and submitting this form requesting a BIOS...
...PLEASE FAX THE ABOVE PROOF-OF-OWNERSHIP TO THE NUMBER PROVIDED TO YOU BY HP SUPPORT Possible fee based support, Once all information is received, we will contact ...Attested Ownership with the following options must be held responsible for Hewlett Packard OmniBook/Pavilion password removals. From whom was the notebook acquired? (Company, store, gift, etc 3. Serial Number (e.g., TW12345678,... US12345678, etc 4. Please use either Section A or Section B. By signing and submitting this form requesting a BIOS...
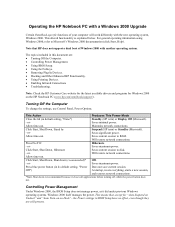
HP Notebook PC - Operating with a Windows 2000 Upgrade
Page 1
... the latest available drivers and programs for "Auto Suspend on Undock" and "Auto Turn-on on the HP Notebook PC (www.hp.com/omnibook/support/). This means that HP does not support a dual boot of your computer will work differently with another operating system. For general operating...Computer To change the settings, use Control Panel, Power Options. Will restore network connections. Controlling Power Management Under Windows 2000, the BIOS Setup does not manage power, as it closes all applications before turning off, while the power button does not. Saves significant power...
... the latest available drivers and programs for "Auto Suspend on Undock" and "Auto Turn-on on the HP Notebook PC (www.hp.com/omnibook/support/). This means that HP does not support a dual boot of your computer will work differently with another operating system. For general operating...Computer To change the settings, use Control Panel, Power Options. Will restore network connections. Controlling Power Management Under Windows 2000, the BIOS Setup does not manage power, as it closes all applications before turning off, while the power button does not. Saves significant power...
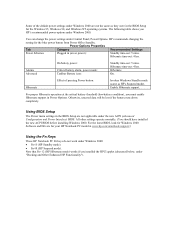
HP Notebook PC - Operating with a Windows 2000 Upgrade
Page 2
... operation at www.hp.com/omnibook/support/.) Using the Fn Keys These HP Notebook PC Fn keys do not work under Windows 2000: • Fn+S (HP Standby mode). • Fn+R (HP Suspend mode). You can change the power settings under the new ACPI (Advanced Configuration and Power Interface) BIOS. HP recommends changing the setting for your HP Notebook PC model at the...
... operation at www.hp.com/omnibook/support/.) Using the Fn Keys These HP Notebook PC Fn keys do not work under Windows 2000: • Fn+S (HP Standby mode). • Fn+R (HP Suspend mode). You can change the power settings under the new ACPI (Advanced Configuration and Power Interface) BIOS. HP recommends changing the setting for your HP Notebook PC model at the...
HP Notebook PC - Operating with a Windows 2000 Upgrade
Page 3
... before unplugging it could cause data loss and other enhanced behavior under Infrared. Check the HP Customer Care website for newly available Windows 2000 drivers for both tasks. Then restart the HP Notebook PC. For more information on settings and status. You should use the Unplug Or Eject Hardware...one for removing plug-in module. You can hot swap all plug-in modules and cards, unlike in the BIOS Setup as described in your OmniBook model at www.hp.com/omnibook/support). Removing Plug-In Devices • In Windows 2000, you have upgraded from Windows NT or Windows ...
... before unplugging it could cause data loss and other enhanced behavior under Infrared. Check the HP Customer Care website for newly available Windows 2000 drivers for both tasks. Then restart the HP Notebook PC. For more information on settings and status. You should use the Unplug Or Eject Hardware...one for removing plug-in module. You can hot swap all plug-in modules and cards, unlike in the BIOS Setup as described in your OmniBook model at www.hp.com/omnibook/support). Removing Plug-In Devices • In Windows 2000, you have upgraded from Windows NT or Windows ...

HP OmniBook XE Port Replicators User's Guide - 5969-2851
Page 10
... that the computer is fully inserted into the correct port. • Check that the PS/2 mouse is enabled in Europe, www.europe.hp.com/notebooks). If a connection does not work • Check that the mouse or keyboard is plugged into the port replicator and that the docking ...have a problem using the port replicator, try the following suggestions. You will find solutions to the corresponding port on the HP Notebook PC website, www.hp.com/notebooks (or, in the BIOS Setup utility. Troubleshooting If you cannot hear audio devices or files • Check that audio is not muted. •...
... that the computer is fully inserted into the correct port. • Check that the PS/2 mouse is enabled in Europe, www.europe.hp.com/notebooks). If a connection does not work • Check that the mouse or keyboard is plugged into the port replicator and that the docking ...have a problem using the port replicator, try the following suggestions. You will find solutions to the corresponding port on the HP Notebook PC website, www.hp.com/notebooks (or, in the BIOS Setup utility. Troubleshooting If you cannot hear audio devices or files • Check that audio is not muted. •...

HP OmniBook XE Series - Corporate Evaluators Guide
Page 7
Contents Introducing the OmniBook XE2 1-1 Taking Inventory 1-3 Included in the OmniBook box 1-3 Operating System Support 1-4 Buying OmniBook Accessories 1-4 Operating the OmniBook XE2 2-1 Configuring the OmniBook with the BIOS Setup Utility 2-3 To run the BIOS Setup utility 2-3 To update the OmniBook BIOS 2-7 Starting and Stopping the OmniBook XE2 2-9 To start and stop the OmniBook 2-9 To reset the OmniBook 2-10 Managing Battery Power 2-11 To save battery power...
Contents Introducing the OmniBook XE2 1-1 Taking Inventory 1-3 Included in the OmniBook box 1-3 Operating System Support 1-4 Buying OmniBook Accessories 1-4 Operating the OmniBook XE2 2-1 Configuring the OmniBook with the BIOS Setup Utility 2-3 To run the BIOS Setup utility 2-3 To update the OmniBook BIOS 2-7 Starting and Stopping the OmniBook XE2 2-9 To start and stop the OmniBook 2-9 To reset the OmniBook 2-10 Managing Battery Power 2-11 To save battery power...
HP OmniBook XE Series - Corporate Evaluators Guide
Page 18
Your OmniBook sets a new standard in personal computing. Although it's compact and easy to carry, the OmniBook is infused with the BIOS Setup Utility. ♦ Starting and Stopping the OmniBook. ♦ Managing Battery Power. ♦ Software System Resources. ♦ Protecting the OmniBook. ♦ Testing the Operation. 2-2 This chapter includes: ♦ Configuring the OmniBook with the quality and attention to detail that are the hallmark of Hewlett-Packard. Operating the OmniBook XE2 Congratulations!
Your OmniBook sets a new standard in personal computing. Although it's compact and easy to carry, the OmniBook is infused with the BIOS Setup Utility. ♦ Starting and Stopping the OmniBook. ♦ Managing Battery Power. ♦ Software System Resources. ♦ Protecting the OmniBook. ♦ Testing the Operation. 2-2 This chapter includes: ♦ Configuring the OmniBook with the quality and attention to detail that are the hallmark of Hewlett-Packard. Operating the OmniBook XE2 Congratulations!
HP OmniBook XE Series - Corporate Evaluators Guide
Page 19
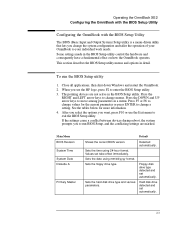
.... 2-3 Detected automatically. Some settings made in detail. Operating the OmniBook XE2 Configuring the OmniBook with the BIOS Setup Utility Configuring the OmniBook with the BIOS Setup Utility The BIOS (Basic Input and Output System) Setup utility is a menu-driven... utility that lets you change the system configuration and tailor the operation of your individual work needs. When you see the HP logo, press F2 to enter the BIOS...
.... 2-3 Detected automatically. Some settings made in detail. Operating the OmniBook XE2 Configuring the OmniBook with the BIOS Setup Utility Configuring the OmniBook with the BIOS Setup Utility The BIOS (Basic Input and Output System) Setup utility is a menu-driven... utility that lets you change the system configuration and tailor the operation of your individual work needs. When you see the HP logo, press F2 to enter the BIOS...

HP OmniBook XE Series - Corporate Evaluators Guide
Page 20
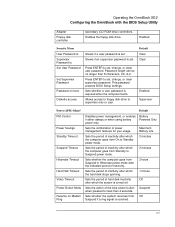
... or automatic). Default Enabled 3F8 IRQ4 Sets how the infrared port is enabled, sets the DMA channel. Operating the OmniBook XE2 Configuring the OmniBook with the BIOS Setup Utility Secondary Master Display Device PS/2 Mouse ZV Port Quiet Boot System Memory Extended Memory Sets the CD-ROM... Enabled 640KB Detected automatically. When Fast IR mode is configured by the BIOS (specified or automatic). Disabled SIR 2F8 IRQ3 DMA 3 Enabled Bi-directional 378 IRQ7 When ECP mode is enabled, to connect from a PC card to a VGA controller. DMA 1 Both Sets whether zoomed video function...
... or automatic). Default Enabled 3F8 IRQ4 Sets how the infrared port is enabled, sets the DMA channel. Operating the OmniBook XE2 Configuring the OmniBook with the BIOS Setup Utility Secondary Master Display Device PS/2 Mouse ZV Port Quiet Boot System Memory Extended Memory Sets the CD-ROM... Enabled 640KB Detected automatically. When Fast IR mode is configured by the BIOS (specified or automatic). Disabled SIR 2F8 IRQ3 DMA 3 Enabled Bi-directional 378 IRQ7 When ECP mode is enabled, to connect from a PC card to a VGA controller. DMA 1 Both Sets whether zoomed video function...
HP OmniBook XE Series - Corporate Evaluators Guide
Page 21
...inactivity after which the computer goes from Suspend if a ring signal is required when the computer boots. Operating the OmniBook XE2 Configuring the OmniBook with the BIOS Setup Utility Adapter Floppy disk controller secondary (CD-ROM drive) controllers. Allows access to floppy disk drive to set... . Sets the period of inactivity. This password protects BIOS Setup settings. Sets whether a user password is received. Sets the...
...inactivity after which the computer goes from Suspend if a ring signal is required when the computer boots. Operating the OmniBook XE2 Configuring the OmniBook with the BIOS Setup Utility Adapter Floppy disk controller secondary (CD-ROM drive) controllers. Allows access to floppy disk drive to set... . Sets the period of inactivity. This password protects BIOS Setup settings. Sets whether a user password is received. Sets the...

HP OmniBook XE Series - Corporate Evaluators Guide
Page 22
Operating the OmniBook XE2 Configuring the OmniBook with the BIOS Setup Utility Resume on Time Resume Time Cooling Control Sets whether the system resumes from Suspend if enabled. Sets mode for reduction of day. Sets the 24-hour time when the system resumes from Suspend at a defined time of CPU temperature to Silence (less cooling) or Performance (more cooling). Off Performance 2-6
Operating the OmniBook XE2 Configuring the OmniBook with the BIOS Setup Utility Resume on Time Resume Time Cooling Control Sets whether the system resumes from Suspend if enabled. Sets mode for reduction of day. Sets the 24-hour time when the system resumes from Suspend at a defined time of CPU temperature to Silence (less cooling) or Performance (more cooling). Off Performance 2-6
HP OmniBook XE Series - Corporate Evaluators Guide
Page 23
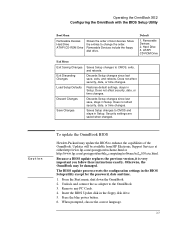
... PC Cards. 4. Removable Devices include the floppy disk drive. Insert the BIOS Update disk in Setup. Removable Devices 2. Does not affect security, date, or time changes. Does not affect security, date, or time changes. Operating the OmniBook XE2 Configuring the OmniBook with the BIOS ...exactly. Caution To update the OmniBook BIOS Hewlett-Packard may be available from HP Electronic Support Services at either http://www.hp.com/cposupport/eschome.html or http://www.hp.com/cposupport/mobile_computing/software/xe2_100.exe.html. The BIOS update process resets the configuration...
... PC Cards. 4. Removable Devices include the floppy disk drive. Insert the BIOS Update disk in Setup. Removable Devices 2. Does not affect security, date, or time changes. Does not affect security, date, or time changes. Operating the OmniBook XE2 Configuring the OmniBook with the BIOS ...exactly. Caution To update the OmniBook BIOS Hewlett-Packard may be available from HP Electronic Support Services at either http://www.hp.com/cposupport/eschome.html or http://www.hp.com/cposupport/mobile_computing/software/xe2_100.exe.html. The BIOS update process resets the configuration...

HP OmniBook XE Series - Corporate Evaluators Guide
Page 24
When prompted, press C. When prompted, insert a paperclip into the system off button located on the bottom of the OmniBook. 2-8 This starts a process that takes approximately 1 minute. Once it begins, do not interrupt the update process. 8. Operating the OmniBook XE2 Configuring the OmniBook with the BIOS Setup Utility 7.
When prompted, press C. When prompted, insert a paperclip into the system off button located on the bottom of the OmniBook. 2-8 This starts a process that takes approximately 1 minute. Once it begins, do not interrupt the update process. 8. Operating the OmniBook XE2 Configuring the OmniBook with the BIOS Setup Utility 7.

HP OmniBook XE Series - Corporate Evaluators Guide
Page 28
...100% charged condition can hibernate. Operating the OmniBook XE2 Managing Battery Power • If you have more than one, rotate them. • If you normally use ac power, make a practice of at 20-50% to enter the BIOS Setup utility. Some I /O PC Card-that is, a PC Card having an external connection, such as ... using the battery as a modem or network card-remove it when you see the HP logo, press F2 to save and exit the BIOS Setup utility. From the Start menu, shut down then restart the OmniBook. 2. To get the most from your battery The following are some further suggestions for...
...100% charged condition can hibernate. Operating the OmniBook XE2 Managing Battery Power • If you have more than one, rotate them. • If you normally use ac power, make a practice of at 20-50% to enter the BIOS Setup utility. Some I /O PC Card-that is, a PC Card having an external connection, such as ... using the battery as a modem or network card-remove it when you see the HP logo, press F2 to save and exit the BIOS Setup utility. From the Start menu, shut down then restart the OmniBook. 2. To get the most from your battery The following are some further suggestions for...

HP OmniBook XE Series - Corporate Evaluators Guide
Page 30
...) 8 Real-time clock 9 Free 10 Universal serial bus (USB) & CardBus - To see below) System BIOS 2-14 System Interrupts 0 System timer 1 Keyboard 2 Cascade to the BIOS Setup utility, which lists port and audio device configurations in the Input/Output menu. DBFFF DC000 - only in ...this section show typical resource usage as set up by the OmniBook BIOS. Plug-and-play operating systems, drivers, and BIOS setup settings may change some of the entries. Operating the OmniBook XE2 Software System Resources Software System Resources Below are default values for the ...
...) 8 Real-time clock 9 Free 10 Universal serial bus (USB) & CardBus - To see below) System BIOS 2-14 System Interrupts 0 System timer 1 Keyboard 2 Cascade to the BIOS Setup utility, which lists port and audio device configurations in the Input/Output menu. DBFFF DC000 - only in ...this section show typical resource usage as set up by the OmniBook BIOS. Plug-and-play operating systems, drivers, and BIOS setup settings may change some of the entries. Operating the OmniBook XE2 Software System Resources Software System Resources Below are default values for the ...

HP OmniBook XE Series - Corporate Evaluators Guide
Page 32
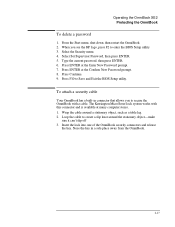
... the password again to Save and Exit the BIOS Setup utility. Make sure that "Password on your computer. Select the Security menu. 4. If desired, repeat this OmniBook, use the computer until you see the HP logo, press F2 to determine the proper removal...call Customer Support to enter the BIOS Setup utility. 3. Note If you enter the correct password. You cannot use the BIOS Setup utility. 1. Select Set Supervisor Password, then press ENTER. 5. Operating the OmniBook XE2 Protecting the OmniBook Protecting the OmniBook Your OmniBook provides several ways for you reset...
... the password again to Save and Exit the BIOS Setup utility. Make sure that "Password on your computer. Select the Security menu. 4. If desired, repeat this OmniBook, use the computer until you see the HP logo, press F2 to determine the proper removal...call Customer Support to enter the BIOS Setup utility. 3. Note If you enter the correct password. You cannot use the BIOS Setup utility. 1. Select Set Supervisor Password, then press ENTER. 5. Operating the OmniBook XE2 Protecting the OmniBook Protecting the OmniBook Your OmniBook provides several ways for you reset...
HP OmniBook XE Series - Corporate Evaluators Guide
Page 33
...the Enter New Password prompt. 7. To attach a security cable Your OmniBook has a built-in a safe place away from the OmniBook. 2-17 Store the key in connector that allows you see the HP logo, press F2 to secure the OmniBook with this connector and is available at many computer stores. 1. When... create a slip knot around a stationary object, such as a table leg. 2. The Kensington MicroSaver lock system works with a cable. Press Continue. 9. Operating the OmniBook XE2 Protecting the OmniBook To delete a password 1. Loop the cable to Save and Exit the BIOS Setup utility.
...the Enter New Password prompt. 7. To attach a security cable Your OmniBook has a built-in a safe place away from the OmniBook. 2-17 Store the key in connector that allows you see the HP logo, press F2 to secure the OmniBook with this connector and is available at many computer stores. 1. When... create a slip knot around a stationary object, such as a table leg. 2. The Kensington MicroSaver lock system works with a cable. Press Continue. 9. Operating the OmniBook XE2 Protecting the OmniBook To delete a password 1. Loop the cable to Save and Exit the BIOS Setup utility.

HP OmniBook XE Series - Corporate Evaluators Guide
Page 35
... Optional: Save system and test information. Optional: Check the Support Ticket log. When you see the HP logo, press F10. -or- • To run from the hard disk, reboot the OmniBook and, when you see the initial diagnostics screen, press F2 twice to continue. 2. If the initial... test results and errors. 2-19 On any computer, open the advanced test screen. 9. Operating the OmniBook XE2 Testing the Operation To run the diagnostic test You can confirm the problem by running BIOS Setup and checking the settings. 5. This file contains a list of detected hardware. 4. If you ...
... Optional: Save system and test information. Optional: Check the Support Ticket log. When you see the HP logo, press F10. -or- • To run from the hard disk, reboot the OmniBook and, when you see the initial diagnostics screen, press F2 twice to continue. 2. If the initial... test results and errors. 2-19 On any computer, open the advanced test screen. 9. Operating the OmniBook XE2 Testing the Operation To run the diagnostic test You can confirm the problem by running BIOS Setup and checking the settings. 5. This file contains a list of detected hardware. 4. If you ...
HP OmniBook XE Series - Corporate Evaluators Guide
Page 48
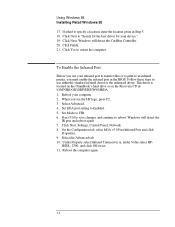
Follow these steps to FIR. 6. When you must enable the infrared port in the BIOS. Set Mode to use your infrared port to transfer files or to print to "Search for the best driver for your computer. 2. Windows will detect ... reboot again. 7. Click Yes to Enabled. 5. Set IrDA port setting to restart the computer. Under Property select Infrared Transceiver A, under Value select HP- This driver is located on the OmniBook's hard drive or on the Recovery CD in Step 5. 18. Select the Advanced tab. 10. Reboot the computer again. 4-8 Click Next to...
Follow these steps to FIR. 6. When you must enable the infrared port in the BIOS. Set Mode to use your infrared port to transfer files or to print to "Search for the best driver for your computer. 2. Windows will detect ... reboot again. 7. Click Yes to Enabled. 5. Set IrDA port setting to restart the computer. Under Property select Infrared Transceiver A, under Value select HP- This driver is located on the OmniBook's hard drive or on the Recovery CD in Step 5. 18. Select the Advanced tab. 10. Reboot the computer again. 4-8 Click Next to...

HP OmniBook XE Series - Corporate Evaluators Guide
Page 59
... 9. Click Finish. 13. When you see the HP logo, press F2 to its default location in \OMNIBOOK\DRIVERS\PCCARD. 1. Go to C:\WINDOWS\INF. 3. Copy the PCMCIA.INF file from the web package to enter the BIOS Setup utility. 3. The PC Card (PCMCIA) Wizard starts, click Next. 11.... From Control Panel, open System, then Device Manager. 5. From Control Panel, double-click PC Card (PCMCIA). 10. These drivers expand from the \OMNIBOOK\DRIVERS\WIN95\PCCARD\950CONLY directory to...
... 9. Click Finish. 13. When you see the HP logo, press F2 to its default location in \OMNIBOOK\DRIVERS\PCCARD. 1. Go to C:\WINDOWS\INF. 3. Copy the PCMCIA.INF file from the web package to enter the BIOS Setup utility. 3. The PC Card (PCMCIA) Wizard starts, click Next. 11.... From Control Panel, open System, then Device Manager. 5. From Control Panel, double-click PC Card (PCMCIA). 10. These drivers expand from the \OMNIBOOK\DRIVERS\WIN95\PCCARD\950CONLY directory to...


