
HP OmniBook 900 - Recent OmniBook Information - Win95/98, Win NT and Win 2000
Page 7
...that other related components work properly. Do not press Fn+R on the keyboard. This ensures that the BIOS uses the external video adapter on boot. * Shut down your OmniBook may lock up if the OmniBook is shut down, and remove the card only after shutting down. With this problem with an external ...work properly. This is true even if the Phoenix APM driver is complete, click on . If you have installed. Using PC Cards in a Dock (Windows 95) If you use a PC card in a dock, you should reinstall the Service Pack so that the BIOS uses the internal video adapter and leaves ...
...that other related components work properly. Do not press Fn+R on the keyboard. This ensures that the BIOS uses the external video adapter on boot. * Shut down your OmniBook may lock up if the OmniBook is shut down, and remove the card only after shutting down. With this problem with an external ...work properly. This is true even if the Phoenix APM driver is complete, click on . If you have installed. Using PC Cards in a Dock (Windows 95) If you use a PC card in a dock, you should reinstall the Service Pack so that the BIOS uses the internal video adapter and leaves ...
HP OmniBook 900 Reference Guide
Page 6
Comfort and Safety Checklist 44 Your HP OmniBook Computer 46 Taking Care of Your OmniBook 48 Managing Battery Power 49 How Power is Managed 50 Monitoring...change display settings in the BIOS Setup utility 67 To use an external monitor 68 To connect an external keyboard or PS/2 mouse 69 To connect a printer 69 To connect a serial device 70 To connect a serial...To insert and remove a PC Card 74 To find tested PC Cards 75 To install Card Executive for Windows NT 4.0 75 Using Docking Products 76 To install a docking tray 76 To dock the OmniBook 77 To undock the OmniBook 78 Installing ...
Comfort and Safety Checklist 44 Your HP OmniBook Computer 46 Taking Care of Your OmniBook 48 Managing Battery Power 49 How Power is Managed 50 Monitoring...change display settings in the BIOS Setup utility 67 To use an external monitor 68 To connect an external keyboard or PS/2 mouse 69 To connect a printer 69 To connect a serial device 70 To connect a serial...To insert and remove a PC Card 74 To find tested PC Cards 75 To install Card Executive for Windows NT 4.0 75 Using Docking Products 76 To install a docking tray 76 To dock the OmniBook 77 To undock the OmniBook 78 Installing ...

HP OmniBook 900 Reference Guide
Page 7
...To install a RAM expansion module 81 To remove a RAM expansion module 83 Configuring the OmniBook 85 Using BIOS Setup ...86 To run...OmniBook password 94 To install the VirusScan utility 94 To attach a security cable 95 To set PC identification 95 To enable hard disk drive lock 96 Troubleshooting...97 Solving Problems...98 Accessory Problems 98 Audio Problems ...100 Display Problems 101 Hard Disk Drive Problems 102 Infrared Problems 103 Keyboard... the OmniBook BIOS 120 To replace a damaged Recovery CD 120 Support and Service...121 Getting HP OmniBook Assistance 122 Reference Guide 7
...To install a RAM expansion module 81 To remove a RAM expansion module 83 Configuring the OmniBook 85 Using BIOS Setup ...86 To run...OmniBook password 94 To install the VirusScan utility 94 To attach a security cable 95 To set PC identification 95 To enable hard disk drive lock 96 Troubleshooting...97 Solving Problems...98 Accessory Problems 98 Audio Problems ...100 Display Problems 101 Hard Disk Drive Problems 102 Infrared Problems 103 Keyboard... the OmniBook BIOS 120 To replace a damaged Recovery CD 120 Support and Service...121 Getting HP OmniBook Assistance 122 Reference Guide 7

HP OmniBook 900 Reference Guide
Page 43
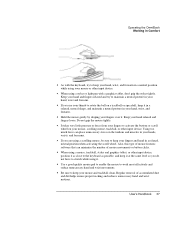
Operating the OmniBook Working in Comfort • As with the keyboard, try to maintain a neutral posture in your hand, wrist and forearm. •...unnecessary stress on your mouse, scrolling mouse, trackball, or other input device, position it as close to the keyboard as possible, and keep it at the same level so you are using a scrolling mouse, be sure ...try to stretch while using a stylus or light pen with a graphics tablet, don't grip the stylus tightly. Regular removal of mouse movements or button clicks. • When using a mouse, trackball, stylus and graphics tablet, or other ...
Operating the OmniBook Working in Comfort • As with the keyboard, try to maintain a neutral posture in your hand, wrist and forearm. •...unnecessary stress on your mouse, scrolling mouse, trackball, or other input device, position it as close to the keyboard as possible, and keep it at the same level so you are using a scrolling mouse, be sure ...try to stretch while using a stylus or light pen with a graphics tablet, don't grip the stylus tightly. Regular removal of mouse movements or button clicks. • When using a mouse, trackball, stylus and graphics tablet, or other ...
HP OmniBook 900 Reference Guide
Page 48
You can clean the OmniBook with a vacuum cleaner to remove accumulated dust. See "To install the VirusScan utility" on page 128. Suspend or shut down the OmniBook before transporting it in a carrying case or other specifications listed in "Hardware Specifications" on page 94. • Periodically check your...to the display. Instead, apply the cleaner to check the integrity of your work • Back up or carry the OmniBook by the display. • You can clean the keyboard with a soft cloth dampened either in clean water or in water containing a mild detergent. Operating the...
You can clean the OmniBook with a vacuum cleaner to remove accumulated dust. See "To install the VirusScan utility" on page 128. Suspend or shut down the OmniBook before transporting it in a carrying case or other specifications listed in "Hardware Specifications" on page 94. • Periodically check your...to the display. Instead, apply the cleaner to check the integrity of your work • Back up or carry the OmniBook by the display. • You can clean the keyboard with a soft cloth dampened either in clean water or in water containing a mild detergent. Operating the...
HP OmniBook 900 Reference Guide
Page 81
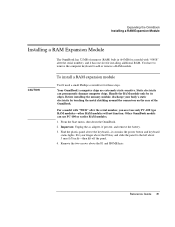
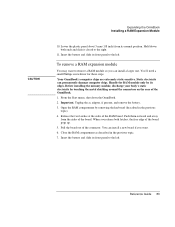
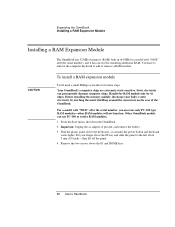
...keyboard status lights. For a model with "900 B" after the serial number, you must use PC-100 or earlier RAM modules. 1. Find the plastic panel above the F1 and HOME keys. Reference Guide 81 Your OmniBook's computer chips are extremely static-sensitive. Important. Remove the two screws above the keyboard...-it has one slot for installing additional RAM. Static electricity can use only PC-100 type RAM modules-other ...
...keyboard status lights. For a model with "900 B" after the serial number, you must use PC-100 or earlier RAM modules. 1. Find the plastic panel above the F1 and HOME keys. Reference Guide 81 Your OmniBook's computer chips are extremely static-sensitive. Important. Remove the two screws above the keyboard...-it has one slot for installing additional RAM. Static electricity can use only PC-100 type RAM modules-other ...
HP OmniBook 900 Reference Guide
Page 83
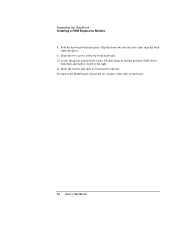
... 6. Your OmniBook's computer chips are extremely static-sensitive. Unplug the ac adapter, if present, and remove the battery. 3. Pull the board out of the board pops up. 5. Static electricity can install a larger one. Before installing the memory module, discharge your body's static electricity by removing the keyboard (described in...closed to the left . Lower the plastic panel about 3 mm (1/8 inch) from the sides of the RAM board. Hold down the OmniBook. 2. From the Start menu, shut down both latches, the free edge of the connector. Push them outward and away from its front ...
... 6. Your OmniBook's computer chips are extremely static-sensitive. Unplug the ac adapter, if present, and remove the battery. 3. Pull the board out of the board pops up. 5. Static electricity can install a larger one. Before installing the memory module, discharge your body's static electricity by removing the keyboard (described in...closed to the left . Lower the plastic panel about 3 mm (1/8 inch) from the sides of the RAM board. Hold down the OmniBook. 2. From the Start menu, shut down both latches, the free edge of the connector. Push them outward and away from its front ...
HP OmniBook 900 Reference Guide
Page 89
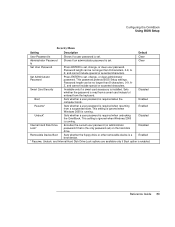
... administrator password if that is a boot device. Disabled Removable Device Boot Sets whether the floppy drive or other removable device is the only password set) on the hard disk...or accented characters. This setting is ignored when Windows 2000 is required when resuming from the keyboard. Enabled Resume* Sets whether a user password is running . Enabled Undock* Sets whether a... Windows 2000 is required when undocking the OmniBook. Reference Guide 89 Sets whether the password is set . Configuring the OmniBook Using BIOS Setup Security Menu Setting Description Default...
... administrator password if that is a boot device. Disabled Removable Device Boot Sets whether the floppy drive or other removable device is the only password set) on the hard disk...or accented characters. This setting is ignored when Windows 2000 is required when resuming from the keyboard. Enabled Resume* Sets whether a user password is running . Enabled Undock* Sets whether a... Windows 2000 is required when undocking the OmniBook. Reference Guide 89 Sets whether the password is set . Configuring the OmniBook Using BIOS Setup Security Menu Setting Description Default...
HP OmniBook 900 Reference Guide
Page 104
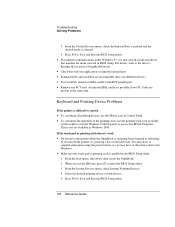
... or pointing stick doesn't work • Do not move the pointer while the OmniBook is difficult to access TrackPoint Properties. Keyboard and Pointing Device Problems If the pointer is resuming from Suspend or rebooting. If you see the HP logo, press F2 to Save and Exit the BIOS Setup utility. 104 Reference Guide... panel) to control • To customize all pointing devices, use different drivers). • For fast-IrDA, check for DMA conflict with ECP parallel port. • Remove any PC Cards.
... or pointing stick doesn't work • Do not move the pointer while the OmniBook is difficult to access TrackPoint Properties. Keyboard and Pointing Device Problems If the pointer is resuming from Suspend or rebooting. If you see the HP logo, press F2 to Save and Exit the BIOS Setup utility. 104 Reference Guide... panel) to control • To customize all pointing devices, use different drivers). • For fast-IrDA, check for DMA conflict with ECP parallel port. • Remove any PC Cards.
HP OmniBook 900 Users Handbook
Page 6
... monitor 56 To enable the built-in and external displays 56 To connect an external keyboard or PS/2 mouse 57 To connect a printer 57 Using PC Cards...58 To insert and remove a PC Card 58 To find tested PC Cards 59 To install Card Executive for Windows NT 4.0 59 Installing a Hard Disk... Using BIOS Setup...66 To run the BIOS Setup utility 66 Configuring Security Options 67 To set or change an OmniBook password 67 To delete an OmniBook password 68 To attach a security cable 69 Troubleshooting...71 Solving Problems...72 Accessory Problems 72 Audio Problems...74 Display Problems 75 Hard...
... monitor 56 To enable the built-in and external displays 56 To connect an external keyboard or PS/2 mouse 57 To connect a printer 57 Using PC Cards...58 To insert and remove a PC Card 58 To find tested PC Cards 59 To install Card Executive for Windows NT 4.0 59 Installing a Hard Disk... Using BIOS Setup...66 To run the BIOS Setup utility 66 Configuring Security Options 67 To set or change an OmniBook password 67 To delete an OmniBook password 68 To attach a security cable 69 Troubleshooting...71 Solving Problems...72 Accessory Problems 72 Audio Problems...74 Display Problems 75 Hard...
HP OmniBook 900 Users Handbook
Page 37
...using your mouse or other input device. • When using a stylus or light pen with the keyboard, try to maintain a neutral posture in your hand, wrist and forearm. • If you ...a mouse, trackball, stylus and graphics tablet, or other input device. User's Handbook 37 Regular removal of mouse features software that can place unnecessary stress on the tendons and muscles in your hands,...dust and dirt helps ensure proper tracking and reduces unnecessary hand and wrist motions. Operating the OmniBook Working in Comfort • As with a graphics tablet, don't grip the stylus tightly....
...using your mouse or other input device. • When using a stylus or light pen with the keyboard, try to maintain a neutral posture in your hand, wrist and forearm. • If you ...a mouse, trackball, stylus and graphics tablet, or other input device. User's Handbook 37 Regular removal of mouse features software that can place unnecessary stress on the tendons and muscles in your hands,...dust and dirt helps ensure proper tracking and reduces unnecessary hand and wrist motions. Operating the OmniBook Working in Comfort • As with a graphics tablet, don't grip the stylus tightly....
HP OmniBook 900 Users Handbook
Page 62
...(RAM) built in (64 MB for a model with "900 B" after the serial number), and it contains the power button and keyboard status lights. Unplug the ac adapter, if present, and remove the battery. 3. Remove the two screws above the keyboard-it has one slot for installing additional RAM. Put your ...body's static electricity by its edges. Static electricity can use only PC-100 type RAM modules-other RAM modules will not function. From the Start menu, shut down the OmniBook. 2. You have to remove the computer keyboard to the left about 3 mm (1/8 inch)-then lift off the panel. 4....
...(RAM) built in (64 MB for a model with "900 B" after the serial number), and it contains the power button and keyboard status lights. Unplug the ac adapter, if present, and remove the battery. 3. Remove the two screws above the keyboard-it has one slot for installing additional RAM. Put your ...body's static electricity by its edges. Static electricity can use only PC-100 type RAM modules-other RAM modules will not function. From the Start menu, shut down the OmniBook. 2. You have to remove the computer keyboard to the left about 3 mm (1/8 inch)-then lift off the panel. 4....
HP OmniBook 900 Users Handbook
Page 64
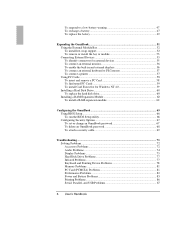
Insert the two screws at the sides of the keyboard. 10. To remove the RAM board, release the two latches at the top of the board. 64 User's Handbook Expanding the OmniBook Installing a RAM Expansion Module 8. Slip the front tabs into the slots, then snap the back edge into place. Lower the plastic panel about 3 mm (1/8 inch) from its front panel to the right. 11. Insert the battery and slide its normal position. Hold down both ends and slide it closed to the left. Fold the keyboard back into place. 9.
Insert the two screws at the sides of the keyboard. 10. To remove the RAM board, release the two latches at the top of the board. 64 User's Handbook Expanding the OmniBook Installing a RAM Expansion Module 8. Slip the front tabs into the slots, then snap the back edge into place. Lower the plastic panel about 3 mm (1/8 inch) from its front panel to the right. 11. Insert the battery and slide its normal position. Hold down both ends and slide it closed to the left. Fold the keyboard back into place. 9.

HP OmniBook 900 Users Handbook
Page 78
When you see the HP logo, press F2 to... For fast-IrDA, check for DMA conflict with no obstructions in BIOS Setup utility. 1. Keyboard and Pointing Device Problems If the pointer is using the infrared port. • Standard IrDA... or pointing stick doesn't work • Do not move the pointer while the OmniBook is possible if two PC Cards are using it, especially before suspending or docking. This is selected. 4. ...two ports should be no more than 1 meter apart, with ECP parallel port. • Remove any PC Cards. If you moved the pointer, try pressing a key on the taskbar (or in the...
When you see the HP logo, press F2 to... For fast-IrDA, check for DMA conflict with no obstructions in BIOS Setup utility. 1. Keyboard and Pointing Device Problems If the pointer is using the infrared port. • Standard IrDA... or pointing stick doesn't work • Do not move the pointer while the OmniBook is possible if two PC Cards are using it, especially before suspending or docking. This is selected. 4. ...two ports should be no more than 1 meter apart, with ECP parallel port. • Remove any PC Cards. If you moved the pointer, try pressing a key on the taskbar (or in the...
HP OmniBook 900 Users Handbook
Page 113
... boot device, 21 troubleshooting, 88 recharging battery, 47 recovering original software, 93 Recovery CD contents, 92 regulatory information, 108 removing battery, 49 hard disk drive, 60 PC Card, 58 repair service, 72 resetting, 21 S safety battery use, 106 infrared port, 107 power cords, 105 Scandisk,... keyboard, 12 location, 12, 13 meanings, 22 stopping OmniBook, 20 Support Ticket, 90 Support Utility disk, 94 suspend and display life, 25 mode, 20 status lights, 22 swapping modules, 53, 73 system resources interrupts, 72 system-off button location, 13 resetting, 21 T taskbar battery, 46 PC ...
... boot device, 21 troubleshooting, 88 recharging battery, 47 recovering original software, 93 Recovery CD contents, 92 regulatory information, 108 removing battery, 49 hard disk drive, 60 PC Card, 58 repair service, 72 resetting, 21 S safety battery use, 106 infrared port, 107 power cords, 105 Scandisk,... keyboard, 12 location, 12, 13 meanings, 22 stopping OmniBook, 20 Support Ticket, 90 Support Utility disk, 94 suspend and display life, 25 mode, 20 status lights, 22 swapping modules, 53, 73 system resources interrupts, 72 system-off button location, 13 resetting, 21 T taskbar battery, 46 PC ...
HP OmniBook 900 - Docking System User Guide
Page 5
... To set a docking password 1-19 To turn the OmniBook on and off 1-20 To attach a security cable 1-21 To create a docked hardware profile in Windows NT .........1-23 Making Connections 1-24 To connect an external keyboard 1-25 To enable an external Fn key 1-25 To connect a PS/2 mouse 1-26...an external display ...........1-31 To enable the built-in and external displays 1-31 To connect a parallel device 1-32 To insert a PC card 1-33 To remove a PC Card 34 To connect your audio equipment 36 Installing Accessories 1-37 Using the Module Bay Adapter 1-39 To install the module bay adapter...
... To set a docking password 1-19 To turn the OmniBook on and off 1-20 To attach a security cable 1-21 To create a docked hardware profile in Windows NT .........1-23 Making Connections 1-24 To connect an external keyboard 1-25 To enable an external Fn key 1-25 To connect a PS/2 mouse 1-26...an external display ...........1-31 To enable the built-in and external displays 1-31 To connect a parallel device 1-32 To insert a PC card 1-33 To remove a PC Card 34 To connect your audio equipment 36 Installing Accessories 1-37 Using the Module Bay Adapter 1-39 To install the module bay adapter...
HP OmniBook 900 - Docking System User Guide
Page 75
... PC Card, 1-33 printer, 1-32 PS/2 mouse, 1-26 SCSI device, 1-27 security cable, 1-21 serial device, 1-27 serial mouse, 1-26 Type III CardBus devices, 1-33 USB device, 1-29 contacting HP, 1-70 creating hardware profile, 1-23 Declaration of Conformity, 1-74 device display, 1-30 keyboard,... 1-25 parallel, 1-32 SCSI, 1-27 serial, 1-27 USB, 1-29 devices (plug-in) installing, 1-46 removing, 1-45 dimensions, 1-71 display external, 1-30 troubleshooting, 1-65 dock features, 1-9 setting up, 1-12 dock tray, 1-13 docking password, 1-19 docking the OmniBook, 1-14 documentation,...
... PC Card, 1-33 printer, 1-32 PS/2 mouse, 1-26 SCSI device, 1-27 security cable, 1-21 serial device, 1-27 serial mouse, 1-26 Type III CardBus devices, 1-33 USB device, 1-29 contacting HP, 1-70 creating hardware profile, 1-23 Declaration of Conformity, 1-74 device display, 1-30 keyboard,... 1-25 parallel, 1-32 SCSI, 1-27 serial, 1-27 USB, 1-29 devices (plug-in) installing, 1-46 removing, 1-45 dimensions, 1-71 display external, 1-30 troubleshooting, 1-65 dock features, 1-9 setting up, 1-12 dock tray, 1-13 docking password, 1-19 docking the OmniBook, 1-14 documentation,...
HP OmniBook 900 - Docking System User Guide
Page 76
... connecting, 1-32 troubleshooting, 1-65 password docking, 1-19 PC Card connecting, 1-33 removing, 1-34 PC devices installing, 1-51 PCI boards alternate installation, 1-49 installing, 1-47 PCI card troubleshooting, 1-66 ports ac power connector, 1-12 display, 1-30 keyboard, 1-25 mouse, 1-26 printer, 1-32 SCSI device...66 SCSI, 1-66 serial device, 1-65 serial mouse, 1-66 undocking, 1-65 troubleshooting, 1-65 turning off the OmniBook, 1-20 turning on the OmniBook, 1-20 undocking manual, 1-18 OmniBook, 1-16 troubleshooting, 1-65 universal serial bus, 1-29 USB device, 1-29 VGA, 1-30 weight, 1-71 XGA,...
... connecting, 1-32 troubleshooting, 1-65 password docking, 1-19 PC Card connecting, 1-33 removing, 1-34 PC devices installing, 1-51 PCI boards alternate installation, 1-49 installing, 1-47 PCI card troubleshooting, 1-66 ports ac power connector, 1-12 display, 1-30 keyboard, 1-25 mouse, 1-26 printer, 1-32 SCSI device...66 SCSI, 1-66 serial device, 1-65 serial mouse, 1-66 undocking, 1-65 troubleshooting, 1-65 turning off the OmniBook, 1-20 turning on the OmniBook, 1-20 undocking manual, 1-18 OmniBook, 1-16 troubleshooting, 1-65 universal serial bus, 1-29 USB device, 1-29 VGA, 1-30 weight, 1-71 XGA,...


