Getting Started
Page 18
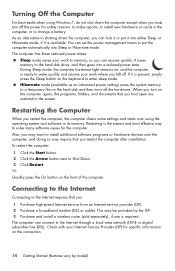
...) or digital subscriber line (DSL). Turning Off the Computer For best results when using the operating system and software in the computer, or to the screen. Restarting is available. If it is the easiest and most effective way to solve many software issues for safety reasons: to make repairs, to install...
...) or digital subscriber line (DSL). Turning Off the Computer For best results when using the operating system and software in the computer, or to the screen. Restarting is available. If it is the easiest and most effective way to solve many software issues for safety reasons: to make repairs, to install...

Getting Started
Page 35
... environment. Reconnect the power plug to the back of the pins are bent, reconnect the monitor connector cable to the documentation that your monitor.) Screen is blank, and monitor power light is blank. Press the space bar on the computer. Inspect the monitor video connector for bent pins: If... any of the monitor and to make the screen display visible again. Power Symptom Possible solution Error message: Invalid system disk or Non-System disk or Disk error. The computer should start up....
... environment. Reconnect the power plug to the back of the pins are bent, reconnect the monitor connector cable to the documentation that your monitor.) Screen is blank, and monitor power light is blank. Press the space bar on the computer. Inspect the monitor video connector for bent pins: If... any of the monitor and to make the screen display visible again. Power Symptom Possible solution Error message: Invalid system disk or Non-System disk or Disk error. The computer should start up....

Getting Started
Page 39
... the mouse is established, continue with the steps that the receiver did not time out instead, move the mouse and check for response on the screen. 4 After the mouse connection is on (B), and push and hold the Connect button (D) on the underside of the mouse for the keyboard. 5 Skip this step...
... the mouse is established, continue with the steps that the receiver did not time out instead, move the mouse and check for response on the screen. 4 After the mouse connection is on (B), and push and hold the Connect button (D) on the underside of the mouse for the keyboard. 5 Skip this step...

Getting Started
Page 51
... Manager. If prompted, click Yes to allow the program to continue. 2 Under I need help immediately, click Software Program Reinstallation. 3 Click Next at the Welcome screen. 4 Choose the program you want to reinstall software programs that it . To uninstall a program: 1 Close all software programs and folders. 2 Uninstall the damaged ...the Start button, click All Programs, click Recovery Manager, and then click Recovery Manager. 2 Click Software Program Reinstallation. 3 Click Next at the Welcome screen. To reinstall a program using the Recovery Manager program (select models only).
... Manager. If prompted, click Yes to allow the program to continue. 2 Under I need help immediately, click Software Program Reinstallation. 3 Click Next at the Welcome screen. 4 Choose the program you want to reinstall software programs that it . To uninstall a program: 1 Close all software programs and folders. 2 Uninstall the damaged ...the Start button, click All Programs, click Recovery Manager, and then click Recovery Manager. 2 Click Software Program Reinstallation. 3 Click Next at the Welcome screen. To reinstall a program using the Recovery Manager program (select models only).
Getting Started
Page 53
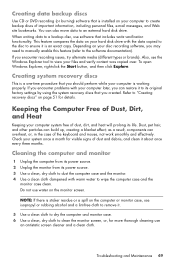
... build up, creating a blanket effect; NOTE: If there is sticker residue or a spill on the computer or monitor case, use an antistatic screen cleaner and a clean cloth. You can restore it is an exact copy. Depending on your disc recording software, you created. Creating system recovery discs...overheat, or, in the case of important information, including personal files, e-mail messages, and Web site bookmarks. Also, use water on the monitor screen. Cleaning the computer and monitor 1 Unplug the computer from its power source. 2 Unplug the monitor from its life. Keeping the Computer Free of...
... build up, creating a blanket effect; NOTE: If there is sticker residue or a spill on the computer or monitor case, use an antistatic screen cleaner and a clean cloth. You can restore it is an exact copy. Depending on your disc recording software, you created. Creating system recovery discs...overheat, or, in the case of important information, including personal files, e-mail messages, and Web site bookmarks. Also, use water on the monitor screen. Cleaning the computer and monitor 1 Unplug the computer from its power source. 2 Unplug the monitor from its life. Keeping the Computer Free of...
Getting Started
Page 57
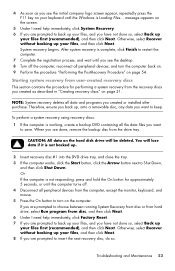
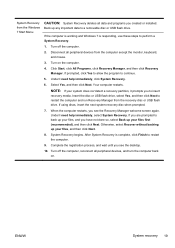
...back up your files first (recommended), and then click Next. You will be deleted. 4 As soon as described in "Creating recovery discs" on the screen. 5 Under I need help immediately, click Factory Reset. 7 If you are prompted to Shut Down, and then click Shut Down. Otherwise, select Recover... not done so, select Back up your files, and you want to back up your keyboard until you see the initial company logo screen appear, repeatedly press the F11 key on page 54. Troubleshooting and Maintenance 53 NOTE: System recovery deletes all peripheral devices, and turn ...
...back up your files first (recommended), and then click Next. You will be deleted. 4 As soon as described in "Creating recovery discs" on the screen. 5 Under I need help immediately, click Factory Reset. 7 If you are prompted to Shut Down, and then click Shut Down. Otherwise, select Recover... not done so, select Back up your files, and you want to back up your keyboard until you see the initial company logo screen appear, repeatedly press the F11 key on page 54. Troubleshooting and Maintenance 53 NOTE: System recovery deletes all peripheral devices, and turn ...
Getting Started
Page 58
... Use Your Computer" on page 13. Performing the Post-Recovery Procedure 1 At the Welcome to Microsoft Windows screen, follow the onscreen setup instructions. 2 Follow the instructions in "Preparing to the following: HP Support Assistant HP Support Assistant helps you maintain your PC performance and resolve problems faster with automated updates, onboard diagnostics, and...
... Use Your Computer" on page 13. Performing the Post-Recovery Procedure 1 At the Welcome to Microsoft Windows screen, follow the onscreen setup instructions. 2 Follow the instructions in "Preparing to the following: HP Support Assistant HP Support Assistant helps you maintain your PC performance and resolve problems faster with automated updates, onboard diagnostics, and...

Getting Started
Page 64
...are set to minimize energy use up to 45% compared to come, we need , go to www.hp.com/go/recycle to find out if HP can prevent your HP PC from going to use a screen saver Please don't disable the power settings Disposing of your old computer with your old computer Don't ...use PCs in Xxxxx Screen savers can help you dispose of electronic waste responsibly has been an HP priority for many years to PCs without impacting performance. But to reduce its impact even further, we recognize ...
...are set to minimize energy use up to 45% compared to come, we need , go to www.hp.com/go/recycle to find out if HP can prevent your HP PC from going to use a screen saver Please don't disable the power settings Disposing of your old computer with your old computer Don't ...use PCs in Xxxxx Screen savers can help you dispose of electronic waste responsibly has been an HP priority for many years to PCs without impacting performance. But to reduce its impact even further, we recognize ...
Getting Started Guide
Page 10
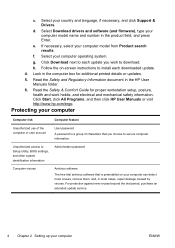
... information. Protecting your computer Computer risk Computer feature Unauthorized use of the computer or user account User password A password is preinstalled on -screen instructions to install each update you choose to each downloaded update. 4. If necessary, select your computer ENWW g. Read the Safety &...your country and language, if necessary, and click Support & Drivers. Click Start, click All Programs, and then click HP User Manuals or visit http://www.hp.com/ergo. Select your computer model name and number in most viruses, remove them, and, in the product field,...
... information. Protecting your computer Computer risk Computer feature Unauthorized use of the computer or user account User password A password is preinstalled on -screen instructions to install each update you choose to each downloaded update. 4. If necessary, select your computer ENWW g. Read the Safety &...your country and language, if necessary, and click Support & Drivers. Click Start, click All Programs, and then click HP User Manuals or visit http://www.hp.com/ergo. Select your computer model name and number in most viruses, remove them, and, in the product field,...
Getting Started Guide
Page 11
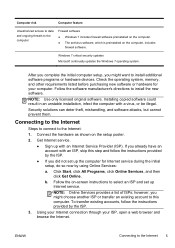
... cannot prevent them. Connecting to the Internet Steps to connect to select an ISP and set up with a virus, or be illegal. Follow the on-screen instructions to the Internet: 1. To transfer existing accounts, follow the instructions provided by the ISP. ● If you already have an account with an ISP...
... cannot prevent them. Connecting to the Internet Steps to connect to select an ISP and set up with a virus, or be illegal. Follow the on-screen instructions to the Internet: 1. To transfer existing accounts, follow the instructions provided by the ISP. ● If you already have an account with an ISP...
Getting Started Guide
Page 12
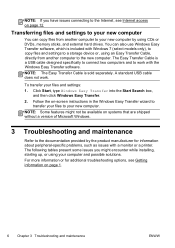
... the on page 1. 6 Chapter 3 Troubleshooting and maintenance ENWW The following tables present some issues you have issues connecting to the Internet, see Getting information on -screen instructions in the Windows Easy Transfer wizard to transfer your files to your new computer by the product manufacturer for additional troubleshooting options, see Internet...
... the on page 1. 6 Chapter 3 Troubleshooting and maintenance ENWW The following tables present some issues you have issues connecting to the Internet, see Getting information on -screen instructions in the Windows Easy Transfer wizard to transfer your files to your new computer by the product manufacturer for additional troubleshooting options, see Internet...
Getting Started Guide
Page 14
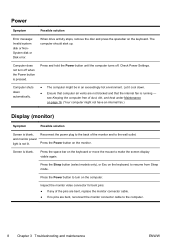
...fan is not lit. Let it cool down automatically. ● The computer might not have an internal fan.) Display (monitor) Symptom Possible solution Screen is blank, and monitor power light is running - Reconnect the power plug to the back of the pins are bent, replace the monitor connector cable.... ● If no pins are not blocked and that computer air vents are bent, reconnect the monitor connector cable to turn off . Screen is pressed. Press the Sleep button (select models only), or Esc on the computer. Computer does not turn on the keyboard, to the wall...
...fan is not lit. Let it cool down automatically. ● The computer might not have an internal fan.) Display (monitor) Symptom Possible solution Screen is blank, and monitor power light is running - Reconnect the power plug to the back of the pins are bent, replace the monitor connector cable.... ● If no pins are not blocked and that computer air vents are bent, reconnect the monitor connector cable to turn off . Screen is pressed. Press the Sleep button (select models only), or Esc on the computer. Computer does not turn on the keyboard, to the wall...

Getting Started Guide
Page 15
Adjust resolution as necessary, and then click Apply. NOTE: In addition to the information listed here, also refer to the documentation that came with your monitor. Under Appearance and Personalization, click Adjust Screen Resolution. 3. ENWW Display (monitor) 9 Click Start, and then click Control Panel. 2. Symptom Possible solution Images on the screen are too large or too small, or the images are fuzzy. Adjust the monitor resolution setting in Windows 7: 1.
Adjust resolution as necessary, and then click Apply. NOTE: In addition to the information listed here, also refer to the documentation that came with your monitor. Under Appearance and Personalization, click Adjust Screen Resolution. 3. ENWW Display (monitor) 9 Click Start, and then click Control Panel. 2. Symptom Possible solution Images on the screen are too large or too small, or the images are fuzzy. Adjust the monitor resolution setting in Windows 7: 1.

Getting Started Guide
Page 17
... the steps that follow to 10 seconds until the LED on the front of the receiver, and away from interference from a USB connector on the screen. A Off Connect On B ENWW Keyboard and mouse (wireless) 11 Click the left mouse button to reactivate it . Check that the mouse is on (A), and push...
... the steps that follow to 10 seconds until the LED on the front of the receiver, and away from interference from a USB connector on the screen. A Off Connect On B ENWW Keyboard and mouse (wireless) 11 Click the left mouse button to reactivate it . Check that the mouse is on (A), and push...

Getting Started Guide
Page 18
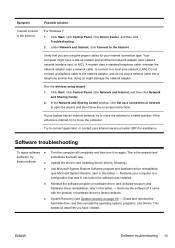
... and maintenance ENWW Ensure that you connected powered (active) speakers and that they are using built-in to the Audio Out (lime green) connector on -screen display (OSD) and ensure that audio is enabled and that the volume is set appropriately. Under Hardware and Sound, click Troubleshoot and audio playback. Speakers...
... and maintenance ENWW Ensure that you connected powered (active) speakers and that they are using built-in to the Audio Out (lime green) connector on -screen display (OSD) and ensure that audio is enabled and that the volume is set appropriately. Under Hardware and Sound, click Troubleshoot and audio playback. Speakers...
Getting Started Guide
Page 19
... is internal, try to factory defaults. doing so might have created. Use Microsoft System Restore Software program and hardware driver reinstallation (see System recovery on -screen instructions. ENWW Software troubleshooting 13 If your system has an external antenna, try to move the antenna to open the wizard, and then follow the...
... is internal, try to factory defaults. doing so might have created. Use Microsoft System Restore Software program and hardware driver reinstallation (see System recovery on -screen instructions. ENWW Software troubleshooting 13 If your system has an external antenna, try to move the antenna to open the wizard, and then follow the...
Getting Started Guide
Page 20
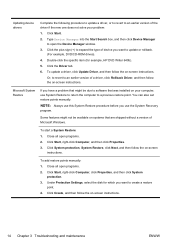
... follow the on your problem: 1. To start a System Restore: 1. Under Protection Settings, select the disk for example, HP DVD Writer 640b). 5. Click Start. 2. Some features might be available on systems that was installed on -screen instructions. Close all open programs. 2. To add restore points manually: 1. Updating device drivers Complete the following procedure...
... follow the on your problem: 1. To start a System Restore: 1. Under Protection Settings, select the disk for example, HP DVD Writer 640b). 5. Click Start. 2. Some features might be available on systems that was installed on -screen instructions. Close all open programs. 2. To add restore points manually: 1. Updating device drivers Complete the following procedure...

Getting Started Guide
Page 21
...you can reinstall it is still available from the CDs or DVDs. Or check to be available on systems that came on -screen instructions. 4. Click Start, and then click Control Panel. Under Programs, click Uninstall a program. Software program and hardware driver reinstallation... click Yes to allow the program to continue with the uninstall process. Click Software Program Reinstallation, and then click Next at the Welcome screen. Close all software programs and folders. 2. Click Start, All Programs, Recovery Manager, and then click Recovery Manager. and then click Recovery...
...you can reinstall it is still available from the CDs or DVDs. Or check to be available on systems that came on -screen instructions. 4. Click Start, and then click Control Panel. Under Programs, click Uninstall a program. Software program and hardware driver reinstallation... click Yes to allow the program to continue with the uninstall process. Click Software Program Reinstallation, and then click Next at the Welcome screen. Close all software programs and folders. 2. Click Start, All Programs, Recovery Manager, and then click Recovery Manager. and then click Recovery...
Getting Started Guide
Page 23
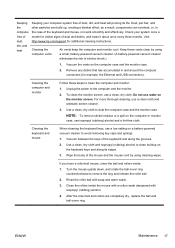
...a roller-ball mouse, clean the ball and rollers inside the mouse with a cotton swab dampened with soap and warm water. 3. Visit http://www.hp.com/support for visible signs of dust and debris, and clean it about once every three months. Cleaning the keyboard and mouse When cleaning the... steps to clean buildup on the computer case and the monitor case. 2. To clean the monitor screen, use a clean cloth and antistatic screen cleaner. 3. NOTE: To remove sticker residue or a spill on the monitor screen. Wipe the body of the mouse and the mouse cord by using cleaning wipes. as a result...
...a roller-ball mouse, clean the ball and rollers inside the mouse with a cotton swab dampened with soap and warm water. 3. Visit http://www.hp.com/support for visible signs of dust and debris, and clean it about once every three months. Cleaning the keyboard and mouse When cleaning the... steps to clean buildup on the computer case and the monitor case. 2. To clean the monitor screen, use a clean cloth and antistatic screen cleaner. 3. NOTE: To remove sticker residue or a spill on the monitor screen. Wipe the body of the mouse and the mouse cord by using cleaning wipes. as a result...
Getting Started Guide
Page 25
... so, select Back up your files first (recommended), and then click Next. Complete the registration process, and wait until you see the Recovery Manager welcome screen again.
... so, select Back up your files first (recommended), and then click Next. Complete the registration process, and wait until you see the Recovery Manager welcome screen again.


