
Installation Guide
Page 34
... to view, search, and print documentation for Compaq branded racks and rack options. Rack Warnings and Cautions Before installing your rack, carefully review the following warnings and cautions: WARNING: To reduce the risk of personal injury or equipment damage, always be sure that: · The ...from the pallet. Extend only one component is extended for any reason. Always handle the rack from the bottom to the top. 2-4 HP ProLiant ML350 Generation 3 Server Setup and Installation Guide Continue to populate the rack from both sides. Overview of Server Installation The resource ...
... to view, search, and print documentation for Compaq branded racks and rack options. Rack Warnings and Cautions Before installing your rack, carefully review the following warnings and cautions: WARNING: To reduce the risk of personal injury or equipment damage, always be sure that: · The ...from the pallet. Extend only one component is extended for any reason. Always handle the rack from the bottom to the top. 2-4 HP ProLiant ML350 Generation 3 Server Setup and Installation Guide Continue to populate the rack from both sides. Overview of Server Installation The resource ...
Installation Guide
Page 35
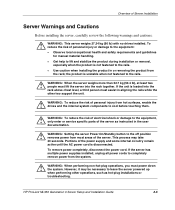
... caution when installing the product in the user documentation. To reduce the risk of Server Installation Server Warnings and Cautions Before installing the server, carefully review the following warnings and cautions: WARNING: This server weighs 27.24 kg (60 lb) with no drives installed. WARNING: When the server weighs more than... to the equipment: · Observe local occupational health and safety requirements and guidelines for manual material handling. · Get help to cool before touching them. HP ProLiant ML350 Generation 3 Server Setup and Installation Guide 2-5
... caution when installing the product in the user documentation. To reduce the risk of Server Installation Server Warnings and Cautions Before installing the server, carefully review the following warnings and cautions: WARNING: This server weighs 27.24 kg (60 lb) with no drives installed. WARNING: When the server weighs more than... to the equipment: · Observe local occupational health and safety requirements and guidelines for manual material handling. · Get help to cool before touching them. HP ProLiant ML350 Generation 3 Server Setup and Installation Guide 2-5

Installation Guide
Page 60
After selecting initial system settings, install your operating system is not needed. 2-30 HP ProLiant ML350 Generation 3 Server Setup and Installation Guide Review and follow the guidelines and procedures in the previous sections of electric shock or fire, do not plug telecommunications/telephone connectors into the network interface ...
After selecting initial system settings, install your operating system is not needed. 2-30 HP ProLiant ML350 Generation 3 Server Setup and Installation Guide Review and follow the guidelines and procedures in the previous sections of electric shock or fire, do not plug telecommunications/telephone connectors into the network interface ...

Installation Guide
Page 62
Overview of this chapter. 2. Register the server. Review and follow the guidelines and procedures in Chapter 1 of electric shock or fire, do not plug telecommunications/telephone connectors into the network interface controller (... "Configuring the Server" later in this chapter for detailed installation instructions. Refer to Chapter 3, "Hardware Options Installation," or the options kits for instructions. 2-32 HP ProLiant ML350 Generation 3 Server Setup and Installation Guide Power up the server by pressing the Power On/Standby button on your operating system for details...
Overview of this chapter. 2. Register the server. Review and follow the guidelines and procedures in Chapter 1 of electric shock or fire, do not plug telecommunications/telephone connectors into the network interface controller (... "Configuring the Server" later in this chapter for detailed installation instructions. Refer to Chapter 3, "Hardware Options Installation," or the options kits for instructions. 2-32 HP ProLiant ML350 Generation 3 Server Setup and Installation Guide Power up the server by pressing the Power On/Standby button on your operating system for details...

Installation Guide
Page 66
Refer to Figure 3-1 and Table 3-1 to review chassis components. Hardware Options Installation Preparing the Server Before installing or removing any options, prepare the server by performing the following procedures. Chassis Components 1 2 3 4 5 Figure 3-1: Identifying rack and tower chassis components Table 3-1: Rack and Tower Chassis Components Item 1 2 3 4 5 Description Access panel Removable media bays CD-ROM drive Diskette drive Hard drive bays 3-2 HP ProLiant ML350 Generation 3 Server Setup and Installation Guide
Refer to Figure 3-1 and Table 3-1 to review chassis components. Hardware Options Installation Preparing the Server Before installing or removing any options, prepare the server by performing the following procedures. Chassis Components 1 2 3 4 5 Figure 3-1: Identifying rack and tower chassis components Table 3-1: Rack and Tower Chassis Components Item 1 2 3 4 5 Description Access panel Removable media bays CD-ROM drive Diskette drive Hard drive bays 3-2 HP ProLiant ML350 Generation 3 Server Setup and Installation Guide

Installation Guide
Page 77
Slide the release latch (1) and remove the hard drive blank (2). 1 2 Figure 3-10: Removing the hard drive blank HP ProLiant ML350 Generation 3 Server Setup and Installation Guide 3-13 Hardware Options Installation Installing and Removing a Hot-Plug Hard Drive To install a hot-plug hard drive, first review the installation documentation that came with the drive. 1. For tower servers, open bezel door. 2.
Slide the release latch (1) and remove the hard drive blank (2). 1 2 Figure 3-10: Removing the hard drive blank HP ProLiant ML350 Generation 3 Server Setup and Installation Guide 3-13 Hardware Options Installation Installing and Removing a Hot-Plug Hard Drive To install a hot-plug hard drive, first review the installation documentation that came with the drive. 1. For tower servers, open bezel door. 2.