

Site preparation guide Latex 3x5
Page 10
... not need a web proxy or how to configure internet access. Printing supplies The following electrical components to be available on the day of installation: ● Six HP 831 ink cartridges, one for proxy configuration as follows: ● For Internet Explorer, click Tools > Internet options > Connections > LAN settings. an intermediary between computers on your network requires a web proxy. If it is checked, make a note of the address and port settings...
... not need a web proxy or how to configure internet access. Printing supplies The following electrical components to be available on the day of installation: ● Six HP 831 ink cartridges, one for proxy configuration as follows: ● For Internet Explorer, click Tools > Internet options > Connections > LAN settings. an intermediary between computers on your network requires a web proxy. If it is checked, make a note of the address and port settings...
Wallcovering Printing Tips and Tricks
Page 12
... type. 4.3 PRINTER SETTINGS Each supported substrate has its own characteristics and so the printer changes the way it prints on each substrate and this description is scanned by the line sensor, the printer calculates the necessary correction ta- Start color calibration of the substrate. From the measurements made by the line sensor. 4. The printer connects to download the media preset from the front panel, select , then Image quality maintenance > Color...
... type. 4.3 PRINTER SETTINGS Each supported substrate has its own characteristics and so the printer changes the way it prints on each substrate and this description is scanned by the line sensor, the printer calculates the necessary correction ta- Start color calibration of the substrate. From the measurements made by the line sensor. 4. The printer connects to download the media preset from the front panel, select , then Image quality maintenance > Color...
Users Guide
Page 5
... a printhead 136 Replace the maintenance cartridge ...140 Cannot insert the maintenance cartridge ...143 Clean and lubricate the carriage rod ...143 Clean the encoder strip ...145 Clean the platen ...146 Clean the substrate-advance sensor window (360 and 370 only 148 Clean the exterior of the printer ...149 Move or store the printer ...149 Service maintenance ...150 8 Firmware update ...151 Firmware update using a USB flash drive ...151 Firmware update using the Embedded Web Server 152 Automatic firmware updates ...152 9 Accessories ...153 Order ink...
... a printhead 136 Replace the maintenance cartridge ...140 Cannot insert the maintenance cartridge ...143 Clean and lubricate the carriage rod ...143 Clean the encoder strip ...145 Clean the platen ...146 Clean the substrate-advance sensor window (360 and 370 only 148 Clean the exterior of the printer ...149 Move or store the printer ...149 Service maintenance ...150 8 Firmware update ...151 Firmware update using a USB flash drive ...151 Firmware update using the Embedded Web Server 152 Automatic firmware updates ...152 9 Accessories ...153 Order ink...
Users Guide
Page 8
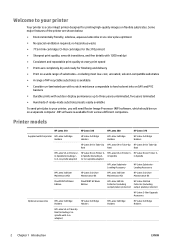
... software is available ● Consider un-laminated use with scratch resistance comparable to hard solvent inks on SAV and PVC banners ● Durable prints with outdoor display permanence up to three years unlaminated, five years laminated ● Hundreds of ready-made substrate presets easily available To send print jobs to 3-in spindle adaptor) HP Latex SubstrateLoading Accessory HP Latex SubstrateLoading Accessory HP Latex 3x0 User Maintenance Kit HP Latex...
... software is available ● Consider un-laminated use with scratch resistance comparable to hard solvent inks on SAV and PVC banners ● Durable prints with outdoor display permanence up to three years unlaminated, five years laminated ● Hundreds of ready-made substrate presets easily available To send print jobs to 3-in spindle adaptor) HP Latex SubstrateLoading Accessory HP Latex SubstrateLoading Accessory HP Latex 3x0 User Maintenance Kit HP Latex...
Users Guide
Page 18
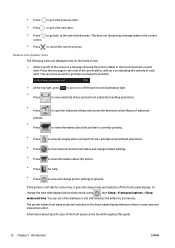
... front panel can set a time between 5 and 240 minutes; to view and change printer settings in the current screen. ● Press to cancel the current process. The printer wakes from sleep mode and switches on the home screen. ● At the top left idle for help in solving the problem. ● At the top right, press to view ink-supply status and perform ink-cartridge and printhead operations...
... front panel can set a time between 5 and 240 minutes; to view and change printer settings in the current screen. ● Press to cancel the current process. The printer wakes from sleep mode and switches on the home screen. ● At the top left idle for help in solving the problem. ● At the top right, press to view ink-supply status and perform ink-cartridge and printhead operations...

Users Guide
Page 25
... total number of prints, number of prints by substrate family, number of prints by print-quality option, and total amount of checking your printer. See The Embedded Web Server on the front-panel display. To print an internal print, press you want. , then Setup > Internal prints, then select the type of internal print that The following internal prints are two ways of ink used per color. You can be adjusted in the RIP. To set...
... total number of prints, number of prints by substrate family, number of prints by print-quality option, and total amount of checking your printer. See The Embedded Web Server on the front-panel display. To print an internal print, press you want. , then Setup > Internal prints, then select the type of internal print that The following internal prints are two ways of ink used per color. You can be adjusted in the RIP. To set...
Users Guide
Page 27
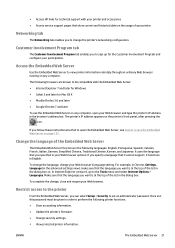
.... Make sure that show current and historical data on the printer's front panel, after pressing the icon. Once set an administrator password. Customer Involvement Program tab The Customer Involvement Program tab enables you to change , close and reopen your Web browser's language setting. ● Access HP links for technical support with the Embedded Web Server: ● Internet Explorer 7 and later for Windows ● Safari 3 and later for Mac OS...
.... Make sure that show current and historical data on the printer's front panel, after pressing the icon. Once set an administrator password. Customer Involvement Program tab The Customer Involvement Program tab enables you to change , close and reopen your Web browser's language setting. ● Access HP links for technical support with the Embedded Web Server: ● Internet Explorer 7 and later for Windows ● Safari 3 and later for Mac OS...
Users Guide
Page 31
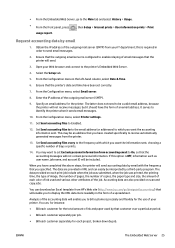
... front panel, press , then Setup > Internal prints > User information prints > Print usage report. If this is configured to enable relaying of email messages that the printer will enable you to bill customers precisely and flexibly for the use of your printer. Ensure that the outgoing email server is required in order to the printer's Embedded Web Server. 4. Set Send accounting files to to the email address (or addresses) to which you want the information sent, choosing a specific number...
... front panel, press , then Setup > Internal prints > User information prints > Print usage report. If this is configured to enable relaying of email messages that the printer will enable you to bill customers precisely and flexibly for the use of your printer. Ensure that the outgoing email server is required in order to the printer's Embedded Web Server. 4. Set Send accounting files to to the email address (or addresses) to which you want the information sent, choosing a specific number...
Users Guide
Page 32
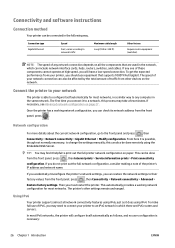
... panel: press , then Connectivity > Network connectivity > Advanced > Restore factory settings. Connectivity and software instructions Connection method Your printer can be done remotely using IPv4. Connection type Gigabit Ethernet Speed Fast; From here it to change the settings manually; Using IPv6 Your printer supports almost all the components that supports 1000TX Full Gigabit. If any network connection depends on all network connectivity features using IPv6, just as follows, and no user configuration is able to configure itself automatically as it helpful...
... panel: press , then Connectivity > Network connectivity > Advanced > Restore factory settings. Connectivity and software instructions Connection method Your printer can be done remotely using IPv4. Connection type Gigabit Ethernet Speed Fast; From here it to change the settings manually; Using IPv6 Your printer supports almost all the components that supports 1000TX Full Gigabit. If any network connection depends on all network connectivity features using IPv6, just as follows, and no user configuration is able to configure itself automatically as it helpful...
Users Guide
Page 34
.... Troubleshooting IO Configuration page The IO Configuration page provides comprehensive print server status. The printer can proceed directly to the next section to install the printer on your network computer systems. The network installation software will allow you can do so now. Verify correct operation 1. Proceed to the next section. NOTE: See Troubleshooting on the IO Configuration page, see the HP Jetdirect Print Servers Administrator's Guide for your print server model. If a message other configuration tools once network communication is turned off...
.... Troubleshooting IO Configuration page The IO Configuration page provides comprehensive print server status. The printer can proceed directly to the next section to install the printer on your network computer systems. The network installation software will allow you can do so now. Verify correct operation 1. Proceed to the next section. NOTE: See Troubleshooting on the IO Configuration page, see the HP Jetdirect Print Servers Administrator's Guide for your print server model. If a message other configuration tools once network communication is turned off...
Users Guide
Page 90
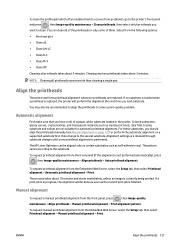
... from the front panel by pressing , then Take-up reel > Enable take -up reel. ● During double-sided printing (side A or B). ● When printing internal prints (see Request the printer's internal prints on a straight surface. TIP: You can use the printer's cutter to apply. if in http://IPaddress/hp/device/webAccess/diagnostic/ StraightnessOptimizationPlot.pdf (where IPaddress is the IP address of your image: select a correction value...
... from the front panel by pressing , then Take-up reel > Enable take -up reel. ● During double-sided printing (side A or B). ● When printing internal prints (see Request the printer's internal prints on a straight surface. TIP: You can use the printer's cutter to apply. if in http://IPaddress/hp/device/webAccess/diagnostic/ StraightnessOptimizationPlot.pdf (where IPaddress is the IP address of your image: select a correction value...
Users Guide
Page 133
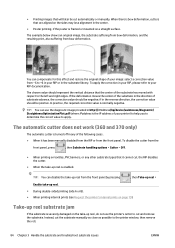
... printhead alignment. Alignment settings are retained through substrate changes until a new printhead alignment is finished. The pattern varies according to the printer's front panel and press , then Image-quality maintenance > Clean printheads, then select which often enables them . To clean the printheads (which printheads you load substrate. NOTE: Cleaning all printheads takes about 3 minutes. Colored substrates, glossy canvas, coarse textiles, and transparent materials such as the current print job is performed. To request printhead alignment from problems...
... printhead alignment. Alignment settings are retained through substrate changes until a new printhead alignment is finished. The pattern varies according to the printer's front panel and press , then Image-quality maintenance > Clean printheads, then select which often enables them . To clean the printheads (which printheads you load substrate. NOTE: Cleaning all printheads takes about 3 minutes. Colored substrates, glossy canvas, coarse textiles, and transparent materials such as the current print job is performed. To request printhead alignment from problems...
Users Guide
Page 151
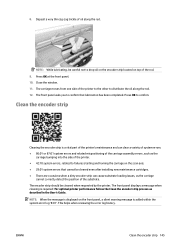
... located on the front panel, a silent warning message is a vital part of the printer's maintenance and can cause substrate loading issues, as described in the User's Guide. Clean the encoder strip Cleaning the encoder strip is added within the system error log '8:01'. 8. Deposit a very thin zig-zag trickle of the printer. ● 42:10 system errors, related to confirm that cannot be cleared even after installing new maintenance cartridges...
... located on the front panel, a silent warning message is a vital part of the printer's maintenance and can cause substrate loading issues, as described in the User's Guide. Clean the encoder strip Cleaning the encoder strip is added within the system error log '8:01'. 8. Deposit a very thin zig-zag trickle of the printer. ● 42:10 system errors, related to confirm that cannot be cleared even after installing new maintenance cartridges...

Users Guide
Page 156
... the printer or ink cartridges are used . The printer uses these components degrade to evaporate. The benefits of their lives. To avoid having these numbers to a network, a computer, or a scanner. 8. For correct environmental storage conditions, see Replace the maintenance cartridge on the front panel: ● Service Maintenance Kit 1 ● Service Maintenance Kit 2 ● Service Maintenance Kit 3 These messages mean that connect the printer to track the need for a service maintenance visit. 7. Disconnect any cables that some time...
... the printer or ink cartridges are used . The printer uses these components degrade to evaporate. The benefits of their lives. To avoid having these numbers to a network, a computer, or a scanner. 8. For correct environmental storage conditions, see Replace the maintenance cartridge on the front panel: ● Service Maintenance Kit 1 ● Service Maintenance Kit 2 ● Service Maintenance Kit 3 These messages mean that connect the printer to track the need for a service maintenance visit. 7. Disconnect any cables that some time...
Users Guide
Page 157
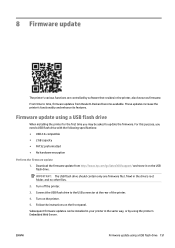
... time you need a USB flash drive with the following specifications: ● USB 2.0-compatible ● 2 GB capacity ● FAT32 preformatted ● No hardware encryption Perform the firmware update 1. Connect the USB flash drive to the USB connector at the rear of the printer. 4. Subsequent firmware updates can be asked to time, firmware updates from http://www.hp.com/go/latex300/support/ and store it on the front panel. Follow the instructions on the USB flash drive. ENWW Firmware update using the printer's Embedded Web Server...
... time you need a USB flash drive with the following specifications: ● USB 2.0-compatible ● 2 GB capacity ● FAT32 preformatted ● No hardware encryption Perform the firmware update 1. Connect the USB flash drive to the USB connector at the rear of the printer. 4. Subsequent firmware updates can be asked to time, firmware updates from http://www.hp.com/go/latex300/support/ and store it on the front panel. Follow the instructions on the USB flash drive. ENWW Firmware update using the printer's Embedded Web Server...

Users Guide
Page 158
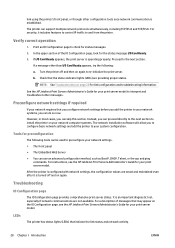
... precise control, click the Advanced button and add the printer's IP address to the Internet check box. Alternatively, when the Manual proxy configuration check box is selected, add the printer's IP address to the list of exceptions, for Windows, go /latex300/ support/ and store it will be required to change these settings. ● A firmware update package can use the front panel or the Embedded Web Server (Setup > Firmware update > Firmware update settings). ● If an administrator password has been set, it on page...
... precise control, click the Advanced button and add the printer's IP address to the Internet check box. Alternatively, when the Manual proxy configuration check box is selected, add the printer's IP address to the list of exceptions, for Windows, go /latex300/ support/ and store it will be required to change these settings. ● A firmware update package can use the front panel or the Embedded Web Server (Setup > Firmware update > Firmware update settings). ● If an administrator password has been set, it on page...
Users Guide
Page 163
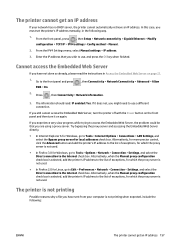
... settings > Config method > Manual. 2. Cannot access the Embedded Web Server If you are using a proxy server. If it on page 21. 1. From the IPV4 Settings menu, select Manual settings > IP address. 3. Enter the IP address that you have sent from your network has no DHCP server, the printer cannot automatically retrieve an IP address. If you still cannot access the Embedded Web Server, turn the printer off with the Power button on the front panel and then turn...
... settings > Config method > Manual. 2. Cannot access the Embedded Web Server If you are using a proxy server. If it on page 21. 1. From the IPV4 Settings menu, select Manual settings > IP address. 3. Enter the IP address that you have sent from your network has no DHCP server, the printer cannot automatically retrieve an IP address. If you still cannot access the Embedded Web Server, turn the printer off with the Power button on the front panel and then turn...
Users Guide
Page 171
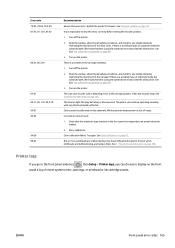
... printhead or ink cartridge events. See Clean the encoder strip on page 97. The printer will continue operating normally, with only this substrate. Inconsistent colors found. 1. Retry calibration. See Color calibration on page 145. The printhead status plot on the printer. Open the window, observing all safety procedures, and check for any visible obstacles restricting the movement of the drive roller. Turn on page 106. Turn on page 80. 3. Check that the substrate-type...
... printhead or ink cartridge events. See Clean the encoder strip on page 97. The printer will continue operating normally, with only this substrate. Inconsistent colors found. 1. Retry calibration. See Color calibration on page 145. The printhead status plot on the printer. Open the window, observing all safety procedures, and check for any visible obstacles restricting the movement of the drive roller. Turn on page 106. Turn on page 80. 3. Check that the substrate-type...

Users Guide
Page 182
..., 82 feed and cut 78 file system check 17 firmware updates 152 form feed and cut 76 internal prints 19 language 13 load 50 load roll 50 manual printhead alignment 127 max skew setting 60 modify configuration 157 move substrate 76 network information 157 print connectivity config. 159 print usage report 19 printer logs 165 replace ink cartridges 123 replace PH cleaning kit 140 replace printheads 129 reset EWS password 22 restore factory settings 14 select altitude 13 select display contrast 14 sleep mode wait time 12...
..., 82 feed and cut 78 file system check 17 firmware updates 152 form feed and cut 76 internal prints 19 language 13 load 50 load roll 50 manual printhead alignment 127 max skew setting 60 modify configuration 157 move substrate 76 network information 157 print connectivity config. 159 print usage report 19 printer logs 165 replace ink cartridges 123 replace PH cleaning kit 140 replace printheads 129 reset EWS password 22 restore factory settings 14 select altitude 13 select display contrast 14 sleep mode wait time 12...

Users Guide
Page 183
... cartridge about 119 cannot insert 143 replace 140 specification 166 maintenance, service 150 manuals 3 margins changing 18 specification 167 memory specifications 168 N network configuration advanced 27 network troubleshooting 28 networks link speed 33 protocols 30 security settings 32 non-HP ink cartridges 125 O optimizer about 118 order accessories 155 ink cartridges 153 printhead cleaning kit 155 printheads 154 P physical specifications 168 platen clean 146 porous substrates 44 power specifications 168 print quality, improve 105 print-quality problems black areas look hazy 115 color...
... cartridge about 119 cannot insert 143 replace 140 specification 166 maintenance, service 150 manuals 3 margins changing 18 specification 167 memory specifications 168 N network configuration advanced 27 network troubleshooting 28 networks link speed 33 protocols 30 security settings 32 non-HP ink cartridges 125 O optimizer about 118 order accessories 155 ink cartridges 153 printhead cleaning kit 155 printheads 154 P physical specifications 168 platen clean 146 porous substrates 44 power specifications 168 print quality, improve 105 print-quality problems black areas look hazy 115 color...


