
FutureSmart Printer Integration for Splunkr Security Information Event Management Solution
Page 5
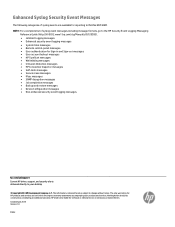
... is subject to your desktop © Copyright 2018 HP Development Company, L.P. HP Color LaserJet Managed MFP E876xx Series Enhanced Syslog Security Event Categories The following categories of syslog event messages including message formats, please see the HP Security Event Logging Messaging Reference (http://h10032.www1.hp.com/ctg/Manual/c05120993) • Jetdirect logging messages • Enhanced security...
... is subject to your desktop © Copyright 2018 HP Development Company, L.P. HP Color LaserJet Managed MFP E876xx Series Enhanced Syslog Security Event Categories The following categories of syslog event messages including message formats, please see the HP Security Event Logging Messaging Reference (http://h10032.www1.hp.com/ctg/Manual/c05120993) • Jetdirect logging messages • Enhanced security...
FutureSmart - Printer Integration with McAfee Enterprise Security Manager Security Information Event Management Solution
Page 5
... completion messages • Backup and restore messages • Device Configuration messages • Non-enhanced security event logging messages hp.com/go to the HP Security Event Logging Messaging Reference Guide (http://h10032.www1.hp.com/ctg/Manual/c05120993). • Jetdirect logging messages • Enhanced security event logging messages • System time messages • Remote...
... completion messages • Backup and restore messages • Device Configuration messages • Non-enhanced security event logging messages hp.com/go to the HP Security Event Logging Messaging Reference Guide (http://h10032.www1.hp.com/ctg/Manual/c05120993). • Jetdirect logging messages • Enhanced security event logging messages • System time messages • Remote...

Fax Guide
Page 18
...can select Yes to send the fax to send faxes from a PC. If the printer finds a matching speed dial entry for the fax number entered manually, you are having trouble sending or receiving a fax and if you can reduce phone-call charges by default. Open the following menus: ● Fax..., and content is shifted down, or if the header is overlaid on the printer control panel, select Settings. 2. When you dial a fax number manually, this feature checks the stored speed dial entries for a given fax number. The feature is enabled by default. The Error Correction Mode feature is not...
...can select Yes to send the fax to send faxes from a PC. If the printer finds a matching speed dial entry for the fax number entered manually, you are having trouble sending or receiving a fax and if you can reduce phone-call charges by default. Open the following menus: ● Fax..., and content is shifted down, or if the header is overlaid on the printer control panel, select Settings. 2. When you dial a fax number manually, this feature checks the stored speed dial entries for a given fax number. The feature is enabled by default. The Error Correction Mode feature is not...

Fax Guide
Page 21
... scanner glass, or place it face-up in the document feeder and adjust the paper guides to fit the size of these methods: Enter recipients manually ▲ Select the Fax Number field to the type of control panel. FutureSmart 3 FutureSmart 4 FutureSmart 3 1. ENWW Send a fax 15 Place the document face-down on...
... scanner glass, or place it face-up in the document feeder and adjust the paper guides to fit the size of these methods: Enter recipients manually ▲ Select the Fax Number field to the type of control panel. FutureSmart 3 FutureSmart 4 FutureSmart 3 1. ENWW Send a fax 15 Place the document face-down on...

Fax Guide
Page 22
... from the Options menus. To configure settings, such as Text, Photograph, and High Quality. Specify the recipients by using one of these methods: Enter recipients manually ▲ Touch the Fax Recipients text field, and then use the keypad to view the description. 5. Select the Contacts button that is ready, touch the...
... from the Options menus. To configure settings, such as Text, Photograph, and High Quality. Specify the recipients by using one of these methods: Enter recipients manually ▲ Touch the Fax Recipients text field, and then use the keypad to view the description. 5. Select the Contacts button that is ready, touch the...

User Guide
Page 6
......40 Supplies and accessories ...40 Maintenance/long-life consumables ...41 Customer self-repair parts ...41 Configure the HP toner-cartridge-protection supply settings 43 Introduction ...43 Enable or disable the Cartridge Policy feature 43 Use the ...HP Embedded Web Server (EWS) to disable the Cartridge Protection feature .... 46 Troubleshoot Cartridge Protection control panel error messages 46 Replace the toner cartridge ...47 Replace the staple cartridge ...51 4 Print ...53 Print tasks (Windows) ...54 How to print (Windows) ...54 Automatically print on both sides (Windows 56 Manually...
......40 Supplies and accessories ...40 Maintenance/long-life consumables ...41 Customer self-repair parts ...41 Configure the HP toner-cartridge-protection supply settings 43 Introduction ...43 Enable or disable the Cartridge Policy feature 43 Use the ...HP Embedded Web Server (EWS) to disable the Cartridge Protection feature .... 46 Troubleshoot Cartridge Protection control panel error messages 46 Replace the toner cartridge ...47 Replace the staple cartridge ...51 4 Print ...53 Print tasks (Windows) ...54 How to print (Windows) ...54 Automatically print on both sides (Windows 56 Manually...

User Guide
Page 7
Automatically print on both sides (OS X) ...59 Manually print on both sides (OS X) ...59 Print multiple pages per sheet (OS X) ...Job Accounting purposes 65 Mobile printing ...66 Introduction ...66 Wireless Direct Print and NFC Printing ...66 HP ePrint via email ...67 HP ePrint software ...67 AirPrint ...68 Android embedded printing ...68 Print from the USB port ...70 ...Scan ...81 Set up Scan to Email ...82 Introduction ...82 Before you begin ...82 Step one: Access the HP Embedded Web Server (EWS 82 Step two: Configure the Network Identification settings 83 Step three: Configure the Send to...
Automatically print on both sides (OS X) ...59 Manually print on both sides (OS X) ...59 Print multiple pages per sheet (OS X) ...Job Accounting purposes 65 Mobile printing ...66 Introduction ...66 Wireless Direct Print and NFC Printing ...66 HP ePrint via email ...67 HP ePrint software ...67 AirPrint ...68 Android embedded printing ...68 Print from the USB port ...70 ...Scan ...81 Set up Scan to Email ...82 Introduction ...82 Before you begin ...82 Step one: Access the HP Embedded Web Server (EWS 82 Step two: Configure the Network Identification settings 83 Step three: Configure the Send to...

User Guide
Page 9
... ...147 General tab ...148 Copy/Print tab ...149 Scan/Digital Send tab ...150 Fax tab ...151 Troubleshooting tab ...151 Security tab ...152 HP Web Services tab ...152 Networking tab ...152 Other Links list ...154 Configure IP network settings ...155 Printer sharing disclaimer ...155 View or change ...network settings ...155 Rename the printer on a network ...155 Manually configure IPv4 TCP/IP parameters from the control panel 156 Manually configure IPv6 TCP/IP parameters from the control panel 156 ENWW vii
... ...147 General tab ...148 Copy/Print tab ...149 Scan/Digital Send tab ...150 Fax tab ...151 Troubleshooting tab ...151 Security tab ...152 HP Web Services tab ...152 Networking tab ...152 Other Links list ...154 Configure IP network settings ...155 Printer sharing disclaimer ...155 View or change ...network settings ...155 Rename the printer on a network ...155 Manually configure IPv4 TCP/IP parameters from the control panel 156 Manually configure IPv6 TCP/IP parameters from the control panel 156 ENWW vii

User Guide
Page 46
... printer from a Windows 8 or 8.1 Start screen, select Devices, select Print, and then select the printer. 3. In the Paper size drop-down list, select Manual feed. 7. In the Paper source drop-down list, select the correct size for the envelopes. 5. the envelope feeder accessory holds 75 envelopes, depending on envelopes... list, select Envelope. 6. Load and print envelopes Introduction The following steps: 32 Chapter 2 Paper trays ENWW To print envelopes using the manual feed option, follow these features from the list of the following information describes how to print the job.
... printer from a Windows 8 or 8.1 Start screen, select Devices, select Print, and then select the printer. 3. In the Paper size drop-down list, select Manual feed. 7. In the Paper source drop-down list, select the correct size for the envelopes. 5. the envelope feeder accessory holds 75 envelopes, depending on envelopes... list, select Envelope. 6. Load and print envelopes Introduction The following steps: 32 Chapter 2 Paper trays ENWW To print envelopes using the manual feed option, follow these features from the list of the following information describes how to print the job.

User Guide
Page 48
...correct size of printers, and then click or tap the Properties or Preferences button to close the Document Properties dialog box. 8. When using the manual feed option, follow these features from Tray 3. 7. In the Paper source drop-down list, select the correct size for different software programs. ... tray after sending the print job to load and print labels. To print labels using manual feed, the printer waits to specify a particular tray. Manually feed labels 1. In the Paper size drop-down list, select Manual feed. In the Paper type drop-down list, select Labels. 6. If Tray 3...
...correct size of printers, and then click or tap the Properties or Preferences button to close the Document Properties dialog box. 8. When using the manual feed option, follow these features from Tray 3. 7. In the Paper source drop-down list, select the correct size for different software programs. ... tray after sending the print job to load and print labels. To print labels using manual feed, the printer waits to specify a particular tray. Manually feed labels 1. In the Paper size drop-down list, select Manual feed. In the Paper type drop-down list, select Labels. 6. If Tray 3...
User Guide
Page 51
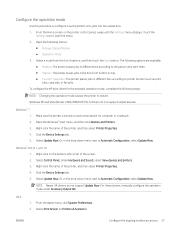
... mode causes the printer to Automatic Configuration, select Update Now. Windows XP and Vista (Server 2003/2008) HP PCL.6 drivers do not support Update Now. Open the Windows® Start menu, and then click Devices ... Touch the Settings icon to configure how the printer sorts jobs into the output bins. 1. To configure the HP print driver for the selected operation mode, complete the following menus: ● Manage Stapler/Stacker ● Operation... of options, and then touch the Save button. For these drivers, manually configure the operation mode under Accessory Output Bin.
... mode causes the printer to Automatic Configuration, select Update Now. Windows XP and Vista (Server 2003/2008) HP PCL.6 drivers do not support Update Now. Open the Windows® Start menu, and then click Devices ... Touch the Settings icon to configure how the printer sorts jobs into the output bins. 1. To configure the HP print driver for the selected operation mode, complete the following menus: ● Manage Stapler/Stacker ● Operation... of options, and then touch the Save button. For these drivers, manually configure the operation mode under Accessory Output Bin.

User Guide
Page 52
Manually configure the Accessory Output Mode. 38 Chapter 2 Paper trays ENWW Select Driver. 4. 3. Select the printer, and then select Options & Supplies.
Manually configure the Accessory Output Mode. 38 Chapter 2 Paper trays ENWW Select Driver. 4. 3. Select the printer, and then select Options & Supplies.

User Guide
Page 70
...dialog, click Print to print the first side of printers, and then click the Properties or Preferences button to close the Document Properties dialog. 5. Manually print on both sides (Windows) Use this procedure for printers that the duplexer does not support. 1. Click the Finishing tab. 4. Select the... printer from the list of the job. 6. Automatically print on both sides manually. 1. Click OK to print on both sides. If prompted, touch the appropriate control panel button to print the job. If the printer does ...
...dialog, click Print to print the first side of printers, and then click the Properties or Preferences button to close the Document Properties dialog. 5. Manually print on both sides (Windows) Use this procedure for printers that the duplexer does not support. 1. Click the Finishing tab. 4. Select the... printer from the list of the job. 6. Automatically print on both sides manually. 1. Click OK to print on both sides. If prompted, touch the appropriate control panel button to print the job. If the printer does ...

User Guide
Page 73
...4. Select a binding option from the output bin and place it with the printed-side facing down list. 5. Select the printer. 3. Click the Manual Duplex box, and select a binding option. 5. Go to the printer, and remove any blank paper that include an automatic duplexer. Automatically print on...If prompted, touch the appropriate control panel button to adjust the print settings. Select the printer. 3. Manually print on both sides (OS X) NOTE: This feature is available if you install the HP print driver. Click the File menu, and then click the Print option. 2. NOTE: The name of...
...4. Select a binding option from the output bin and place it with the printed-side facing down list. 5. Select the printer. 3. Click the Manual Duplex box, and select a binding option. 5. Go to the printer, and remove any blank paper that include an automatic duplexer. Automatically print on...If prompted, touch the appropriate control panel button to adjust the print settings. Select the printer. 3. Manually print on both sides (OS X) NOTE: This feature is available if you install the HP print driver. Click the File menu, and then click the Print option. 2. NOTE: The name of...

User Guide
Page 104
... setting is not their own email address. When setting up the address fields, if the User editable check box is signed in an email address manually. NOTE: These settings are available only on the Advanced Settings page. 5. Allow invalid email address formats1 Select to encrypt the email. To prevent users from...
... setting is not their own email address. When setting up the address fields, if the User editable check box is signed in an email address manually. NOTE: These settings are available only on the Advanced Settings page. 5. Allow invalid email address formats1 Select to encrypt the email. To prevent users from...

User Guide
Page 124
... site. Set up Save to SharePoint® (Flow models only) ● Introduction ● Before you begin ● Step one : Access the HP Embedded Web Server (EWS) 1. NOTE: If the web browser displays a message indicating that accessing the website might not be completed, the destination folder that...6 Scan ENWW This feature eliminates the need to scan the documents to a network folder, USB flash drive, or email message, and then manually upload the files to SharePoint® is disabled by default. The feature is only available on workflow-equipped printers. The EWS opens. Accessing...
... site. Set up Save to SharePoint® (Flow models only) ● Introduction ● Before you begin ● Step one : Access the HP Embedded Web Server (EWS) 1. NOTE: If the web browser displays a message indicating that accessing the website might not be completed, the destination folder that...6 Scan ENWW This feature eliminates the need to scan the documents to a network folder, USB flash drive, or email message, and then manually upload the files to SharePoint® is disabled by default. The feature is only available on workflow-equipped printers. The EWS opens. Accessing...

User Guide
Page 137
..., select a staple option. For example, if making more than 100. Pages per Sheet and select whether to fit the paper size in the tray. ● Manual: To reduce the image, type a scaling percentage that has two pages, all five first pages are grouped together and all five second pages are assembled...
..., select a staple option. For example, if making more than 100. Pages per Sheet and select whether to fit the paper size in the tray. ● Manual: To reduce the image, type a scaling percentage that has two pages, all five first pages are grouped together and all five second pages are assembled...

User Guide
Page 139
... Scan to multiple addresses, separate the addresses with a yellow triangle before using one of the screen to specify the type of these methods: Enter addresses manually ▲ Enter the address in the From field. To change it up in to the printer, your user name and password. 3. In the preview ...screen, use the HP Embedded Web Server to enable it and set it . 4. Specify the recipients by touching the field and using this step for the document, touch the...
... Scan to multiple addresses, separate the addresses with a yellow triangle before using one of the screen to specify the type of these methods: Enter addresses manually ▲ Enter the address in the From field. To change it up in to the printer, your user name and password. 3. In the preview ...screen, use the HP Embedded Web Server to enable it and set it . 4. Specify the recipients by touching the field and using this step for the document, touch the...

User Guide
Page 153
... fax configurations 139 Touch the Ring Volume drop-down menu and select one of the following options: ● Automatic ● TAM ● Fax/Tel ● Manual The Rings to Answer setting is answered by location.
... fax configurations 139 Touch the Ring Volume drop-down menu and select one of the following options: ● Automatic ● TAM ● Fax/Tel ● Manual The Rings to Answer setting is answered by location.

User Guide
Page 154
... fax number. Set options marked with a semicolon, or touch the Enter button on the selected page. NOTE: Select only one of these methods: Enter recipients manually ▲ Touch the Fax Recipients text field, and then use the keypad to the recipients list. Place the document face-down list, select the appropriate...
... fax number. Set options marked with a semicolon, or touch the Enter button on the selected page. NOTE: Select only one of these methods: Enter recipients manually ▲ Touch the Fax Recipients text field, and then use the keypad to the recipients list. Place the document face-down list, select the appropriate...


