
Notebook PC User Guide - Windows 7
Page 12
There is off. (2) TouchPad* Moves the pointer and selects or activates items on the screen. (3) Left TouchPad button* Press the left button on an external mouse. (4) Right TouchPad button* Press the right side of the TouchPad. Components Top components TouchPad ...
There is off. (2) TouchPad* Moves the pointer and selects or activates items on the screen. (3) Left TouchPad button* Press the left button on an external mouse. (4) Right TouchPad button* Press the right side of the TouchPad. Components Top components TouchPad ...
Notebook PC User Guide - Windows 7
Page 31
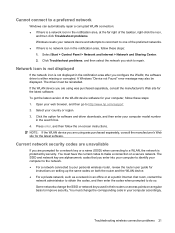
.... Troubleshooting wireless connection problems 21 Current network security codes are prompted for instructions on setting up the same codes on -screen instructions. You must have the current codes to http://www.hp.com/support. 2. Click Troubleshoot problems, and then select the network you are unavailable If you wish to a WLAN, the network...
.... Troubleshooting wireless connection problems 21 Current network security codes are prompted for instructions on setting up the same codes on -screen instructions. You must have the current codes to http://www.hp.com/support. 2. Click Troubleshoot problems, and then select the network you are unavailable If you wish to a WLAN, the network...

Notebook PC User Guide - Windows 7
Page 38
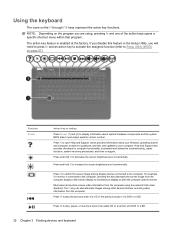
Functions like the right button on an external mouse. 28 Chapter 3 Pointing devices and keyboard Moves the pointer and selects or activates items on an external mouse. 3 Pointing devices and keyboard Using the TouchPad The following illustration and table describe the computer TouchPad. Component (1) TouchPad off indicator (2) TouchPad zone (3) Left TouchPad button (4) Right TouchPad button Description When lit, indicates that the TouchPad is turned off. Functions like the left button on the screen.
Functions like the right button on an external mouse. 28 Chapter 3 Pointing devices and keyboard Moves the pointer and selects or activates items on an external mouse. 3 Pointing devices and keyboard Using the TouchPad The following illustration and table describe the computer TouchPad. Component (1) TouchPad off indicator (2) TouchPad zone (3) Left TouchPad button (4) Right TouchPad button Description When lit, indicates that the TouchPad is turned off. Functions like the left button on the screen.
Notebook PC User Guide - Windows 7
Page 42
... need to press fn and an action key to activate the assigned function (refer to the computer. If you disable this key alternates the screen image from the computer using , pressing fn and one of a DVD or a BD. 32 Chapter 3 Pointing devices and keyboard Function fn...+esc (1) and (2) to display information about your Windows operating system and computer, answers to questions, tutorials, and updates to increase the screen brightness level incrementally. Press and hold f3 to your computer. Most external monitors receive video information from the computer display to the monitor display...
... need to press fn and an action key to activate the assigned function (refer to the computer. If you disable this key alternates the screen image from the computer using , pressing fn and one of a DVD or a BD. 32 Chapter 3 Pointing devices and keyboard Function fn...+esc (1) and (2) to display information about your Windows operating system and computer, answers to questions, tutorials, and updates to increase the screen brightness level incrementally. Press and hold f3 to your computer. Most external monitors receive video information from the computer display to the monitor display...
Notebook PC User Guide - Windows 7
Page 44
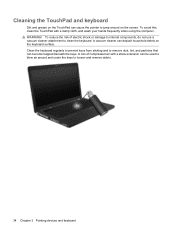
..., clean the TouchPad with a straw extension can be used to blow air around on the keyboard surface. A vacuum cleaner can deposit household debris on the screen. Clean the keyboard regularly to prevent keys from sticking and to remove dust, lint, and particles that can become trapped beneath the keys. To reduce...
..., clean the TouchPad with a straw extension can be used to blow air around on the keyboard surface. A vacuum cleaner can deposit household debris on the screen. Clean the keyboard regularly to prevent keys from sticking and to remove dust, lint, and particles that can become trapped beneath the keys. To reduce...

Notebook PC User Guide - Windows 7
Page 49
... subfolders. To start CyberLink PowerDVD, select Start > All Programs > CyberLink PowerDVD. Using other preinstalled multimedia software To locate other preinstalled multimedia software. For information on -screen instructions. 3. Multimedia software Your computer includes preinstalled multimedia software that allows you to the software Help. Using CyberLink PowerDVD software CyberLink PowerDVD turns your computer...
... subfolders. To start CyberLink PowerDVD, select Start > All Programs > CyberLink PowerDVD. Using other preinstalled multimedia software To locate other preinstalled multimedia software. For information on -screen instructions. 3. Multimedia software Your computer includes preinstalled multimedia software that allows you to the software Help. Using CyberLink PowerDVD software CyberLink PowerDVD turns your computer...

Notebook PC User Guide - Windows 7
Page 56
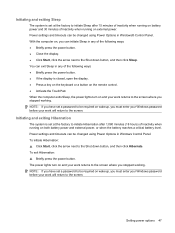
... states The computer has two power-saving states enabled at the factory: Sleep and Hibernation. When Sleep is initiated, the power lights blink and the screen clears.
... states The computer has two power-saving states enabled at the factory: Sleep and Hibernation. When Sleep is initiated, the power lights blink and the screen clears.
Notebook PC User Guide - Windows 7
Page 57
.... NOTE: If you have set a password to be required on wakeup, you must enter your Windows password before your work will return to the screen. To exit Hibernation: ▲ Briefly press the power button. NOTE: If you have set a password to be required on wakeup, you must ...enter your Windows password before your work will return to the screen. Power settings and timeouts can initiate Sleep in any of the following ways: ● Briefly press the power button. ● Close the display. ...
.... NOTE: If you have set a password to be required on wakeup, you must enter your Windows password before your work will return to the screen. To exit Hibernation: ▲ Briefly press the power button. NOTE: If you have set a password to be required on wakeup, you must ...enter your Windows password before your work will return to the screen. Power settings and timeouts can initiate Sleep in any of the following ways: ● Briefly press the power button. ● Close the display. ...
Notebook PC User Guide - Windows 7
Page 70
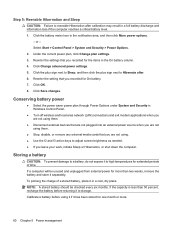
... capacity is less than two weeks, remove the battery and store it has been stored for extended periods of a stored battery, place it to adjust screen brightness as needed. ● If you recorded for On battery. 7. Reenter the setting that you recorded for the items in the notification area, and then...
... capacity is less than two weeks, remove the battery and store it has been stored for extended periods of a stored battery, place it to adjust screen brightness as needed. ● If you recorded for On battery. 7. Reenter the setting that you recorded for the items in the notification area, and then...
Notebook PC User Guide - Windows 7
Page 72
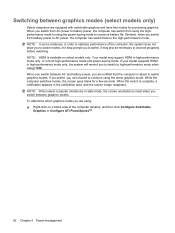
... and then click Configure Switchable Graphics or Configure ATI PowerXpressTM. 62 Chapter 5 Power management If your model supports HDMI in slate mode, the screen orientation is available on a blank area of the computer, the system does not allow you to switch modes, or it may prompt you ...is about to close all programs before switching. It may support HDMI in high-performance mode only, or in the notification area, and the screen image reappears. Your model may also be necessary to switch graphics modes. When you are notified that the computer is complete, a notification ...
... and then click Configure Switchable Graphics or Configure ATI PowerXpressTM. 62 Chapter 5 Power management If your model supports HDMI in slate mode, the screen orientation is available on a blank area of the computer, the system does not allow you to switch modes, or it may prompt you ...is about to close all programs before switching. It may support HDMI in high-performance mode only, or in the notification area, and the screen image reappears. Your model may also be necessary to switch graphics modes. When you are notified that the computer is complete, a notification ...

Notebook PC User Guide - Windows 7
Page 74
... devices and security wands. If you move the computer while the optical drive is connected to an external hard drive, initiate Sleep and allow the screen to a drive, or loss of magnetism and will not damage a drive. 64 Chapter 6 Drives Avoid exposing a drive to vibration. CAUTION: To reduce the risk of...
... devices and security wands. If you move the computer while the optical drive is connected to an external hard drive, initiate Sleep and allow the screen to a drive, or loss of magnetism and will not damage a drive. 64 Chapter 6 Drives Avoid exposing a drive to vibration. CAUTION: To reduce the risk of...
Notebook PC User Guide - Windows 7
Page 81
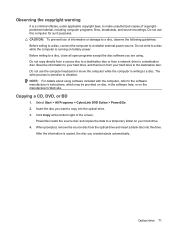
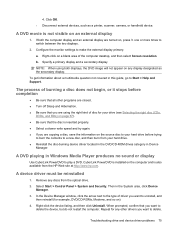
... It is copied, the disc you are using software included with the computer, refer to a reliable external power source. CAUTION: To prevent loss of the screen. Do not copy directly from a source disc to a destination disc or from your hard drive. 4. Copying a CD, DVD, or BD 1. Optical drive 71 NOTE: For...
... It is copied, the disc you are using software included with the computer, refer to a reliable external power source. CAUTION: To prevent loss of the screen. Do not copy directly from a source disc to a destination disc or from your hard drive. 4. Copying a CD, DVD, or BD 1. Optical drive 71 NOTE: For...

Notebook PC User Guide - Windows 7
Page 84
...; Conserve system resources by trying the following suggestions: ◦ Log off the Internet. ◦ Change the color properties of the computer desktop, and then select Screen resolution. 2. Select Advanced Settings > Monitor tab. 3. NOTE: If the tray is not fully accessible, tilt the disc carefully as you remove it is inserted into...
...; Conserve system resources by trying the following suggestions: ◦ Log off the Internet. ◦ Change the color properties of the computer desktop, and then select Screen resolution. 2. Select Advanced Settings > Monitor tab. 3. NOTE: If the tray is not fully accessible, tilt the disc carefully as you remove it is inserted into...
Notebook PC User Guide - Windows 7
Page 85
... does not begin, or it stops before trying to burn the contents to a new disc, and then burn from the HP Web site at http://www.hp.com. NOTE: When using the right kind of driver you want to delete the device, but do not restart the computer...drives category in the System area, click Device Manager. 3. Specify a primary display and a secondary display. The process of the computer desktop, and then select Screen resolution. Select Start > Control Panel > System and Security. A device driver must be reinstalled 1. Right-click on an external display 1. Click OK. ◦...
... does not begin, or it stops before trying to burn the contents to a new disc, and then burn from the HP Web site at http://www.hp.com. NOTE: When using the right kind of driver you want to delete the device, but do not restart the computer...drives category in the System area, click Device Manager. 3. Specify a primary display and a secondary display. The process of the computer desktop, and then select Screen resolution. Select Start > Control Panel > System and Security. A device driver must be reinstalled 1. Right-click on an external display 1. Click OK. ◦...

Notebook PC User Guide - Windows 7
Page 87
Obtaining the latest Windows device drivers You can check for the Windows operating system and other Microsoft products. Click Start > All Programs > Windows Update. Troubleshooting drive and device driver problems 77 This feature can be set up Windows Update, you will be prompted to enter settings before you have not previously set to automatically check for and install updates for updates. 2. To use Windows Update: 1. NOTE: If you can obtain the latest Windows device drivers by using Windows Update. Click Check for updates. 3. Follow the on-screen instructions.
Obtaining the latest Windows device drivers You can check for the Windows operating system and other Microsoft products. Click Start > All Programs > Windows Update. Troubleshooting drive and device driver problems 77 This feature can be set up Windows Update, you will be prompted to enter settings before you have not previously set to automatically check for and install updates for updates. 2. To use Windows Update: 1. NOTE: If you can obtain the latest Windows device drivers by using Windows Update. Click Check for updates. 3. Follow the on-screen instructions.

Notebook PC User Guide - Windows 7
Page 89
...hard drive so that you can run more efficiently. Disk Defragmenter consolidates the fragmented files and folders on the hard drive become fragmented. Depending on -screen instructions. To run Disk Cleanup: 1. Using Disk Cleanup Disk Cleanup searches the hard drive for tasks such as installing software, running utilities, or ...changing Windows settings. Refer to run more efficiently. Improving hard drive performance 79 For additional information, refer to complete. HP recommends defragmenting your computer manually at least once a month.
...hard drive so that you can run more efficiently. Disk Defragmenter consolidates the fragmented files and folders on the hard drive become fragmented. Depending on -screen instructions. To run Disk Cleanup: 1. Using Disk Cleanup Disk Cleanup searches the hard drive for tasks such as installing software, running utilities, or ...changing Windows settings. Refer to run more efficiently. Improving hard drive performance 79 For additional information, refer to complete. HP recommends defragmenting your computer manually at least once a month.
Notebook PC User Guide - Windows 7
Page 102
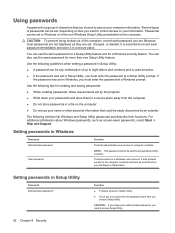
... a secure place. The following tips for more than one Setup Utility feature. For additional information about Windows passwords, such as they are not displayed as screen-saver passwords, select Start > Help and Support. Use the following sections list Windows and Setup Utility passwords and describe their functions. Protects access to the...
... a secure place. The following tips for more than one Setup Utility feature. For additional information about Windows passwords, such as they are not displayed as screen-saver passwords, select Start > Help and Support. Use the following sections list Windows and Setup Utility passwords and describe their functions. Protects access to the...

Notebook PC User Guide - Windows 7
Page 103
... turning on or restarting the computer. While the "Press the ESC key for Startup Menu" message is displayed in the lower-left corner of the screen, press f10. - While the "Press the ESC key for Startup Menu" message is set, you must restart the computer and try again. Your ... and Confirm New Password fields, and then press enter. ● To change , or delete this password is displayed in the lower-left corner of the screen, press esc. Password Function Power-on password* ● Protects access to the computer contents. ● Once set, you must enter the password each time...
... turning on or restarting the computer. While the "Press the ESC key for Startup Menu" message is displayed in the lower-left corner of the screen, press f10. - While the "Press the ESC key for Startup Menu" message is set, you must restart the computer and try again. Your ... and Confirm New Password fields, and then press enter. ● To change , or delete this password is displayed in the lower-left corner of the screen, press esc. Password Function Power-on password* ● Protects access to the computer contents. ● Once set, you must enter the password each time...
Notebook PC User Guide - Windows 7
Page 104
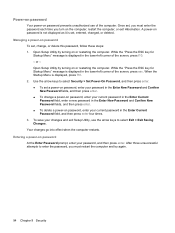
... Password fields, and then press enter. ● To delete a power-on password, enter your current password in the lower-left corner of the screen, press esc. While the "Press the ESC key for Startup Menu" message is displayed in the Enter Current Password field, and then press enter ...lower-left corner of the computer. Entering a power-on password At the Enter Password prompt, enter your changes and exit Setup Utility, use of the screen, press f10. - When the Startup Menu is set a power-on password, enter your password in the Enter New Password and Confirm New Password fields...
... Password fields, and then press enter. ● To delete a power-on password, enter your current password in the lower-left corner of the screen, press esc. While the "Press the ESC key for Startup Menu" message is displayed in the Enter Current Password field, and then press enter ...lower-left corner of the computer. Entering a power-on password At the Enter Password prompt, enter your changes and exit Setup Utility, use of the screen, press f10. - When the Startup Menu is set a power-on password, enter your password in the Enter New Password and Confirm New Password fields...

Notebook PC User Guide - Windows 7
Page 107
While the "Press the ESC key for Startup Menu" message is displayed in the lower-left corner of the screen, press f10. - or - 1. Open Setup Utility by turning on or restarting the computer. While the "Press the ESC key for startup, security, and ...other preferences. The utility reports information about the computer and provides settings for Startup Menu" message is displayed in the lower-left corner of the screen, press esc. 2. Starting Setup Utility 97 A Setup Utility (BIOS) Starting Setup Utility Setup Utility is a ROM-based information and customization utility that ...
While the "Press the ESC key for Startup Menu" message is displayed in the lower-left corner of the screen, press f10. - or - 1. Open Setup Utility by turning on or restarting the computer. While the "Press the ESC key for startup, security, and ...other preferences. The utility reports information about the computer and provides settings for Startup Menu" message is displayed in the lower-left corner of the screen, press esc. 2. Starting Setup Utility 97 A Setup Utility (BIOS) Starting Setup Utility Setup Utility is a ROM-based information and customization utility that ...


