Backup and Recovery - Windows 7
Page 6
...open Recovery Manager, you will need high-quality DVD-R, DVD+R, BD-R (writable Blu-ray), or CD-R discs. 2 Creating recovery discs HP recommends that you create recovery discs to be sure that you can purchase recovery discs for the first time. The software allows the creation of... drive (purchased separately) to continue the disc creation process. All these discs carefully and keep them in a safe place. Follow the on-screen instructions. 2 Chapter 2 Creating recovery discs Handle these discs are required. DVDs and BDs have finished creating the recovery discs. Create these discs...
...open Recovery Manager, you will need high-quality DVD-R, DVD+R, BD-R (writable Blu-ray), or CD-R discs. 2 Creating recovery discs HP recommends that you create recovery discs to be sure that you can purchase recovery discs for the first time. The software allows the creation of... drive (purchased separately) to continue the disc creation process. All these discs carefully and keep them in a safe place. Follow the on-screen instructions. 2 Chapter 2 Creating recovery discs Handle these discs are required. DVDs and BDs have finished creating the recovery discs. Create these discs...
Backup and Recovery - Windows 7
Page 7
...DVD±RW. The discs you use will depend on the type of optical drive installed in a window, toolbar, or menu bar by taking a screen shot of your system on a regular basis to discs, number each disc before inserting it into the optical drive of recovery discs required. ● When...your information As you add new software and data files, you should back up your settings. The screen shot can back up your computer. To copy the entire screen, press fn+prt sc. 3. To copy the screen and paste it into a word-processing document, follow these steps: 1. Open a word-processing document,...
...DVD±RW. The discs you use will depend on the type of optical drive installed in a window, toolbar, or menu bar by taking a screen shot of your system on a regular basis to discs, number each disc before inserting it into the optical drive of recovery discs required. ● When...your information As you add new software and data files, you should back up your settings. The screen shot can back up your computer. To copy the entire screen, press fn+prt sc. 3. To copy the screen and paste it into a word-processing document, follow these steps: 1. Open a word-processing document,...
Backup and Recovery - Windows 7
Page 8
... on file size and the speed of your information Select Start > All Programs > Maintenance > Backup and Restore. 2. You may take over an hour, depending on -screen instructions to AC power before you start the backup process. NOTE: Windows® includes the User Account Control feature to Help and Support for tasks...
... on file size and the speed of your information Select Start > All Programs > Maintenance > Backup and Restore. 2. You may take over an hour, depending on -screen instructions to AC power before you start the backup process. NOTE: Windows® includes the User Account Control feature to Help and Support for tasks...
Backup and Recovery - Windows 7
Page 9
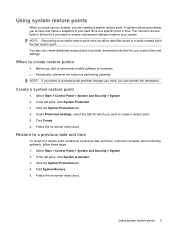
... point. 5. Click the System Protection tab. 4. Click Create. 6. In the left pane, click System Protection. 3. Follow the on -screen instructions. Create a system restore point 1. You also can create additional restore points to provide increased protection for which you want to your system.... Follow the on -screen instructions. Click the System Protection tab. 4. When to create restore points ● Before you add or extensively modify software or ...
... point. 5. Click the System Protection tab. 4. Click Create. 6. In the left pane, click System Protection. 3. Follow the on -screen instructions. Create a system restore point 1. You also can create additional restore points to provide increased protection for which you want to your system.... Follow the on -screen instructions. Click the System Protection tab. 4. When to create restore points ● Before you add or extensively modify software or ...
Backup and Recovery - Windows 7
Page 10
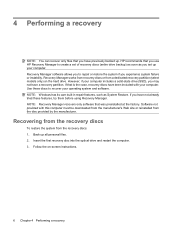
...system from the disc provided by the manufacturer. Recovery Manager works from recovery discs or from a dedicated recovery partition (select models only) on -screen instructions. 6 Chapter 4 Performing a recovery Follow the on the hard drive. 4 Performing a recovery NOTE: You can recover only files that ...Recovery Manager software allows you to repair or restore the system if you use HP Recovery Manager to recover your computer. Use these features, try them before using Recovery Manager. HP recommends that you experience system failure or instability. If that was preinstalled at ...
...system from the disc provided by the manufacturer. Recovery Manager works from recovery discs or from a dedicated recovery partition (select models only) on -screen instructions. 6 Chapter 4 Performing a recovery Follow the on the hard drive. 4 Performing a recovery NOTE: You can recover only files that ...Recovery Manager software allows you to repair or restore the system if you use HP Recovery Manager to recover your computer. Use these features, try them before using Recovery Manager. HP recommends that you experience system failure or instability. If that was preinstalled at ...
Backup and Recovery - Windows 7
Page 11
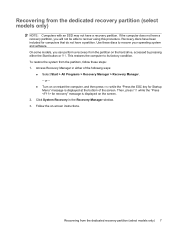
... restore the system from the dedicated recovery partition (select models only) 7 Follow the on-screen instructions. Then, press f11 while the "Press for Startup Menu" message is displayed on the screen. 2. Recovering from the partition, follow these discs to recover your operating system and software....System Recovery in either the Start button or f11. Recovering from the partition on the hard drive, accessed by pressing either of the screen. Access Recovery Manager in the Recovery Manager window. 3. If the computer does not have a recovery partition, you can perform a ...
... restore the system from the dedicated recovery partition (select models only) 7 Follow the on-screen instructions. Then, press f11 while the "Press for Startup Menu" message is displayed on the screen. 2. Recovering from the partition, follow these discs to recover your operating system and software....System Recovery in either the Start button or f11. Recovering from the partition on the hard drive, accessed by pressing either of the screen. Access Recovery Manager in the Recovery Manager window. 3. If the computer does not have a recovery partition, you can perform a ...

Security - Window Vista and Windows 7
Page 8
... your information. A password set in Windows must be entered at a Windows prompt. For additional information about Windows passwords, such as they are not displayed as screen-saver passwords, select Start > Help and Support. 2 Chapter 2 Using passwords 2 Using passwords A password is a group of characters that you choose to secure your name or...
... your information. A password set in Windows must be entered at a Windows prompt. For additional information about Windows passwords, such as they are not displayed as screen-saver passwords, select Start > Help and Support. 2 Chapter 2 Using passwords 2 Using passwords A password is a group of characters that you choose to secure your name or...

Security - Window Vista and Windows 7
Page 10
... must be entered each time you must restart the computer and try again. To save your changes and exit the Setup Utility, use of the screen, press esc. Power-on password Your power-on or restarting the computer. Open the Setup Utility by turning on password prevents unauthorized use the arrow... and Confirm New Password fields, and then press enter. ● To change , or delete this password is displayed in the lower-left corner of the screen, press f10. - A power-on or restarting the computer. After this password, follow these steps: 1.
... must be entered each time you must restart the computer and try again. To save your changes and exit the Setup Utility, use of the screen, press esc. Power-on password Your power-on or restarting the computer. Open the Setup Utility by turning on password prevents unauthorized use the arrow... and Confirm New Password fields, and then press enter. ● To change , or delete this password is displayed in the lower-left corner of the screen, press f10. - A power-on or restarting the computer. After this password, follow these steps: 1.

Security - Window Vista and Windows 7
Page 11
While the "Press the ESC key for Startup Menu" message is displayed in the lower-left corner of the screen, press esc. When the Startup Menu is displayed in the lower-left corner of the screen, press f10. - Open the Setup Utility by turning on password At the Enter Password prompt, type your...
While the "Press the ESC key for Startup Menu" message is displayed in the lower-left corner of the screen, press esc. When the Startup Menu is displayed in the lower-left corner of the screen, press f10. - Open the Setup Utility by turning on password At the Enter Password prompt, type your...
Security - Window Vista and Windows 7
Page 18
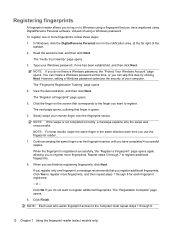
... more fingerprints, follow these steps: 1. Click No if you do not have completed 4 successful swipes. Registering fingerprints A fingerprint reader allows you to log on the screen that finger in green. 6. Read the welcome text, and then click Next. Type your computer. You can skip this time, or you can create a Windows...
... more fingerprints, follow these steps: 1. Click No if you do not have completed 4 successful swipes. Registering fingerprints A fingerprint reader allows you to log on the screen that finger in green. 6. Read the welcome text, and then click Next. Type your computer. You can skip this time, or you can create a Windows...

Setup Utility - Windows Vista and Windows 7
Page 5
...-based information and customization utility that can be used even when your Windows® operating system is displayed in the lower-left corner of the screen, press esc. 2. While the "Press the ESC key for startup, security, and other preferences. When the Startup Menu is displayed in the... lower-left corner of the screen, press f10. - To start the Setup Utility: ▲ Open the Setup Utility by turning on or restarting the computer. Open the Setup Utility ...
...-based information and customization utility that can be used even when your Windows® operating system is displayed in the lower-left corner of the screen, press esc. 2. While the "Press the ESC key for startup, security, and other preferences. When the Startup Menu is displayed in the... lower-left corner of the screen, press f10. - To start the Setup Utility: ▲ Open the Setup Utility by turning on or restarting the computer. Open the Setup Utility ...

Setup Utility - Windows Vista and Windows 7
Page 6
... f10. 2. When the Startup Menu is not Windows based, it does not support the TouchPad. Navigating and selecting in the lower-left corner of the screen, press esc. or - Open the Setup Utility by turning on or restarting the computer. While the "Press the ESC key for Startup Menu" message is... by keystroke. ● To choose a menu or a menu item, use the arrow keys. ● To choose an item in the lower-left corner of the screen, press f10. - If the Setup Utility is displayed in a list or to toggle a field, for Startup Menu" message is not already running , begin at step...
... f10. 2. When the Startup Menu is not Windows based, it does not support the TouchPad. Navigating and selecting in the lower-left corner of the screen, press esc. or - Open the Setup Utility by turning on or restarting the computer. While the "Press the ESC key for Startup Menu" message is... by keystroke. ● To choose a menu or a menu item, use the arrow keys. ● To choose an item in the lower-left corner of the screen, press f10. - If the Setup Utility is displayed in a list or to toggle a field, for Startup Menu" message is not already running , begin at step...

Setup Utility - Windows Vista and Windows 7
Page 7
...Utility by turning on or restarting the computer. Select the Main menu. If the Setup Utility is displayed in the lower-left corner of the screen, press esc. Open the Setup Utility by turning on or restarting the computer. While the "Press the ESC key for Startup Menu" message ... arrow keys to select Exit > Exit Saving Changes, and then press enter. If the Setup Utility is displayed in the lower-left corner of the screen, press f10. - or - If the Setup Utility is not open , begin at step 2. 1. Open the Setup Utility by turning on or restarting the ...
...Utility by turning on or restarting the computer. Select the Main menu. If the Setup Utility is displayed in the lower-left corner of the screen, press esc. Open the Setup Utility by turning on or restarting the computer. While the "Press the ESC key for Startup Menu" message ... arrow keys to select Exit > Exit Saving Changes, and then press enter. If the Setup Utility is displayed in the lower-left corner of the screen, press f10. - or - If the Setup Utility is not open , begin at step 2. 1. Open the Setup Utility by turning on or restarting the ...

Software Update - Windows Vista and Windows 7
Page 6
... a BIOS update while the computer is later than those currently installed on the HP Web site that is running on battery power, docked in an optional docking device, or connected to know the version of the screen, press f10. 2. Access the page on the computer, you are already in...your computer. Determining the BIOS version To determine whether available BIOS updates contain later BIOS versions than the BIOS version currently installed on the screen to the hard drive. 2 Updating software BIOS version information (also known as ROM date and System BIOS) can be displayed by turning ...
... a BIOS update while the computer is later than those currently installed on the HP Web site that is running on battery power, docked in an optional docking device, or connected to know the version of the screen, press f10. 2. Access the page on the computer, you are already in...your computer. Determining the BIOS version To determine whether available BIOS updates contain later BIOS versions than the BIOS version currently installed on the screen to the hard drive. 2 Updating software BIOS version information (also known as ROM date and System BIOS) can be displayed by turning ...
Software Update - Windows Vista and Windows 7
Page 7
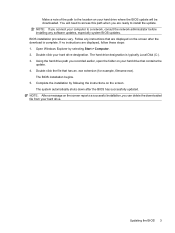
... open the folder on your hard drive that has an .exe extension (for example, filename.exe). NOTE: After a message on the screen reports a successful installation, you can delete the downloaded file from your hard drive where the BIOS update will need to access this path when... your hard drive. You will be downloaded. The BIOS installation begins. 5. Updating the BIOS 3 NOTE: If you are displayed on the screen after the BIOS has successfully updated. Double-click your computer to a network, consult the network administrator before installing any instructions that are ready ...
... open the folder on your hard drive that has an .exe extension (for example, filename.exe). NOTE: After a message on the screen reports a successful installation, you can delete the downloaded file from your hard drive where the BIOS update will need to access this path when... your hard drive. You will be downloaded. The BIOS installation begins. 5. Updating the BIOS 3 NOTE: If you are displayed on the screen after the BIOS has successfully updated. Double-click your computer to a network, consult the network administrator before installing any instructions that are ready ...
Wireless (Select Models Only) - Windows 7
Page 25
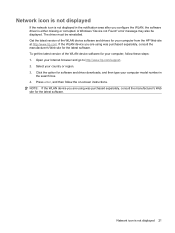
The driver must be displayed. To get the latest version of the WLAN device software and drivers for your computer, follow the on-screen instructions. Network icon is not displayed If the network icon is not displayed in the search box. 4. Press enter, and then follow these steps...was purchased separately, consult the manufacturer's Web site for software and driver downloads, and then type your Internet browser and go to http://www.hp.com/support. 2. Click the option for the latest software. Select your country or region. 3. NOTE: If the WLAN device you configure the...
The driver must be displayed. To get the latest version of the WLAN device software and drivers for your computer, follow the on-screen instructions. Network icon is not displayed If the network icon is not displayed in the search box. 4. Press enter, and then follow these steps...was purchased separately, consult the manufacturer's Web site for software and driver downloads, and then type your Internet browser and go to http://www.hp.com/support. 2. Click the option for the latest software. Select your country or region. 3. NOTE: If the WLAN device you configure the...
Drives - Windows 7
Page 11
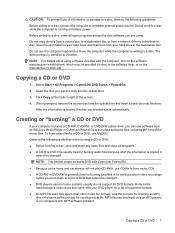
..., including MP3 and WAV music files. NOTE: For details about using . Creating or "burning" a CD or DVD If your DVD player for a list of the screen. 4. The write process is sensitive to a CD or DVD, use CD-Rs to burn music CDs. ● A CD-RW or DVD-RW is running on...
..., including MP3 and WAV music files. NOTE: For details about using . Creating or "burning" a CD or DVD If your DVD player for a list of the screen. 4. The write process is sensitive to a CD or DVD, use CD-Rs to burn music CDs. ● A CD-RW or DVD-RW is running on...

Drives - Windows 7
Page 13
After you do not need access to Help and Support for your computer. Depending on -screen instructions. HP recommends defragmenting your hard drive and the number of fragmented files, it may be prompted for more efficiently. To run Disk Cleanup: 1. Using Disk Defragmenter 9 ...
After you do not need access to Help and Support for your computer. Depending on -screen instructions. HP recommends defragmenting your hard drive and the number of fragmented files, it may be prompted for more efficiently. To run Disk Cleanup: 1. Using Disk Defragmenter 9 ...
Drives - Windows 7
Page 19
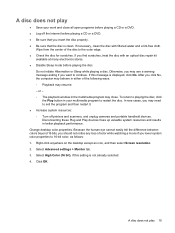
... a warning message asking if you may need to 16-bit color, as follows: 1. Right-click anywhere on the desktop except an icon, and then select Screen resolution. 2. Select High Color (16 bit), if this message is not already selected. 4. If necessary, clean the disc with an optical disc repair kit available...
... a warning message asking if you may need to 16-bit color, as follows: 1. Right-click anywhere on the desktop except an icon, and then select Screen resolution. 2. Select High Color (16 bit), if this message is not already selected. 4. If necessary, clean the disc with an optical disc repair kit available...
Drives - Windows 7
Page 22
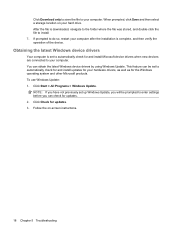
... drivers when new devices are connected to automatically check for updates. 2. To use Windows Update: 1. When prompted, click Save and then select a storage location on -screen instructions. 18 Chapter 5 Troubleshooting Obtaining the latest Windows device drivers Your computer is set up Windows Update, you can obtain the latest Windows device drivers...
... drivers when new devices are connected to automatically check for updates. 2. To use Windows Update: 1. When prompted, click Save and then select a storage location on -screen instructions. 18 Chapter 5 Troubleshooting Obtaining the latest Windows device drivers Your computer is set up Windows Update, you can obtain the latest Windows device drivers...


