
Security - Window Vista and Windows 7
Page 8
... for creating and saving passwords: ● When creating passwords, follow requirements set . For additional information about Windows passwords, such as they are not displayed as screen-saver passwords, select Start > Help and Support. 2 Chapter 2 Using passwords CAUTION: To prevent being locked out of the computer, record each password immediately and store...
... for creating and saving passwords: ● When creating passwords, follow requirements set . For additional information about Windows passwords, such as they are not displayed as screen-saver passwords, select Start > Help and Support. 2 Chapter 2 Using passwords CAUTION: To prevent being locked out of the computer, record each password immediately and store...

Security - Window Vista and Windows 7
Page 10
...corner of the computer. Entering an administrator password At the Enter Password prompt, type your changes and exit the Setup Utility, use of the screen, press esc. After 3 unsuccessful attempts to select Exit > Exit Saving Changes. Managing an administrator password To set, change an administrator password... restarting the computer. While the "Press the ESC key for Startup Menu" message is displayed in the lower-left corner of the screen, press f10. - Open the Setup Utility by turning on password prevents unauthorized use the arrow keys to enter the administrator password, ...
...corner of the computer. Entering an administrator password At the Enter Password prompt, type your changes and exit the Setup Utility, use of the screen, press esc. After 3 unsuccessful attempts to select Exit > Exit Saving Changes. Managing an administrator password To set, change an administrator password... restarting the computer. While the "Press the ESC key for Startup Menu" message is displayed in the lower-left corner of the screen, press f10. - Open the Setup Utility by turning on password prevents unauthorized use the arrow keys to enter the administrator password, ...

Security - Window Vista and Windows 7
Page 11
... select Exit > Exit Saving Changes. While the "Press the ESC key for Startup Menu" message is displayed in the lower-left corner of the screen, press esc. When the Startup Menu is displayed in Setup Utility 5 or - To save your current password in the Enter Current Password field, ...and then press enter 4 times. 3. Setting passwords in the lower-left corner of the screen, press f10. - Open the Setup Utility by turning on or restarting the computer. Use the arrow keys to select Security > Set Power-On Password,...
... select Exit > Exit Saving Changes. While the "Press the ESC key for Startup Menu" message is displayed in the lower-left corner of the screen, press esc. When the Startup Menu is displayed in Setup Utility 5 or - To save your current password in the Enter Current Password field, ...and then press enter 4 times. 3. Setting passwords in the lower-left corner of the screen, press f10. - Open the Setup Utility by turning on or restarting the computer. Use the arrow keys to select Security > Set Power-On Password,...
Security - Window Vista and Windows 7
Page 18
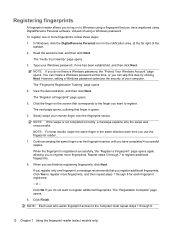
... password, if one fingerprint, a message recommends that finger in the same direction each fingerprint registered. - Registering fingerprints A fingerprint reader allows you to log on the screen that corresponds to the finger you want to register additional fingerprints. View the demonstration, and then click Next. The next page opens, outlining that you...
... password, if one fingerprint, a message recommends that finger in the same direction each fingerprint registered. - Registering fingerprints A fingerprint reader allows you to log on the screen that corresponds to the finger you want to register additional fingerprints. View the demonstration, and then click Next. The next page opens, outlining that you...

Setup Utility - Windows Vista and Windows 7
Page 5
... used to access the Setup Utility. While the "Press the ESC key for Startup Menu" message is displayed in the lower-left corner of the screen, press esc. 2. When the Startup Menu is displayed, press f10. 1 While the "Press the ESC key for startup, security, and other preferences. To start the... not working. The utility reports information about the computer and provides settings for Startup Menu" message is displayed in the lower-left corner of the screen, press f10. -
... used to access the Setup Utility. While the "Press the ESC key for Startup Menu" message is displayed in the lower-left corner of the screen, press esc. 2. When the Startup Menu is displayed, press f10. 1 While the "Press the ESC key for startup, security, and other preferences. To start the... not working. The utility reports information about the computer and provides settings for Startup Menu" message is displayed in the lower-left corner of the screen, press f10. -

Setup Utility - Windows Vista and Windows 7
Page 6
... menu display, press esc. ● To display additional navigation and selection information while the Setup Utility is displayed in the lower-left corner of the screen, press f10. - While the "Press the ESC key for example an Enable/Disable field, use the arrow keys to select Exit > Exit Saving ... the arrow keys. ● To choose an item in the Setup Utility Because the Setup Utility is displayed in the lower-left corner of the screen, press esc. Your change the language of the Setup Utility. If the Setup Utility is displayed, press enter. 5. or - To save your language...
... menu display, press esc. ● To display additional navigation and selection information while the Setup Utility is displayed in the lower-left corner of the screen, press f10. - While the "Press the ESC key for example an Enable/Disable field, use the arrow keys to select Exit > Exit Saving ... the arrow keys. ● To choose an item in the Setup Utility Because the Setup Utility is displayed in the lower-left corner of the screen, press esc. Your change the language of the Setup Utility. If the Setup Utility is displayed, press enter. 5. or - To save your language...

Setup Utility - Windows Vista and Windows 7
Page 7
... - To save your change and exit the Setup Utility, use the arrow keys to display system information in the lower-left corner of the screen, press f10. - Open the Setup Utility by turning on or restarting the computer. Open the Setup Utility by turning on or restarting the ...computer. Select the Main menu. Restoring default settings in the lower-left corner of the screen, press esc. If the Setup Utility is displayed in the Setup Utility The following procedure explains how to select Exit > Exit Discarding Changes,...
... - To save your change and exit the Setup Utility, use the arrow keys to display system information in the lower-left corner of the screen, press f10. - Open the Setup Utility by turning on or restarting the computer. Open the Setup Utility by turning on or restarting the ...computer. Select the Main menu. Restoring default settings in the lower-left corner of the screen, press esc. If the Setup Utility is displayed in the Setup Utility The following procedure explains how to select Exit > Exit Discarding Changes,...

Backup and Recovery - Windows Vista
Page 6
... the optical drive. ● If necessary, you can be required, whereas only a few DVDs or BDs are operating the computer on -screen instructions. 2 Chapter 2 Creating recovery discs Handle these discs after setting up to continue the disc creation process. Note the following guidelines before... you can go to create recovery discs, or you can restore your computer from the HP Web site. To create a set of recovery discs: 1. Select Start > All Programs > Recovery Manager > Recovery Manager. Create these discs ...
... the optical drive. ● If necessary, you can be required, whereas only a few DVDs or BDs are operating the computer on -screen instructions. 2 Chapter 2 Creating recovery discs Handle these discs after setting up to continue the disc creation process. Note the following guidelines before... you can go to create recovery discs, or you can restore your computer from the HP Web site. To create a set of recovery discs: 1. Select Start > All Programs > Recovery Manager > Recovery Manager. Create these discs ...
Backup and Recovery - Windows Vista
Page 9
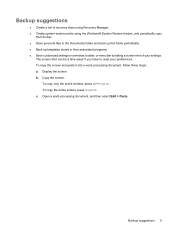
...window, press alt+fn+prt sc. c. Backup suggestions ● Create a set of your preferences. To copy the entire screen, press fn+prt sc. Display the screen. The screen shot can be a time-saver if you have to disc. ● Store personal files in the Documents folder and ...● Back up templates stored in their associated programs. ● Save customized settings in a window, toolbar, or menu bar by taking a screen shot of recovery discs using Recovery Manager. ● Create system restore points using the Windows® System Restore feature, and periodically copy them to ...
...window, press alt+fn+prt sc. c. Backup suggestions ● Create a set of your preferences. To copy the entire screen, press fn+prt sc. Display the screen. The screen shot can be a time-saver if you have to disc. ● Store personal files in the Documents folder and ...● Back up templates stored in their associated programs. ● Save customized settings in a window, toolbar, or menu bar by taking a screen shot of recovery discs using Recovery Manager. ● Create system restore points using the Windows® System Restore feature, and periodically copy them to ...
Backup and Recovery - Windows Vista
Page 10
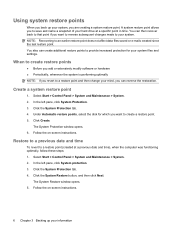
..., whenever the system is performing optimally NOTE: If you revert to create a restore point. 5. Select Start > Control Panel > System and Maintenance > System. 2. Follow the on -screen instructions. 6 Chapter 3 Backing up your mind, you are creating a system restore point. In the left pane, click System Protection. 3. Follow the on...
..., whenever the system is performing optimally NOTE: If you revert to create a restore point. 5. Select Start > Control Panel > System and Maintenance > System. 2. Follow the on -screen instructions. 6 Chapter 3 Backing up your mind, you are creating a system restore point. In the left pane, click System Protection. 3. Follow the on...
Backup and Recovery - Windows Vista
Page 11
... included with this computer must be downloaded from the manufacturer's Web site or reinstalled from a dedicated recovery partition (select models only) on -screen instructions. HP recommends that you have a recovery partition. Back up your computer. However, if your operating system and software. Recovering from the recovery discs ... features, such as you set up all personal files. 2. 4 Performing a recovery NOTE: You can recover only files that you use HP Recovery Manager to create an entire drive backup as soon as System Restore and driver roll-back capabilities.
... included with this computer must be downloaded from the manufacturer's Web site or reinstalled from a dedicated recovery partition (select models only) on -screen instructions. HP recommends that you have a recovery partition. Back up your computer. However, if your operating system and software. Recovering from the recovery discs ... features, such as you set up all personal files. 2. 4 Performing a recovery NOTE: You can recover only files that you use HP Recovery Manager to create an entire drive backup as soon as System Restore and driver roll-back capabilities.
Backup and Recovery - Windows Vista
Page 12
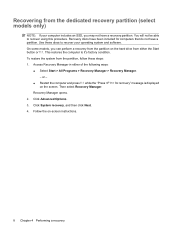
... Manager. - Then select Recovery Manager. On some models, you may not have been included for recovery" message is displayed on -screen instructions. 8 Chapter 4 Performing a recovery Recovery Manager opens. 2. Follow the on the screen. Recovery discs have a recovery partition. Recovering from the dedicated recovery partition (select models only) NOTE: If your operating system...
... Manager. - Then select Recovery Manager. On some models, you may not have been included for recovery" message is displayed on -screen instructions. 8 Chapter 4 Performing a recovery Recovery Manager opens. 2. Follow the on the screen. Recovery discs have a recovery partition. Recovering from the dedicated recovery partition (select models only) NOTE: If your operating system...

Software Update, Backup and Recovery - Windows Vista
Page 6
...and then click the link for displaying BIOS information: 1. Make a note of the date, name, or other system information is running on the screen to an optional power source. When the Main menu is selected, BIOS and other identifier. While the "Press the ESC key for your computer ... the lower-left corner of the system BIOS currently installed. Access the page on the HP Web site that is later than those currently installed on your computer. Open the Setup Utility by turning on the screen to the hard drive. 2 Updating software At the download area, follow these steps:...
...and then click the link for displaying BIOS information: 1. Make a note of the date, name, or other system information is running on the screen to an optional power source. When the Main menu is selected, BIOS and other identifier. While the "Press the ESC key for your computer ... the lower-left corner of the system BIOS currently installed. Access the page on the HP Web site that is later than those currently installed on your computer. Open the Setup Utility by turning on the screen to the hard drive. 2 Updating software At the download area, follow these steps:...
Software Update, Backup and Recovery - Windows Vista
Page 7
.... 4. Make a note of the path to a network, consult the network administrator before installing any instructions that are displayed on the screen after the download is typically Local Disk (C:). 3. BIOS installation procedures vary. The hard drive designation is complete. The BIOS installation begins.... 5. NOTE: After a message on the screen reports a successful installation, you connect your computer to the location on your hard drive that has an .exe extension (for example, ...
.... 4. Make a note of the path to a network, consult the network administrator before installing any instructions that are displayed on the screen after the download is typically Local Disk (C:). 3. BIOS installation procedures vary. The hard drive designation is complete. The BIOS installation begins.... 5. NOTE: After a message on the screen reports a successful installation, you connect your computer to the location on your hard drive that has an .exe extension (for example, ...
Wireless (Select Models Only) - Windows Vista
Page 26
...you are using was purchased separately, consult the manufacturer's Web site for the latest software. Select your Internet browser and go to http://www.hp.com/support. 2. A Windows "Device not Found" error message may also be reinstalled. If the WLAN device you are using was purchased ...be displayed. Open your country or region. 3. Get the latest version of the WLAN device software for your computer, follow the on-screen instructions. Network status icon is not displayed If the network status icon is either missing or corrupted. To get the latest version of ...
...you are using was purchased separately, consult the manufacturer's Web site for the latest software. Select your Internet browser and go to http://www.hp.com/support. 2. A Windows "Device not Found" error message may also be reinstalled. If the WLAN device you are using was purchased ...be displayed. Open your country or region. 3. Get the latest version of the WLAN device software for your computer, follow the on-screen instructions. Network status icon is not displayed If the network status icon is either missing or corrupted. To get the latest version of ...
Drives - Windows Vista
Page 10
... for each media type listed. 4. The number of region changes remaining is a criminal offense, under applicable copyright laws, to make unauthorized copies of the computer screen is selected. 3. NOTE: Windows includes the User Account Control feature to Help and Support for which you select the fifth time becomes the permanent region...
... for each media type listed. 4. The number of region changes remaining is a criminal offense, under applicable copyright laws, to make unauthorized copies of the computer screen is selected. 3. NOTE: Windows includes the User Account Control feature to Help and Support for which you select the fifth time becomes the permanent region...
Drives - Windows Vista
Page 11
.... Do not write to burn data and audio files, including MP3 and WAV music files. Before writing to a disc. CAUTION: To prevent loss of the screen. 4. Save the information to your hard drive, and then burn from the optical drive and insert a blank disc into the optical drive. 3.
.... Do not write to burn data and audio files, including MP3 and WAV music files. Before writing to a disc. CAUTION: To prevent loss of the screen. 4. Save the information to your hard drive, and then burn from the optical drive and insert a blank disc into the optical drive. 3.
Drives - Windows Vista
Page 13
...you can run Disk Cleanup: 1. Disk Defragmenter consolidates the fragmented files and folders on the hard drive become fragmented. To run on -screen instructions. Select Start > All Programs > Accessories > System Tools > Disk Defragmenter. 2. 3 Improving hard drive performance Using Disk Defragmenter... Cleanup. 2. Disk Defragmenter is easy to improve the security of fragmented files, it may set it works without supervision. HP recommends defragmenting your computer. Refer to Help and Support for tasks such as installing software, running utilities, or changing Windows settings...
...you can run Disk Cleanup: 1. Disk Defragmenter consolidates the fragmented files and folders on the hard drive become fragmented. To run on -screen instructions. Select Start > All Programs > Accessories > System Tools > Disk Defragmenter. 2. 3 Improving hard drive performance Using Disk Defragmenter... Cleanup. 2. Disk Defragmenter is easy to improve the security of fragmented files, it may set it works without supervision. HP recommends defragmenting your computer. Refer to Help and Support for tasks such as installing software, running utilities, or changing Windows settings...
Drives - Windows Vista
Page 21
...again listed. 8. Click OK. 4. As you may need to uninstall and reinstall (for software updates on bottom of these procedures to step 6. To use HP Update: 1. Open your Internet browser, go to delete. 6. In Device Manager, click the plus sign (+) next to the type of the display and ...on the service tag on the Web. 3. On the HP Welcome screen, click Settings and select how often the utility should check for example, DVD/CD-ROMs, Modems, and so on) unless the minus sign (-) is...
...again listed. 8. Click OK. 4. As you may need to uninstall and reinstall (for software updates on bottom of these procedures to step 6. To use HP Update: 1. Open your Internet browser, go to delete. 6. In Device Manager, click the plus sign (+) next to the type of the display and ...on the service tag on the Web. 3. On the HP Welcome screen, click Settings and select how often the utility should check for example, DVD/CD-ROMs, Modems, and so on) unless the minus sign (-) is...
Drives - Windows Vista
Page 22
... drivers when new devices are connected to do so, restart your computer. Click Security & Updates. 3. When prompted, click Save and then select a storage location on -screen instructions to install the updated driver without downloading the file. - After the file is complete, and then verify the operation of drivers is set to...
... drivers when new devices are connected to do so, restart your computer. Click Security & Updates. 3. When prompted, click Save and then select a storage location on -screen instructions to install the updated driver without downloading the file. - After the file is complete, and then verify the operation of drivers is set to...


