
Getting Started
Page 17
... to 30 minutes for this section. Preparing to complete the setup at a later time. For help with getting started using your computer, see the Windows 7 desktop, the initial setup is complete. NOTE: Do not connect or add other devices to the computer until after you turn on the computer. NOTE: If...
... to 30 minutes for this section. Preparing to complete the setup at a later time. For help with getting started using your computer, see the Windows 7 desktop, the initial setup is complete. NOTE: Do not connect or add other devices to the computer until after you turn on the computer. NOTE: If...
Getting Started
Page 19
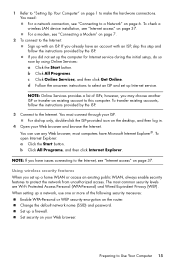
... ISP and set up Internet service. If you have issues connecting to the Internet: Sign up only, double-click the ISP-provided icon on the desktop, and then log in. 4 Open your Web browser and browse the Internet. If you already have Microsoft Internet Explorer®. The most computers have an...
... ISP and set up Internet service. If you have issues connecting to the Internet: Sign up only, double-click the ISP-provided icon on the desktop, and then log in. 4 Open your Web browser and browse the Internet. If you already have Microsoft Internet Explorer®. The most computers have an...
Getting Started
Page 30
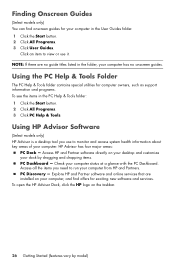
... for exciting new software and services. Using HP Advisor Software (Select models only) HP Advisor is a desktop tool you need to monitor and access system health information about key areas of your computer. To open the HP Advisor Dock, click the HP logo on your desktop and customize your dock by model) Click... an item to view or use to run your computer status at a glance with the PC Dashboard. HP Advisor has four major areas: PC Dock - ...
... for exciting new software and services. Using HP Advisor Software (Select models only) HP Advisor is a desktop tool you need to monitor and access system health information about key areas of your computer. To open the HP Advisor Dock, click the HP logo on your desktop and customize your dock by model) Click... an item to view or use to run your computer status at a glance with the PC Dashboard. HP Advisor has four major areas: PC Dock - ...
Getting Started
Page 56
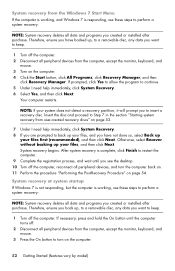
... Recovery Manager. Your computer restarts. NOTE: If your files, and then click Next. If necessary, press and hold the On button until you see the desktop. 10 Turn off the computer. Therefore, ensure you have not done so, select Back up , to a removable disc, any data you want to keep . 1 Turn...
... Recovery Manager. Your computer restarts. NOTE: If your files, and then click Next. If necessary, press and hold the On button until you see the desktop. 10 Turn off the computer. Therefore, ensure you have not done so, select Back up , to a removable disc, any data you want to keep . 1 Turn...
Getting Started
Page 57
... if it is not responding, press and hold the On button for performing a system recovery from the recovery discs you created as you see the desktop. 8 Turn off . 4 Disconnect all data and programs you want to Shut Down, and then click Shut Down. Starting system recovery from user-created recovery discs...
... if it is not responding, press and hold the On button for performing a system recovery from the recovery discs you created as you see the desktop. 8 Turn off . 4 Disconnect all data and programs you want to Shut Down, and then click Shut Down. Starting system recovery from user-created recovery discs...
Getting Started Guide
Page 25
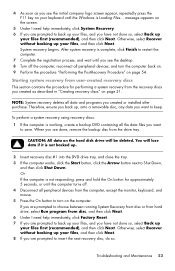
... Yes to allow the program to perform a System Recovery. 1. Select Yes, and then click Next. Complete the registration process, and wait until you see the desktop. 10. Turn off the computer. 2. Click Start, click All Programs, click Recovery Manager, and then click Recovery Manager. Your computer restarts. If the computer is...
... Yes to allow the program to perform a System Recovery. 1. Select Yes, and then click Next. Complete the registration process, and wait until you see the desktop. 10. Turn off the computer. 2. Click Start, click All Programs, click Recovery Manager, and then click Recovery Manager. Your computer restarts. If the computer is...
Getting Started Guide
Page 26
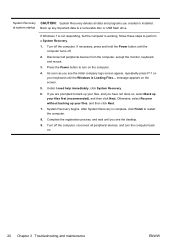
... initial company logo screen appear, repeatedly press F11 on . 20 Chapter 3 Troubleshooting and maintenance ENWW Complete the registration process, and wait until you see the desktop. 9. If Windows 7 is not responding, but the computer is Loading Files... If you are prompted to turn the computer back on your keyboard until the...
... initial company logo screen appear, repeatedly press F11 on . 20 Chapter 3 Troubleshooting and maintenance ENWW Complete the registration process, and wait until you see the desktop. 9. If Windows 7 is not responding, but the computer is Loading Files... If you are prompted to turn the computer back on your keyboard until the...
Getting Started Guide
Page 30
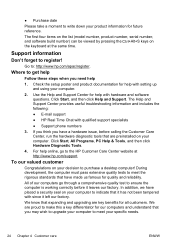
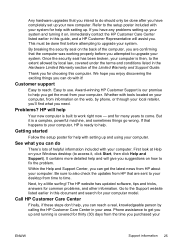
...that expanding and upgrading are preinstalled on your specific needs. 24 Chapter 4 Customer care ENWW Support information Don't forget to : http://www.hp.com/apac/register. Go to register! Click Start, All Programs, PC Help & Tools, and then click Hardware Diagnostic Tools. 4. &#...extensive quality tests to meet your decision to make this a key differentiator for quality and reliability. We are proud to purchase a desktop computer! Use the Help and Support Center for future reference. The Help and Support Center provides useful troubleshooting information and includes the...
...that expanding and upgrading are preinstalled on your specific needs. 24 Chapter 4 Customer care ENWW Support information Don't forget to : http://www.hp.com/apac/register. Go to register! Click Start, All Programs, PC Help & Tools, and then click Hardware Diagnostic Tools. 4. &#...extensive quality tests to meet your decision to make this a key differentiator for quality and reliability. We are proud to purchase a desktop computer! Use the Help and Support Center for future reference. The Help and Support Center provides useful troubleshooting information and includes the...
Getting Started Guide
Page 31
...the Hardware Limited Warranty section of the Limited Warranty and Support Guide. Award-winning HP Customer Support is covered for common problems, and other information. Once the security seal has been broken, your desktop from the time you can reach a real, knowledgeable person by local law, ...covered under the terms and conditions listed in your computer. Problems? Call HP Customer Care Center Finally, if these steps don't help and ...
...the Hardware Limited Warranty section of the Limited Warranty and Support Guide. Award-winning HP Customer Support is covered for common problems, and other information. Once the security seal has been broken, your desktop from the time you can reach a real, knowledgeable person by local law, ...covered under the terms and conditions listed in your computer. Problems? Call HP Customer Care Center Finally, if these steps don't help and ...
Quick Setup Guide
Page 13
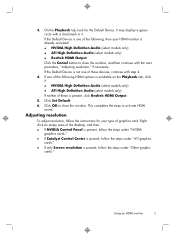
... completes the steps to close the window. Right click an empty area of graphics card. If one of the following , then your type of the desktop, and then: ● If NVIDIA Control Panel is present, follow the steps under "NVIDIA graphics cards." ● If Catalyst Control Center is present, follow the...
... completes the steps to close the window. Right click an empty area of graphics card. If one of the following , then your type of the desktop, and then: ● If NVIDIA Control Panel is present, follow the steps under "NVIDIA graphics cards." ● If Catalyst Control Center is present, follow the...
Quick Setup Guide
Page 14
...a dual-monitor system with ATI™ Eyefinity software, follow these instructions for this option. NVIDIA graphics cards 1. If your HP computer is connected to an HP monitor, make sure that the Show only TV resolutions check box does not contain a check mark. ATI graphics cards 1. Right...Control Center window opens. 2. The Change resolution window opens. 3. Close the NVIDIA Control Panel. Right-click an empty area of the desktop, and then click NVIDIA Control Panel. This completes the steps to connect and set up multiple displays Use the following steps to adjust ...
...a dual-monitor system with ATI™ Eyefinity software, follow these instructions for this option. NVIDIA graphics cards 1. If your HP computer is connected to an HP monitor, make sure that the Show only TV resolutions check box does not contain a check mark. ATI graphics cards 1. Right...Control Center window opens. 2. The Change resolution window opens. 3. Close the NVIDIA Control Panel. Right-click an empty area of the desktop, and then click NVIDIA Control Panel. This completes the steps to connect and set up multiple displays Use the following steps to adjust ...
Quick Setup Guide
Page 15
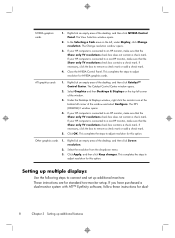
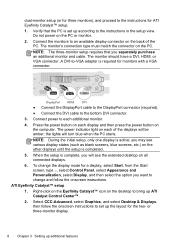
...will see various display states (such as blank screens, blue screens, etc.) on the PC. Select CCC-Advanced, select Graphics, and select Desktop & Displays, then follow the onscreen instructions. monitor setup (or for three monitors), and proceed to the instructions for monitors with a VGA connector.... Connect the monitors to an available display connector on the desktop to the instructions in the setup view. NOTE: The three-monitor setup requires that the PC is required for ATI Eyefinity Catalyst™...
...will see various display states (such as blank screens, blue screens, etc.) on the PC. Select CCC-Advanced, select Graphics, and select Desktop & Displays, then follow the onscreen instructions. monitor setup (or for three monitors), and proceed to the instructions for monitors with a VGA connector.... Connect the monitors to an available display connector on the desktop to the instructions in the setup view. NOTE: The three-monitor setup requires that the PC is required for ATI Eyefinity Catalyst™...

Troubleshooting & Maintenance Guide
Page 15
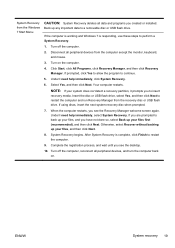
... files, and you to continue. 5. Turn on the screen. 5. Turn off the computer. 2. Turn off the computer, reconnect all data and programs you see the desktop. 10. Under I need help immediately, click System Recovery. 6. If you are prompted to back up your files first (recommended), and then click Next. Otherwise, select...
... files, and you to continue. 5. Turn on the screen. 5. Turn off the computer. 2. Turn off the computer, reconnect all data and programs you see the desktop. 10. Under I need help immediately, click System Recovery. 6. If you are prompted to back up your files first (recommended), and then click Next. Otherwise, select...

Troubleshooting & Maintenance Guide
Page 16
... the disc. Recovery media Recovery media can be created on page 13. Create recovery media from the drive tray. 2. To create recovery media, see the desktop. 9. If you are using recovery DVDs, insert recovery disc #1 into a USB port. 3. If you are prompted to a removable disc or USB flash drive. NOTE: Some...
... the disc. Recovery media Recovery media can be created on page 13. Create recovery media from the drive tray. 2. To create recovery media, see the desktop. 9. If you are using recovery DVDs, insert recovery disc #1 into a USB port. 3. If you are prompted to a removable disc or USB flash drive. NOTE: Some...

Quick Setup Guide - Windows 8
Page 11
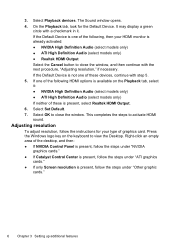
... button, press Fn+B to connect a TV. To view the Beats user interface, from the Start screen, type b, and then select HP Beats Audio. Using an HDMI monitor If your monitor, you may need to adjust some settings to hear sound (see Adjusting resolution on ... and disable Beats. If you use . Save this , HP recommends that are using the internal speakers, HP recommends connecting a matching HP subwoofer to view the Desktop. 2. 3 Setting up additional features Using Beats Audio™ (select models only) Your HP TouchSmart PC features audio connectors (headphone and Audio Out) that...
... button, press Fn+B to connect a TV. To view the Beats user interface, from the Start screen, type b, and then select HP Beats Audio. Using an HDMI monitor If your monitor, you may need to adjust some settings to hear sound (see Adjusting resolution on ... and disable Beats. If you use . Save this , HP recommends that are using the internal speakers, HP recommends connecting a matching HP subwoofer to view the Desktop. 2. 3 Setting up additional features Using Beats Audio™ (select models only) Your HP TouchSmart PC features audio connectors (headphone and Audio Out) that...
Quick Setup Guide - Windows 8
Page 12
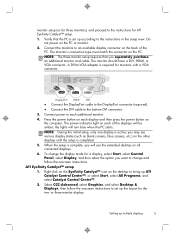
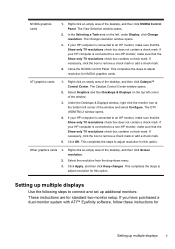
... and then continue with the next procedure, "Adjusting resolution," if necessary. Select Set Default. 7. This completes the steps to view the Desktop. Adjusting resolution To adjust resolution, follow the steps under "ATI graphics cards." ● If only Screen resolution is present, select Realtek HDMI... is present, follow the steps under "Other graphic cards." 6 Chapter 3 Setting up additional features Right-click an empty area of the desktop, and then: ● If NVIDIA Control Panel is present, follow the steps under "NVIDIA graphics cards." ● If Catalyst Control ...
... and then continue with the next procedure, "Adjusting resolution," if necessary. Select Set Default. 7. This completes the steps to view the Desktop. Adjusting resolution To adjust resolution, follow the steps under "ATI graphics cards." ● If only Screen resolution is present, select Realtek HDMI... is present, follow the steps under "Other graphic cards." 6 Chapter 3 Setting up additional features Right-click an empty area of the desktop, and then: ● If NVIDIA Control Panel is present, follow the steps under "NVIDIA graphics cards." ● If Catalyst Control ...
Quick Setup Guide - Windows 8
Page 13
...TV resolutions check box contains a check mark. The Change resolution window opens. 3. If your HP computer is connected to connect and set up multiple displays 7 Right-click an empty area of the desktop, and then click NVIDIA Control Panel. In the Selecting a Task area on the top left...click an empty area of the window and select Configure. Select Graphics and then Desktops & Displays on the left corner of the desktop, and then click Catalyst™ Control Center. This completes the steps to a non-HP monitor, make sure that the Show only TV resolutions check box contains a check...
...TV resolutions check box contains a check mark. The Change resolution window opens. 3. If your HP computer is connected to connect and set up multiple displays 7 Right-click an empty area of the desktop, and then click NVIDIA Control Panel. In the Selecting a Task area on the top left...click an empty area of the window and select Configure. Select Graphics and then Desktops & Displays on the left corner of the desktop, and then click Catalyst™ Control Center. This completes the steps to a non-HP monitor, make sure that the Show only TV resolutions check box contains a check...
Quick Setup Guide - Windows 8
Page 14
...display states (such as blank screens, blue screens, etc.) on all connected displays. 6. When the setup is complete, you may see the extended desktop on the other displays until the setup is required for ATI Eyefinity Catalyst™ setup. 1. Right-click on the Eyefinity Catalyst™ icon on the...and cable. Connect the monitors to the bottom DVI connector. 3. Connect power to each display and then press the power button on the desktop to bring up additional features Verify that you want to change the display mode for the two- The power indicator light on the back ...
...display states (such as blank screens, blue screens, etc.) on all connected displays. 6. When the setup is complete, you may see the extended desktop on the other displays until the setup is required for ATI Eyefinity Catalyst™ setup. 1. Right-click on the Eyefinity Catalyst™ icon on the...and cable. Connect the monitors to the bottom DVI connector. 3. Connect power to each display and then press the power button on the desktop to bring up additional features Verify that you want to change the display mode for the two- The power indicator light on the back ...

